
by Anant Jain
A Beginner’s Guide to Rapid Prototyping
Everything you need to know about rapid prototyping in 7 minutes (or less)
The process of going from an idea to a product is a messy one. Learning how to prototype your idea, getting feedback, and iterating on it is the most critical skill anyone aspiring to build their own products should have. This is also one of the most significant parts of a UX Designer’s job.
Prototypes come in many forms, from a rough sketch on paper to an interactive simulation that looks like the final product. This guide is for complete beginners who want to understand what Prototyping is all about.
We’ll cover the meaning of a few terms related to rapid prototyping as well as the following:
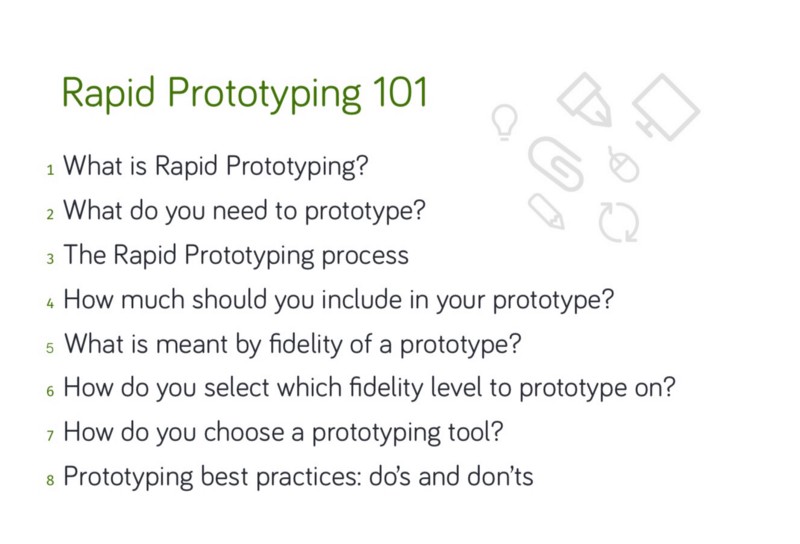
What is Rapid Prototyping?
Rapid Prototyping is an iterative process used to visualize what a website or an application will look like in order to get feedback and validation from users, stakeholders, developers, and designers.
When used well, rapid prototyping will improve the quality of your designs by enhancing communication between the various parties and reducing the risk of building something that no one wants.
What do you need to prototype?
A prototype is not designed to be a fully functional version of a system, but is only meant to help visualize the user experience of the final product. As Google Ventures design partner Daniel Burka says:
The ideal prototype should be “Goldilocks quality.” If the quality is too low, people won’t believe the prototype is a real product. If the quality is too high, you’ll be working all night, and you won’t finish. You need Goldilocks quality. Not too high, not too low, but just right.
You can prototype not just screens, apps, or websites, but almost anything. Prototyping is an excellent method to test the following (examples provided):
- New functionalities: Prototype Instagram Stories in the Instagram app (before they were launched)
- Changes in a workflow: Prototype Medium’s new publishing flow after the introduction of paid memberships
- New technology: Prototype a self-driving car journey!
- New interface: Prototype Apple Watch interface (when it first launched)

So, now you understand what rapid prototyping is for. But how do you do it? We’ll cover that next.
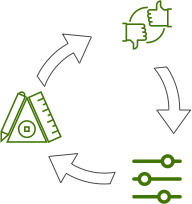
The Rapid Prototyping Process
Rapid Prototyping involves a three-step process, repeated as many times as needed:
- Prototype: Create a visual mock-up of your solution or interface.
- Review: Share the prototype with users and evaluate if it meets their needs and expectations.
- Refine: Based on this feedback, identify areas that need to be improved or clarified.
A prototype will usually start with a very simple mock-up of key areas and become more complex with each iteration as you gather more data from user feedback.
How much should you include in your prototype?
Focus on the critical functions that will be used most often. The point of rapid prototyping is to show how a feature will work or what the design will look like without prototyping the entire product in detail. Remember, we’re aiming for the Goldilocks quality!
Prototype one User Flow at a time. Instead of going screen by screen, base your prototype on a story that will take the user through the areas that you want to prototype. This way, you will get more accurate feedback because your prototype will reflect real life scenarios. For instance, prototype the “sign-up/sign-in/reset password” flow together.
Also, remember to have an iteration plan in mind. A good rule of thumb when planning iterations is to start broad and then work your way towards a more detailed version of the solution. As you iterate, the fidelity of your prototypes, as well as how much you include in them, will increase.
But wait, what is this fidelity?
What is meant by the fidelity of a prototype?
Fidelity refers to how closely a prototype matches the final product or solution. You can choose from a lot of different options and levels of accuracy, depending on the stage of the process and the goal of the prototype.
Visual (Sketched vs. Styled)
Layout and design are the most noticeable aspects of a prototype’s fidelity. If a prototype is produced with a high level of visual fidelity from the beginning, users will tend to focus on visual rather than functional details, which would distract from the primary goal of the early stages of prototyping.

Functional (Static vs. Interactive)
Should the prototype be static, or does it have to look fully functional (interactive)? Both versions have pros and cons: static prototypes are simpler and quicker to implement, while interactive ones can be used later for usability testing and user training.

Content (Lorem ipsum vs. real content)
In the early stages of prototyping, standard “lorem ipsum” content can be useful to avoid distracting the user so they can focus on providing functional feedback instead of commenting on changes in the text.
However, as the prototyping process continues, evaluate the need to replace dummy text with real content so users can get a feel for how it affects the overall design.
Using real labels is also an excellent opportunity to test whether your “copy” is working well or not. “Copy” is just a fancy term for text labels and information you see on the screen, like calling the “Publish” button “Publish,” “Post,” “Send,” “Done” or something else.
What fidelity levels exist?
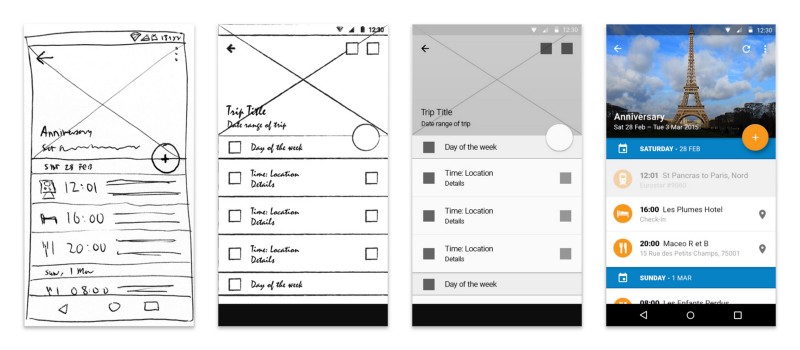
- Low-Fidelity: Low-Fi methods like pencil-and-paper sketches produce static prototypes with low visual and content fidelity that allow for quick and easy changes. This forces the user to focus on functionality and on how they will use the system instead of what it looks like.
- Medium-Fidelity: Computer-based tools like Visio produce what we can call medium-fidelity prototypes in the form of wireframes and workflows. This level of fidelity is used to demonstrate a system’s behavior, to determine if user needs are being met, and to evaluate the user experience.
- High-Fidelity: High-fidelity prototypes can sometimes be so realistic that they are often mistaken for the real product. They are also much more time-consuming to produce. Tools like InVision, Sketch, Figma, Adobe XD, Framer, and so on allow non-technical users to create high-fidelity prototypes. Although these cannot be converted into usable code, they can be very handy later for usability testing or user training purposes.
How do you select which fidelity level to prototype on?
Most of the time, designs are best evaluated by starting with a rough sketch, then moving on to higher fidelity levels depending on the system’s complexity and requirements.
Sometimes, your choice might be guided by client requirements or areas of focus. For example, if you want to evaluate the visual impact of an interface change, you might want to go with a styled design instead of a rough sketch. Or if your solution is message focused, you may decide to use real content instead of standard “lorem ipsum” placeholder text.
How do you choose a prototyping tool?
There is a wide variety of tools available for prototyping depending on your needs and approach. Before choosing a tool, here are a few questions to ask:
- How much time would it take to learn how to use the tool?
- Does it support prototypes for the needs of my product (web, software applications, mobile apps, some new technology, and so on)?
- Does the tool allow me to share my prototypes with others and gather their feedback?
- How easy is it to make changes to the prototype?
- Can I use pre-defined templates and stencils with this tool?

Prototyping best practices: do’s and don’ts
Do’s:
- Work with users and stakeholders to get the most feedback and engage them in the ownership of the final product
- Set expectations early by making sure the users and stakeholders know that prototyping is a way to get answers to specific questions, and does not represent the finished product.
- Make your high-fidelity realistic (including response delays) so that users and stakeholders are not disappointed when they compare it with the final product.
- Save templates and stencils to reuse on future projects.

Don’ts:
- Don’t prototype features that won’t be in the final product
- Don’t be a perfectionist. Good enough is your friend. The goal of rapid prototyping is to give everyone a common ground.
- Don’t prototype everything!
If your’re wondering how you should go about testing out your prototypes, read my post on Usability Testing here:
The well-kept secret behind great UX: Usability Testing
Whether you only have a prototype or a full-fledged product, it’s a really good idea to run monthly usability tests…medium.freecodecamp.org

Thanks for reading this quick guide. This was originally published as part of the UX Design course on Commonlounge, a platform that has courses with small bite-sized lessons like these on topics ranging from Django to Machine Learning that deliver the most value for the time you put in.
You learn by working on real-world projects and getting feedback from industry mentors. You should check it out here!
