
Webhook.
It sounds like what happens when you cross a spider and a pirate. In the world of the internet though, webhooks are something completely different. Webhooks help connect services together.
Let me explain.
Say we have two hypothetical services. One is a service that generates data, and the other that gathers and organizes that data.
The developers of the first service thought, “Man, our platform is only so useful. Let’s give the users the ability to forward real-time data to other services.”
The developers of the second service thought. “Gee willikers, it would be great if our users could import data easier.” So, they added webhooks to receive data in real time from a service like the first service.
Now as a user, you happen to use both services. You now have the power in your hands to connect them together.
The best way to explain it is with a real-world example.

Real World Example
On a recent project, I connected an IoT sensor to a Google Docs Sheet. It took me only about 10 minutes. I’m going to show you the same right now.
Let’s first start by setting up the Google Sheet.
- Create a new sheet
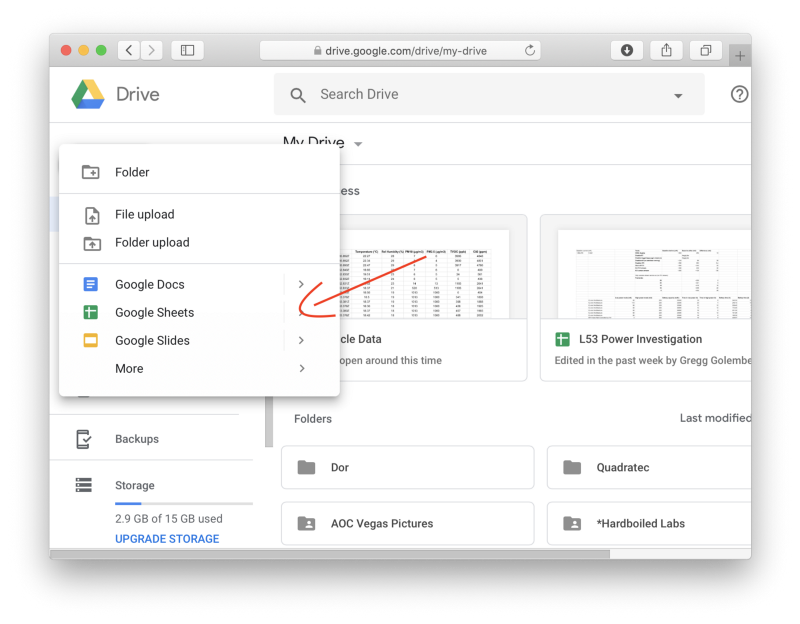
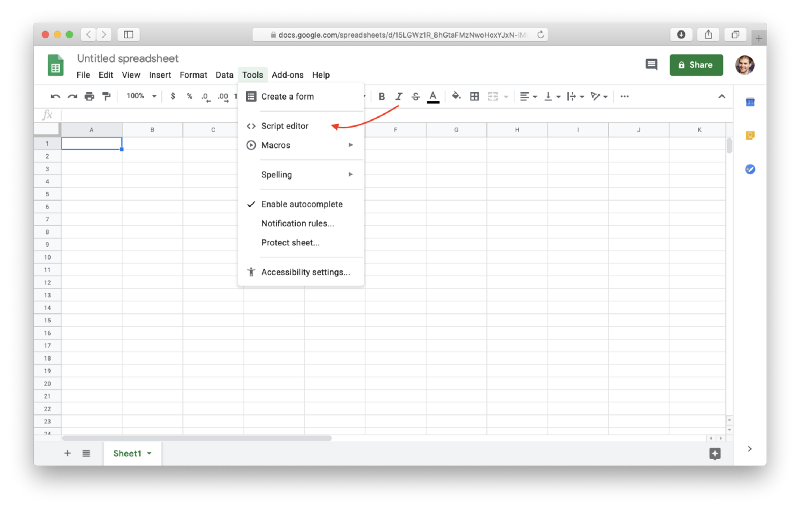
- Once you’re there, go to Tools and click Script editor
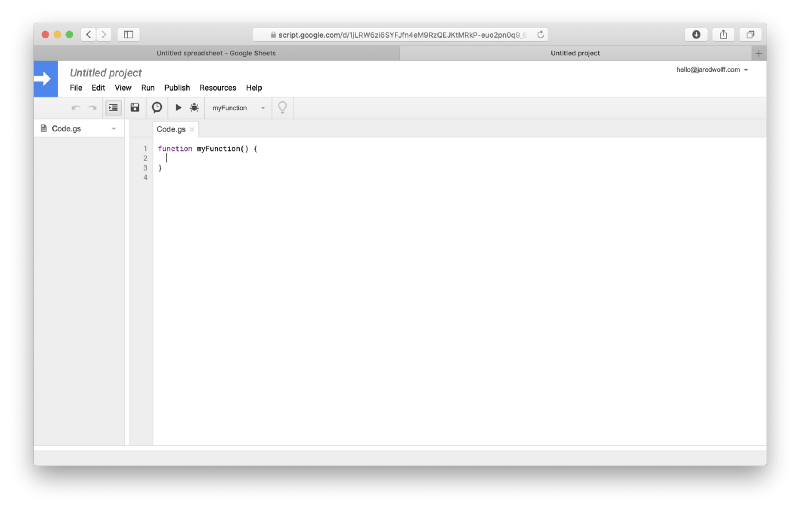
- It should open up a new window which looks something like this:
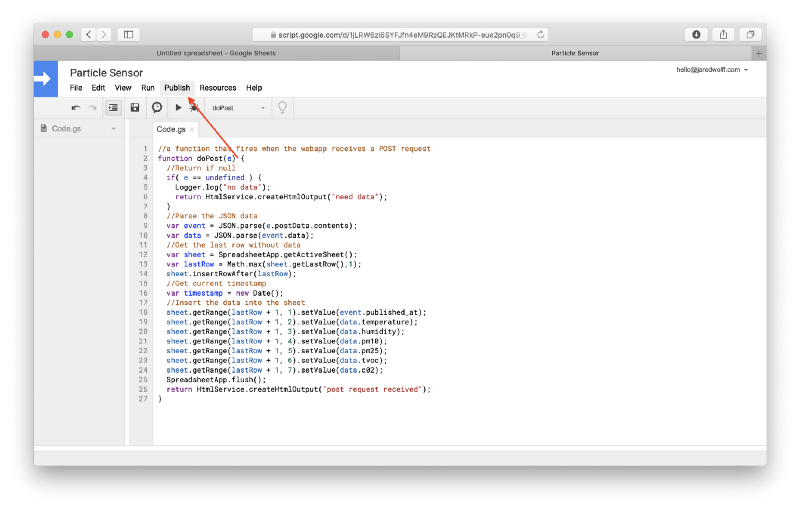
- Copy and paste this code. I’ll explain it after we do that.
//this is a function that fires when the webapp receives a POST requestfunction doPost(e) { //Return if null if( e == undefined ) { console.log("no data"); return HtmlService.createHtmlOutput("need data"); } //Parse the JSON data var event = JSON.parse(e.postData.contents); var data = event.data;//Get the last row without data var sheet = SpreadsheetApp.getActiveSheet(); var lastRow = Math.max(sheet.getLastRow(),1); sheet.insertRowAfter(lastRow); //Get current timestamp var timestamp = new Date(); //Insert the data into the sheet sheet.getRange(lastRow + 1, 1).setValue(event.published_at); sheet.getRange(lastRow + 1, 2).setValue(data.temperature); sheet.getRange(lastRow + 1, 3).setValue(data.humidity); sheet.getRange(lastRow + 1, 4).setValue(data.pm10); sheet.getRange(lastRow + 1, 5).setValue(data.pm25); sheet.getRange(lastRow + 1, 6).setValue(data.tvoc); sheet.getRange(lastRow + 1, 7).setValue(data.c02); SpreadsheetApp.flush(); return HtmlService.createHtmlOutput("post request received");}Now, let’s understand everything.
function doPost(e) {Is the function that gets called on a POST event. Consider this script as a web server. We’re sending it data at a specific address (that we’ll have in a hot minute)
e is the object of the HTTP call. It will have the data that we’re sending it. So it’s a good idea to check if it’s NULL. If it is, then there’s no need to run the script.
If we do have valid data, let’s change it from a string into useable JSON. You can use everyone’s favorite functionJSON.parse to do so.
var event = JSON.parse(e.postData.contents);Remember, the structure of the data will determine how you process it! You may have to run JSON.parse several times depending on how nested your data is and what format it’s in.
After you have your data, it’s time to put it in the right place!
//Get the last row without datavar sheet = SpreadsheetApp.getActiveSheet();var lastRow = Math.max(sheet.getLastRow(),1);sheet.insertRowAfter(lastRow);These three calls will get you to the first available row starting at row 1 (leaving row 0 for the column labels).
Then, finally, we put the data in the row it belongs:
sheet.getRange(lastRow + 1, 1).setValue(event.published_at);Where the first parameter of sheet.getRange is the row and the second is the column. You can use the setValue function to set what you want in that particular cell.
By the way, the inspiration for this code came from this post.
Cool. So we have a script. How do we call it?

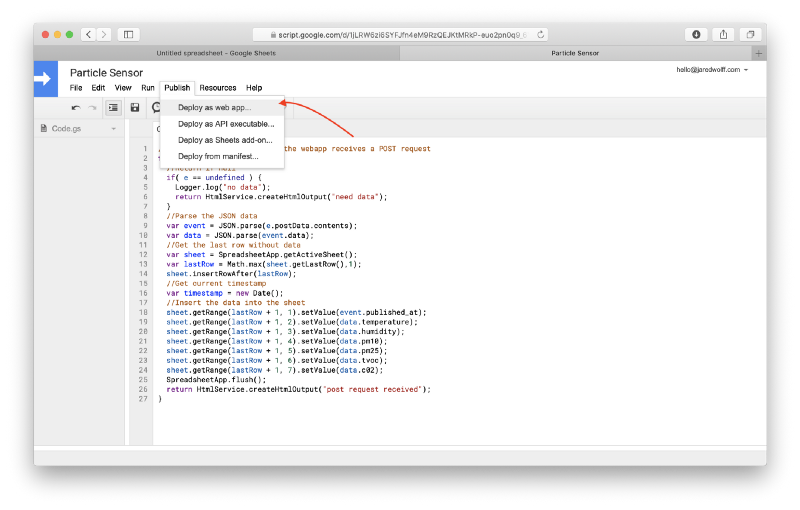
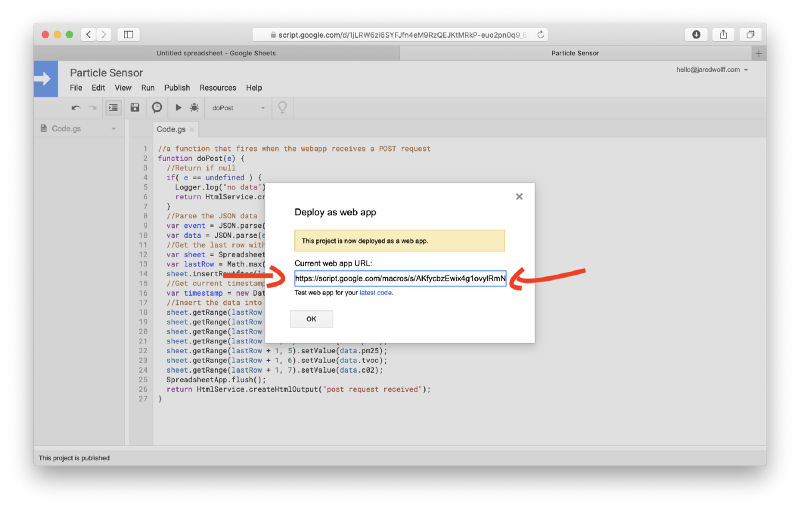
- Hit that Publish button
- Click
Deploy as a web app
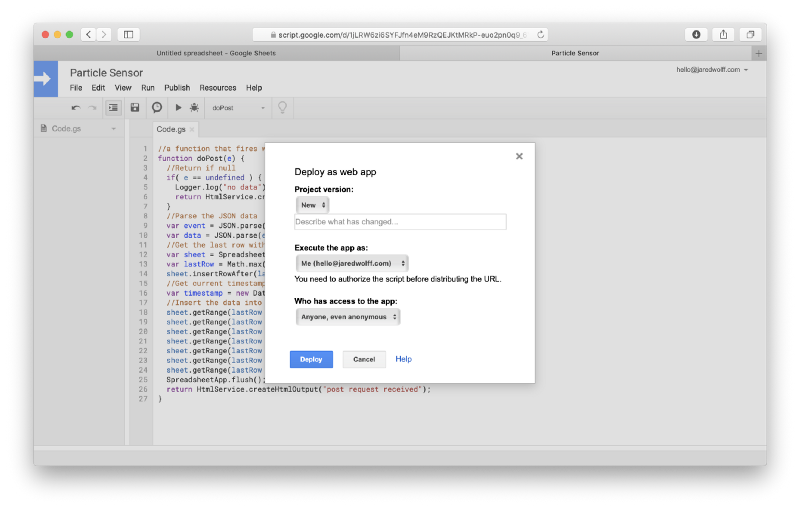
- Change the settings to match the screenshot below. Then click
Deploy
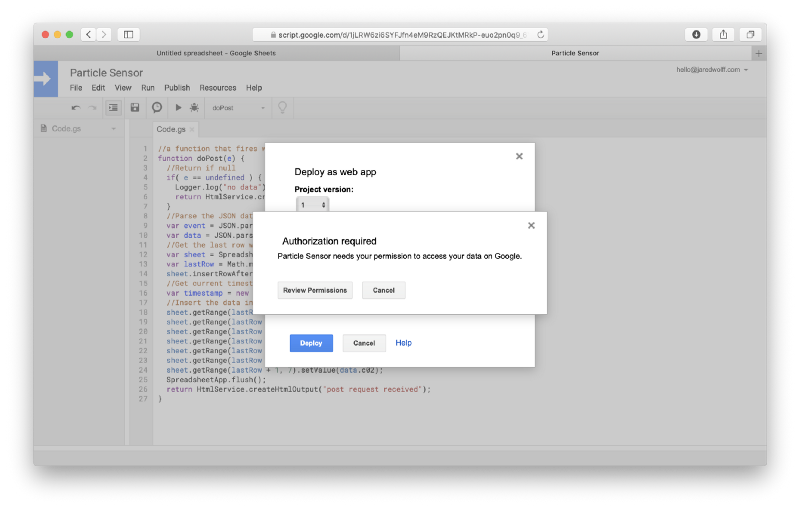
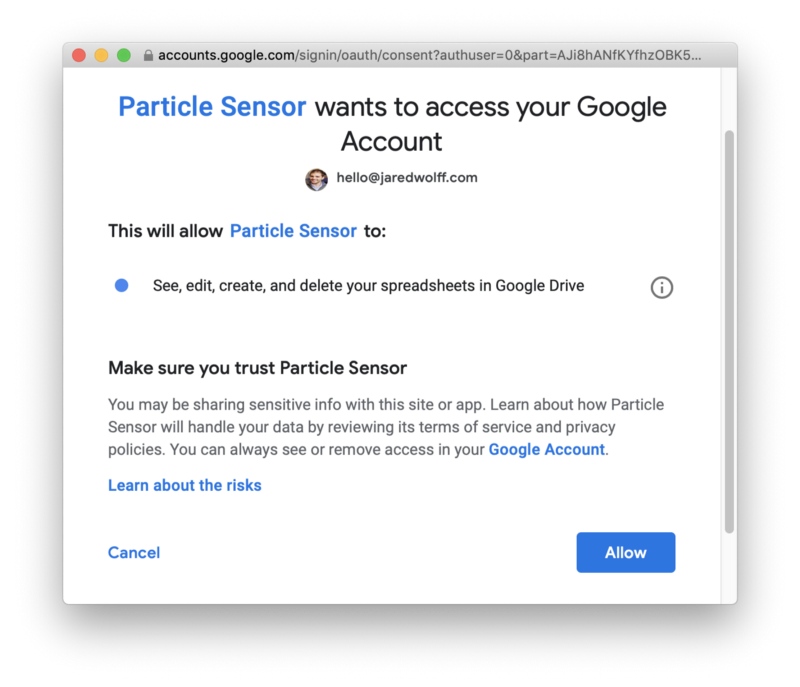
- You may get a screen asking you to update your permissions. Click
Review Permissions
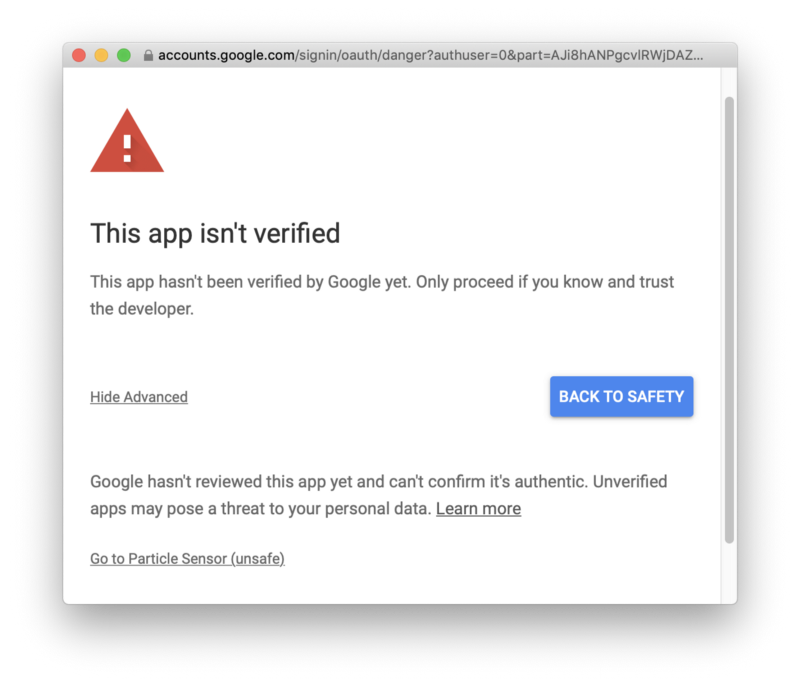
- Click the
Advancedand then clickGo to <Your File Name> in the bottom left.
- Finally, click
Allow
- In the last screen, copy your Webhook URL!
Test it
Now we can test if everything works by using Postman. If you haven’t played with Postman yet, it’s a great graphical user interface for curl.
- Install Postman. You may need an account to go further.
- Once inside, create a new request. Name it so you know it belongs to this Google Docs webhook
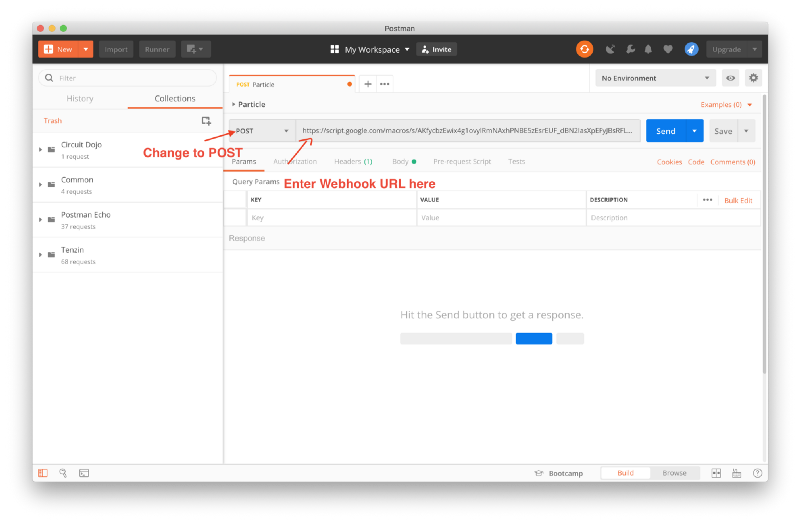
- Click
bodyand enter the following test code:
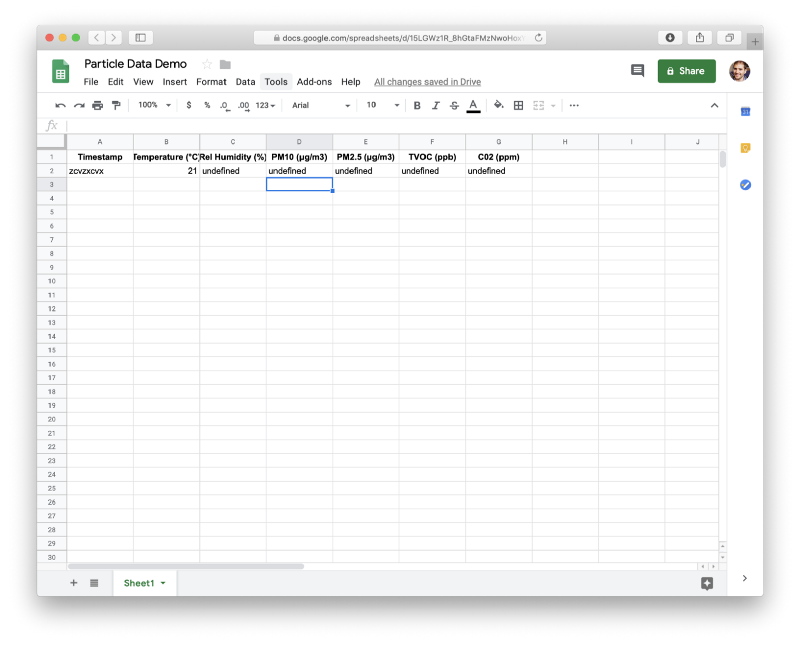
{ "event": "gdxg", "data": { "temperature": 21 }, "coreid": "zczxvz", "published_at": "zcvzxcvx"}- Finally, click that blue
Sendbutton.
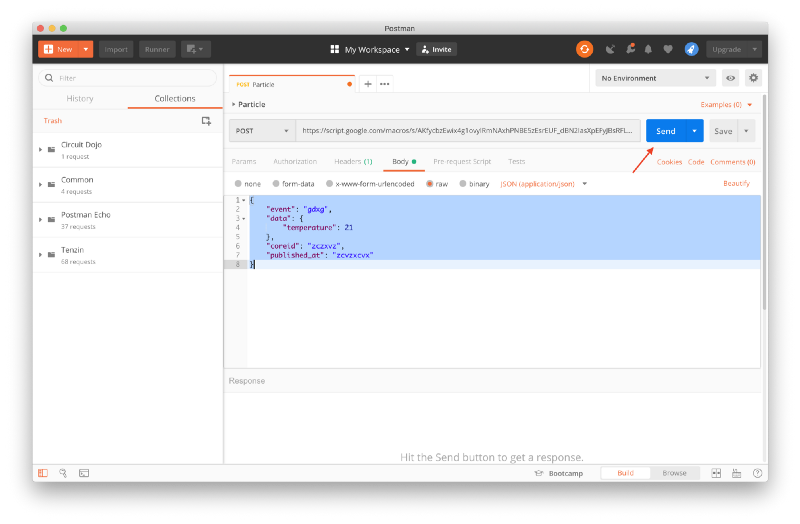
- Go back to your excel sheet and see the magic!
Now we’re cooking with gas!

Conclusion
I hope you’ve gotten the above example to work. Luckily for you, there’s a lot less to worry about once you get this part up and running!
To recap, we’ve talked about webhooks and why they’re used. You should be feeling confident at this point to go and set up some of your own. If you’re still feeling intimidated, I recommend using services like Zapier or IFTTT. (They’re shiny front ends for APIS and Webhooks already available.)
Last but not least check out the full post where I integrate hardware and web in one awesome project.
Happy webhooking!