by Wassim Chegham
Angular Authentication made easy with Firebase

UPDATE: The code in this article has been updated to Angular Final. We also assume that you’re using the latest Angular CLI.
Any serious Web application requires some sort of authentication feature. In this blog post, we’ll set up this feature for an Angular application using Firebase, thanks to the official AngularFire2 library.
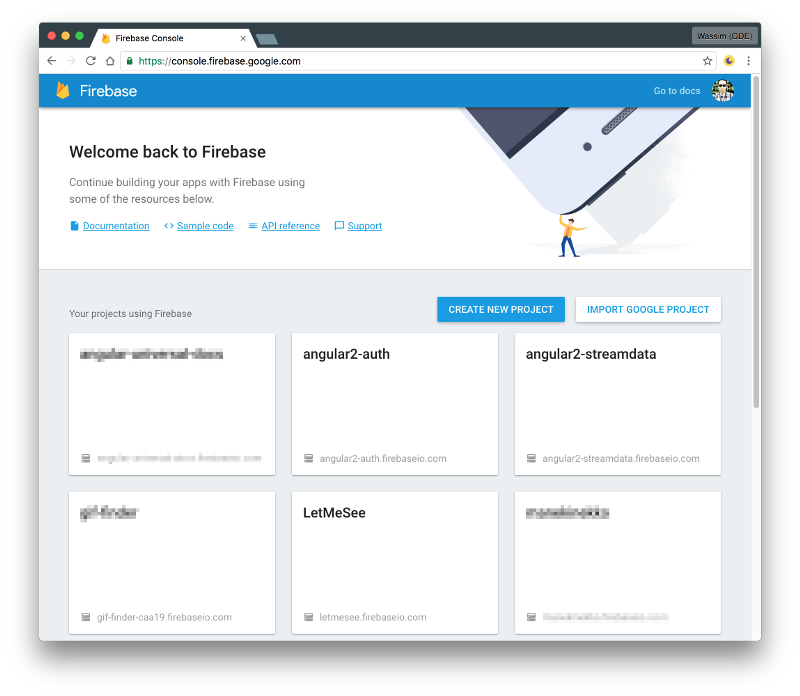
Create a new Firebase project
Before using Firebase with our application, we need to create a new project in our Firebase developer console:
To use the Firebase Authentication feature, we need to enable the sign-in providers we want to use in our project. In our case, we’re going to use Google, Facebook, Twitter and Github to log in our users.
You can find the Authentication page in: Your App → Auth → SIGN-IN METHOD:

Some providers, such as Facebook, Twitter and Github, require you to provide an App/Client/API ID and App/Client/API secret keys, and use the given OAuth URI as the redirect URI:
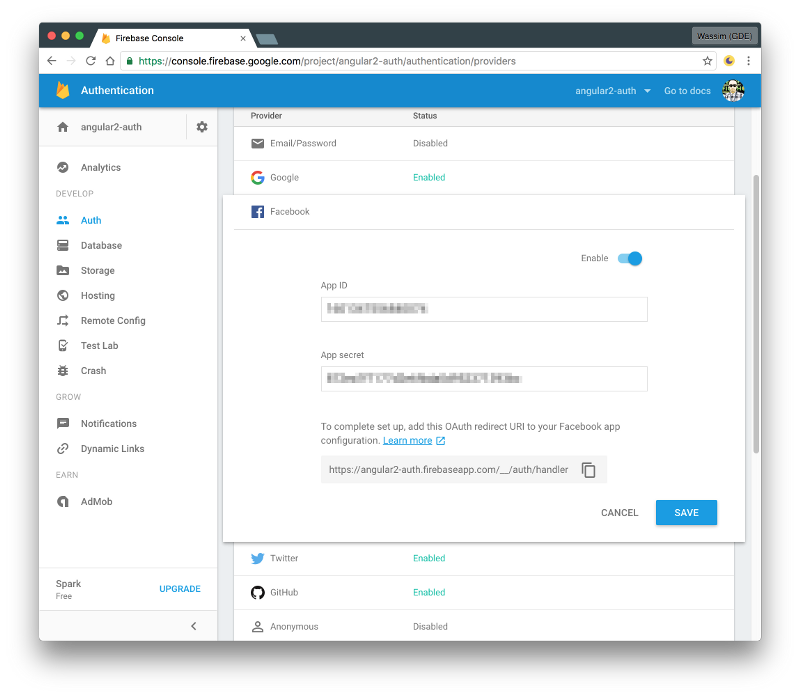
In order to obtain this information, you will need to create one application for each provider using your developer account of each service (Github, Facebook and Twitter).
Configure your services
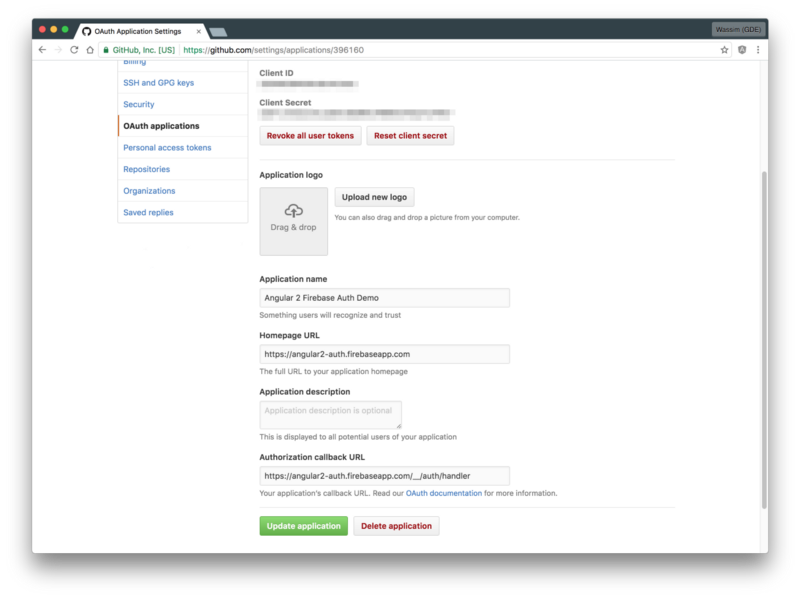
For Github, go to your developer settings, and register a new application.
Use your application Client ID and Client Secret in your Firebase configuration page.
You also need to fill in the Authorization callback URL using the OAuth URI from Firebase.
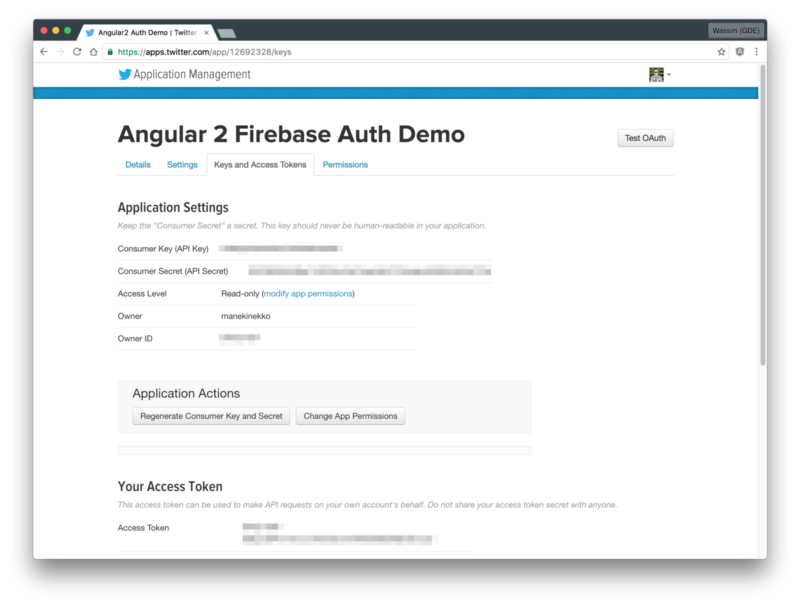
For Twitter, go to your Application Management settings, and create a new application.
Use your application API key and API Secret in your Firebase configuration page.
You also need to fill in the Callback URL (in the Settings tab) using the OAuth URI from Firebase.
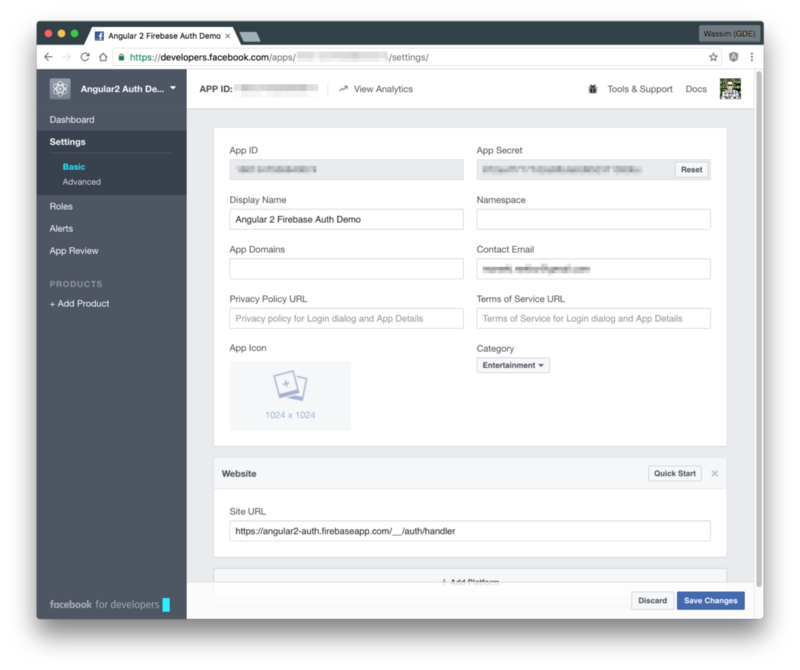
Finally, for Facebook, go to your developer apps home page, and click on the “Add New App” green button at the upper-right corner.
Use your App ID and App Secret in your Firebase configuration page.
You also need to add a new Web platform. Click on +Add platform at the bottom of the page—and fill in the Site URL with the redirect URI from Firebase (i.e. OAuth URI).
Now you are ready to use Google, Twitter, Github and Facebook as your authentication providers for your web application.
Use AngularFire in your application
For the next step, I’m going to use an Angular application I scaffolded thanks to the official Angular CLI.
In this application, I’m going to use the Authentication providers we just set up in the previous step.
Here’s what the application looks like:
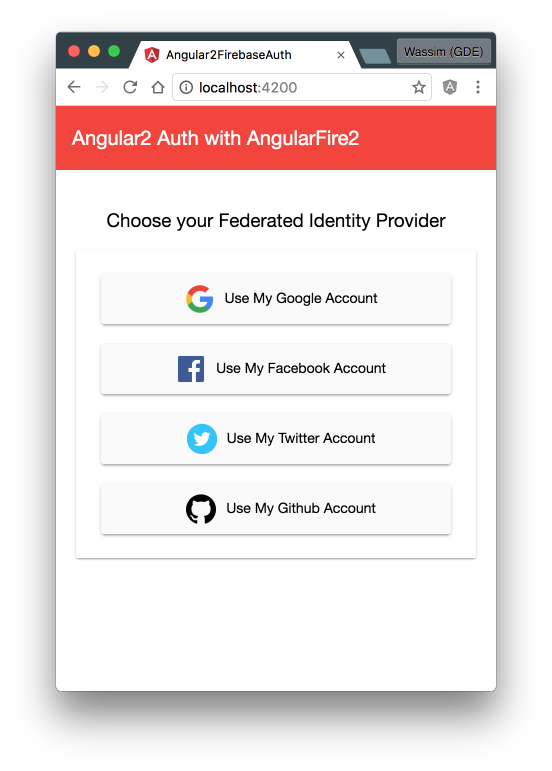
Clicking on a button will call a specific provider, authenticate the user, and get their information:

Install and setup angularfire2
First things first, we need to install the firebase and angularfire2 libraries:
$ npm install angularfire2 firebase --saveThen we need to install Firebase types:
$ npm install @types/firebaseAnd add those types to your src/tsconfig.json file:
{ "compilerOptions": { "declaration": false, "emitDecoratorMetadata": true, "experimentalDecorators": true, "lib": ["es6", "dom"], "mapRoot": "./", "module": "es6", "moduleResolution": "node", "outDir": "../dist/out-tsc", "sourceMap": true, "target": "es5", "typeRoots": [ "../node_modules/@types" ], "types": [ "jasmine", "firebase", "node" ] }}A more detailed setup process is described in the official docs.
Configure AngularFire for your Application
In order to use Firebase with Angular, we need to provide some configuration for the AngularFire services.
Let’s start with the default Firebase configuration which looks like this:
defaultFirebase({ apiKey: "AIzaSyCk3weREVFpOIN6pL_QVVNFRl3C3keMIRU", authDomain: "angular2-auth.firebaseapp.com", databaseURL: "https://angular2-auth.firebaseio.com", storageBucket: "angular2-auth.appspot.com"})Note: Don’t worry about this exposed apiKey. This key is only used to identify the different services of your project: a kind of project identifier.
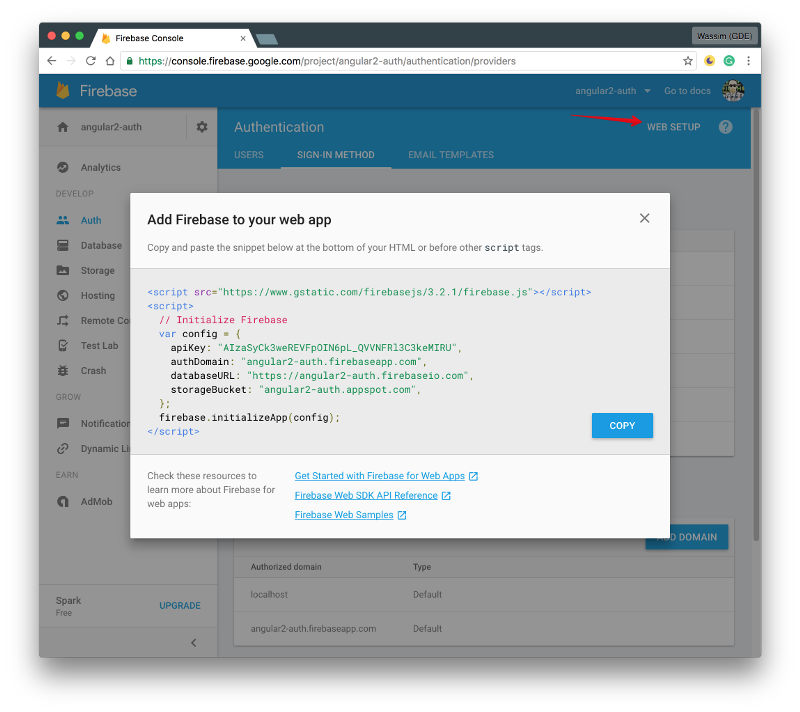
You can get your Firebase apiKey, projectId, databaseName, and bucket ID from your application dashboard.
Click on the WEB SETUP button in the top-right corner:
Next, for our use case, we want to provide a default authentication method:
firebaseAuthConfig({ method: AuthMethods.Popup})Here, we choose to use a Popup to allow the user to log in. We could also use a Redirect method like this:
firebaseAuthConfig({ method: AuthMethods.Redirect})Let’s now create a CoreModule in src/app/core.module.ts where we will put our configuration. It is best practice to group core dependencies in a separate NgModule named CoreModule. Here is an example of such module:
import { BrowserModule } from '@angular/platform-browser';import { HttpModule } from '@angular/http';import { NgModule } from '@angular/core';import { FormsModule } from '@angular/forms';import { AngularFireModule, AuthMethods, AuthProviders } from "angularfire2";const firebaseConfig = { apiKey: "AIzaSyCk3weREVFpOIN6pL_QVVNFRl3C3keMIRU", authDomain: "angular2-auth.firebaseapp.com", databaseURL: "https://angular2-auth.firebaseio.com", storageBucket: "angular2-auth.appspot.com"};@NgModule({ imports: [ BrowserModule, FormsModule, HttpModule, AngularFireModule.initializeApp(firebaseConfig,{ provider: AuthProviders.Google, method: AuthMethods.Popup }) ], exports: [ BrowserModule, ]})export class CoreModule {}Using it in your components
Now we’re finally ready to implement the authentication feature for our Angular application.
We need to inject the AngularFire service in the component’s constructor:
import { Component } from '@angular/core';import { AngularFire, AuthProviders } from 'angularfire2';@Component({ moduleId: module.id, selector: 'app-root', templateUrl: 'app.component.html', styleUrls: ['app.component.css']})export class AppComponent { user = {}; constructor( public af: AngularFire ) { this.af.auth.subscribe(user => { if(user) { // user logged in this.user = user; } else { // user not logged in this.user = {}; } }); }}In a real world application, you would create a separate service that handles authentication. Think SRP and DRY. But for this tutorial, we will keep it simple.
The AngularFire service gives us the auth property which implements the Observable API. So that means we need to subscribe to this auth property in order to get the authentication state. A NULL value means the user is not logged in.
Let’s add a couple of buttons in the component’s view:
<button md-raised-button (click)="login()"> <img width="30" src="google-logo.png" />Use My Google Account</button><button md-raised-button (click)="logout()"> Logout</button>We will use those buttons to log in and log out, using the Google provider as an example.
In app.component.ts, we need to implement the login() and logout() methods:
login() { this.af.auth.login({ provider: AuthProviders.Google });} logout() { this.af.auth.logout();}To log a user in, we call the this.af.auth.login() method using the Google provider, and this.af.auth.logout() to log a user out.
The AngulareFire login() usually needs an authentication method. In our case, it will use the default method (i.e. AuthMethods.Popup) we set up in the bootstrap phase.
If you need to override the authentication method when calling the login() method, just provide a new auth configuration:
login() { this.af.auth.login({ provider: AuthProviders.Google, method: AuthMethods.Redirect });}Once everything is setup and working correctly, we can inspect the user object containing all the user’s session tokens sent by Google (the authentication provider):
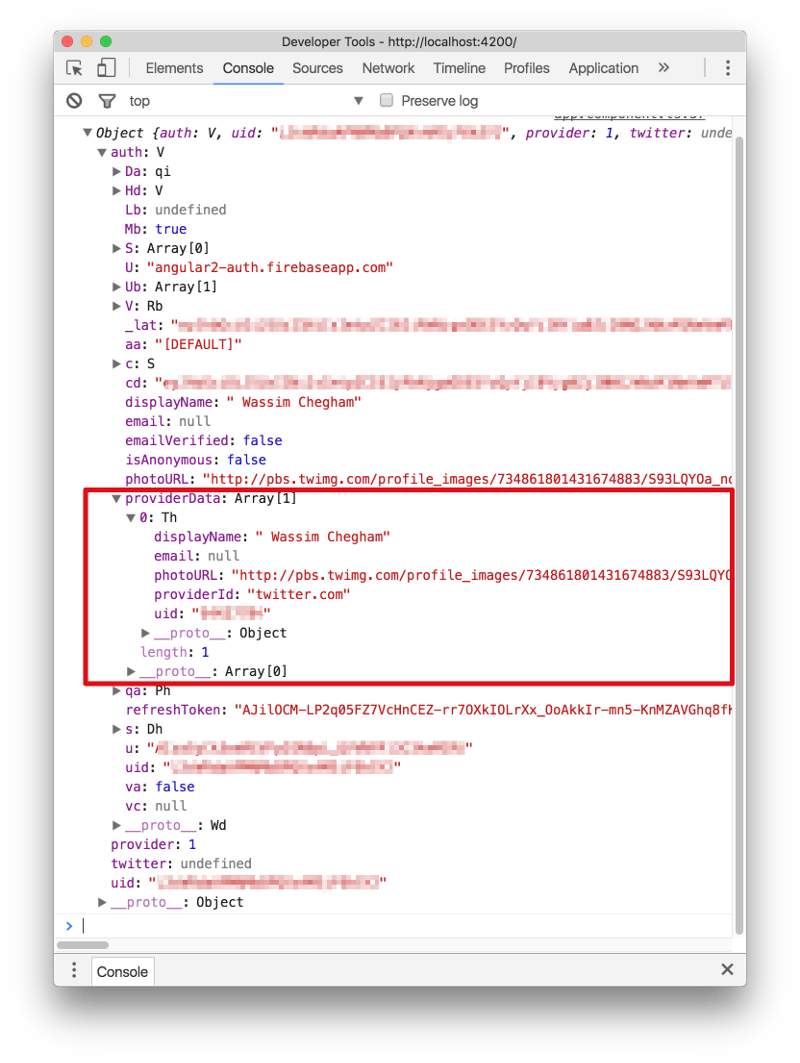
You can get the user’s information such the displayName and the photoURL form the auth.provideData entry.
That’s it! Your users can now log in using their Google accounts.
You can add Github and Facebook in much the same way.
See the complete working application hosted on Firebase or read the complete source code on Github.
NOTE: I’m in the process of migration this repo to Angular final (see branch). This process is pending because of this issue in AngularFire2.
manekinekko/angular-firebase-authentication
angular-firebase-authentication - An angular demoing Firebase Authentication providersgithub.com
Tips & References
Follow @manekinekko to learn more about the web platform.