by Gareth Redfern
Here is how to authenticate users using Vue.js and Firebase

In this tutorial we will work through building a simple Vue.js app. It will use Firebase for authentication and allow users to sign-up. Once signed-up users access protected areas of a web application via a sign-in page.
To keep things as simple and short as possible an assumption is made that you are familiar with Vue.js. You can get up and running with a project using the CLI and webpack. We will work through two main topics to create our app:
- Using the vue-router 2 to load and protect pages of the web app.
- Set up a Firebase back end that uses Firebase authentication to manage a user sign-up and sign-in.
The tutorial files are free to download on github. Where possible comments have been added to explain what the code is doing. To get the site up and running on your local machine follow the instructions in the README file. The main directory we will be writing our code in is the src directory. If you have built Vue apps in the past this should be familiar to you.
App Architecture
The app we are building will have a simple home page where a user navigates to access the site. They will need to sign-up for an account with a sign-up form. Once registered, a sign-in page will enable the user to access a dashboard (the secure area of the site).
Handling Routes and Securing Pages
The first concept to understand is how to send page requests and secure the pages behind a sign-in. To do this we will install vue-router 2, a first party library for handling routes. To get a good understanding of simple routes we will ignore securing any pages at first. Lets set up the site structure:
- Home
- Sign-up
- Sign-in
- Dashboard (We will secure this page eventually)
- Error/404 (catch-all page)
There are two main files to review to gain a basic understanding of what the vue-router does. In the main.js file we import the VueRouter and tell Vue that you want to use it. Next we create a VueRouter instance and pass in the routes that the app will use via a separate routes.js file.
Here we also set the mode for the router to us, out of the box the vue-router will load each page with a hash in the URL. In modern browsers we can use the HTML5 History API and remove the need to have the hash in the URL.
There would also be some server config to get this to work, for more info read the official docs.
Vue.use(VueRouter);const router = new VueRouter({ routes: routes, mode: 'history'} );The routes.js file imports all the components that you will display throughout the site. It exports an array of all your routes as objects. Each object has the following key value pairs:
- route name (optional)
- path (the url the user navigates to)
- component (Vue component to load)
To explain a little further have a look at the following code:
{ path: '/sign-in', // set the URL the user will visit name: 'signIn', // use this name as a shortcut in your links component: SignIn // load the SignIn component}For each route we repeat the above code and swap out the properties for all our route options. Next we will add the <router-view></router-view> opening and closing tags to the App.js file. These act as placeholders, telling Vue where to swap out the components when a route path is selected. With this in place you should be able to navigate to each URL and the component for that path will load.
Securing Routes
The vue-router provides a way to secure routes using Navigation Guards. There are three levels of guard that you can work with:
- Global guards (what we will use) are set once on the route instance.
- Per-route guards are set on each route separately.
- In-component guards are set in each component.
You could opt to use any of these methods but for simplicity we will set the guard to run globally on every page load, this probably has the greatest overhead so just bare that in mind. To get our secure routes working we will check two things:
- Does the route have a meta property with
requiresAuthset to true. - Is the user logged in and authenticated via the Firebase authentication.
Lets work through the above points to better understand what is happening. The vue-router has route meta fields where you can add data to retrieve for that particular route. We can use this to set a simple boolean requiresAuth for our protected pages:
{ path: '/dashboard', name: 'dashboard', component: Dashboard, meta: { requiresAuth: true }},With the above code in place, we check to see if the route requires authentication before it loads. This check uses the global navigation guard set in the main.js file.
router.beforeEach((to, from, next) => {const requiresAuth = to.matched.some(record => record.meta.requiresAuth);if(requiresAuth) { next('/sign-in');} else { next();}});Here we are are calling the beforeEach method on the router instance. It takes 3 arguments explained in detail in the docs but the main one to focus on is the next argument. This is where you tell the router what to do when the requiresAuth condition is set to true.
In our application we use it to send the user to the sign-in page. To access the route meta data we are setting a constant that takes the to argument (the route we are navigating to). The docs explain how you can access the meta fields that you set:
All route records matched by a route are exposed on the$routeobject (and also route objects in navigation guards) as the$route.matchedArray. Therefore, we will need to iterate over$route.matchedto check for meta fields in route records.
With the meta array available to us we can iterate over it using a ES6 function:
const requiresAuth = to.matched.some(record => record.meta.requiresAuth);We pass the requiresAuth into the conditional. If true send the user to the sign-in page, if false load the page as normal.
It’s worth taking the time to read through the docs. Get a good understanding of what the beforeEach method is doing. It is a key principal to understanding route guards. Next we will move on to using Firebase to authenticate the user and add a check to the route guard.
Authentication With Firebase
Firebase offers a complete backend and authentication system. It can be added to the front end of your web app. For this demo we will be using it’s authentication API to allow users to sign-up and sign-in. Once signed in, authenticated users can view protected content. The first thing you will need to do is sign up for an account at Firebase. I would also suggest watching getting started with Firebase Auth.
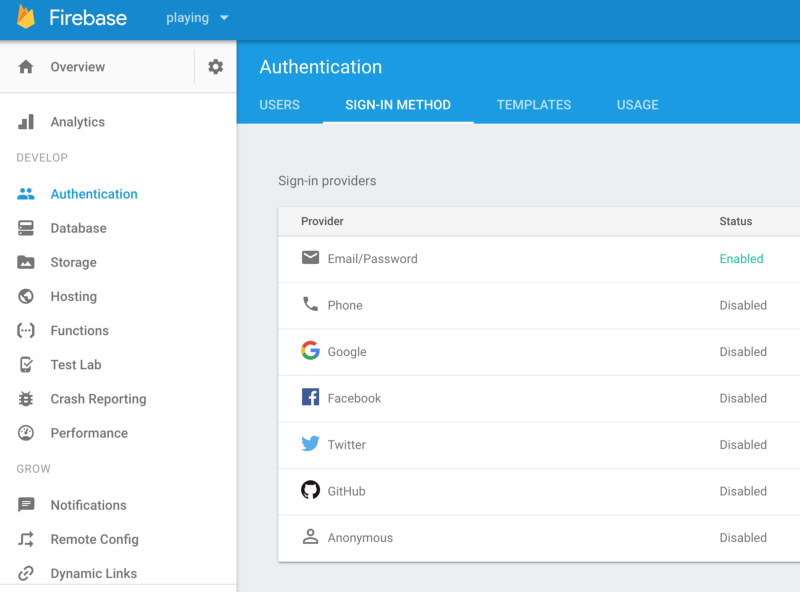
Once you have an account set up you will need to create a project in Firebase. Rather than into this, you can read through the docs on Firebase. They provide an excellent set of instructions to get you started. Note that you will need to copy and paste your config settings and swop them in the project’s main.js. Make sure you enable email & password authentication as the sign in method.
With Firebase set up and your config settings added. Lets look at the final part of the authentication process. Add a second conditional to the the route guard’s beforeEach method we created earlier.
router.beforeEach((to, from, next) => {const currentUser = Firebase.auth().currentUser;const requiresAuth = to.matched.some(record => record.meta.requiresAuth);if (requiresAuth && !currentUser) { next('/sign-in');} else if (requiresAuth && currentUser) { next();} else { next();}});We have added a variable currentUser, it returns the current signed in user from Firebase. If nobody is signed in then it returns null. We can use this as the second check in our conditional statement. If both requiresAuth and currentUser are true the route will display the page.
If this condition is not met then it returns the user to a sign-in page. If the route is not protected using the requiresAuth meta tag, the page is loaded as normal and no authentication is required.
Make Sure Firebase is Initialised Before Loading Vue
Our routes have been set up so that if you have already signed-in then you are redirected to the dashboard page. Unfortunately this will not happen. The execution of the navigation guard beforeEach takes place before Firebase initialisation ends. This is a very important gotcha which Anas Mammeri explains in his post.
Using Vue to Handle the Sign-up & Sign-in
We need users to be able to sign-up and sign-in to our app. Take a look at the two Vue components SignUp.vue and SignIn.vue. They both work in a similar way, binding the email and password fields to the data property.
The integration with Firebase happens when the signUp or signIn method is run. These functions are provided by Firebase. We pass in the email and password from the Vue data property. On success navigate to the dashboard using the vue-router replace method. If any errors occur then an alert with the error message is displayed.
signUp: function() { Firebase.auth() .createUserWithEmailAndPassword(this.email, this.password) .then( user => { this.$router.replace('dashboard'); }, error => { alert(error.message); });}signIn: function() { Firebase.auth() .signInWithEmailAndPassword(this.email, this.password) .then( user => { this.$router.replace("dashboard"); }, error => { alert(error.message); });}If you load the site up in your browser you should now be able to sign-up and sign-in. All we need to do now is provide the user with a sign out link.
Allowing Users to Sign-out
Take a look at the Header.vue component. We can use a Firebase signOutmethod which fires when a user clicks the Sign-out button. Then redirect them to the sign-in page with the vue-router replace method.
signOut: function() { Firebase.auth() .signOut() .then(() => { this.$router.replace('sign-in'); });}Load the site up in your browser and click on the sign-out button. You should now be redirected back to the sign-in page.
Wrapping Up & Further Learning
Our app now has basic Firebase authentication with some simple vue-router fundamentals added. Next we need to look at how we manage user state. The state helps display content and links depending on whether a user is logged in. After reviewing a few options it would be a good use case to dive into Vuex.