by Aurélien Giraud

Building a Node.js application on Android - Part 1: Termux, Vim and Node.js
If you are excited about Node.js and own an Android device, no doubt you’ll enjoy running Node.js on it. Thanks to Termux a terminal emulator and Linux environment for Android, the fun of developping Node.js web applications is just a few ‘npm install’s away!
What we are going to do
I will show how to get started with Node.js using Termux on Android. We are also going to use Express and see how to store our app’s data in NeDB, a lightweight JavaScript database, whose API is a subset of MongoDB’s.
In this first post, we will limit ourselves to setting up our Node.js development environment, that is:
- Install and configure Termux.
- Install and see how to use Vim as a text editor. (This section can be skipped if you already know Vim.)
- Install and run Node.js.
1. Termux
Termux combines terminal emulation with a Linux package collection. It comes as a free app that can be installed directly from the Play Store or from F-Droid catalogue.
Configuration
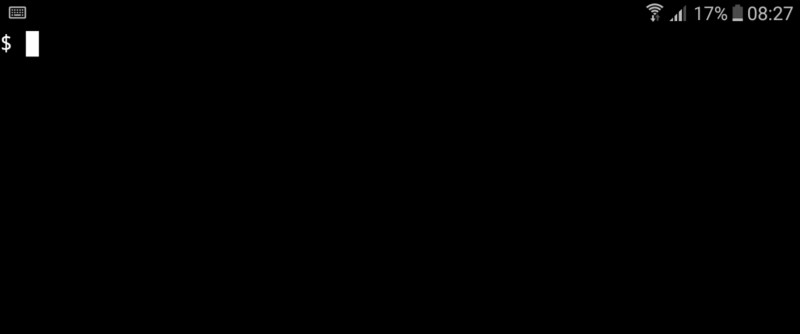
When you open Termux, you are greeted by a Command Line Interface (CLI). Right after installing Termux, it is recommended to check for updates, and upgrade if need be. So type the following commands at the prompt — that is, after the ‘$’ sign — and press <Enter>:
$ apt update && apt upgradeTermux comes with a minimal base system, so you should also install ‘coreutils’ for the full-fledged variants of base CLI utilities such as ‘mv’, ‘ls’, etc.
$ apt install coreutilsStorage
There are three main types of storage in Termux:
- App-private storage: This is right where you are when you start Termux.
- Shared internal storage: Storage in the device available to all apps.
- External storage: Storage on external SD cards.
Although the environment setup in Termux is similar to that of a modern Linux distribution, running on Android implies differences and so far I have only managed to run Node.js fully while storing my data in Termux’s private storage (option 1 above).
So let’s create a directory for our app and change to this directory:
$ mkdir test-node && cd test-nodeKeyboard
I have only been using a soft keyboard so far and I encountered some issues with the default touch keyboard while using the volume up key as a replacement for <Esc>, <Tab> or the Arrow keys.
To circumvent these issues, I installed Hacker’s Keyboard from the Play Store and I really like it. It is a touch keyboard that can be used instead of the default one and has all the keys needed for writing code and using the terminal.
You can find useful information about using a touch or hardware keyboard with Termux directly on the Help page.
Using multiple sessions
One more thing I would like to mention about Termux: if you swipe the screen left to right from its left edge, it opens a menu that enables to start or switch between multiple Termux sessions.
Accessing Help in Termux
In Termux, you can access the help documentation, which contains all the necessary information, by long pressing the screen, and clicking first on ‘More’, then on ‘Help’. Note though, that this help documentation cannot be accessed when your device isn’t connected to the internet.
2. Vim
Vim is a text editor that can be used right in the Command Line Interface and it is available as a package in Termux. So let’s install it:
$ apt install vimVim’s interface is not based on menus or icons but on commands given in a text user interface. In case you are new to it I’m going to guide you through the very basics of Vim.
First, create the file ‘server.js’:
$ touch server.js To edit this file with Vim, simply type:
$ vim server.js
Using the different modes
Vim behaves differently, depending on which mode you are in. At start, you are in what is called command mode. You should see a cursor on the first line, tildes (~) on the other lines and the name of the file at the very bottom.
Tilde lines are here to indicate that these lines are not part of the content of the file.
To start writing into the file, you need to switch to writing mode. So just type the letter “i”. At the very bottom, you should now see something like this:
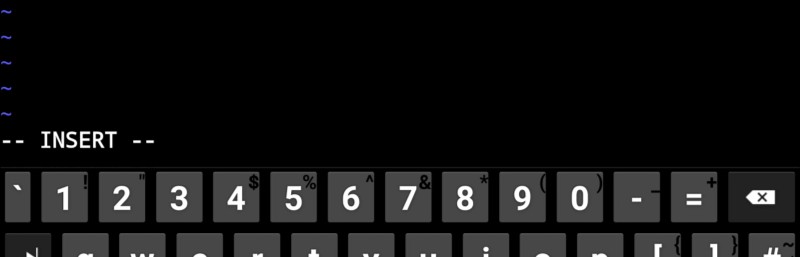
So now go on. Write something.
Done? So here is how you can save your changes/quit Vim. First you need to come back to the command mode by pressing <Esc> and then you have the choice:
- Type :w and press <Enter>to save (write) the changes.
- Type :wq and press <Enter> to save the changes and quit.
- Type :q! and press <Enter> to quit without saving the changes.
And that is about it for our very short introduction to Vim.
Not getting lost and learning more about Vim
If you are lost, you can press <Esc> and type :help followed by <Enter>. This will open Vim help documentation.
Something like this simple Vim Reference might be useful if you are new to Vim. Alternatively, you can type ‘vimtutor’ in the terminal for a 30 minutes tutorial, play a learning game at http://vim-adventures.com/ or follow the interactive tutorial at http://www.openvim.com/.
3. Node.js
Installing Node.js is very simple:
$ apt install nodejsIf you haven’t done it yet, create a folder for the application, move into it and type:
$ npm initThis will ask you a bunch of questions, and then write a ‘package.json’ file for you. (You can just press <Enter> for each question asked.)
Now let us check that everything is working all right. Open server.js
$ vim server.jsand type in it
console.log('This is Node.js running on Android.')Save the changes and quit Vim.
Now we have everything in place and we can finally run node:
$ node server.jsThis should print the text “This is Node.js running on Android.” in the terminal.

In a nutshell
As a recap, here is the whole process again (with minor differences as it is all done directly from the command line).
Update and upgrade Termux: $ apt update && apt upgradeInstall some core utilities, Vim and Node.js: $ apt install coreutils $ apt install vim $ apt install nodejsCreate a directory called test-node and move into it: $ mkdir test-node && cd test-nodeCreate an empty file called server.js: $ touch server.jsInteractively create a package.json file: $ npm initAdd some content to server.js: $ echo “console.log(‘This is Node.js running on Android.’)” > server.jsRun node: $ node server.jsWrapping it up
We have seen how to use Termux on Android, how to edit files with Vim and how to run Node.js.
Here are a the main links related to Termux: its web page, its wiki and its GitHub repositories. It can be installed from the Play Store or from the F-Droid catalogue.
In the next post we are going to build a basic Node.js application using the Express web framework and a lightweight JavaScript database called NeDB which uses MongoDB’s API and can be used to develop and run a web application in Termux.
In the meantime, happy coding!