
Do you want to access your database, control your system, or execute some code from another website? An API can do all of this for you, and they’re surprisingly easy to set up.
An API is a URL that you can perform GET, PUT, POST, and DELETE requests on to control another service. If you make one yourself, then you can build these APIs to do whatever you want behind the scenes. Common uses are providing database control, performing actions on third-party APIs (API-ception), or controlling another service.
Why use an API?
You may ask why we need an API when we can access the database directly or run the code on the website. There are a few massive advantages to APIs over running the code in your website.
Hide your access keys and tokens
This is possibly the most important reason to use an API. If you are accessing a database, then you’re going to need the database details as well as user and access token/key data.
If you access the database from the website, then you’re going to have all of these details in the source code of your site. This is really bad practice, as anyone can look into the source control and steal your details. This doesn’t sound too bad, but what if these are your AWS or Google Cloud Compute credentials? The people accessing your site could then use these to run whatever they want on your account, leaving you with a huge bill.
Running these processes from behind an API means no one can see any of the private details — they can’t steal them to use in their own projects. If you store your website code in GitHub or another public source control, then it also means that they aren’t visible there, either.
Run the code elsewhere
What if you aren’t using any other services and aren’t using any secret keys? If you are running a large or complex bit of code, or if you don’t want anyone else reading your code and discovering how it works, then you can still use an API.
Control who has access

Providing an API also allows you to restrict who is able to access the database or run the code. You can do this by requiring an API key. This key is used to identify the user making the request, and then allowing or rejecting the request.
This can be used to allow only a few people to access the service, or even to create a tier system. This is how a lot of paid APIs work. Everyone is given free but limited access, and then you allow payment for access to superior parts of the service or just a higher rate of requests.
Building the API
Now that we know some reasons why we might want to create an API, let’s do just that. We’re going to use API Gateway and AWS Lambdas, because it’s simpler than running a server. Make sure you have an AWS account and are logged in.
Setting up an API Gateway
We’ll start by opening the API Gateway service and clicking “Get Started”. On the next page, we need to select the “New API” option. Then we’ll give our API a name and description, and click “Create API”.
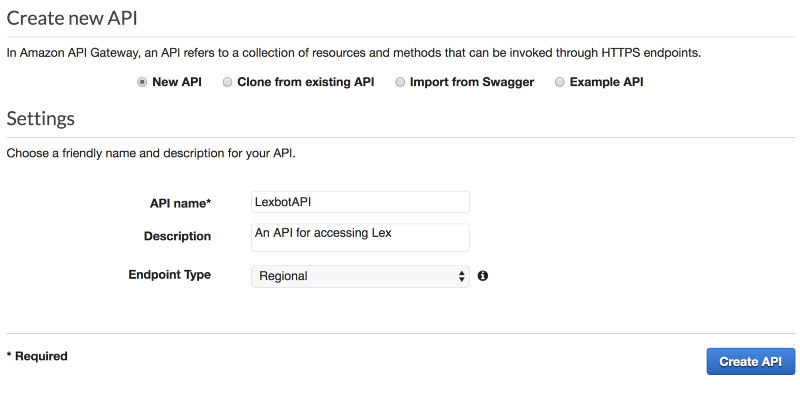
Clicking “Create API” will get us into the configuration page for the API.
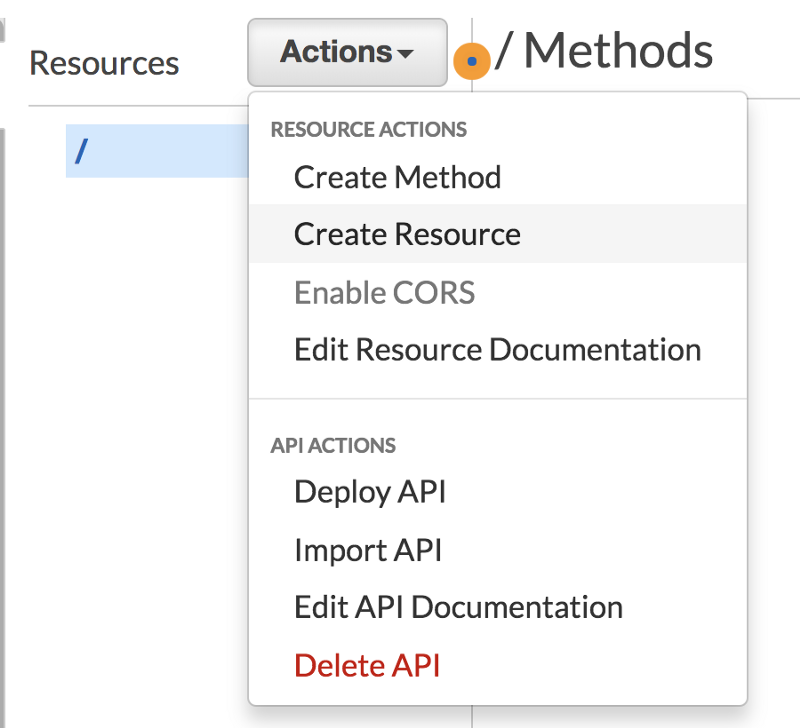
The first thing we need to do is to add a resource onto the API. Using resources allows us to group similar API calls together using nested slashes. We are going to create an API that we can use to make recommendations on what to watch. Therefore we can have /tv-shows and /movies as two base methods.
Click the “Actions” dropdown and select “Create Resource”. Name your resources, making sure that they are both in the “/” path.
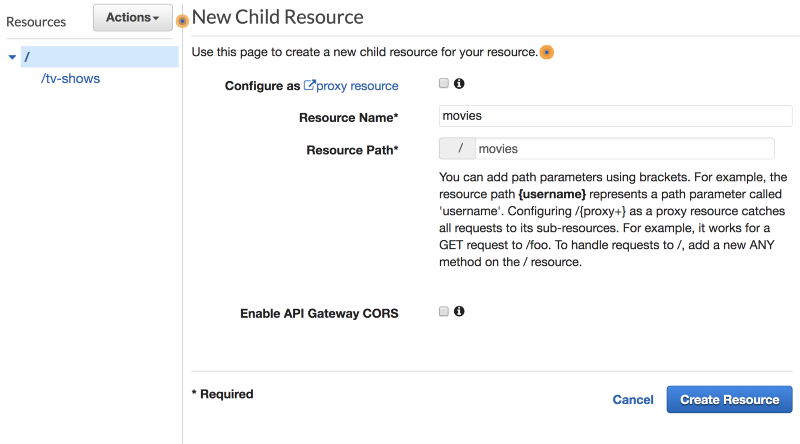
We want users to be able to go to “/movies/horror”or “/tv-shows/comedy”, and we can do this by adding path parameters. These are variables that we can access inside the API. To create one of these, we need to set the resource to {resourceName} as shown below. This can be done for “tv-shows”and “movies”.
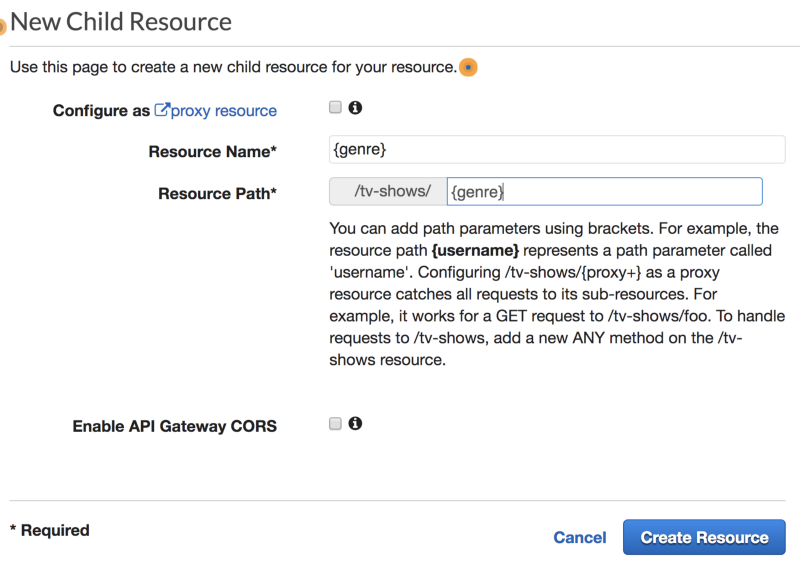
Now that we have length and genre, we can create methods for getting and adding data to a table. Select one of the {genre} resources, click “Actions”, and then “Create Method”. This will create a small grey box below the resource which we can click. We are going to start with a GET request, so select that and click the tick button.
This is where we get to decide how to handle the request. We are going to use AWS Lambdas, but we need to create them before we can finish setting up the methods.
Creating the Lambdas
We are able to respond to these API requests using Lambdas, which is great as they only run when we need them to. They are also really easy to create, so that’s what we’ll do now.
In the Lambda console, click “Create function”. Then we can name our first API function movieAPI, set it to run Node 8.10, and “Create new role from template(s)”. We’ll name our new role “tableAPI” and add “Simple Microservice permissions” as the only template.
All code can be found at https://github.com/SamWSoftware/Projects/tree/master/movieAPI
Clicking “Create function” will send us into the Lambda window. Scroll down to the “Function code” section and we’ll change the code. The first thing we’re going to do is to check what request method was used.
exports.handler = async (event) => {
    console.log(event);
    if (event.httpMethod === 'PUT'){
        let response = putMovie(event)
        return done(response);
    } else if (event.httpMethod === 'GET'){
        let response = getMovie(event);
        return done(response);
    }
};
We’re going to start by writing the getMoviefunction. This function will start by getting the genrefrom the path parameters. This is where using path parameters can make this process easy.
const getMovie = event => {
    let genre = event.pathParameters.genre;
    return;
}
With the genre that the user requested, we are going to get a recommended movie for them. I copied these from 25 Top Films From Each Genre and added them to an object with the genre as the key. We can then get the film by getting the value of the genre requested.
const movies = {
    action: 'Desperado (1995)',
    fantasy: 'Inception (2010)',
    ...
    horror: 'Black Swan (2010)'
}

const getMovie = event => {
    let genre = event.pathParameters.genre;
    return movies[genre];
}
This means that the title of the movie is being passed into the done function. This function is used, as API Gateway expects the data to come back in a very specific format. This function turns a string into that required format.
const done = response => {
    return {
        statusCode: '200',
        body: JSON.stringify(response),
        headers: {
            'Content-Type': 'application/json',
            'Access-Control-Allow-Methods': '*',
            'Access-Control-Allow-Origin': '*'
        }
    }
}
We can do a very similar thing for a tv-showsAPI function, reusing most of the code. Just change the function names and the movie suggestions to tv show.
Connecting the Lambdas to API Gateway
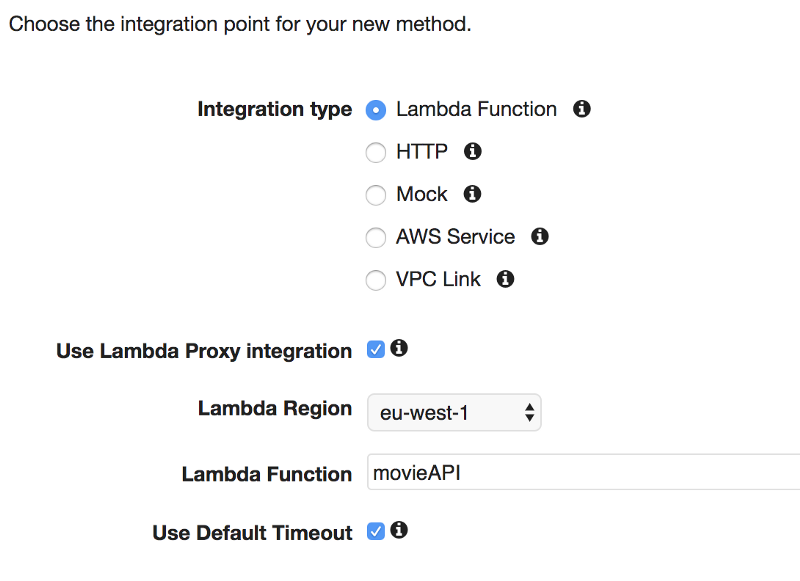
Back in API Gateway, we can add our new Lambdas to the methods we created earlier. We need to make sure that “Use Lambda Proxy integration” is selected and that we are pointing at the correct Lambda. Clicking “Save” will ask you for permissions to access this Lambda, to which we can give the “OK”.
Do this for the GET methods on both resources and we can start to test. Selecting the methods should now show a method execution diagram. This sounds complicated but the only bit we need is the “TEST” section.
Clicking “TEST” will open a new section where we can try out the API. There are lots of things you can set here, but the only one we care about is the Path {genre}. We need to set this to the genre we’re requesting. Entering “western” as the genre and hitting the “Test” button gets a response like this:

We got our API working! Now we need to make sure that other people can access it. There are two steps to this.
- We enable CORS — Select the “{genre}” resource and then click “Actions” and “Enable CORS”. Leave everything as defaults and, when asked, click “Yes, replace existing values”.
- Deploy our API — Click on “Actions” and “Deploy API”. Set the deployment stage to “[New Stage]” and then give your stage a name like “production” or “public”.
Once your API has deployed you should get a URL like this. This is the base of your API. You can add /movies/western to access your API.
https://{uniqueCode}.execute-api.eu-west-1.amazonaws.com/productionYour API URL might end up something like:
https://fds1fe31fes476s.execute-api.eu-west-1.amazonaws.com/production/movies/westernThat’s all for this article. In the next one we’ll connect this API to Dynamo tables and let users vote on their favourite movies in each genre. You can read that article below.
Building an API with Lambdas and API Gateway — Part 2
In the first part we created an API which passed requests through to a Lambda which returned the top tv show or movie…
medium.com