by Onur Tuna
How to start using C++ code in your Android project
Last year I gave a talk at the GDG DevFest in Ankara, Turkey. I have been planning to share that talk here ever since. Now that I’m a PhD candidate and have a bit more time, I’m putting the post down here.
If you would like to get the presentation, it’s available on my drive.
Warm Up
I would like to start by explaining the build process of an app in Android. Because you need to know some basic internal stuff, this topic is somewhat technical.
You don’t need to know everything shown in the image above — but it’s a good reference.
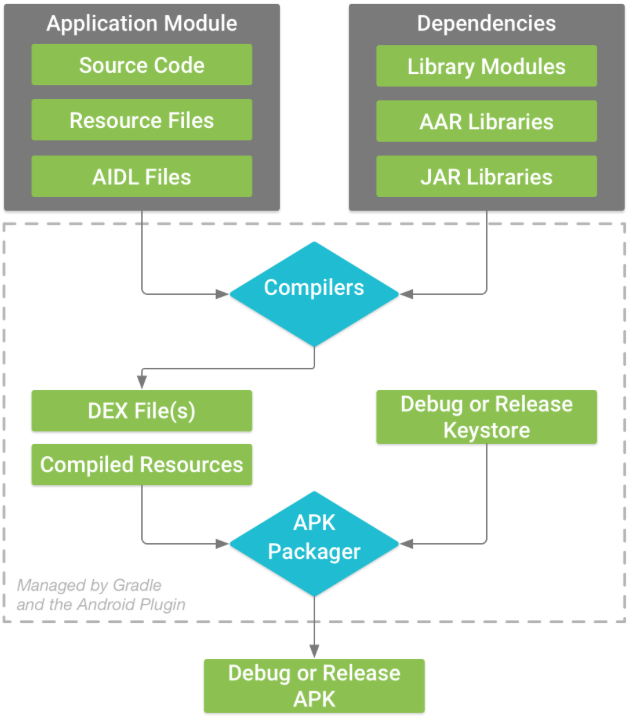
Now say that you write an application for Android using Java. You’re going to have:
- the source code for that application
- some sort of resource files (like images or xml files for the arrangement of the GUI)
- and perhaps some AIDL files, which are Java interfaces that make processes talk to each other.
You’re probably also going to use additional libraries and their related files in your project.
When building a working app, you first compile those source codes together. A compiler will yield a DEX file which then can be read by a virtual machine. This machine-readable file and some additional information about the app will be packaged together by a package manager. The final package — called an APK package — is the final app.
This is the build process of an Android package in the simplest terms.
Android Run Time
Now let’s talk about the run time stuff. You have an app, and when it starts running it’s read by a machine. Android has two kinds of virtual machines to run an app. I won’t introduce the old one, called Dalvik, as today most Android devices run a virtual machine called Android Run Time, ART — so that’s what we’ll talk about here.
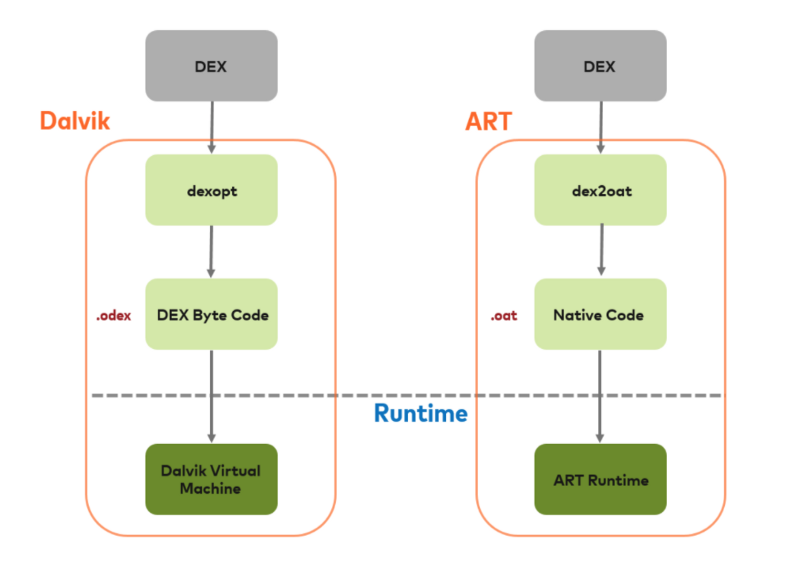
ART is an ahead-of-time (AOT) virtual machine. So, what does that mean? Let me explain. When your app starts running for the first time, its code is compiled to machine code which can then be read by the real machine. This means that the code isn’t compiled part by part at run time. This enhances the install time of the app while reducing the battery usage.
In sum, you write an app then compile it to binary code which is read by the ART. Then the ART converts that code to native code which can be read by the device itself.
ART & C++
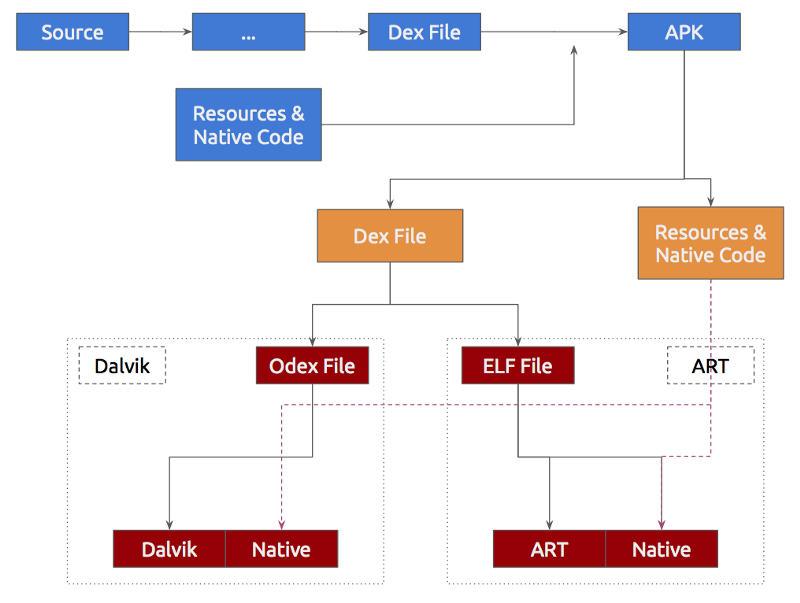
What if you write an Android app using Java but there is some C++ code that is in contact with the Java? What’s the effect of that C++ code on your app’s build process or run time? Not too much.
The C++ code is compiled directly to the real machine code by its compiler. So, if you use C++ code, it will be packaged as machine-readable code in your package. The ART will not reprocess it while it converts the ART-readable code into machine-readable code at the first time usage. You don’t need to worry about this process. You’re only responsible for writing an interface which lets Java talk to C++. We’re going to talk about that soon.
C++ Build Process
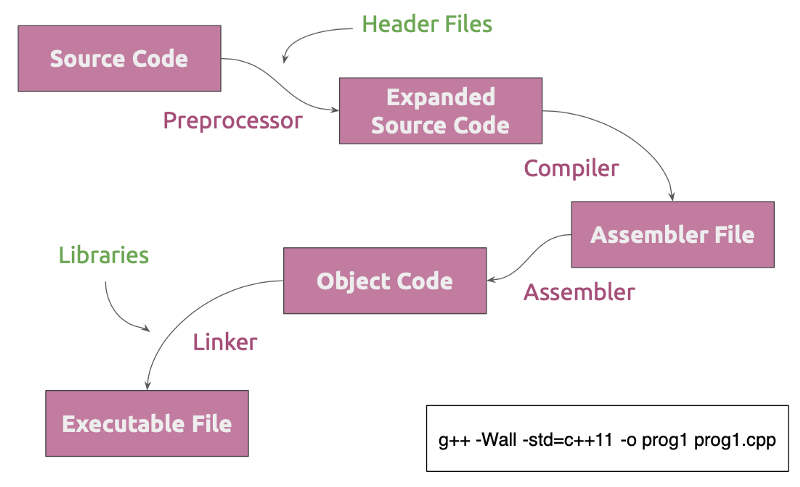
We now have to talk about the C++ build process. The source code (the .cpp and .h files) is turned into expanded source code by a preprocessor in the very first step. This source code contains a whole lot of code. While you can get the final executable file using a command like the above, it’s possible to cut the build steps with related flags. You can get the extended source by giving the -E flag to the g++ compiler. I have a 40867 line file for a 4 line ‘hello world’ .cpp source code.
Use g++ -E hello.cpp -o hello.ii in order to get the extended source code.
The second one is the actual compilation step. The compiler compiles our code to obtain an assembler file. So, the real compilation yields an assembler file, not the executable. This file is assembled by an assembler. The resulting code is called object code. When we have multiple libraries aimed to be linked to each other we have many object codes. Those object codes are linked by a linker. Then we get an executable.
There are two kinds of linking: dynamic and static.
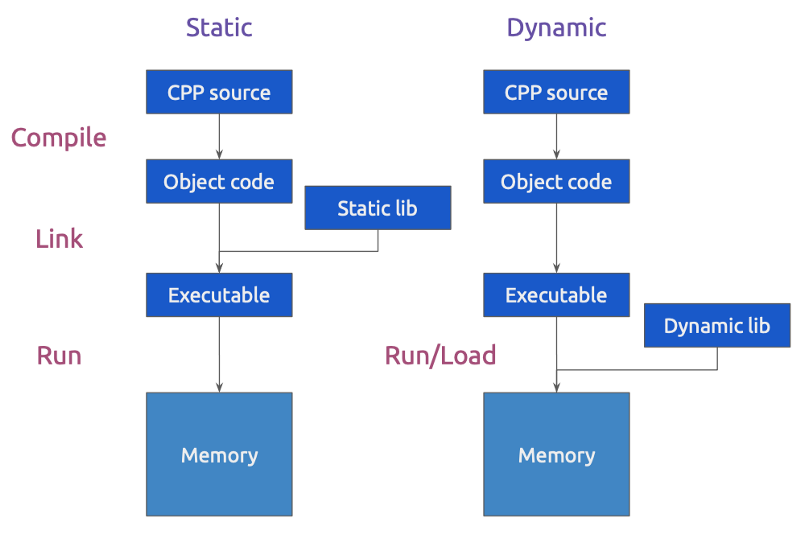
So now it’s time to go a bit deeper as we discuss pure C++ stuff.
The important thing: You can consider static linked libraries as a part of your code. So be careful when you link a library to your project. Because the library you use might not have a suitable license to be statically linked. Most open source libraries have been restricted to be used as dynamically linked.
From a technical point of view, a statically linked library is linked to the project at build time by the compiler. On the other hand, a dynamically linked library is linked by the operating system at run time. So you don’t need to distribute your project with the library code you use. You can use another project’s library or system library as well.
Because of this fact dynamic linking may cause vulnerability in your project. While the security case is out of the scope of this post, however.
Some Concepts
CMake and Gradle
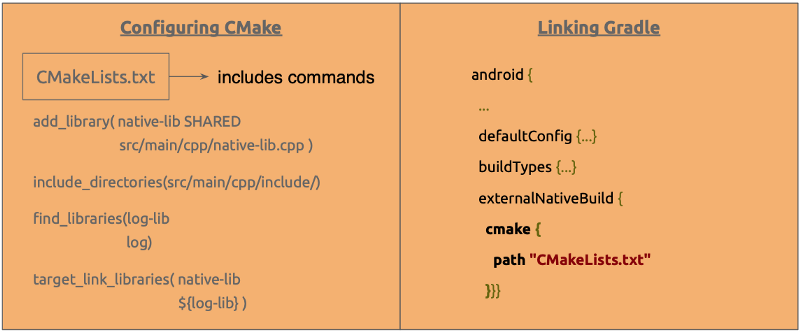
If we want to add C++ code in our Android project, it’s good to use CMake to handle build operations. Remember the build process I have just introduced above? When you have a bunch of C++ libraries and source code it becomes more complicated to handle all of them. A tool like CMake makes it easier to carry out the build process.
CMake will be available by default when you choose to include C++ support at the start of your project. Also you need to use a Gradle closure in order to package libraries to your APK.
ABI
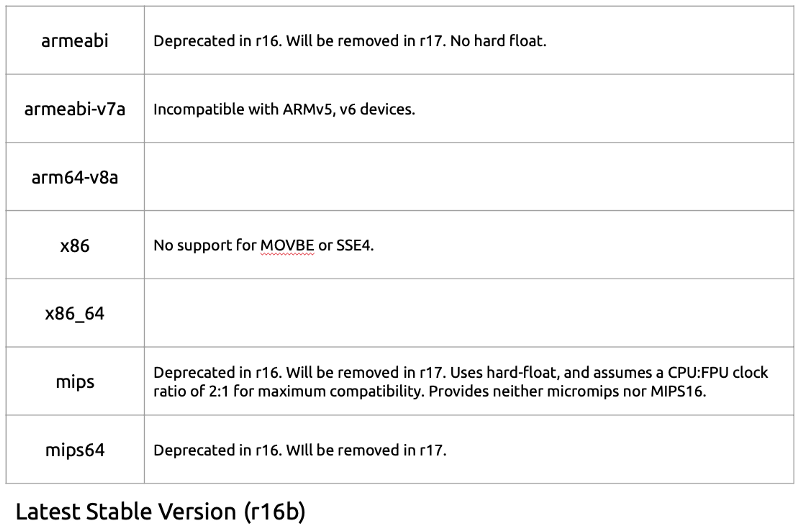
As you know, Android is distributed for a variety of devices. Each device might have a different CPU architecture. When you develop an Android application that contains C++ code, you should care about the platforms on which your application will run.
Remember the C++ build mechanism I introduced above? The C++ code should be compiled as a library for each platform you target. You can compile the library for all the supported platforms, or you can choose to compile it for only one platform.
Please note that 64-bit ABI support will be mandatory with Android Pie release if you want to put your app in the Google Play Store.
JNI
This is the last thing I would like introduce you to concerning C++ usage in Android. As I mentioned previously, I’m introducing you these concepts considering you want to develop an app using Java.
JNI is an abbreviation for Java Native Interface. It allows C++ and Java parts to talk to each other in the simplest terms. For example, if you want to call a function from C++ in Java, you should write a JNI interface for this purpose.
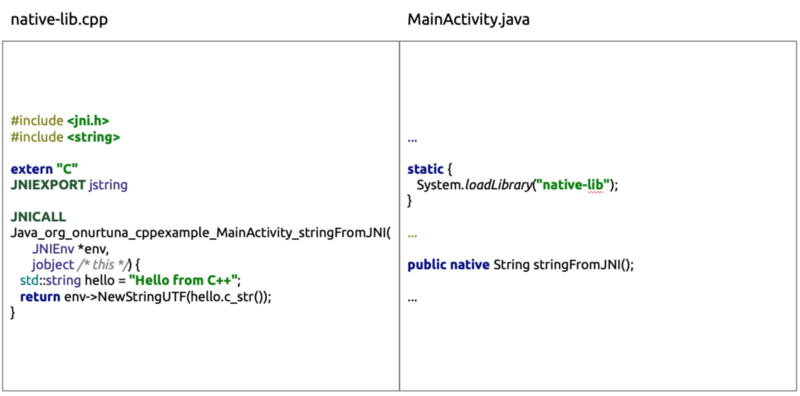
The native-lib.cpp is the interface and it connects the C++ code to the Java code. In the above example, the only C++ code is the JNI itself. However, you can include the libraries you want to use and implement a function which calls them. This new function can be called from the Java part. So it works as a bridge in that way.
Things to do in case you want to try it out
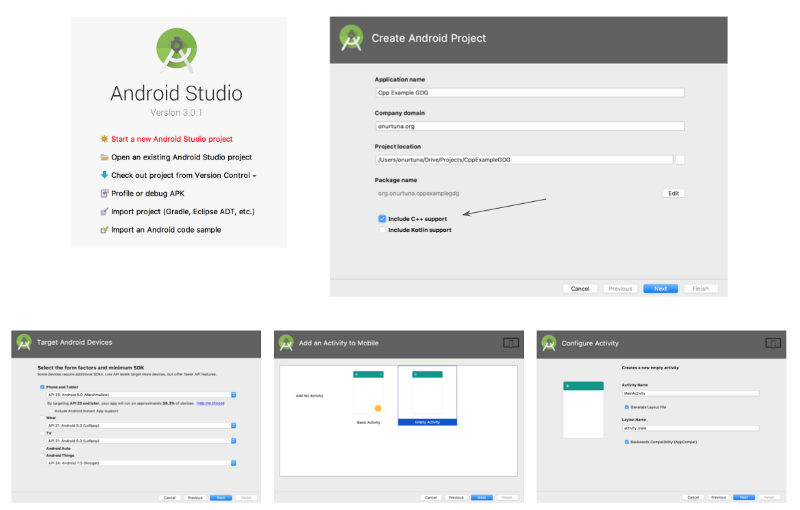
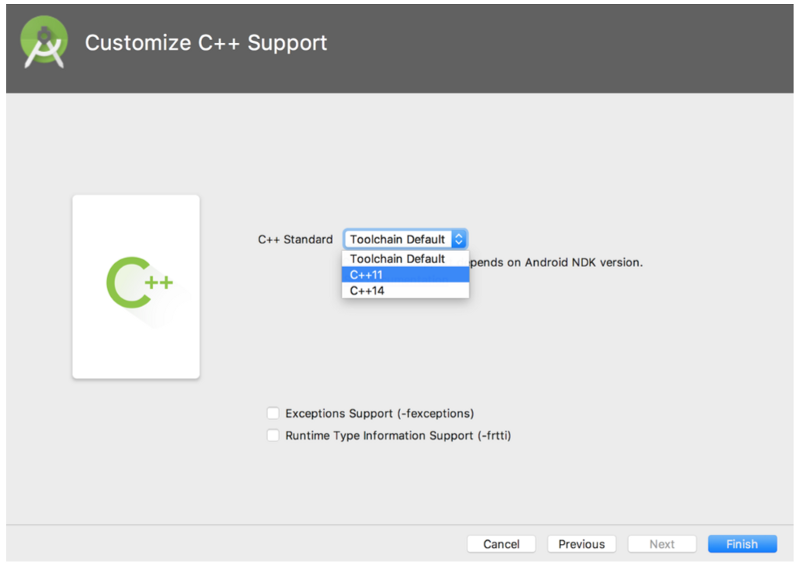
Here, you have all the necessary and basic knowledge to use C++ in your Android project. If you want to give it a try, this is how to create a simple Android project with C++ code.
The below images show you the steps to start such a project. After finishing them, you might want to read over this post to modify and understand the mechanism more deeply.
This post was only an introduction. Don’t forget there are many more things to learn. However, I aimed to introduce you the most important things about the concept of using C++.