
by Wassim Chegham
Demystifying Open Source Contributions
This quick guide is mainly for first-time contributors and people who want to start helping open source projects.

As an author and maintainer of a bunch of open source projects, I appreciate hearing and seeing my projects being used. And I even love it when other developers step in and offer their help to fix and improve my projects.
In this quick guide, I’d like to show you how easy it is to start contributing to any open source project. Trust me, it’s basically a no-brainer!
I’ll assume you’re already familiar with Git. If that’s not the case, here is a complete guide for you.
Identify the project you want to work on
First things first, start by identifying the project that’s close to your heart, or the one that you feel comfortable contributing to. I usually advise first-time contributors to start with the projects of the tools they use on their everyday job. It would make it easier to contribute to these tools since you are familiar with them and you may be already aware of some issues or missing features you want to help fix or improve.
At the same time, there is really nothing stopping you from choosing any random project you’d like to contribute to. Some people choose a project based on the technology they use, other choose a project with no particular reason, just for a challenge!
It’s up to you. Just pick one!
Fork the project
You need to fork the project to your GitHub account (assuming you are using GitHub) before you start contributing. This process will basically copy the upstream project to your own GitHub projects, so you can have your own copy of the project to work on.

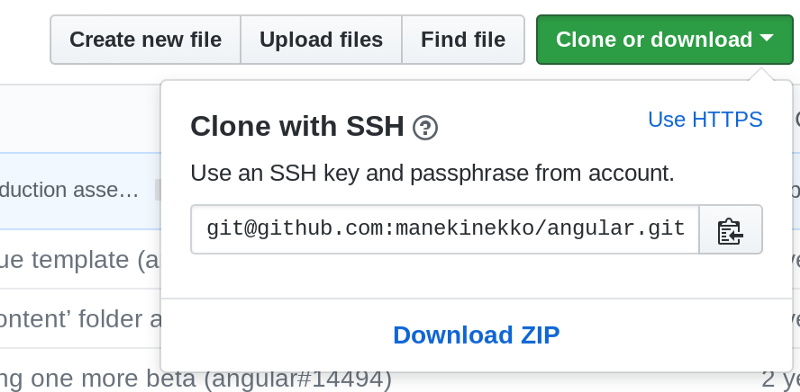
Clone and install the dependencies
The next step would be to clone — download — the project you just cloned to your local machine so you can start working—hacking.
If you’re mainly working on documentation, translation, or fixing typos, this is something you can definitely do directly from your browser. No need to clone the project locally. However, if the project requires you run a build step for the documentation, or running a formatting process on the documentation itself before pushing your changes, then you will have to clone the project locally and install the required dependencies.
Once you have the project cloned locally, you need to make sure to carefully read the CONTRIBUTING.md file — or the README.md — or any other file describing all the necessary steps to run and build the project locally. In case you are stuck, just ask the project’s maintainers for assistance and they’ll be happy to onboard you.
Don’t be shy! You are providing your help “for free”, and the project’s maintainers — including myself — can only be thankful for that!
What you can do to help
Most first-time contributors usually get confused by this step and what it actually implies. Let’s clarify first what a “contribution” is.
Contributing to an open source project doesn’t only mean writing code and fixing technical issues. Open source contributions have literally no limits or boundaries. They can be (from quick to more engaging):
- Using the tool and thanking the team working on it,
- Promoting the project at events or online,
- Helping answering questions,
- Fixing typos in documentation,
- Writing or translating documentation,
- Helping reproducing bugs and reported issues,
- Refactoring existing code,
- Fixing — technical — bugs,
- Writing unit tests,
- Implementing new features,
- Challenging the core architecture design
- You name it!
It’s basically anything you can do to help improve a project.
Identify an issue to “fix”
By “fixing” we mean “providing help”. I usually recommend that first-time contributors start small. Pick something you can easily and quickly fix. Typos in documentation are great. Plus, you will able to read the whole project documentation and get even more familiar with the project —it’s great if you want to get the high-level picture!
Next, writing or fixing unit tests is also another easy way to get started contributing. Unit tests allow you to progressively dive into the implementation details of a specific feature, at your own pace. If the project has integration tests, start with those before unit tests. This way you will have an understanding of the high-level architecture without digging into the implementation details.
Having said that, you should feel free to pick up any issue you feel comfortable fixing. However, just make sure to let the other contributors on the project know that you are working on that particular issue by commenting on the related thread on the project’s repository page.
Applying the “fix”
This step really depends on the type of issue you’re solving. Just make sure you read carefully the project’s contributing guidelines and comply to them. Most mainstream open source projects have a strict process of guidelines and formatting rules that all contributors must follow.
Also, feel free to ask the maintainer or other contributors for help if you’re stuck or have any question about anything.
Commit and push your changes
Once your fix is ready, you should be proud of yourself! You’ve done the hard work, the rest is just a formality.
So next, you need to commit and push your changes to your own copy of the project — the one you forked!
Again, read carefully the project’s contributing guidelines and check how you should format your commit messages and branch names. Every project has its own convention. Also, it is considered a good practice to push your changes — fix — to a different branch other than “master” or “develop”, so you can easily merge or rebase your changes later on — in case you have to do so.
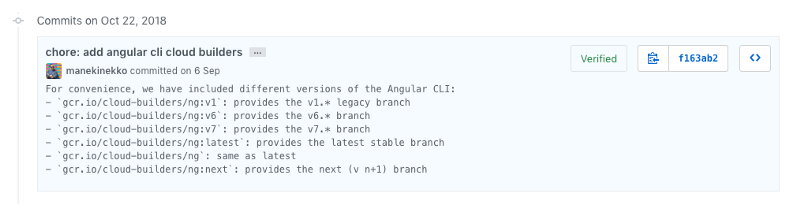
It is usually appreciated, sometimes mandatory, to include a detailed description about your changes/fix/implementation in the commit’s body. This will help others to instantly know about the changes introduced by this commit.
Send a PR—Pull Request
Now, you’re ready to send your changes to the original project — the upstream project. For that, you’ll have to open a Pull Request.
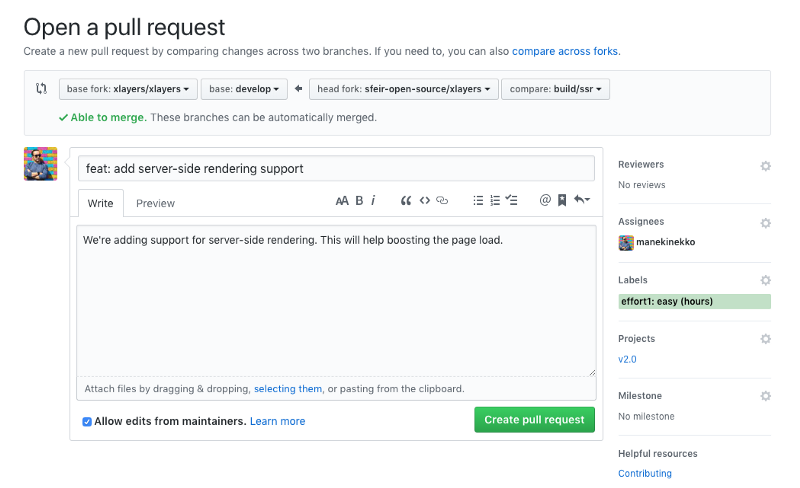
Now, send your PR and cross your fingers! Sometimes, you will get asked by the project’s maintainers to update or provide some changes to your changes before they can merge your PR.
If the project’s maintainers can’t merge your PR for some reason (usually a technical one), don’t be upset or disappointed! Give it another shot or simply move on and take another issue to fix. That’s totally fine, it’s part of the contribution.
I hope you now have a clear idea about Open Source contributions and how easy they can be.
Cheers.
Follow me @manekinekko on Twitter for more updates about Open Source.