
After my first year working as a frontend web developer, I got the idea to have my own personal site. It’d be a platform to showcase my work, share content, and serve as a creative outlet for me outside of work. Here, I’ll walk you through my experience building the site from zero to deploy.
Buying a Domain: Google Domains
I started from square one, buying a domain. There are lots of options out there. I chose Google Domains since I already had an account and wouldn’t have to open another just for this. It costs $12/year (standard price) and was freaky fast to set up. (FYI, you can buy a domain through Netlify as well.)
3 months went by where my domain was blank. I was too caught up in the many details of getting the site up and running. Taking a step back, I realized that no one was even going to see my site until I decide to start actively promoting it. Once I relieved myself of the pressure, I pushed myself to put something there to fill the void. With the heavy weight off my shoulders, I decided to have fun with it and make something simple and fun.
Getting Started
There’s a lot to consider when creating a website: design, UI/UX, accessibility, SEO, analytics, and more. It can be overwhelming to think about and plan for all at once.
To make it less intimidating, I decided to break it down into stages. Stage one was to make a simple “coming soon” page and deploy it. Then, once that was up and running, I could work behind-the-scenes on designing, developing, and perfecting the site.
“Done is better than perfect.” — Sheryl Sandberg
Building the front end: Gatsby.js
I first learned about Gatsby at the ReactNext conference I attended, and have been curious about using it ever since. An alternative I considered was Hugo, another very popular static site generator written in Go.
Gatsby.js was also attractive to me since it’s based on React.js, which we use in our stack at Lemonade. It also incorporates GraphQL, which is something I’ve been meaning to try out. I’m all for efficiency, so I’m curious how GraphQL helps fetch data more efficiently, and allow the frontend to be less dependent on the server logic.
When it came time to choosing a boilerplate, or “starter” as Gatsby calls them, I knew I wanted something basic. After looking through the popular starters, I chose to go with the gatsby-starter-default over gatsby-starter-netlify-cms.
Why? I didn’t want to commit to the site being primarily a blog. With the Netlify starter I’d have a lot of extra dependencies that I didn’t foresee needing.
The first iteration of the site is a simple “coming soon” placeholder page with an emphasis on simple. I took some inspiration from CodePen, made my custom React component, and added some custom fonts and icons. That’s it.
To edit the default header title, I was gently forced (?) to dip into GraphQL. Here’s a slimmed down version of what my header looks like:
The key takeaways here are:
- StaticQuery has 2 props:
queryandrender SiteTitleQueryis the operation name. Think of it like a function name. It’s useful for debugging and logging purposes, allowing you to easily search for the specific query in your codebase.- One major benefit of
StaticQueryoverpage queryis that it lets you set up a GraphQL query within the component where it’s used (as opposed to passing it through as a prop). - I edited my title in the
gatsby-config.jsfile, where site configuration options are stored. This explains where thesiteindata.site.siteMetadata.titlecomes from.
Hosting: Netlify
With so many tools available, it’s hard to know what’s right for the scope of a project. The important criteria for me were:
- Free hosting for a custom domain
- Ease of use
- Ability to serve dynamic (not just static) content
- Built-in HTTPS security
Netlify is a hosting and serverless backend service for static sites. It gave me everything I was looking for plus bonus features that I hadn’t even thought of, like:
- Ability to view a preview version before deploying to production
- Out-of-the-box A/B testing functionality
They sort of spoil you in that way, I was impressed.
Once I had achieved what you saw above, I decided it was ready to deploy. Since I didn’t use Netlify as my DNS provider, I had to set up a “custom domain.” I followed their tutorial, and a few minutes later it was configured.
All I had left to do was deploy. For that, there are a few options:
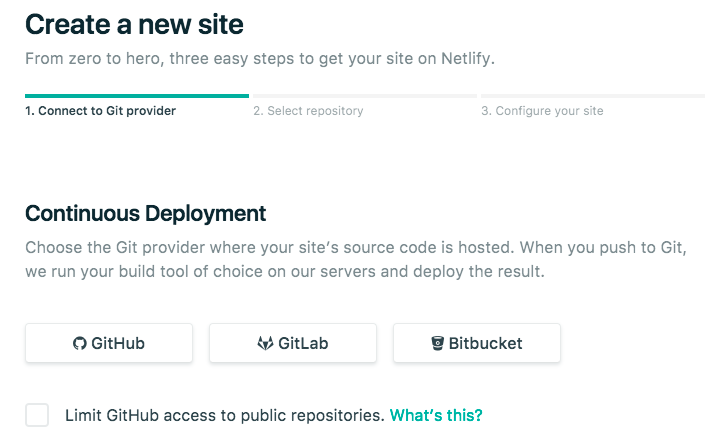
- Continuous Deployment
Link your Github (or other) account, and Netlify will automatically build and deploy for you when you push your newest version. You can also choose to limit their Github access to only your public repos.
- Manual
If you choose not to link your account, or were like me and just wanted to try it out the first time, you can easily drag and drop your project to trigger the deploy.
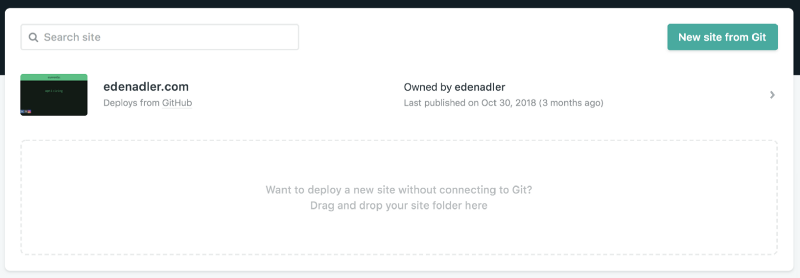
I tested it out with the manual way for the first deploy. 2 minutes (?) later, the site was up and running.
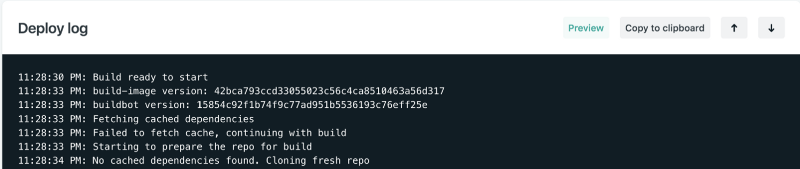
Check it out → edenadler.com
Retrospective
For this basic POC, I’m glad I didn’t try to do fancy things with GraphQL, and be overly ambitious with the site design and execution. You may even notice things, like the favicon, that are still there from the Gatsby boilerplate. I truly wanted to do the bare minimum. Done rather than perfect.
Whether you’re creating your own personal site, working on a side project, or writing a blog post, don’t strive for perfection. Set a realistic, tangible goal for yourself and get started. If your project involves trying out new technologies, don’t try them all out at once. Break the project up into smaller, bite-sized tasks that you can accomplish in a day, or even an afternoon. Most importantly, have fun with it.
My Next Stages
- Hire designer & implement the designs
- Plan & add content
- Play around with GraphQL integration
- … many more ideas ?
Thanks for reading ✨ If you have questions, feel free to comment here or connect with me on Instagram ❤