
by Ayo Isaiah
How to add HTTPS to your website for free in 10 minutes, and why you need to do this now more than ever

Last week, Google announced that Chrome 68, arriving in July, will mark all HTTP pages as “Not secure”.

This is the strongest nudge yet to drive the web towards encryption by default and has been a long time coming.
Although there is a ton of evidence that speaks to why everyone should hop on the HTTPS bandwagon, a lot of people still don’t see the value in serving their sites securely.
“Why do I need this for a blog?”
I’ve written about the value of HTTPS previously, but just to reiterate:
- HTTPS protects users against Man In the Middle attacks.
- HTTPS is required to leverage many new features in browsers such as Service Workers
- HTTPS impacts SEO
If you’re not convinced, read doesmysiteneedhttps.com to get the full picture of why every website should be served securely.
And if you still don’t get it, then life is about to get a lot harder for you.
In an effort to drive users away from insecure sites, browsers have been shaming websites served insecurely in certain contexts.
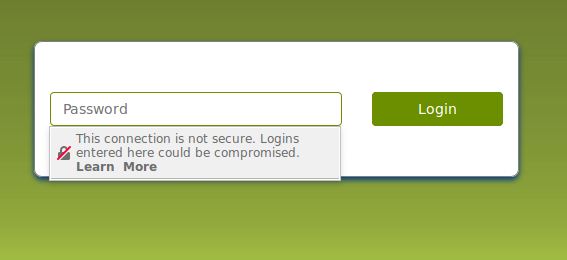
Chrome 56 started that trend by marking pages with sensitive login fields as “Not secure” while Chrome 62 extended this warning to all HTTP pages that contained any type of input field. In addition, the warning is displayed on all HTTP pages in incognito mode regardless of whether they contained an input field or not.
Firefox also warns users when they attempt to fill an insecure login form.
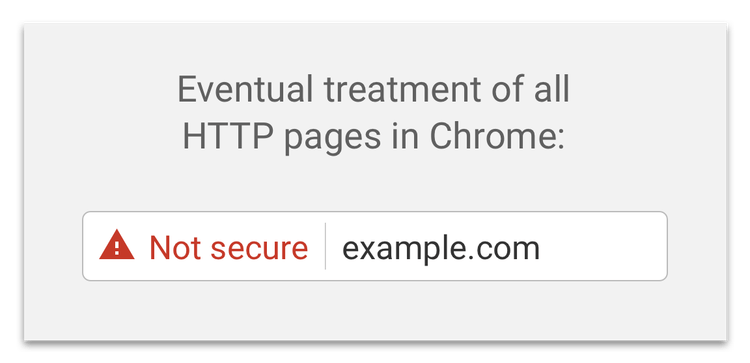
Now Chrome has decided to place this warning on all HTTP pages going forward. Eventually, the icon beside the “Not secure” label will change and the text will be made red to further emphasize that HTTP pages cannot be trusted.
To prevent users from seeing this warning on your website, all you need to get a valid SSL certificate. The good news is, doing so is not as hard or expensive as it used to be. In fact I’m going to show you how to deploy HTTPS on your site for free using Cloudflare. And it won’t take much time at all.
Why Cloudflare?
CloudFlare can help you secure an SSL certificate for free regardless of what server side infrastructure you have. It also works for sites that are hosted on platforms that do not provide server access such as GitHub Pages, Ghost and the likes.
You don’t need to install anything or write any code. This makes it a really great option to deploy HTTPS on your website and setup time should literally take no more than 10 minutes.
It also provides a myriad of other benefits in security and performance of your website which I’m not going to cover here. But I will talk a little bit about how it all works so you can get a good idea of how it’s able to do all those stuff.
How Cloudflare works
Cloudflare sits right in the middle of traffic between visitors to your website and your server. Visitors could be regular humans, crawlers and bots (such as search engine bots) or hackers. By acting as an intermediary between your web server and visitors to your site, Cloudflare helps to filter out all illegitimate traffic so that only the good stuff goes through.
Now you might be wondering if all that could have an adverse effect on the speed of your website, but it’s quite the opposite. Cloudflare has data centers all around the globe, so it will just use the nearest endpoint to your visitor which should make your site a lot faster than it was before.

Now that we know how Cloudflare works, let’s take a look at how to setup a website on their infrastructure and how to get on HTTPS for free. The focus here will be on the features that Cloudflare provides for free, but do note that paid plans are also available with a bunch of extra features.
Setting up a new site
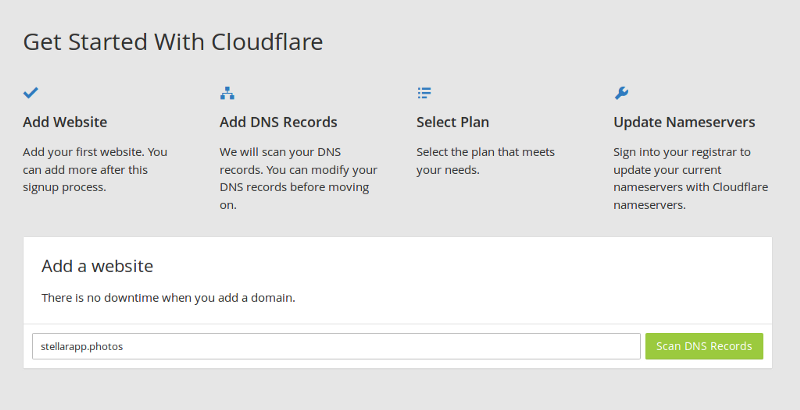
After you sign up at Cloudflare, the first thing to do is to add a domain and scan the DNS records.
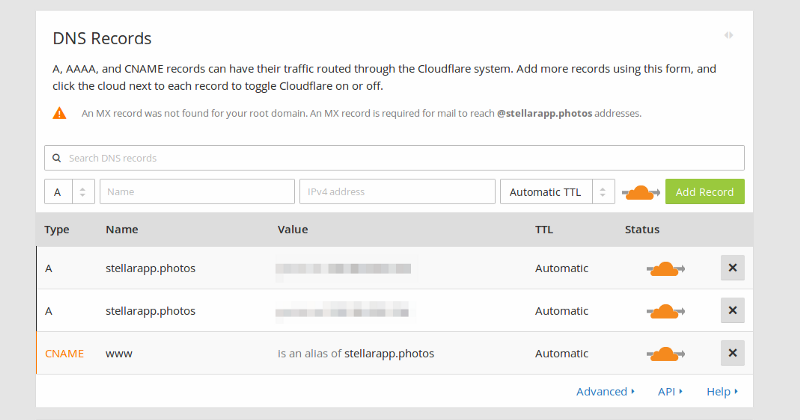
Once the scan is completed, all the DNS records on the domain will be displayed. You can choose the sub-domains you want to enable Cloudflare on and make any desired modifications. Once you’re ready, click Continue to go to the next step.
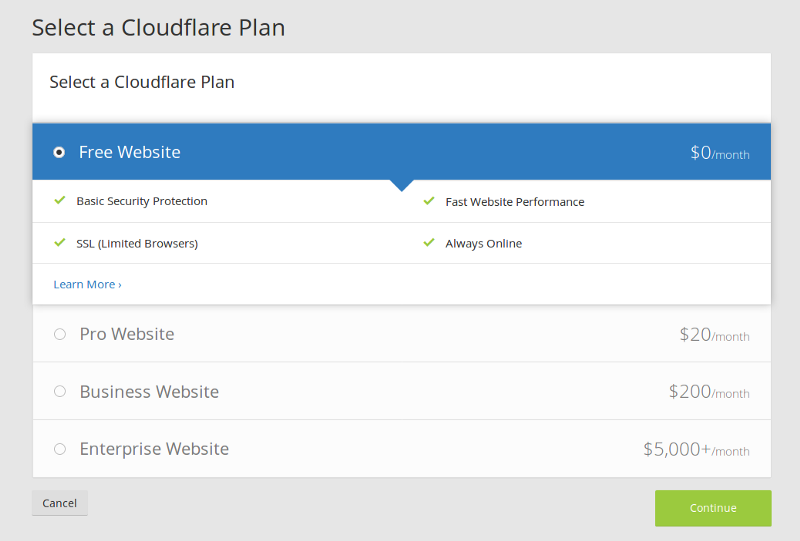
Select the free plan and click Continue.
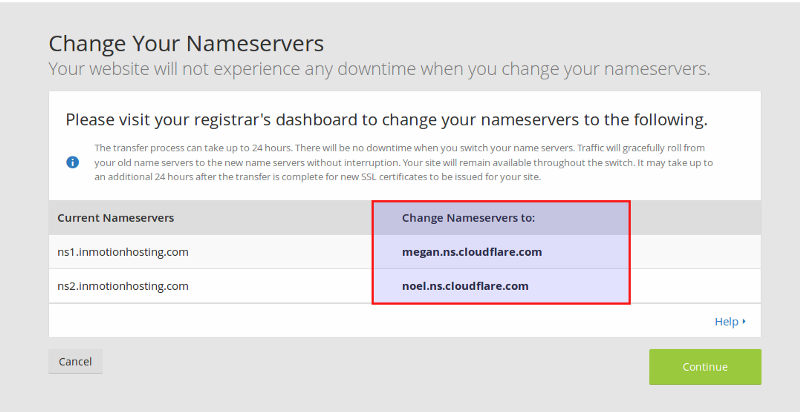
Next, you’ll need to change the nameservers on your domain registrar to the Cloudflare provided ones. The process for doing this on each domain registrar is slightly different, so do check with your domain registrar.
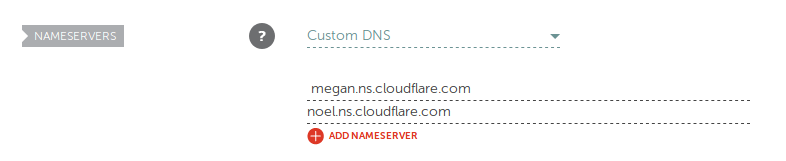
Here’s how it looks like in Namecheap:
Now you must wait for the nameserver changes to finish propagating. Click on Recheck Nameservers after a while to see if your site is now active on Cloudflare. This is the longest part of the setup and could take up to 24 hours, but in my experience it took less than 5 minutes.
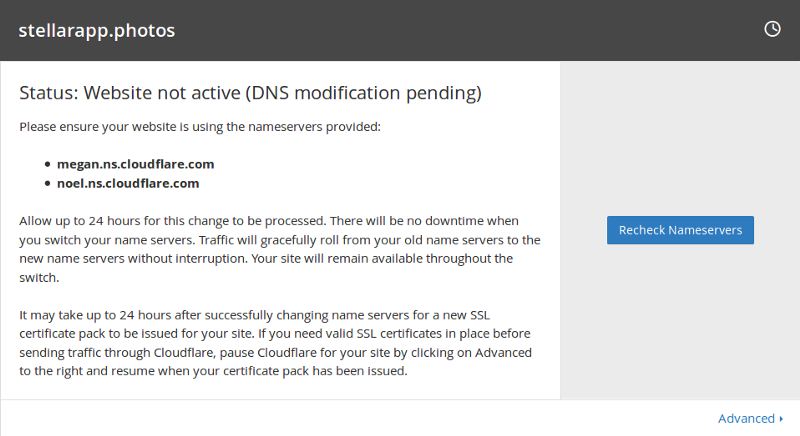
Once your nameserver updates have been validated by Cloudflare, your site becomes active on the service.

If you want to be absolutely sure that your DNS settings have propagated everywhere, What’s My DNS provides a way to check what IP address your domain resolves to in different locations.
You can also use dig or nslookup in the command line to verify your domains DNS configuration.
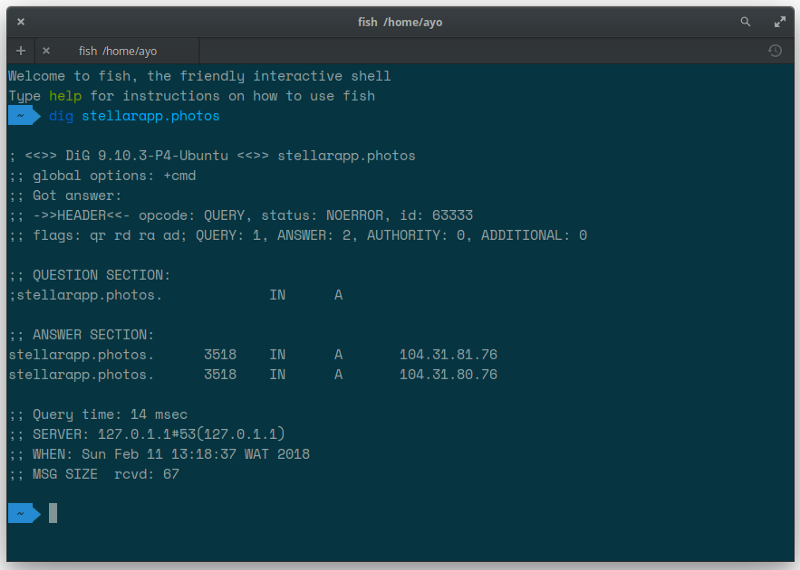
This way, you can be sure that all traffic going to your domain is now being routed through Cloudflare.
Before you start configuring Cloudflare, make sure your browser is not using the old DNS records from its cache. In Chrome and Firefox, you can do this by clearing your browser history.
Getting SSL for free
SSL is still a premium service and many Certificate Authorities charge significant amounts before issuing an SSL certificate. It’s not something you can just get for free everywhere, but that’s changing rapidly in the industry.

Now that you’ve got Cloudflare sitting in the middle of your web traffic, you should get SSL on your domain automatically. It can take up to 24 hours for the certificate to become active, but in my experience, it doesn’t take long at all.
Once the certificate becomes active, load up your site in a browser. You should see the site served over HTTPS and a nice green padlock in the address bar.
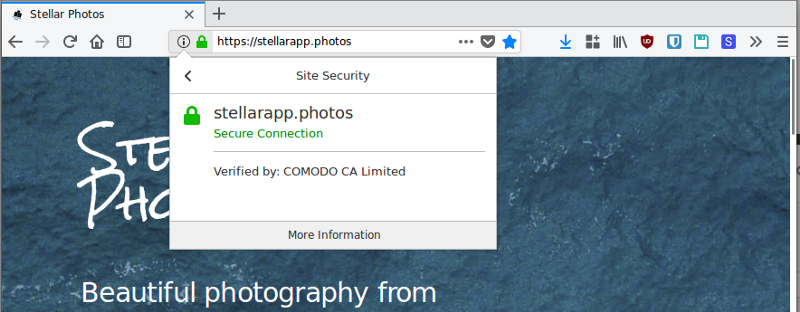
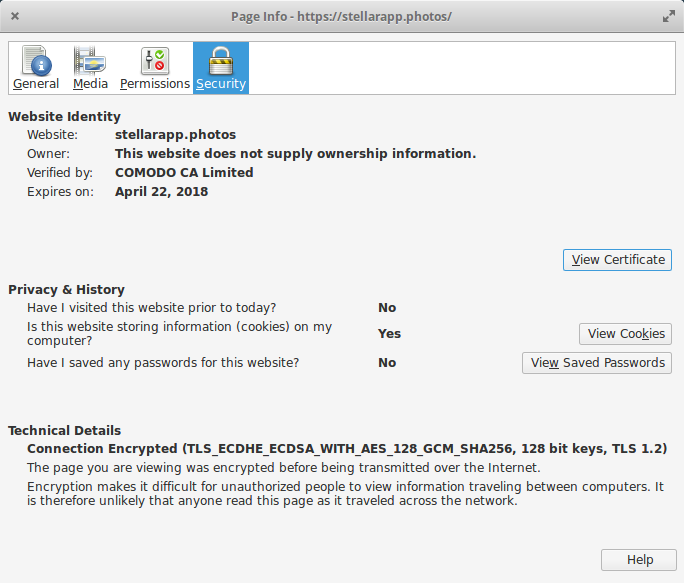
If you view more information about the cert you will see the Certificate Authority that issued it (Comodo in my case) and the expire date. One of the great things about Cloudflare is that certificate renewal is done automatically for you so no worries there.
Difference between Flexible, Full and Full (Strict) SSL
Cloudflare makes it really easy to get SSL on your site for free without configuring anything, but it’s not always the same as serving your site over SSL directly from the origin.
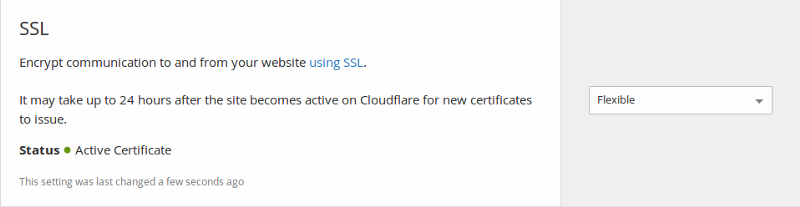
There are three implementations of Cloudflare’s SSL. The first one, which you get by default, is Flexible SSL. In this case, traffic is encrypted between the users of your site and Cloudflare but this encryption does not go all the way to the origin server. Cloudflare still speaks to your server over plain HTTP.
This means that any Man In The Middle (such as network providers) between Cloudflare and your server can see the traffic. If you collect sensitive information on your website, refrain from using this option.
In order to have encryption all the way to the origin server, you need to use the Full or Full (Strict) implementation. The former requires you to install a valid certificate on your server, but the authenticity of the certificate will not be verified so you can get by with a self-signed certificate. On the other hand, the Full (Strict) implementation requires you to install a valid SSL certificate that has been signed by a trusted Certificate Authority.
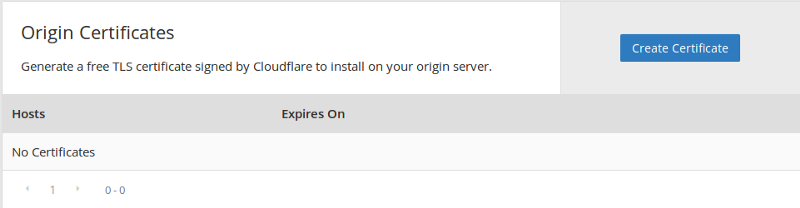
If you do not want to purchase SSL from the likes of Comodo, you can get free Origin CA certificates from Cloudflare that can be used with either the Full or Full(Strict) options as they are trusted by Cloudflare. But keep in mind that these certs are only trusted by Cloudflare so they will stop working if you decide to take your website off Cloudflare’s infrastructure.
If you do not control your server environment, say if your site is hosted on GitHub Pages or similar platforms, you will not be able to use the Full or Full (Strict) implementations which means even though your users see HTTPS in the address bar, traffic will not go all the way to the origin server encrypted.
But that’s still a vast improvement compared to no HTTPS at all because it’s going to protect your users from being Man In The Middled on the client side.
Strengthen SSL implementation
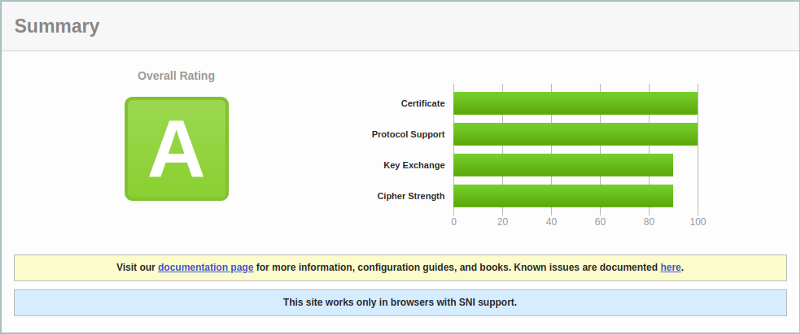
No matter what SSL implementation you opt for, there are ways to strengthen it to make sure that users can never access your site over insecure HTTP. Qualys SSL Labs is a tool that helps you run a test on your SSL configuration to see if there’s any room for improvement.
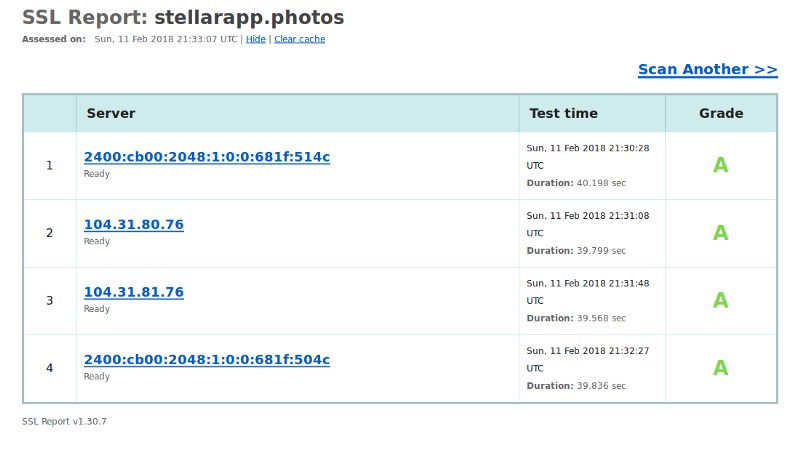
Even though I get an A grade on my domain, if you drill into the results you will see that there’s definitely room for improvement in the Key Exchange and Cipher Strength side of things.
Let’s take a look at a few things that we can do within Cloudflare to strengthen our SSL and get the ratings even higher.
Force HTTPS Everywhere
Once you’ve gone HTTPS, you definitely want to prevent users from accessing your site over an insecure connection. You can do this in Cloudflare by 301 redirecting all HTTP traffic to HTTPS.
Under Crypto settings, find the Always use HTTPS option and turn it On.

Enable HTTP Strict Transport Security (HSTS)
I’ve written about how HSTS strengthens your sites SSL in the past but let’s just go over it again briefly.
The problem with just 301 redirecting HTTP traffic to HTTPS is that the initial insecure request still goes over the wire which means it could be read by anyone with access to the traffic.
HSTS is a response header that fixes that problem by telling the browser that it may not make an insecure request to a website for a specified duration of time.
This is how the header looks like:
strict-transport-security: max-age=31536000Once the browser receives this header, it will not make an insecure request to your site for the next 31,536,000 seconds (1 year’s worth). Instead, all HTTP requests will be upgraded internally to HTTPS before being sent out over the network.
If you want to prevent all subdomains from being accessed over HTTP, you’ll need the includeSubdomains directive. You can also add the preload directive to allow browser vendors bake your site into the browser itself as being HTTPS only.
strict-transport-security: max-age=31536000; includeSubdomains; preloadOnce you’ve enabled HSTS on your domain, you can be pretty sure that once someone has loaded your website over HTTPS, they will only be able to make access your it over the secure scheme henceforth.
So before you enable HSTS on your site, make sure you’re confident that all of your traffic will be served over HTTPS otherwise you will run into problems.
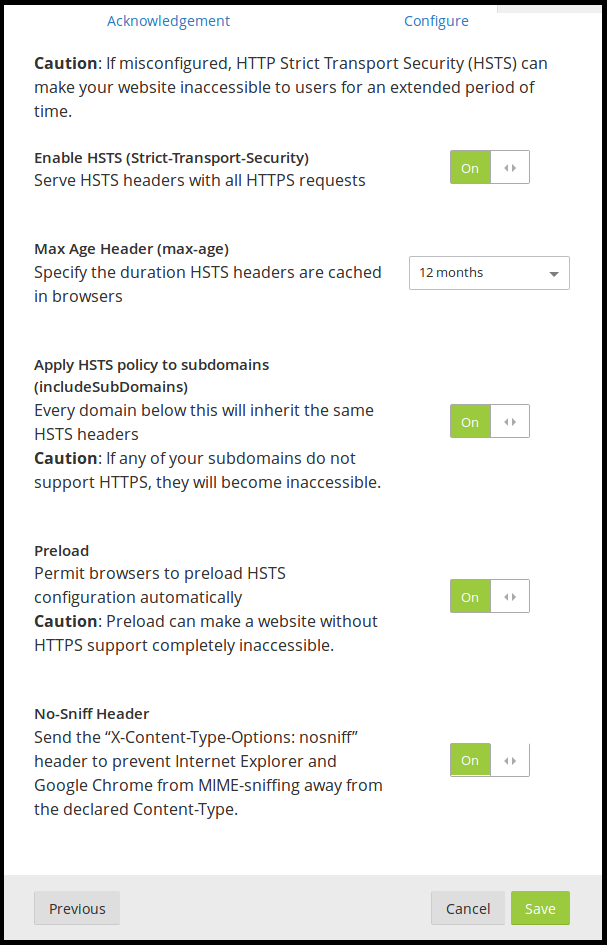
To enable this in Cloudflare, go to the Crypto settings and scroll down to the HTTP Strict Transport Security (HSTS) section. Click on Change HSTS Settings, enable all the relevant options and hit Save.
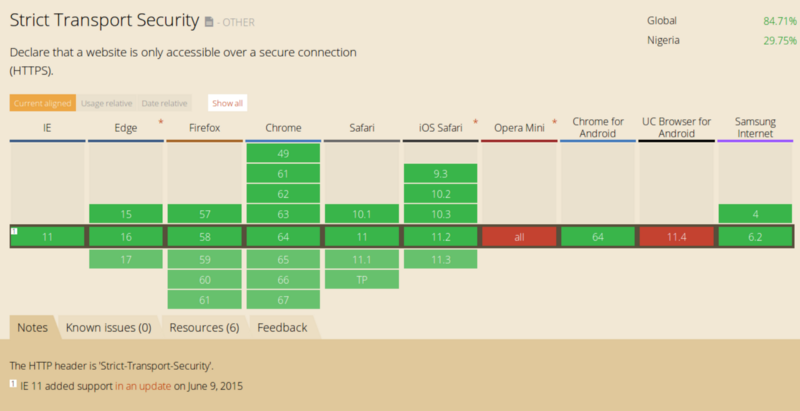
And just in case you’re wondering, browser support for HSTS is pretty good.
Fix Insecure Scheme References
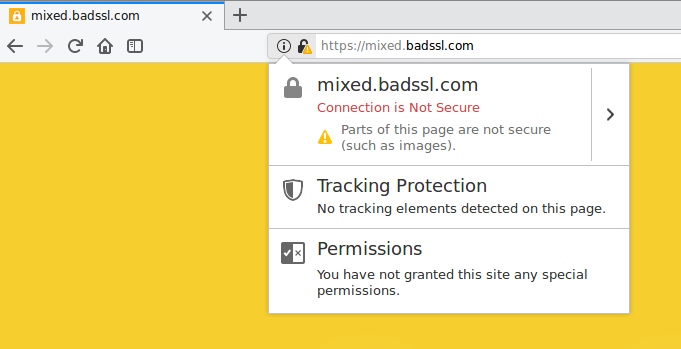
If you embed a passive resource (such as an image) insecurely on a secure page, the browser still loads it just fine. It just takes off the green padlock from the address bar. You can see an example of this error here.
If you check the browser console, you will see some warnings or errors that point to the resource that was embedded insecurely. In this case it’s
<img class="mixed" src="http://mixed.badssl.com/image.jpg" alt="HTTP image">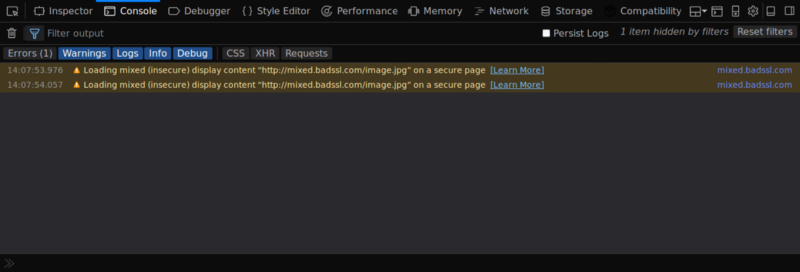
To fix this, just change scheme to HTTPS and all will be well again.
<img class="mixed" src="https://mixed.badssl.com/image.jpg" alt="HTTP image">If you have a lot of content in your site embedded insecurely, finding and fixing each one could be quite tedious. But Cloudflare can help you here again with the Automatic HTTPS Rewrites feature.

To be double sure that no content on your website can ever be served insecurely, consider implementing a Content Security Policy on your site.
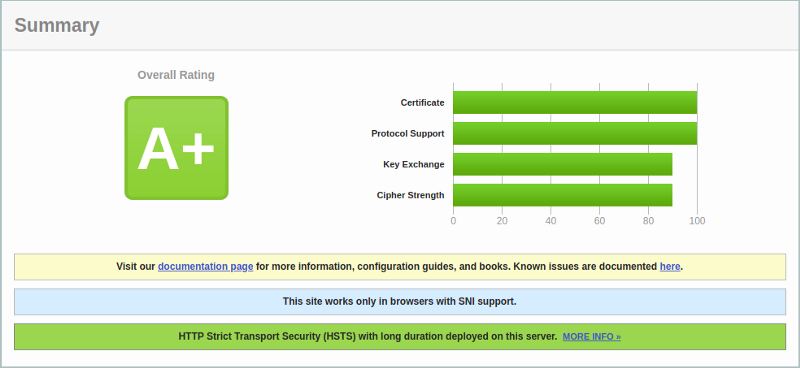
Now let’s see how the above changes to has affected our SSL Labs report. I’ve rerun the test on my domain, and now we now get an A+ rating.
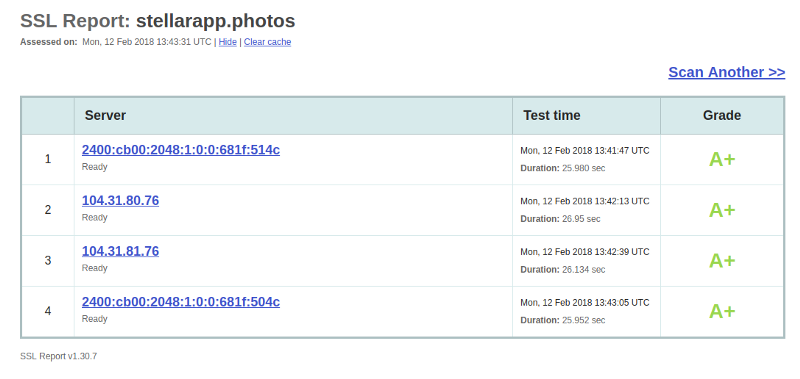
If you check the individual ratings in the graph, nothing has changed but we still do get a really secure SSL implementation for free and in just a few minutes.
Alternatives to Cloudflare for free SSL
If you prefer not to use Cloudflare for some reason, there are other ways you can get your website on HTTPS for free. Here are two options you can try:
Let’s Encrypt
If you have control over your server, you can quickly deploy HTTPS on your site using Let’s Encrypt. They offer free SSL certificates that last for three months and can be renewed automatically.
Even if you don’t have server access, check with your web host. Some hosts will allow you to use Let’s Encrypt SSL without providing shell access.
Amazon AWS Certificate Manager
Amazon also issues and automatically renews SSL certificates for customers on its Amazon Web Services (AWS) infrastructure. That way, you can set and forget HTTPS on your site if you use AWS resources such as Cloudfront.
Regardless of how you implement HTTPS on your website, the most important thing is to make sure you get setup as soon as possible so that your users get the security benefits it provides and you do not miss out on several cool features in browsers that will help you create better web experiences.
If you liked this article, do share with others who might benefit from reading it. By the way, do checkout my blog at freshman.tech for articles on web development. Thanks for reading.