

Kubernetes is a platform to manage and orchestrate your cloud infrastructure. It provides a configuration-driven framework where you can define a few different pieces and with one click get an entire network, disk, and application spun up in a way that’s scalable and easy to manage.
Moving your application over to Kubernetes is a high-effort activity if you haven’t designed your app with containers in mind from the start. The goal of this article is to help you on your path towards containerizing your applications with Kubernetes integration in mind.
Be aware that if you try and force your application into Kubernetes without the proper architecture, you will be essentially shooting yourself in the foot by wasting time and accruing technical debt.
Step 1 — Containerize your application ?
A container is basically a partitioned section of the operating system that can function as an independent machine. Unlike traditional virtual machines, which rely on a hypervisor to simulate an operating system, containers use a variety of kernel features to provide an environment isolated from the host machine.

Containerization is a fairly simple process — using Docker, just define a Dockerfile which lays out the steps needed to install your application on an OS (download packages, install dependencies, and so on).
Then, build an image which can be used by developers. More information about the containerization process can be found on Docker’s website.
Step 2 — Adopt a multi-instance architecture ?

Before you move to Kubernetes, you need to take a hard look at the current way you deliver your application to the end-user.
Traditional web applications use a multi-tenant architecture. This means all your users will be sharing a single database instance and a single instance of an application. This can be made to work in Kubernetes — however, I urge you to consider implementing a multi-instance architecture to fully utilize the power of Kubernetes and containerized applications.
Some major benefits of adopting a multi-instance architecture are:
- Stability— Instead of a single point of failure (the single application instance), each customer can exist in their own instance. If one instance fails, the others will remain unaffected.
- Scalability — With a multi-instance architecture, scaling up is a simple matter of adding more resources. However, with a multi-tenant architecture, you could reach a point where you need to come up with a clustered application architecture whose deployment is usually far from trivial.
- Security — When you are using a single database, all your data lives together. This becomes a major problem in the event of a security breach because all customers’ data can become vulnerable when a single account is compromised. With a multi-instance architecture, only a single customer’s data can be at risk.
Step 3— Determine your app’s resource consumption ⛽
In order to have the most cost-effective infrastructure, you need to pin down how much CPU, memory, and storage are going to be required to run a single instance of your application.
This way, you can set limits so you can get an accurate reading of how much space your Kubernetes nodes need, as well as making sure your nodes aren’t going to become overloaded and unreliable.
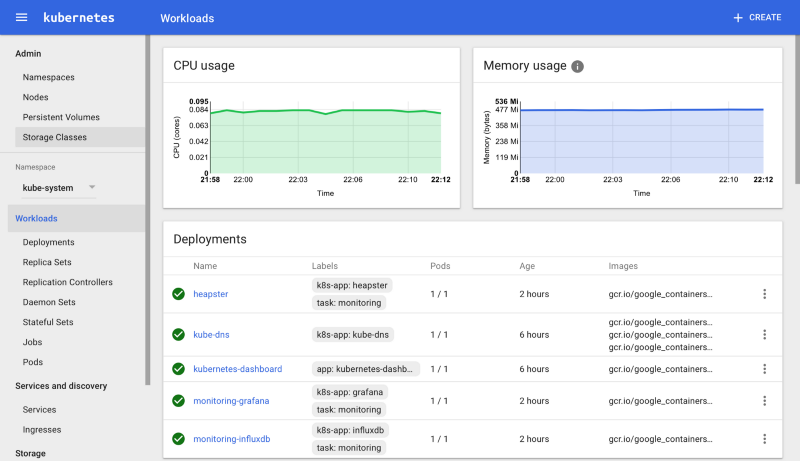
This is usually a trial-and-error process, but you can use a monitoring solution such as Heapster to give a straightforward breakdown of the resources your pods are consuming. This will let you gauge how much to allocate.
After you figure out your resource allocation, you can calculate optimal server sizes for your Kubernetes nodes so you get the most bang for your buck.
You take the memory or CPU each instance needs to function, and multiply it by 100 (the maximum number of pods a node can hold). This will give you a ballpark estimate of how much memory/CPU your nodes should have.
Still, you should always stress test your application to ensure it runs smoothly when the node fills up.
Step 4— Integrate with Kubernetes ⚙️
Once your Kubernetes cluster is up and running, there are a lot of DevOps practices you can begin developing to make your life easier. Some of these integration points take the following forms:
Automatic scaling of Kubernetes nodes
When your nodes become full, generally you want to provision more nodes so everything can keep chugging along smoothly. One way you can do this is with a tool like kops.
Automatic scaling of applications
Some applications will need to be scaled up or down based on the current usage. Kubernetes provides this function out of the box using triggers which automatically scale deployments. For example, running this command:
kubectl autoscale deployment myapp --cpu-percent=50 --min=1 --max=10will set the myapp deployment to scale up to 10 pods when the CPU percentage goes above 50.
Automatic provisioning of instances upon user action
For a multi-instance architecture, end-users will ultimately be requesting applications be deployed in Kubernetes. To provide this, you should be looking at integrating your app with the Kubernetes API, or using a third-party solution such as ServiceBot to provide a portal to request instances.
Custom Hostname definition by user action
A growing trend lately has been end-users attaching their domain to applications. Kubernetes has tools in place to make this process easier and even get to the point where it becomes self-service (users pressing a button to get their domain pointing to the pod). You can use a system such as Nginx Ingress to accomplish this.
Conclusion
Kubernetes is a great way to manage your cloud infrastructure. If you are in a position where you are having trouble scaling your application, consider moving to a Kubernetes-based architecture. You will see a large increase in your DevOps productivity when it comes to deployments, clustering, and overall stability.
ServiceBot is a platform that helps you manage your SaaS by automating billing, deployments, and your sales pipeline.