
by Rohan Taneja
Google Certified Associate Android Developer: Exam Walkthrough
UPDATE (24th July, 2018)
The certification exam is available again! The exam duration has been reduced to 8 hours and the ‘Exam Content’ section has also been updated.
UPDATE (28th May, 2018)
The Associate Android Developer Certification exam is no longer available. Most probably, the certification team may be coming up with a revised certification exam, that would have multiple levels and probably support for Kotlin as well.
Right now, you’ll be redirected to this form when you click ‘Sign Up’ on the certification page.
When I wanted to appear for this certification exam, I had no clue what the exam interface would look like. I searched for the same but I found no results. It was then that I decided that I would take screenshots of my exam and create a blog post which would in some way make future test takers less nervous after they go through it.
Hence, this post will walk you through the actual exam interface. If you’d like to know about my overall experience of the exam or you’ve no clue about what this certification is, read my certification exam experience, tips & FAQs post here. Here’s a link to the official Google certification page.
Before we proceed, I must clarify that this post does not contain any specifics about the exam, which in any way would make it easier to crack the exam. I’m not allowed to share any specifics (hence the edited pictures below) so please do not ask for the same in the comments section or via any other medium since this would be against the Certification Code of Ethics.
The Exam Walkthrough: As it happened
#1: Pay for the exam here. At the time when I took the exam (15th July 2017), the fee was 6500 INR (or $149). Please make sure you’re logged in with the correct Google account — the Google account to which you want your certification linked to.
After your payment is successful, you’ll see this screen:
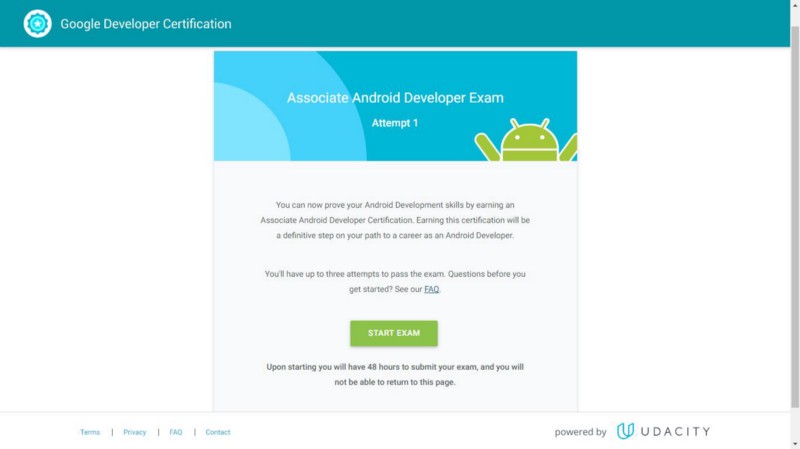
It is not necessary to start the exam at that very moment. Your payment was successful, you can now opt to take the exam whenever you feel like.
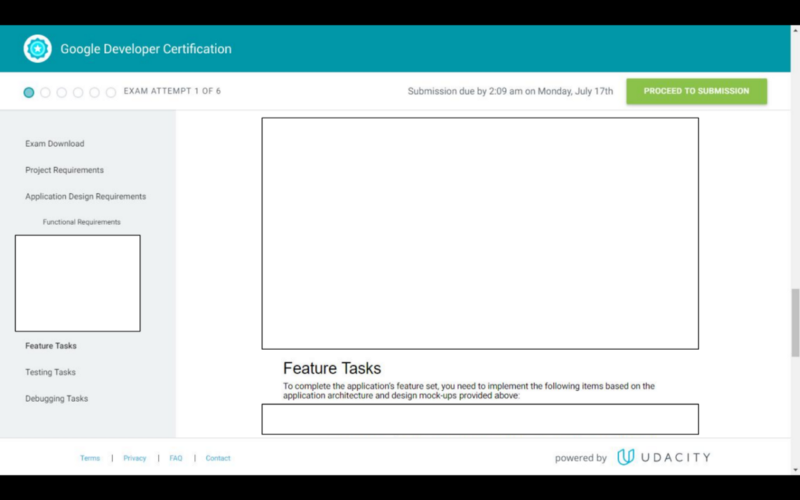
#2: As soon as you click the ‘Start Exam’ button, you’ll have exactly 24 hours to submit your exam (The time limit used to be 48 hours when I took the exam as you can see in the image above). This is what the exam screen looks like:
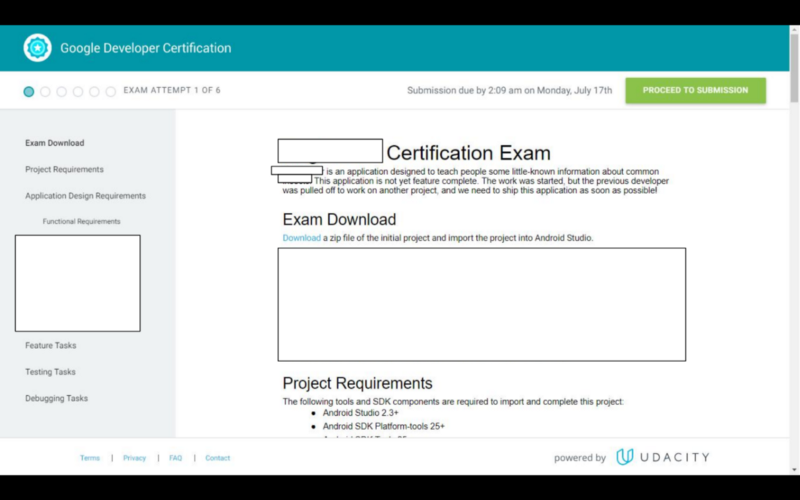
NOTE: Images have been edited to hide exam-specific data.
You can see the deadline of your submission at the top. I am a night owl so I started my exam at 2:09am on 15th July and hence my submission was due at 2:09 on the 17th of July.

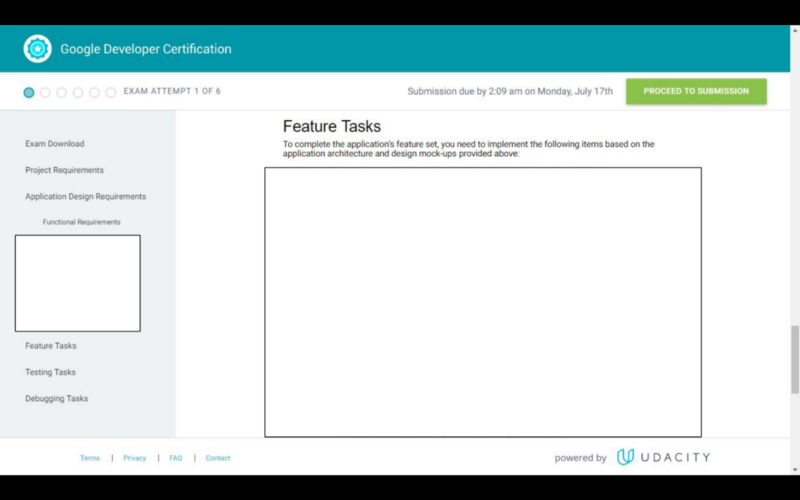

#3: After you are done with the coding part in your Android Studio, click on the 'Proceed to Submission’ button on the top right.
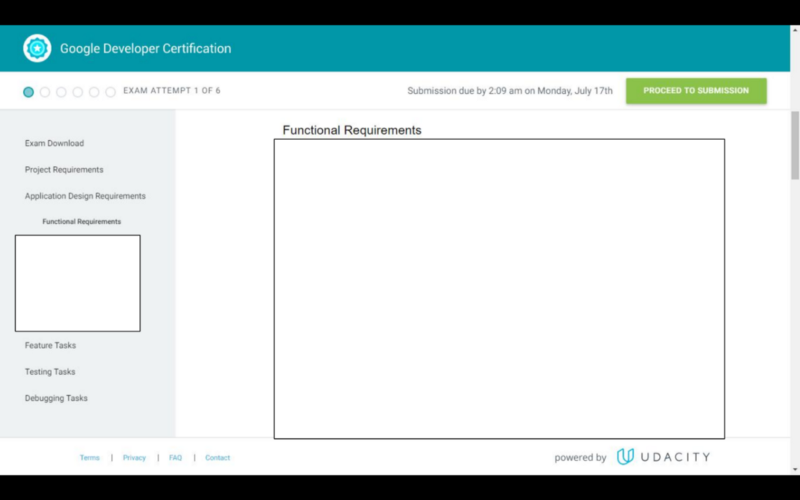
Note that uploading your Android Studio project must happen within the 24 hours time:

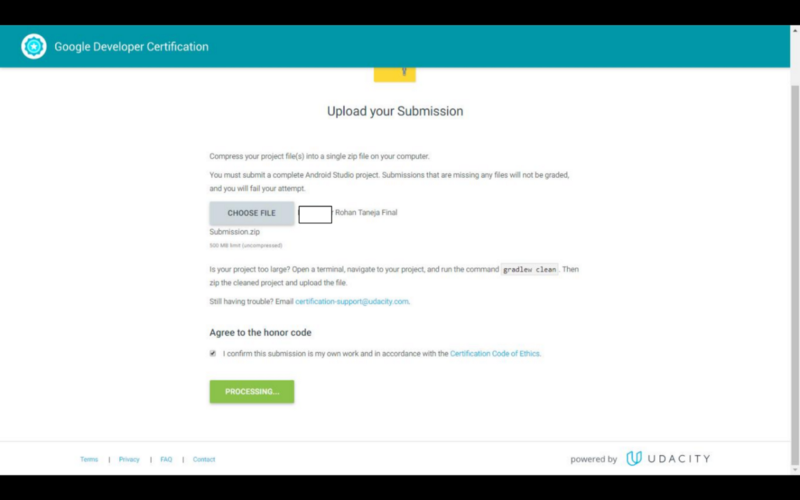
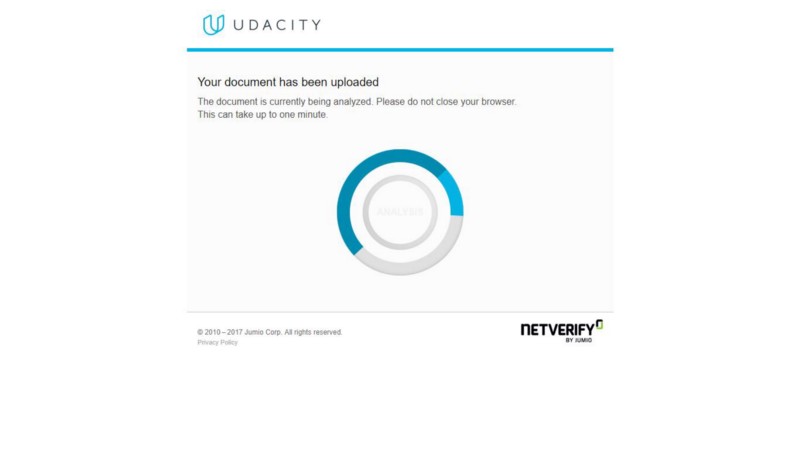
#4: Next, after you choose your project file (.zip) for upload and hit 'Submit’, your file is processed. Don’t forget to agree to agree to the honor code by checking the box.
Wait for the processing to complete until you get to this screen:
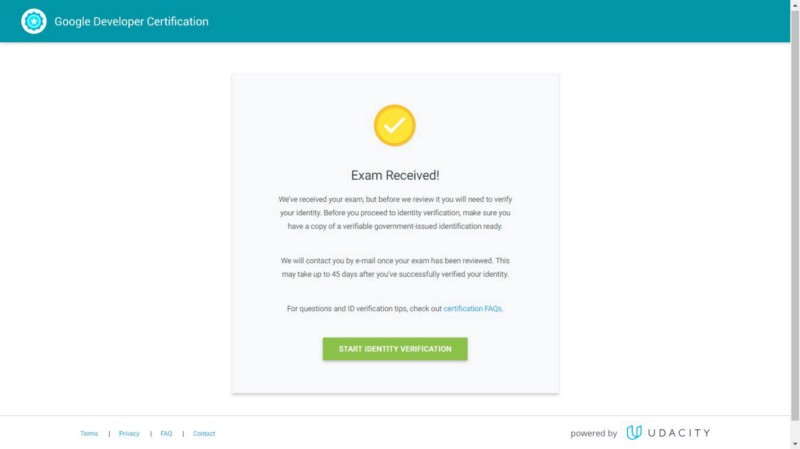
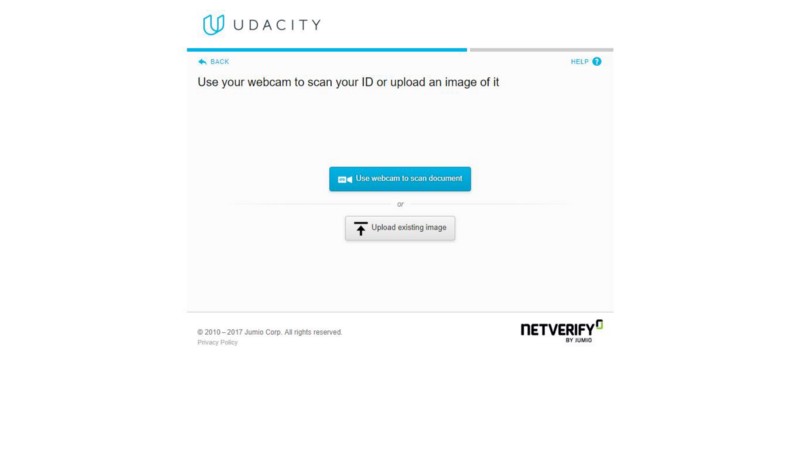
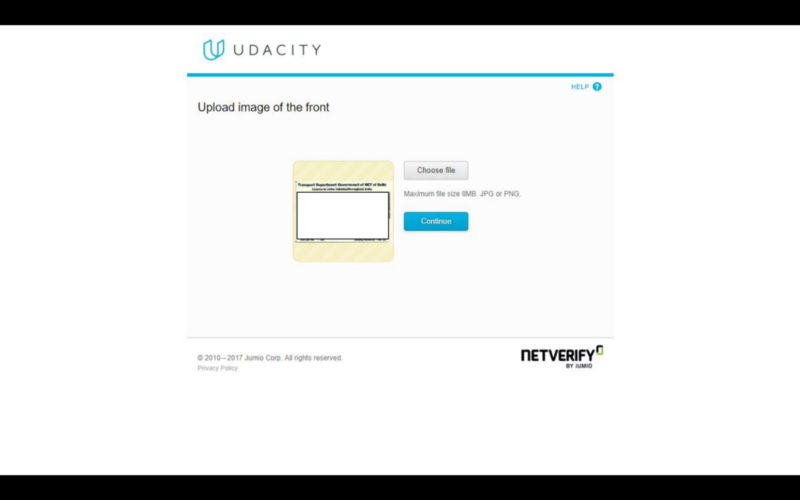
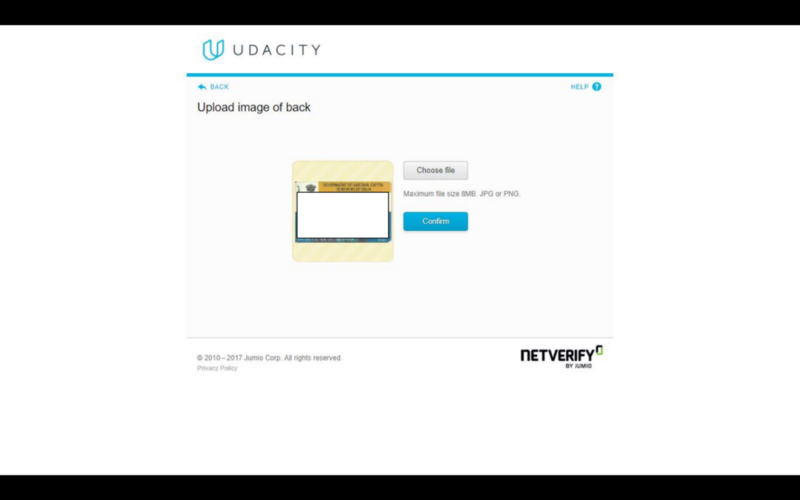
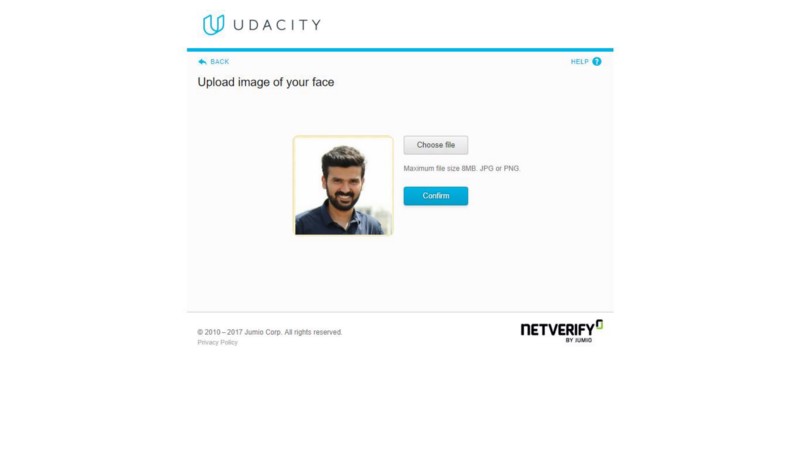
Congratulations! You’ve submitted your exam successfully. Now you must get your identity verified. The documents that you upload during this process would be used to verify your identity again during your exit interview.
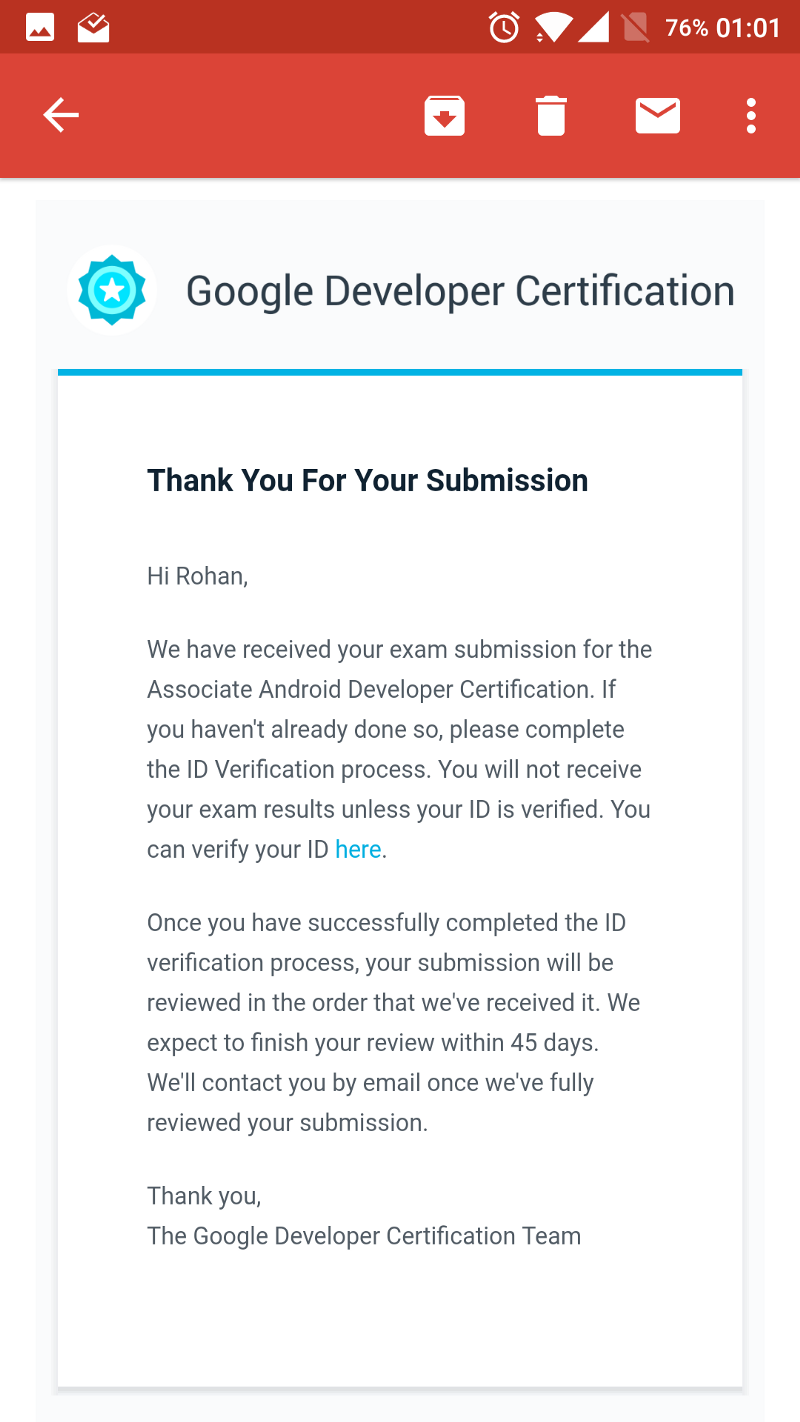
You also receive an email after your submission, informing you about the same:
You can complete the identity verification later but I opted to get done with it right after my exam submission and I recommend you to do the same.
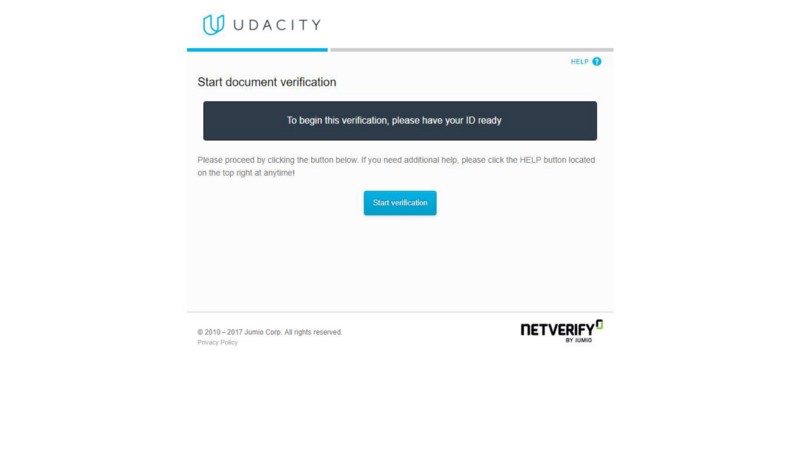
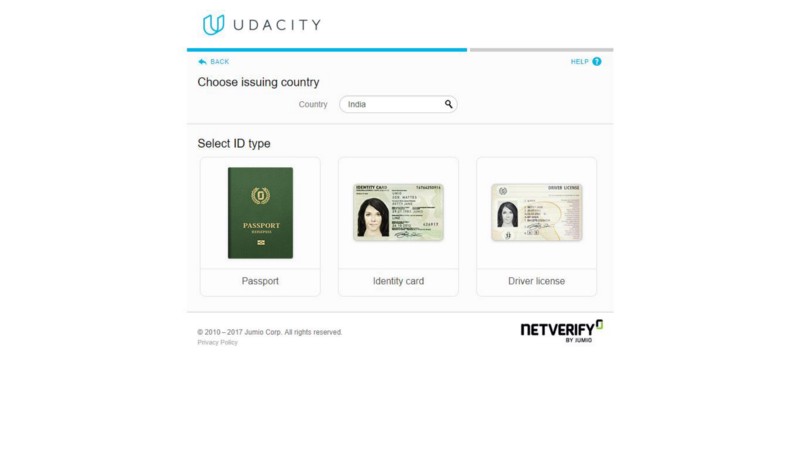
#5: So to get started with your identity verification, click on ‘Start Identity Verification’ and then you’ll see this screen:
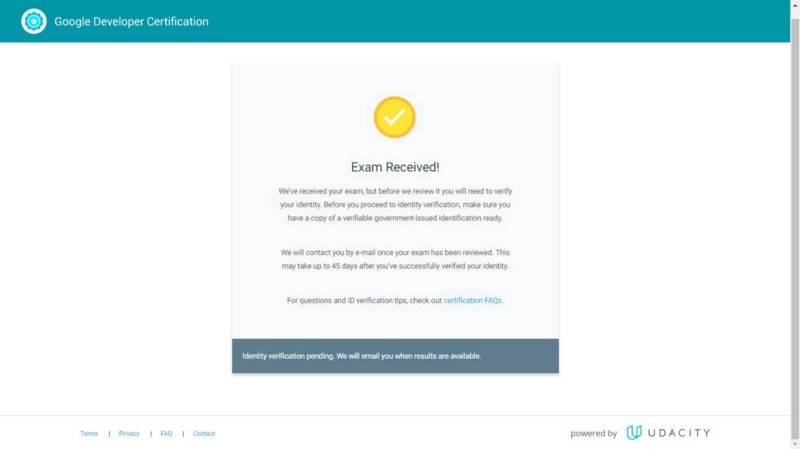
#6: If you would have completed the registration process successfully, you would’ve seen the above message which says ‘Identity verification pending. We will email you when the results are available.’
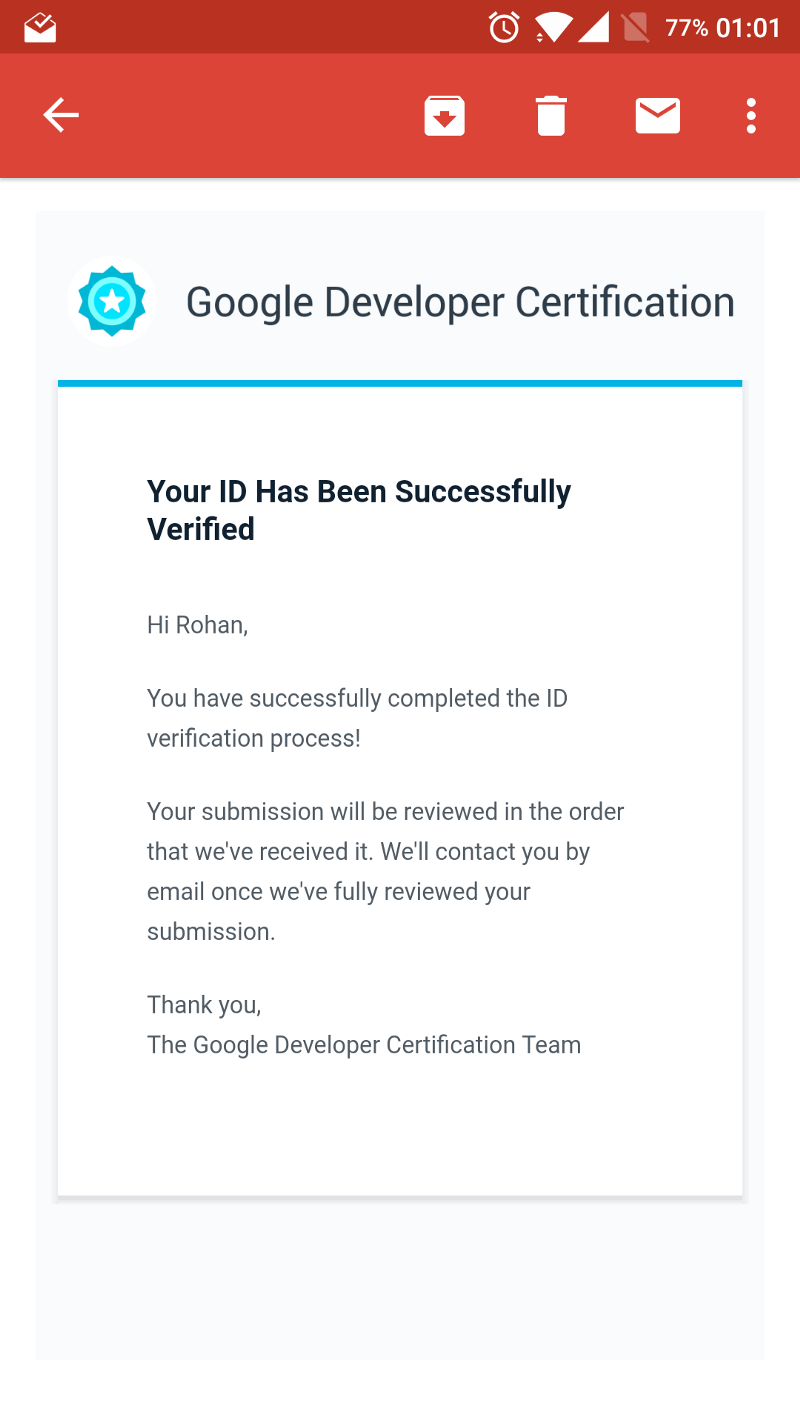
After a while, you’ll get an email stating that your identity verification was complete:
Now all you can do is sit back and (try to) relax until you get your exam result.
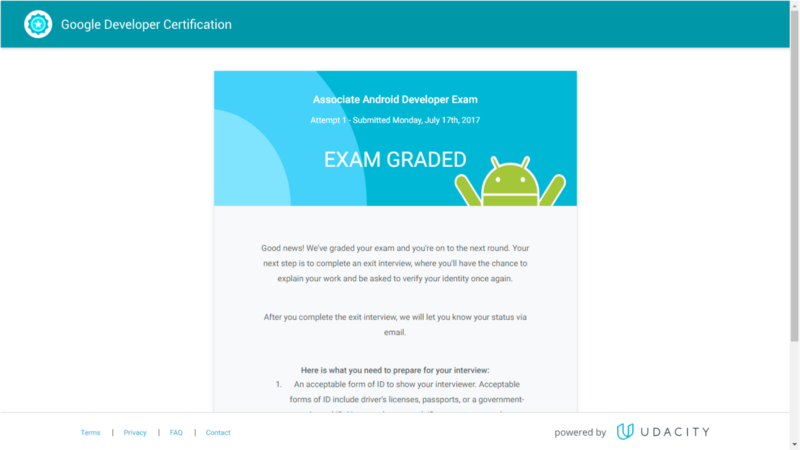
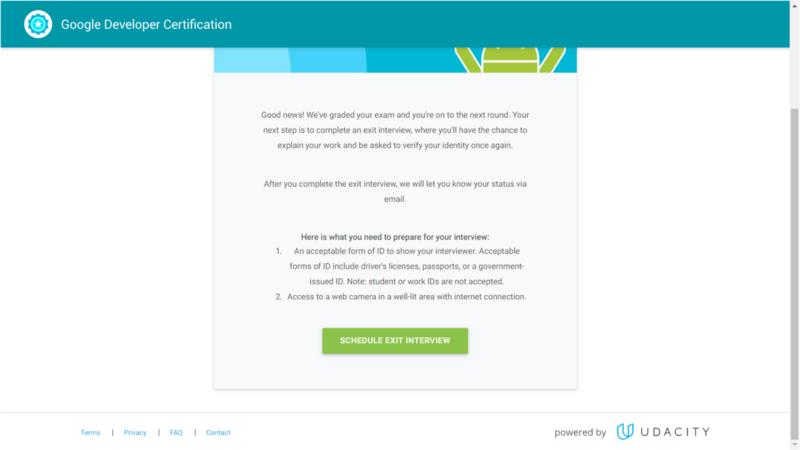
On 19th of July 2017 — within 3 days of my exam submission, I got the following mail:
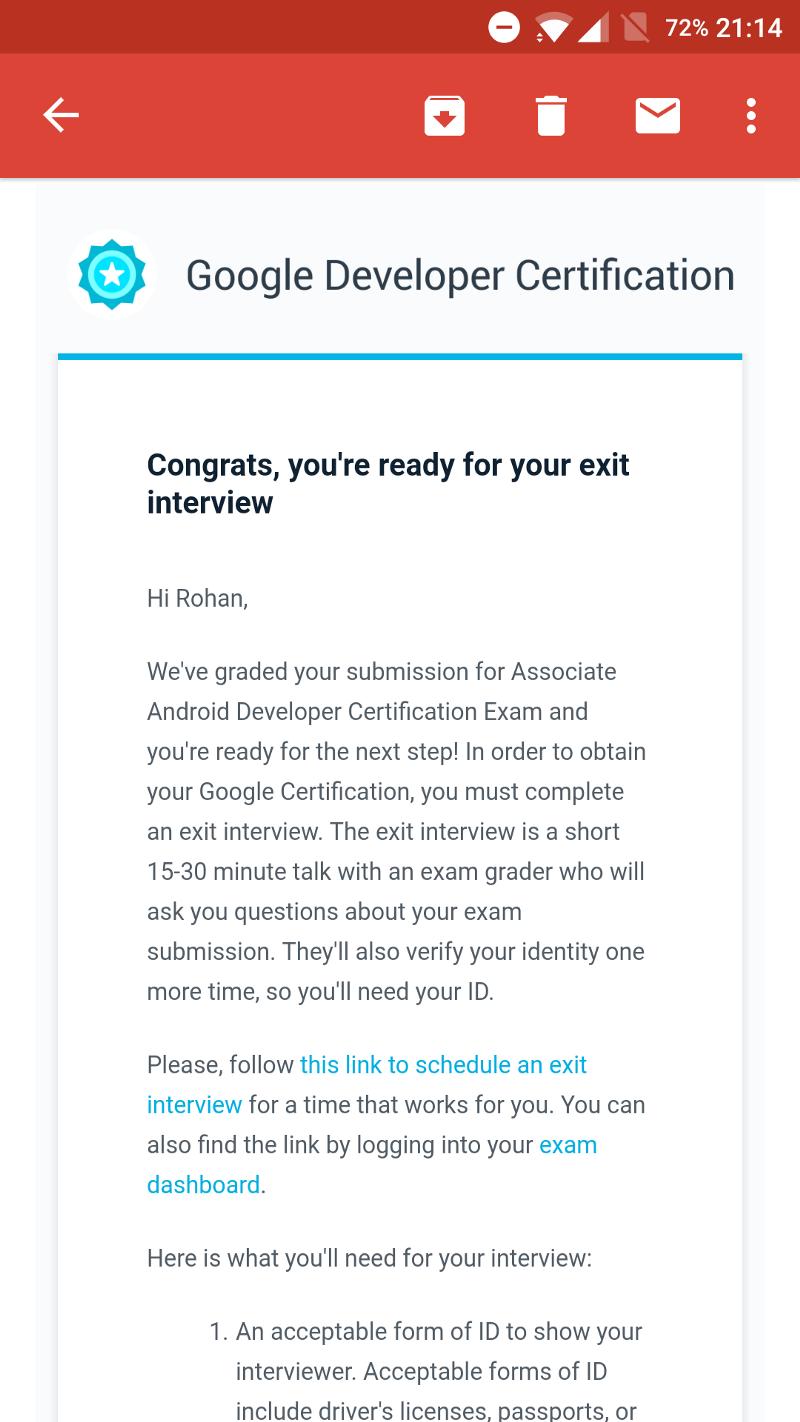
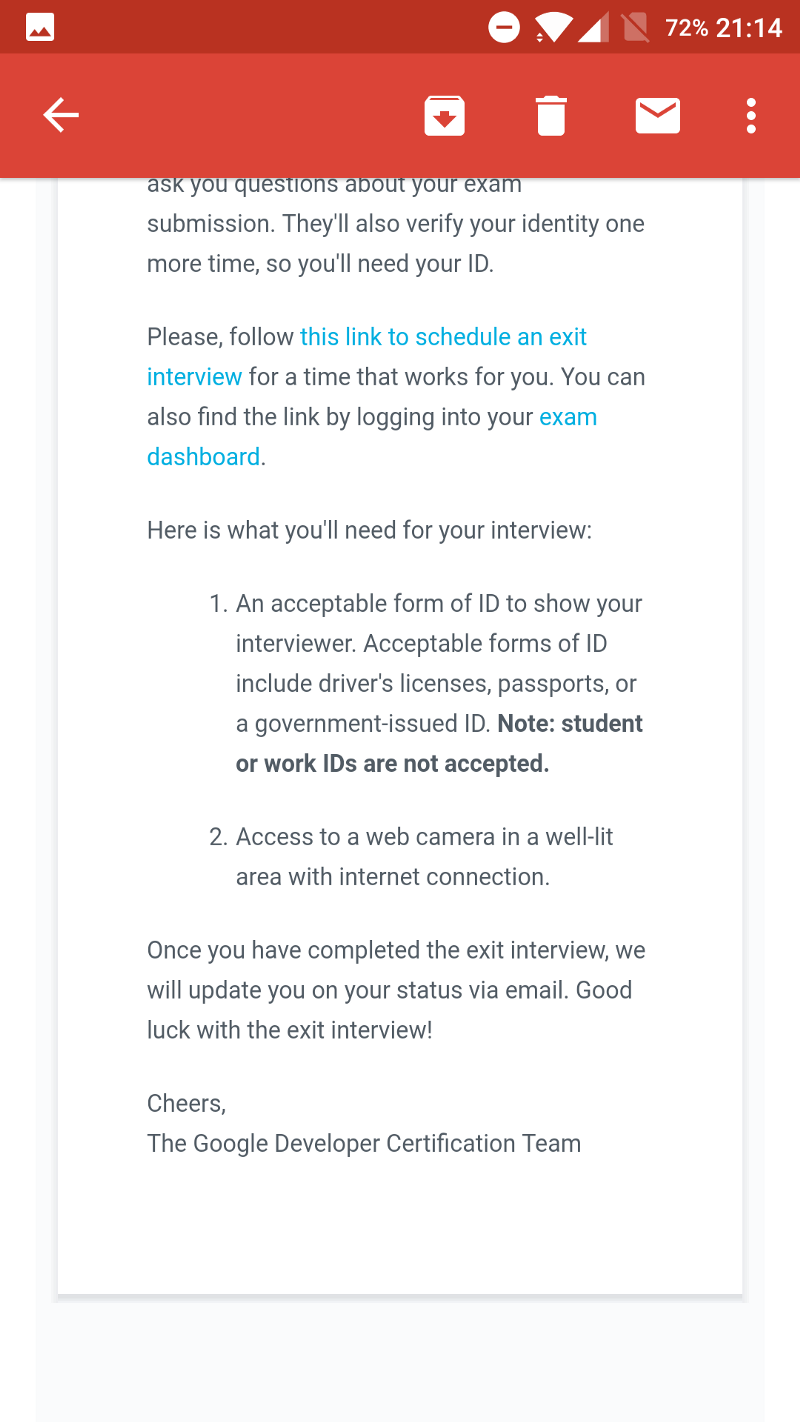
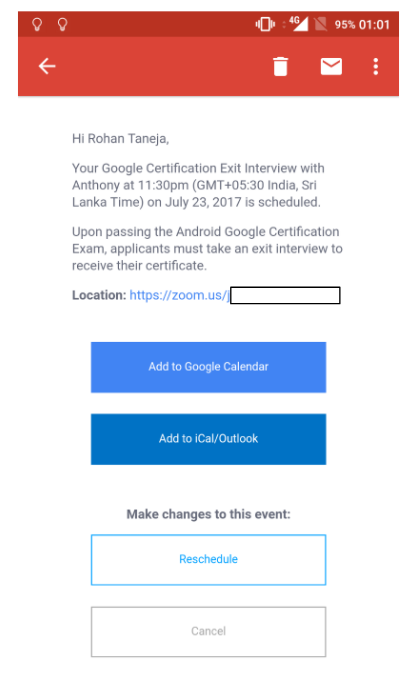
I had cleared the coding exam (yay!) and was now asked to select a date for my exit interview. I clicked on the link in the image above:
There are many dates available for the exit interview. I had dates ranging from a couple of days after I received the above email to a few months in the future.
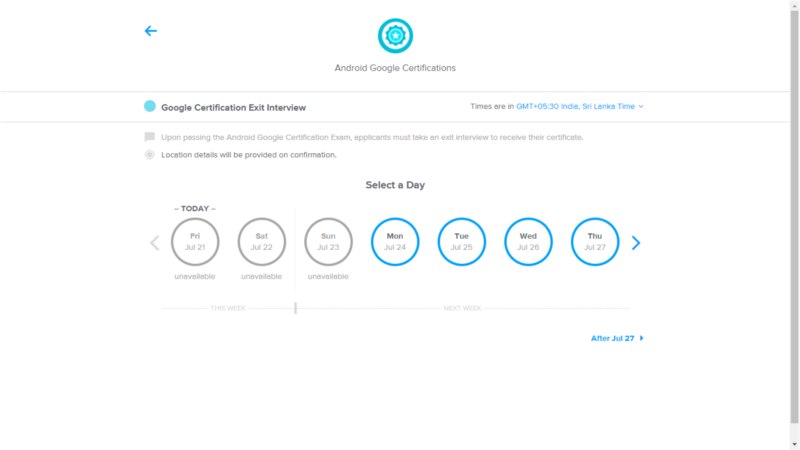
I’m not sure if you can select the time for the interview, you can only select the date. As soon as you select a date, you get an email about the details of the interview — date, time, interviewer name and video call link for the interview. In the mail, you have the option to reschedule your interview or cancel it as well.
My interview was 15 minutes long and usually lasts that long or up to a maximum of 30 minutes. At the end of the interview, I was informed that I would receive my badge soon if they felt that all was well. If you want to know the details of the interview, read my other post here.
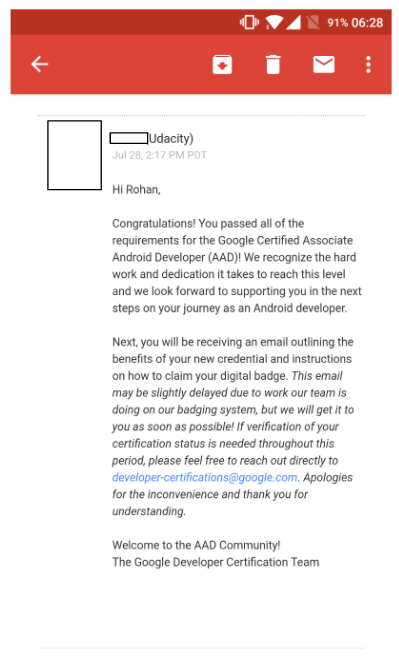
My interview took place on the 23rd of July and 5 days later, I got ‘the’ email.
I was now a Google Certified Associate Android Developer! ?
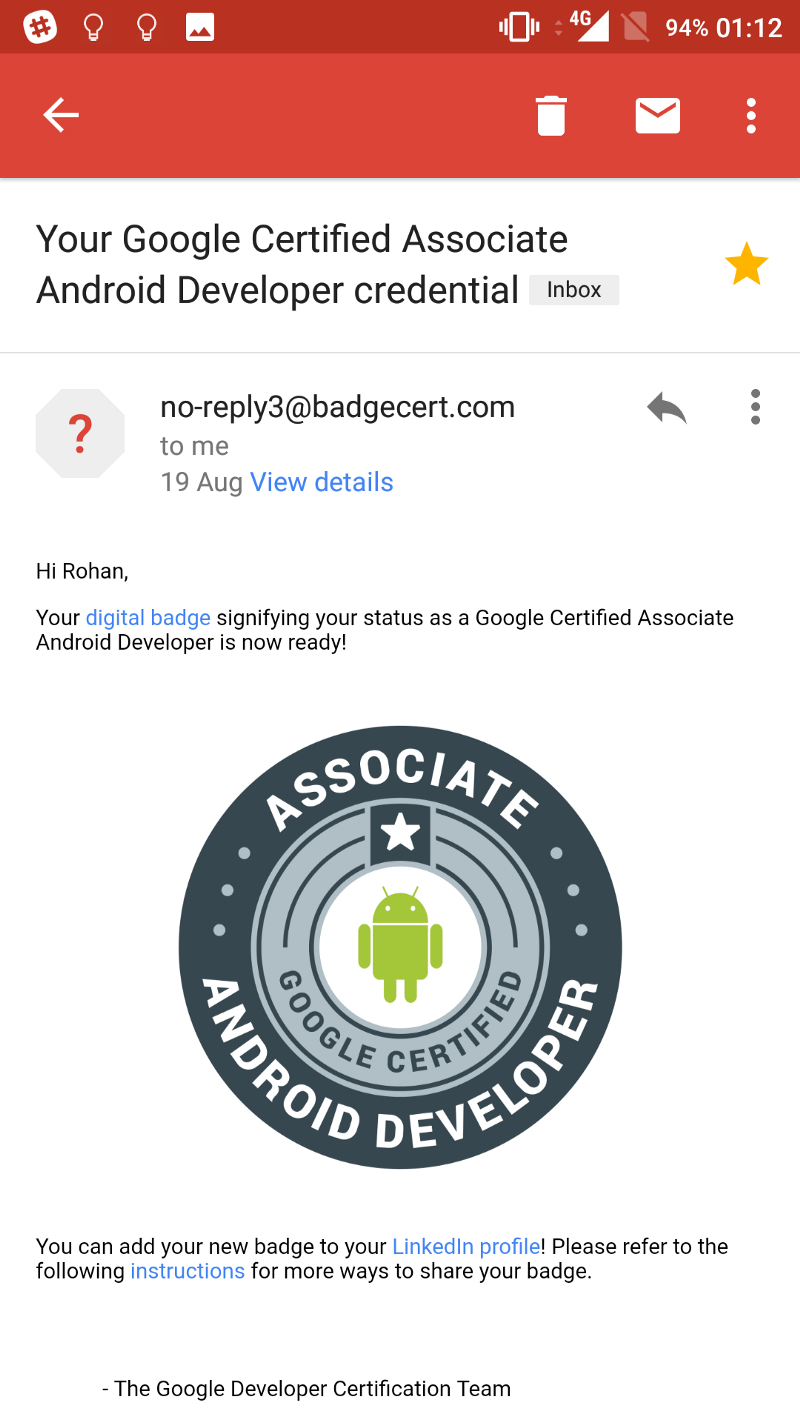
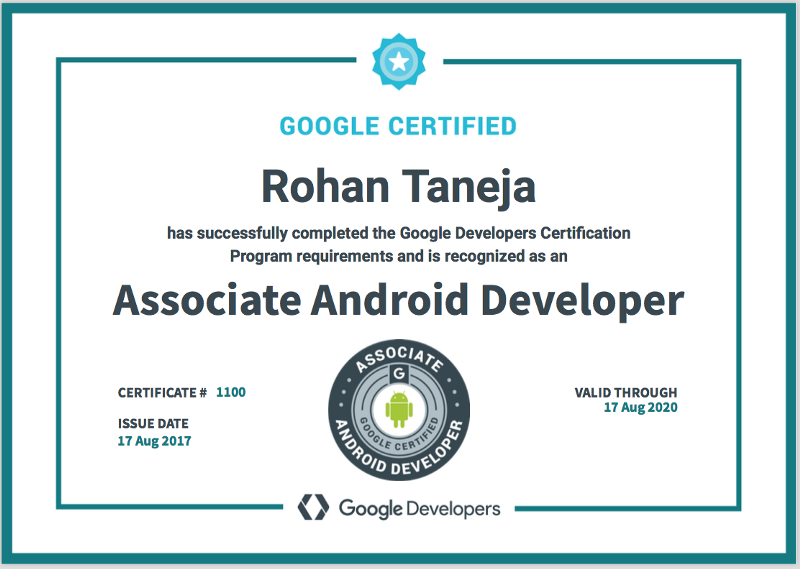
I was happy, but I had still not received my certification badge (Update: new certificate) yet. Then, 23 looooong days later, I received that as well.
A few days later I received another email which had a feedback form and a PDF stating the benefits of becoming a Google certified Associate Android Developer as well as my responsibilities as one. This email was also a confirmation of my enrollment into the Google Developer Certification Alumni program.
I hope this post helped you become less nervous if you’re planning on taking this certification exam sometime soon. If you’re one of those people who has already been certified, I hope it brought back fond memories of your experience.
UPDATE: 9th October 2017
Just received this email from the certification team:

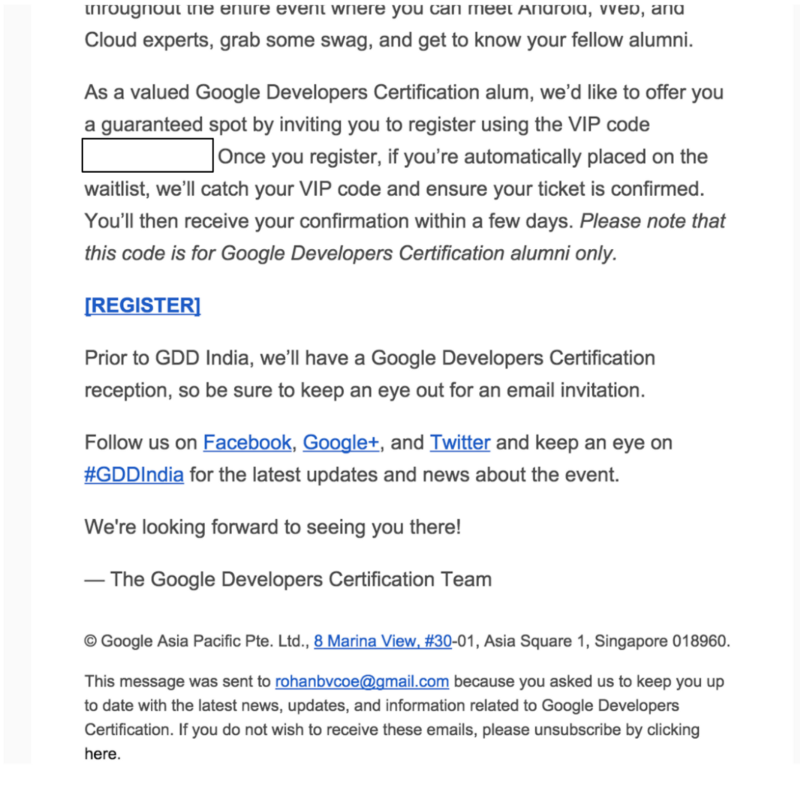
- A confirmed seat at Google Developer Days India #GDDIndia
- Access to Google Developers Certification lounge at the GDD = Awesome networking opportunity!
- A special reception for the certified developers before GDD.
Getting certified from Google does have its own benefits ?
UPDATE: 9th October 2017
Received my new certificate today
Google Cloud Certified : Accredible : Certificates, Badges and Blockchain Credentials.
I have the necessary skills to leverage Google Cloud technology in a way that transforms businesses and meaningfully…www.credential.net
If you’d like to know about my journey to becoming an Associate Android Developer, tips for the exam and FAQs, click here.