
by Niharika Singh
Hands On: Get Started With Infura and the IPFS on Ethereum

Why Infura?
There are a lot of pain points being faced by blockchain which may be solved by Infura and/or the InterPlanetary File System (IPFS), to some extent. These are the main challenges:
- It’s expensive to store data on the Ethereum blockchain
- It’s tough to configure an Ethereum geth client
- It’s tough to scale the infrastructure
If you use Infura, access to the Ethereum network and the IPFS becomes a lot faster. It no longer takes hours to sync up the geth client which uses up a huge chunk of memory and bandwidth while the entire blockchain gets downloaded.
Here are some other advantages that come with using Infura:
- Huge amounts of data can be stored on the IPFS, and just the hash of the file can be stored on Ethereum.
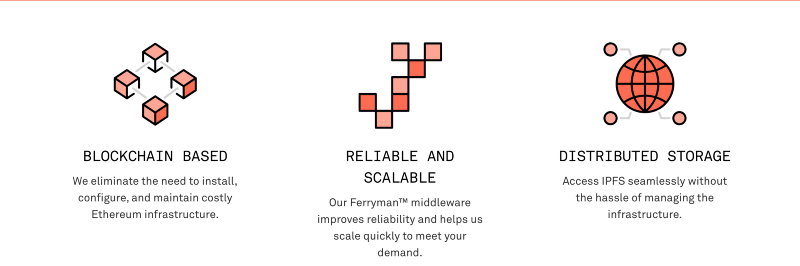
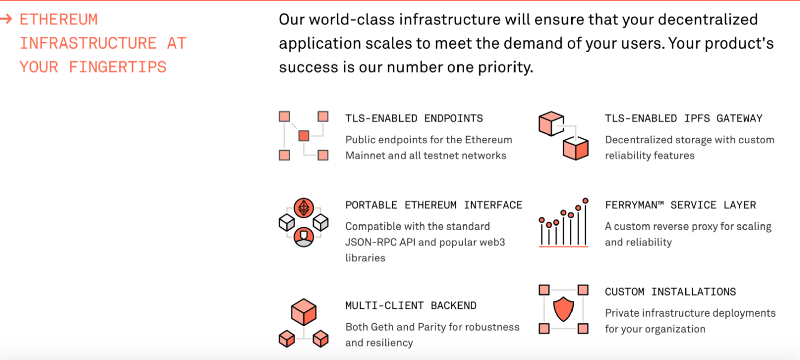
- Infura provides secure, reliable, scalable, and easy to use APIs to access the Ethereum network and the IPFS. Developers do not have to worry about the infrastructure of an Ethereum node or an IPFS node. That is taken care of by Infura.
- Infura provides TLS enabled public endpoints.
- The code is portable on Ethereum’s interface using JSON RPC, Web3.
- Infura is practically a developer’s Swiss Army knife, and also saves the deployment team from the hell of scalability issues.
- And finally, Infura is trusted:
dApp Description
Our dApp will take a file as input from a user and upload it to the IPFS by invoking an Ethereum contract. The hash of the file will be stored on Ethereum.
This is the process we’ll go through:
- Take file as an input
- Convert file to buffer
- Upload buffer to IPFS
- Store hash of file returned by IPFS
- Get user’s Metamask Ethereum address
- User confirms transaction to Ethereum via Metamask
- IPFS hash is written on Ethereum

Tech Stack Involved
- React — Front end library
- Solidity — The language used to build smart contracts that runs on Ethereum
- IPFS — Decentralized storage
- Infura —API access to Ethereum network and IPFS
Let’s Code!
Make sure you already have Metamask downloaded. If not, download it from here.
Also, keep your Node and NPM up to date.
Install the following dependencies:
$ npm i -g create-react-app$ npm install react-bootstrap$ npm install fs-extra$ npm install ipfs-api$ npm install web3After you’re done, run the following command on your CLI to create a sample React project. I’ll name my project ipfs.
$ create-react-app ipfsDeploy the Smart Contract on Ropsten Testnet
.Make sure you’re on Ropsten testnet on metamask.
To deploy the smart contract, we need ether. To get ether for Ropsten testnet, go to https://faucet.metamask.io/.
To deploy the smart contract, go to https://remix.ethereum.org.
pragma solidity ^0.4.17;contract Contract { string ipfsHash; function setHash(string x) public { ipfsHash = x; } function getHash() public view returns (string x) { return ipfsHash; }}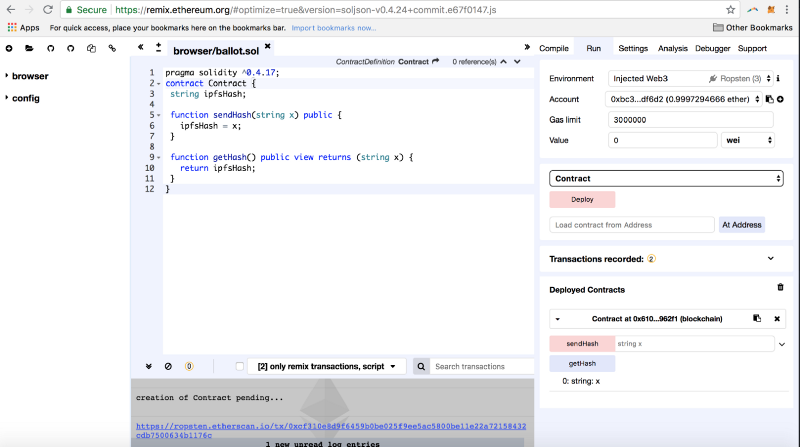
Save the address of smart contract. Mine is: 0x610DD75057738B73e3F17A9D607dB16A44f962F1
Also, save the Application Binary Interface (ABI) in JSON. It can be found in the ‘compile’ tab, under ‘details’.
Mine is the following:
[ { "constant": false, "inputs": [ { "name": "x", "type": "string" } ], "name": "sendHash", "outputs": [], "payable": false, "stateMutability": "nonpayable", "type": "function" }, { "constant": true, "inputs": [], "name": "getHash", "outputs": [ { "name": "x", "type": "string" } ], "payable": false, "stateMutability": "view", "type": "function" }]In the “ipfs/src” directory, create the following files: web3.js, ipfs.js, and storehash.js.
File 1 — Web3.js
import Web3 from 'web3';const web3 = new Web3(window.web3.currentProvider);export default web3;File 2 — Storehash.js
import web3 from './web3';//Your contract addressconst address = '0x610dd75057738b73e3f17a9d607db16a44f962f1';//Your contract ABIconst abi = [ { "constant": false, "inputs": [ { "name": "x", "type": "string" } ], "name": "sendHash", "outputs": [], "payable": false, "stateMutability": "nonpayable", "type": "function" }, { "constant": true, "inputs": [], "name": "getHash", "outputs": [ { "name": "x", "type": "string" } ], "payable": false, "stateMutability": "view", "type": "function" }]export default new web3.eth.Contract(abi, address);File 3 — Ipfs.js
const IPFS = require('ipfs-api');const ipfs = new IPFS({ host: 'ipfs.infura.io', port: 5001, protocol: 'https' });export default ipfs;Edit — Index.js
import React from 'react';import ReactDOM from 'react-dom';import './index.css';import App from './App';import registerServiceWorker from './registerServiceWorker';import 'bootstrap/dist/css/bootstrap.min.css';ReactDOM.render(<App />, document.getElementById('root'));registerServiceWorker();File 4 — App.js
import React, { Component } from 'react';import web3 from './web3';import ipfs from './ipfs';import storehash from './storehash';import { Button } from 'reactstrap';class App extends Component {state = { ipfsHash:null, buffer:'', ethAddress:'', transactionHash:'', txReceipt: '' };//Take file input from usercaptureFile =(event) => { event.stopPropagation() event.preventDefault() const file = event.target.files[0] let reader = new window.FileReader() reader.readAsArrayBuffer(file) reader.onloadend = () => this.convertToBuffer(reader) };//Convert the file to buffer to store on IPFS convertToBuffer = async(reader) => { //file is converted to a buffer for upload to IPFS const buffer = await Buffer.from(reader.result); //set this buffer-using es6 syntax this.setState({buffer}); };//ES6 async functiononClick = async () => {try{ this.setState({blockNumber:"waiting.."}); this.setState({gasUsed:"waiting..."});await web3.eth.getTransactionReceipt(this.state.transactionHash, (err, txReceipt)=>{ console.log(err,txReceipt); this.setState({txReceipt}); }); }catch(error){ console.log(error); }}onSubmit = async (event) => { event.preventDefault();//bring in user's metamask account address const accounts = await web3.eth.getAccounts(); //obtain contract address from storehash.js const ethAddress= await storehash.options.address; this.setState({ethAddress}); //save document to IPFS,return its hash#, and set hash# to state await ipfs.add(this.state.buffer, (err, ipfsHash) => { console.log(err,ipfsHash); //setState by setting ipfsHash to ipfsHash[0].hash this.setState({ ipfsHash:ipfsHash[0].hash }); // call Ethereum contract method "sendHash" and .send IPFS hash to etheruem contract //return the transaction hash from the ethereum contract storehash.methods.sendHash(this.state.ipfsHash).send({ from: accounts[0] }, (error, transactionHash) => { console.log(transactionHash); this.setState({transactionHash}); }); }) };render() {return ( <div className="App"> <header className="App-header"> <h1>Ethereum and IPFS using Infura</h1> </header><hr/><grid> <h3> Choose file to send to IPFS </h3> <form onSubmit={this.onSubmit}> <input type = "file" onChange = {this.captureFile} /> <Button bsStyle="primary" type="submit"> Send it </Button> </form><hr/> <Button onClick = {this.onClick}> Get Transaction Receipt </Button> <hr/> <table bordered responsive> <thead> <tr> <th>Tx Receipt Category</th> <th> </th> <th>Values</th> </tr> </thead><tbody> <tr> <td>IPFS Hash stored on Ethereum</td> <td> : </td> <td>{this.state.ipfsHash}</td> </tr> <tr> <td>Ethereum Contract Address</td> <td> : </td> <td>{this.state.ethAddress}</td> </tr> <tr> <td>Tx # </td> <td> : </td> <td>{this.state.transactionHash}</td> </tr> </tbody> </table> </grid> </div> ); }}export default App;And that is all!
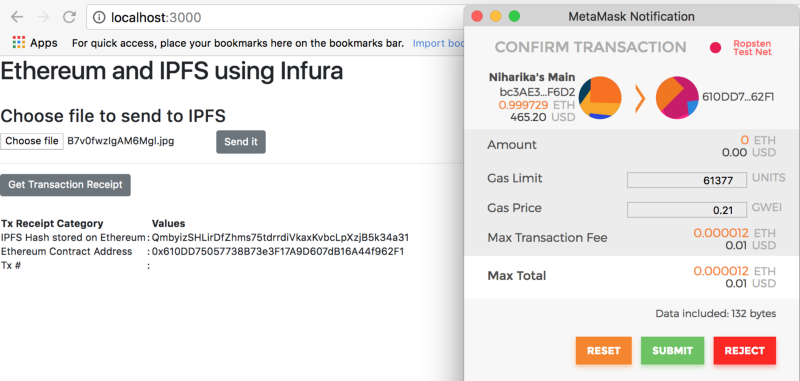
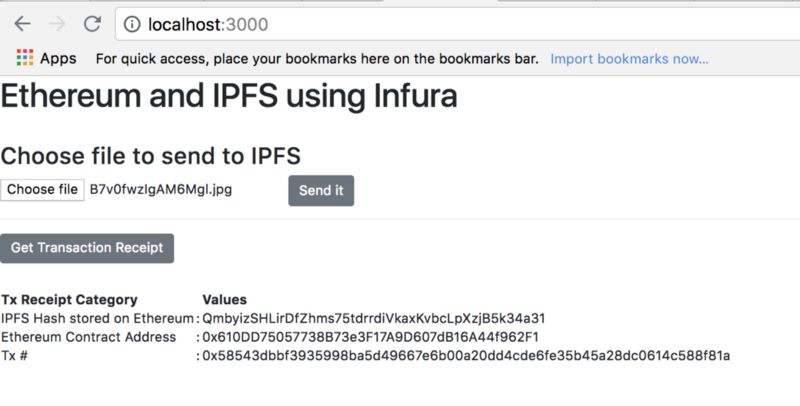
Access your dApp at localhost:3000. Upload a file and you will see a hash generated. To make sure your file is uploaded, access it via the IPFS gateway. Make sure you accept the Metamask requests.
Access your file at: https://gateway.ipfs.io/ipfs/your IPFS hash
Mine is at: https://gateway.ipfs.io/ipfs/QmbyizSHLirDfZhms75tdrrdiVkaxKvbcLpXzjB5k34a31
To know more about IPFS, see my other articles:
Learn by doing: a nice and easy intro to the Inter Planetary File System
Primer on IPFSmedium.freecodecamp.orgIPFS ? and Merkle Forest?
What is IPFS?hackernoon.com