
by Oyetoke Tobi Emmanuel
How I built a job scraping web app using Node.js

Scraping jobs from the web has now become easier thanks to Indreed.
About Indreed
Indreed is a Rest API for scraping jobs from Indeed and around the web. It is powered by my personal web scraping project and layered on a rest API. Its a real Rest API and can be used from any platform using any programming language. It has support for CORs so you can use it from external web pages. Indreed supports a wide range of filters that you can use to fine tune your job results. With Indreed, you can get almost all the information you need about a job around the web. The docs can be found here.
Building the Web App
For this tutorial, we’ll be using Node.js to build a job listing web app. The technology stack we are going to use includes:
- Axios for performing Rest API calls
- Express for the server
- Handlebars for the template language.
- And yes, we’ll be using MDL for our UI/UX.
Let’s begin…
Open your terminal:
mkdir jobby && cd jobbynpm init -ynpm install --save express axios express-handlebarsnpm install --save-dev nodemonOnce you’ve done that, open the created package.json file in your preferred text editor and you should see something like below:
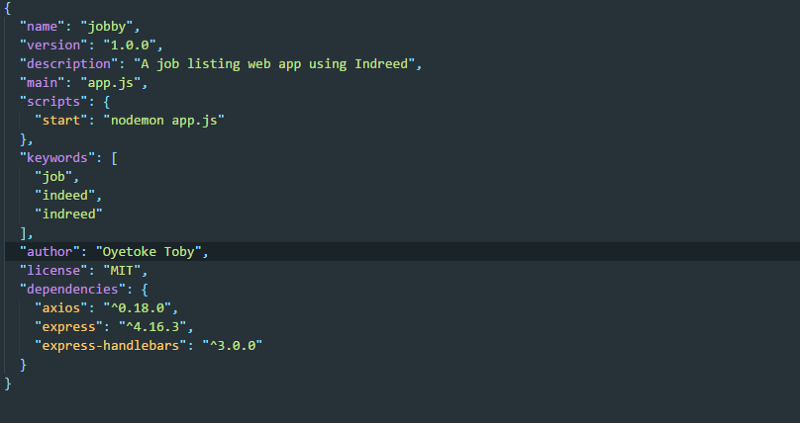
I already added a description, pointed my main to app.js, and I added keywords, my name and also nodemon for live reloading.
Now let’s setup a basic express server and the handlebars templating engine. Create app.js file in your project directory:
Make sure you have the same folder structure like below:
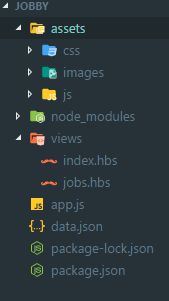
data.json)Now we need to create a index.hbsfile in the views folder that will hold our HTML:
To run the app, you can basically use node app.js. In case you want to use nodemon, you can do nodemon app.js.
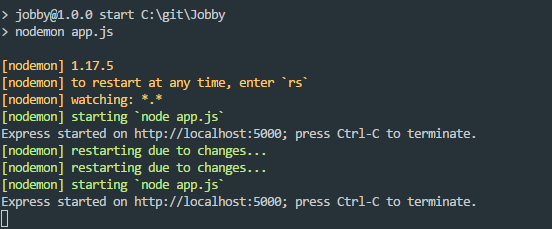
You can now open http://localhost:5000 in your browser.
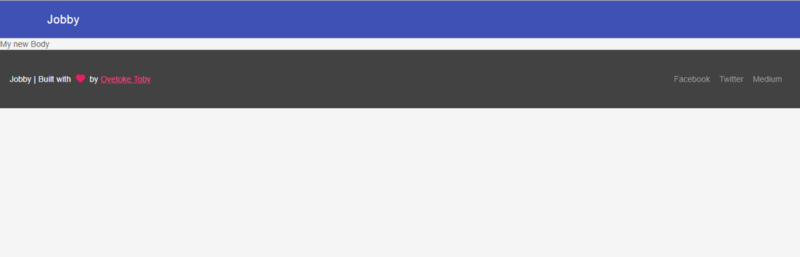
Hurray!
Now lets try getting jobs from the Indreed API using axios, then using handlebars to format it.
Open the app.js and update the app.get("/") :
Then replace {{ body }} with the below:
<div class="mdl-grid portfolio-max-width">{{# each jobs }} <div class="mdl-cell mdl-card mdl-shadow--4dp portfolio-card"> <div class="mdl-card__media"></div> <div class="mdl-card__title"> <h2 class="mdl-card__title-text">{{ this.title }}</h2> </div> <div class="mdl-card__supporting-text"> {{ this.summary }} </div> <div class="mdl-card__actions mdl-card--border"> <a class="mdl-button mdl-button--colored mdl-js-button mdl-js- ripple-effect mdl-button--accent" href="{{ this.url }}">Read more</a> </div> </div>{{/each}}</div>Note: For this, we are only displaying title , summary and url . There is other information you can add, so check that out.
Refresh it and you will be wowed:
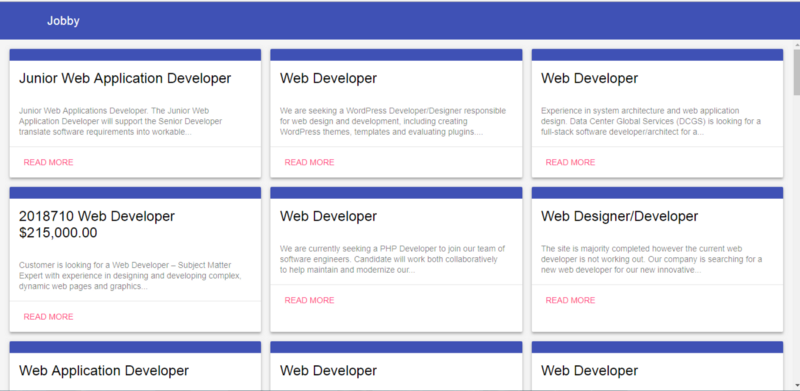
Congratulations, you just built a simple job listing web app.
Let’s break down what we just built:
- We sent a
GETrequest to the Indreed API usingaxios - this fetched the web developer job listings
- and returned JSON data we passed into handlebars to help us loop through it
- the results are displayed.
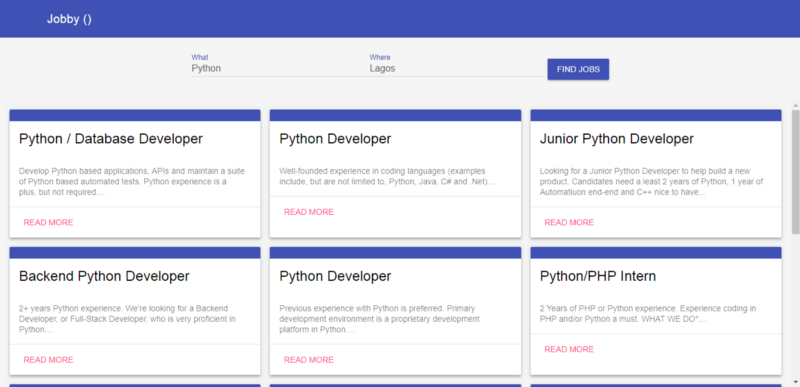
Our app is just showing web developer jobs. What if we wanted to see other types of jobs? It would be silly to go change it from the code side. So what we are going to do next is create a simple form to filter job results.
Lets create a /search endpoint:
Next, create search.hbs:
Let’s add some CSS though:
Next, update your homepage template with this:
Now that we are done with the templates, let’s go clean up our app.js:
That’s it, we are done.

Some Suggestions
- Location: The app detecting the user’s location is something you can add to make Indreed smarter. I’d suggest that you use Express-IP, an express middleware for getting IP information. You can use it as below:
req.ipInfo might return null if you are on localhost (that’s why the if statement is there).
2. Advanced Search Results: Indreed has a variety of filters you can use to filter your job results, and we’ve only used the q and l . So you can add a form that utilizes some of the available filters:
3. Authentication: You can add an authentication system to personalize search results for the user. With this, users can select the categories of jobs they’d like to see, and you’ll continue to suggest jobs relating to that when they log in.
4. Cache: If you want to personalize search results for a user without going through Authentication, you can opt in for Cache.
Short Note
I am the creator of the Indreed API, and its currently in its Alpha stage. As you can see, its hosted on Heroku and still needs lot of improvement in terms of structuring, performance, speed and hosting. To make this go forward, you can contribute to the development by contacting me (oyetoketoby80[at]gmail.com) or you can also help through my patreon page. http://patreon.com/oyetoketoby
That’s all for this article. You can get the code from here and also view the live demo: http://jobbyio.herokuapp.com.
If you enjoyed this article, kindly clap and share to others.