
By Vishwa Shah
Update: code and tutorial updated on June 28 to reflect Slack API changes.
Slackbots: Why use them?
Before we get into the tutorial part of this post, let’s take a look at why this can be a worthy project and tool.
Slack is an increasingly popular tool for team-wide communication. It’s grown to include plugins for other widely used project management tools, like JIRA, Google Drive, and the likes. Any slack user knows — the more you can do from within the conversation, the better.
Common uses for a slackbot range from a simple notifier for when a task is complete (like a test build, or when your lunch is ready) to interactive, button-based bots that execute commands at the user’s will. You can build polling mechanisms, conversational bots, and more.
Setting up a python programming environment
If you’re a windows user and you haven’t used python before, you’ll need to install it. Linux/Mac users: Unix comes with python!
Once installed, fire up your terminal and type python or python3 (if you have multiple installations) to make sure it works and is there.
Also check to see you have a good text editor for code: sublime and atom are great choices.
Optional: It might also be useful to work in a virtual environment — it’s good practice for when you have a lot of dependencies.
pip install virtualenv
virtualenv tutorial
source tutorial/bin/activate
You should also fork the tutorial GitHub repo and clone to your local machine, as we’ll be using that code as a framework for this tutorial.
To do this, go to the repo and click Fork on the top right. The forked repo should be <yourusername>/slackbot-tutorial. Hit the green Clone or download button on the right under the stats bar, and copy the url. Return to the terminal to clone the repository:
cd Desktop/
git clone https://github.com/yourusername/slackbot-tutorial.git
cd slackbot-tutorial/
sublime . (or open your text editor and open this directory)
Slack Apps
There are two ways to go about creating your slackbot: standalone bots, or Slack apps. Apps allow a wider range of functionality going forward, and is Slack’s recommended route for creating a bot user.
Go to https://api.slack.com/apps and hit Create New App on the top right. Give it a name and pick a workspace where you can create a channel to test your bot in. You can always reconfigure your bot for another workspace later, or even post it to the Slack App Directory.
I recommend making a #test channel in a workspace you create just for development purposes, or one that has relatively few users who wouldn’t mind you testing something out there.
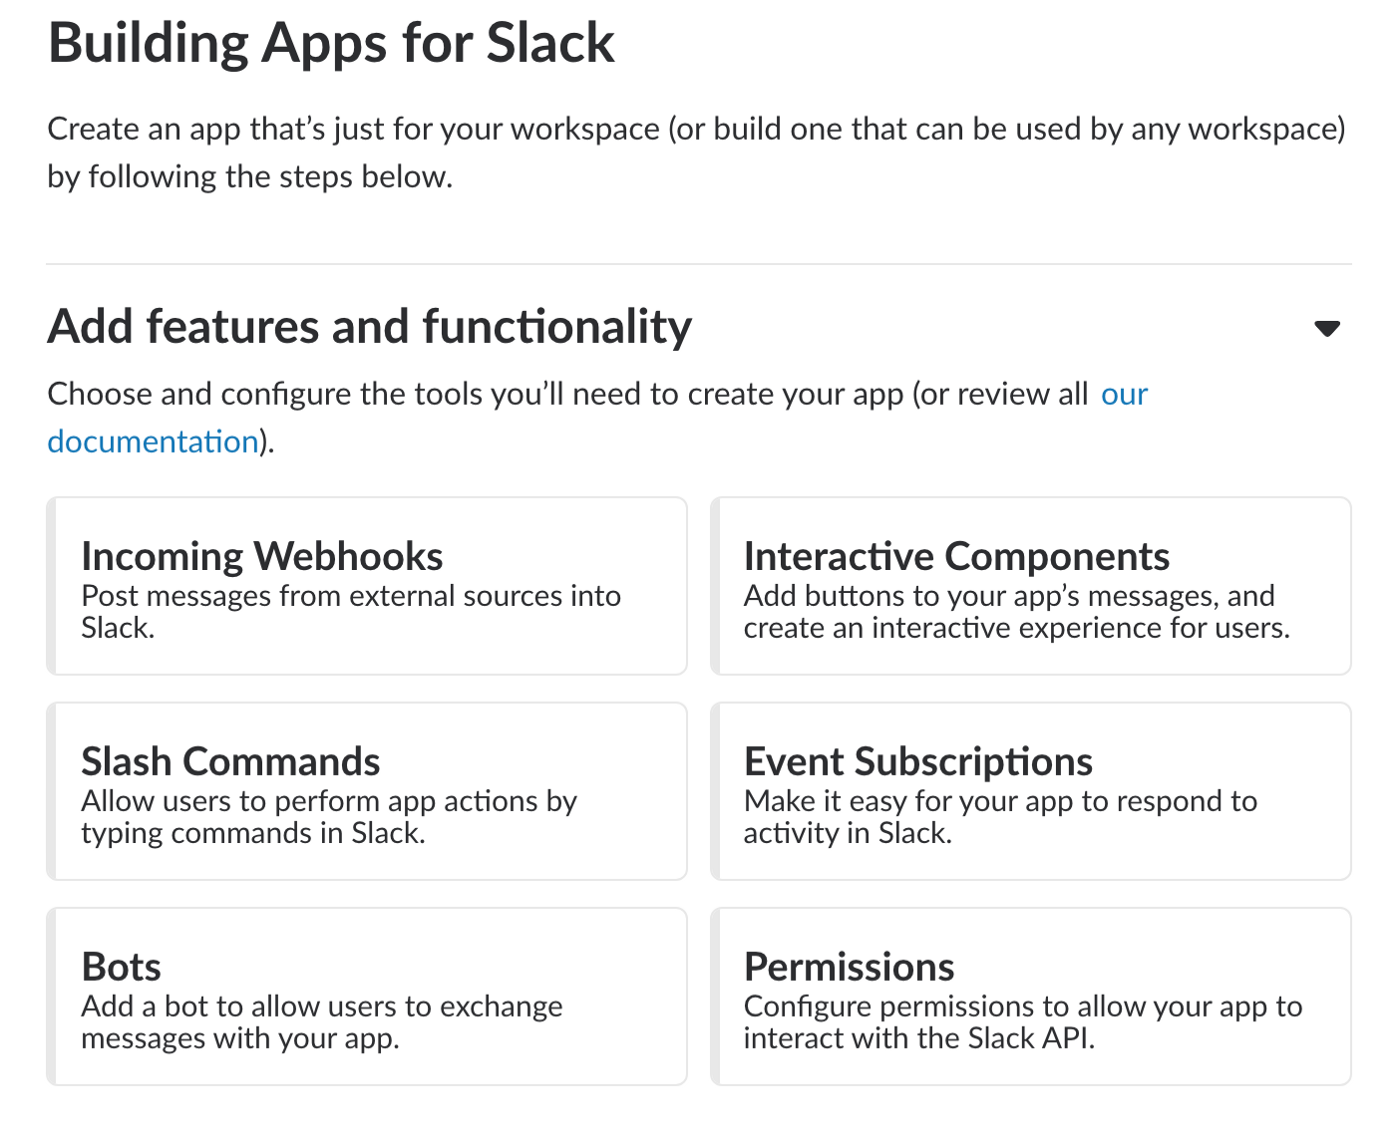
The first thing you’ll want to do is get the bot token. When you get to the above page, click Bots. Add some scopes; these determine what permissions your app’s bot user will have. To start, chat:write and im:write are probably enough.
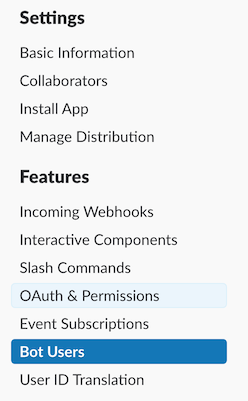
Now, to actually get your tokens, you’ll want to go to OAuth & Permissions on the left sidebar.
Here, you’ll be able to Install the App to the Workspace and generate the necessary tokens. As a rule of thumb, bot tokens start with xoxb-.
You’ll also want the signing secret, which is located under Basic Information > App Credentials.
Acting as your Bot
Now you have the credentials necessary to make API calls and act as your bot. To test this out, fire up a terminal and run this (with the correct token and channel name):
curl -X POST \
     -H 'Authorization: Bearer xoxb-your-token' \
     -H 'Content-type: application/json;charset=utf-8' \
    --data '{"channel":"#test","text":"Hello, Slack!"}' \
https://slack.com/api/chat.postMessage
If you go to that channel in your slack workspace, you should now see a message from your bot! You just made an HTTP POST request — asked a server to post a message somewhere.
Programming the Bot
We want to do the above programatically. There are a few different ways you can set up a slackbot. I’ll cover the following:
- Triggered periodically (on a schedule) to say something
- /slash commands
The second requires a server running, while the first does not.
Scheduled Messages
Let’s say you want to periodically send a message somewhere — maybe every Monday morning. Go to the text editor where you opened up slackbot-tutorial.
You should see a file scheduled.py. Take a look: sendMessage is a function that fires off the API call to slack and posts a message. At the bottom, you’ll see the main method: what executes when you run the script. Here, you’ll see a few things to note:
SLACK_BOT_TOKENis pulled fromos.environ['SLACK_BOT_TOKEN']— how? Runexport SLACK_BOT_TOKEN="xoxb-your-token"in your terminal to set this variable.- a scheduler is used here, and there’s an infinite loop that checks for events on the scheduler. By default here, I’ve scheduled the
sendMessagefunction to be called every minute.
To test this out, go back to the terminal where you’re in the slackbot-tutorial directory and run
export SLACK_BOT_TOKEN="xoxb-your-token"
python scheduled.py
You should see the log messages print. Make sure you’ve changed channel=#test in the code to your test channel name (if different) and added your bot (in the slack channel, type /invite @botname. Let it run for a couple minutes and watch the messages show up on Slack!
This is, of course, a super basic implementation of a scheduled message sender — you can actually do this just with slackbot /remind #test “Hello, Slack!” every Monday at 9am.
The true power here is that you can substitute in any function for sendMessage, leveraging the power of interfacing with external services through APIs, doing math, etc and then constructing a message to post.
Slash Commands
This one requires a little more setup — go back to your app settings > Slash Commands. Create a new slash command: for example, /test. For the request URL, you’ll need to either deploy this web server (I use Heroku), or run a local ngrok instance to test it. The latter will run it locally, and is best for testing. You can brew install ngrok or get it from here.
In the starter code repo, look for slashCommand.py to start understanding this method. To start the server, run python server.py. The Request URL to put in Slack will be given by your ngrok instance and the @app.route in your code — it would be something like http://a1234b5cde6f.ngrok.io/slack/test (the bold part comes from the route defined in the code). You should be able to test the slash commands in your Slack workspace. From the tutorial code, try /test.
Moving Forward
Now you have a very basic slackbot that either operates on a command or runs every so often. Be creative with how you use it! Think about what else you can link this skeleton to to make it more useful.
Other ways your bot might respond
- Actions/responses could be triggered by mentions or certain phrases. This requires running a server and listening the messages somewhere.
- You bot could be conversational, and might contribute to threads. Check out some NLP to get started on having intelligible conversation! Word2Vec + TensorFlow or Keras might be a place to start. DialogFlow is also great.
- Link it up with some other APIs. Maybe you want to be able to interact with a Google Sheet and run some calculations. You might want to send other users a message based on some actions. Integrate buttons. Perhaps you want to trigger messages based on something else.