by Paul Pinard
Meet Sato the Cryptobot, who is able to fetch any cryptocurrency price from an external API!

Chatbots have an incredible potential. Yet, for bots to be efficient, they must integrate and exchange data with existing services and processes.
The ability to fetch data from external API allows for more complex use case that a simple Q&A logic. Moreover, this ability combined with NLP offers even more opportunities.
For instance, Sato — the cryptobot we’ll be building today — is able to recognize all cryptocurrencies, even those not even listed yet. I won’t have to do anything for him to be able to process queries on crypto appearing even years from now, because Sato, deep-down, understood what a cryptocurrency symbol is (after being fed with thousands of them).
What are we building today?
By the end of this tutorial, we will have a bot able to fetch data from a third party API depending on what our users input, and reply to them with the value fetched. Here’s the end-result of what we’ll build today: a cryptobot aka a chatbot able to fetch any cryptocurrency price.
In a rush? Here is all you need to build your own:
- A chatbot created with SAP Conversational AI. Sign up here, it’s totally free!
- The GitHub repo
Need to see it to believe it? That’s wise! Click here!
Or if you would rather understand how it was made, go through with the tutorial.
1. Build the base of your chatbot: choose your path
The goal today is to build bot able to recognize a question about pricing on any cryptocurrency. Let your imagination flow, it could be really anything there is involving data available on third party APIs.
Before we dive in the tutorial, let me give you some information on how Sato works.
Meet Sato, the cryptobot
Sato is a bot made to answer basic questions about cryptocurrencies and fetch their prices. Here’s an overview of what he can do:
- Fetch cryptocurrencies prices (what we’ll build today): Sato recognizes cryptocurrencies symbol (“ETH”, “BTC”) and fetch their price on cryptocompare API to finally return BTC and USD value to the user.
- Answer the users’ questions about wallets — online wallets, exchange wallets, cold wallets and hardware wallets.
- Address questions about private and public keys as well as the security of cryptocurrencies.
- Briefly present the main cryptocurrencies, currently BTC, ETH, BCH and LTC.
Inside Sato
Today, we’ll focus on the skill fetching the crypto prices, as it requires an external API call. Essentially, Sato needs three things to be able to detect a question about crypto price and return the value asked:
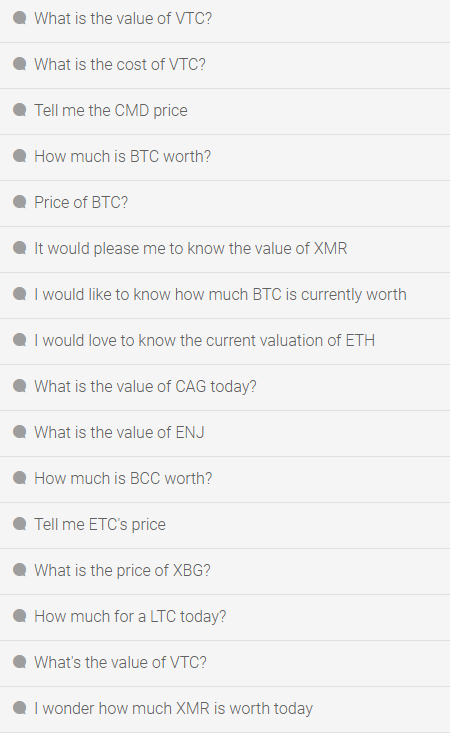
Firstly, he needs an intent (@crypto_price) with diverse expressions and cryptocurrencies mentioned, so he can efficiently recognize these questions. Here are some of the expressions used to define the @crypto_price intent:
Secondly, for Sato to be able to recognize all cryptocurrencies, he’ll need the biggest list you can find. I found 1200+ on CoinMarketCap which is good enough to begin with. I created a gazette of the crypto names to improve its understanding.
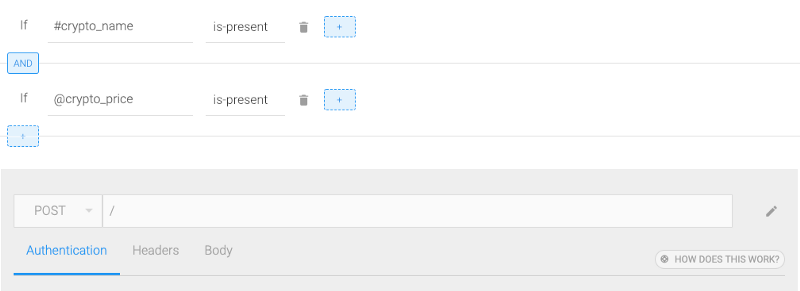
Thirdly, we’ll need to build a skill which triggers when the @ask_price intent or #crypto_name entity is recognized:
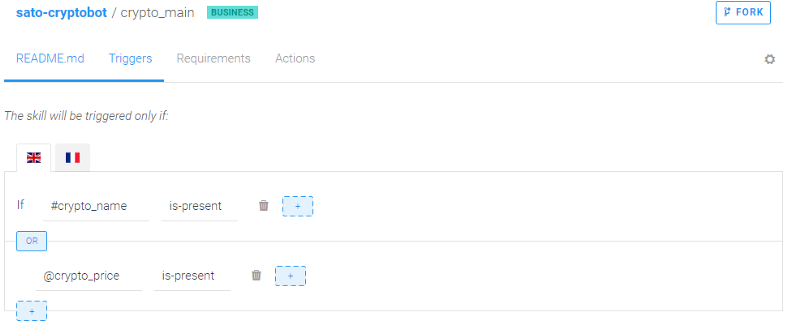
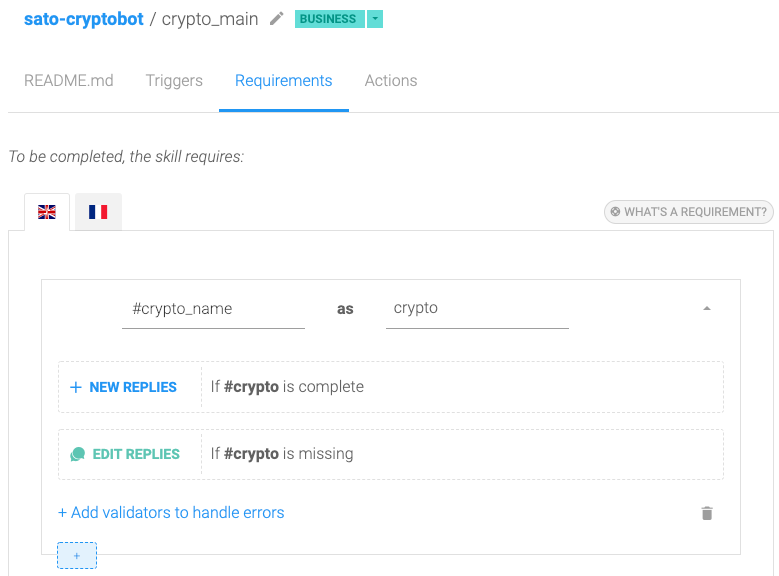
You can also add #crypto_name as a requirements, to make sure no API called is fired without parameters:
This skill must also call your webhook that we’ll setup below:
Don’t forget to add a memory reset after the webhook trigger, it’s required to clean the memory after each answer.
Finally, we’ll test our bot straight in Messenger, so you’ll need to create a page and an app and connect it. Everything is documented in the CONNECT tab and in the getting started tutorial.
To keep it concise, this tutorial will not detail the creation of a bot. We’ll start from a functioning bot already.
To meet me there, you have two options:
- Option A: build your own bot (who doesn’t have to be a cryptobot) by following the getting started tutorial and creating an account on SAP Conversational AI.
- Option B: fork Sato and start from here. That’s why SAP Conversational AI is a collaborative chatbot platform. It works pretty much like GitHub!

2. Basic server code and requirements
Since we want to interact with our bot, we’ll need a server to be able to receive the results of the NLP made by SAP Conversational AI and send our responses back.
On the bot builder, go to the CODE tab to find an example of base code required to start your API. We give examples in Node.JS, PHP, Python and Ruby. This tutorial will be Python only.
Here’s the base code for Python:
from flask import Flask, request, jsonify import json app = Flask(__name__) port = '5000' @app.route('/', methods=['POST']) def index(): print(json.loads(request.get_data())) return jsonify( status=200, replies=[{ 'type': 'text', 'content': 'Roger that', }] ) @app.route('/errors', methods=['POST']) def errors(): print(json.loads(request.get_data())) return jsonify(status=200) app.run(port=port)Take some time to look at the code to get a better understanding of what we’ll be doing: we’ll build on this code during this tutorial. You can save it in your favorite text editor for now.
Requirements
As you can see, the server script uses the Flask as a web framework, so we’ll need it.
For the API call, we’ll also use Requests. Let’s go ahead and install both:
pip install Flaskpip install requests3. Test the server: NGROK
Now that we have the base server, let’s make it run and test it. It will allow us to be more incremental in the process so the debugging (if any) is simplified.
To expose our local server to the internet, we’ll need ngrok.
Note: If you are using Windows like me, there is awesome package manager, Chocolatey which works pretty much like apt-get on UNIX. With it, you’ll be able to install ngrok in one line choco install ngrok_portable. Moreover, Chocolatey adds ngrok to your PATH, allowing you to start ngrok from any terminal simply by typing ngrok.
Now is the time to start our server and test it, this implies:
- Set a webhook trigger in your bot (detailed in step 1)
- Run your python script
- Expose port 5000 to the internet with ngrok:
ngrok http 5000 - Copy the forwarding URL form ngrok and past it as your bot base URL on SAP Conversational AI
4. Preparing the external API call
It’s about time to start building! Let’s have a look at the api call we’ll be doing to get the price of any cryptocurrency. Several APIs are available for this purpose so I just went ahead and picked one: Cryptocompare API.
Cryptocompare API offers thousands of possibilities, but for the sake of simplicity, we’ll stick with the basics. We want the price of the matched crypto in BTC, USD and EUR.
Here’s how the call is structured (here for ETH):
https://min-api.cryptocompare.com/data/price?fsym="ETH"&tsyms=BTC,USD,EUR"
You have two parameters:
fsym: the symbol of the cryptocurrency, this is where we’ll need to fetch the crypto_name recognized in the #crypto_name entity.tsyms: the currency in which the price will be returned. We chose BTC, USD and EUR here.
So, in our case, we’ll only need to adapt the fsym parameter to the recognized cryptocurrency, while the rest of the call stays the same.
5. Adapt the API call to include the symbol recognized in the user input
Now that we know how to fetch the prices, we need to go back to our server code and upgrade it so it can:
- Know the #crypto_name recognized by SAP Conversational AI.
- Make an API call to Cryptocompare using the #crypto_name.
Let’s get started!
Step 1: Finding our data in SAP Conversational AI JSON
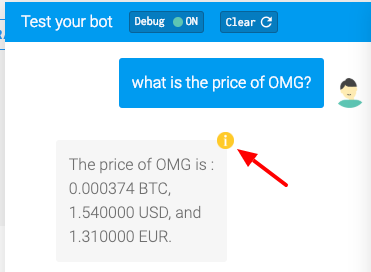
Let’s have a look at the data returned by SAP Conversational AI on a user input. To do so, you click the CHAT WITH YOUR BOT button present on all pages, on the bottom-right corner. Then, you can switch between the conversation and the JSON view by clicking on the orange information circle as below:
Here, our symbol is accessible with ['conversation']['memory']['crypto']['raw']. Since the value and the raw and identical in this case, you can use either.
On our server, the JSON returned by the website test panel is encapsulated into the data dictionary (see server code). So we need an extra step to retrieve it on our server:
# FETCH THE CRYPTO NAMEcrypto_name = data['conversation']['memory']['crypto']['value']Step 2: Make an API call using the recognized entity
import requestsr = requests.get("https://min-api.cryptocompare.com/data/price?fsym="+crypto_name+"&tsyms=BTC,USD,EUR")Go ahead and print it, but you may be disappointed:
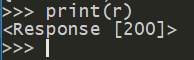
Indeed, if you want to get the values returned by the call, you need to print r.json(). The good news is that JSON returned by Cryptocompare is really as simple as it could be:

Great! Now, we just have one last step to figure out: returning the prices to the user.
Step 3: Returning the data fetched to the user
Now, it’s time to finish our base server code upgrade: we need to edit the replies returned to include our freshly fetched data. To do so, we’ll edit the message returned by our server code:
return jsonify( status=200, replies=[{ 'type': 'text', 'content': 'Roger that', }],We’ll be editing the replies only, to include the prices we fetched:
replies=[{ 'type': 'text', 'content': 'The price of %s is %f BTC and %f USD' % (crypto_name, r.json()['BTC'], r.json()['USD']) }],Since the reply is a string, we must use the modulo (%) operator to include our prices in the string. Here, the first %s tells Python to look for a string while the two following %f indicates floats.
Our upgraded server is now finished, here’s the whole code:
from flask import Flask, request, jsonifyimport jsonimport requestsapp = Flask(__name__)port = '5000'@app.route('/', methods=['POST'])def index(): data = json.loads(request.get_data()) # FETCH THE CRYPTO NAME crypto_name = data['conversation']['memory']['crypto']['raw'] # FETCH BTC/USD/EUR PRICES r = requests.get("https://min-api.cryptocompare.com/data/price?fsym="+crypto_name+"&tsyms=BTC,USD,EUR") return jsonify( status=200, replies=[{ 'type': 'text', 'content': 'The price of %s is %f BTC and %f USD' % (crypto_name, r.json()['BTC'], r.json()['USD']) }] )@app.route('/errors', methods=['POST'])def errors(): print(json.loads(request.get_data())) return jsonify(status=200)app.run(port=port)With our new server completed, we now have all the pieces of our puzzle. Let’s assemble it:
- Run your python script,
- Expose port 5000 to the internet with ngrok:
ngrok http 5000, - Copy the forwarding URL form ngrok and past it as your bot base URL on SAP Conversational AI
Now that you have the basics to build a bot able to fetch third party data, what’s it gonna be? You show us!
PS: Since this tutorial uses ngrok, your computer must be on and ngrok must be running for your bot to function.
Originally published on SAP Conversational AI blog.