
Live chat is a customer support method with a proven record. It’s fast and efficient since one agent can help many customers at once. Best of all, the quicker you can answer customer’s questions during the buying process, the more likely that person is to buy.
So, how do you integrate a live chat into your React application?
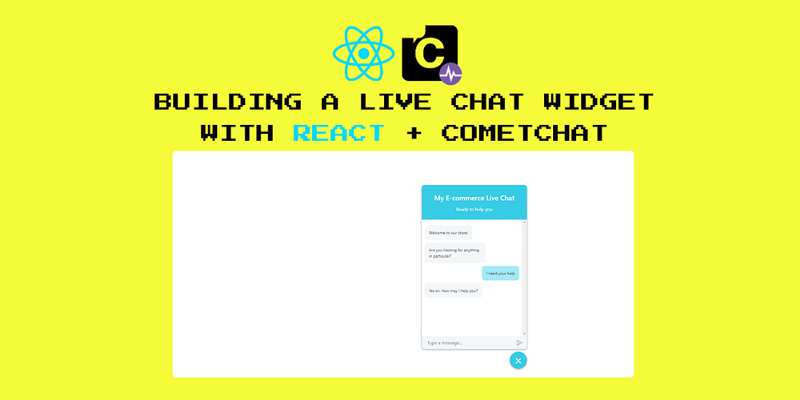
In this tutorial, I’m going to show you how to integrate a live chat feature into your React app without the worry of maintaining your own chat server and architecture.
Here’s a preview of what we’ll be building:
To power our chat application, we’ll be using CometChat Pro.
CometChat Pro is a powerful communication API that enables you to add chat features to your application. With easy integrations and clear documentation, you’ll be able to add a live chat feature into your application with just a few lines of code, as you will soon see. If you want to follow along, you can create a free account here.
In addition to CometChat, we will use the following technologies:
- Create React App
- react-chat-widget
- Express
- Bootstrap
- Axios
- react-md (spinner component only)
I encourage you to follow along but if you’d rather to skip ahead to the code, you can find the complete code for this application on GitHub.
First things first, create your CometChat app
To power your chat application, you’ll be using CometChat. Before you can integrate CometChat, however, you must first create a CometChat app.
To create a CometChat app, go to the CometChat dashboard (if you don’t have a free CometChat account already now is a good time to sign up) and hit the + icon.
I called my application “react-chat-widget” but you can call yours whatever you like.
We’ll have two types of users connect to our chat: Customers who open the chat widget and one support agent who will access the chat and respond to inquiries from the dashboard. Users are a fundamental concept in CometChat, which you can read more about here.
Because we will likely have many customers, for each customer who connects to our chat, we will need to dynamically create a CometChat user. However, because there will only be one agent, we can create an “Agent” user in advance from the dashboard.
To do so, click Explore then head to the Users tab. Here, you can click Create User:
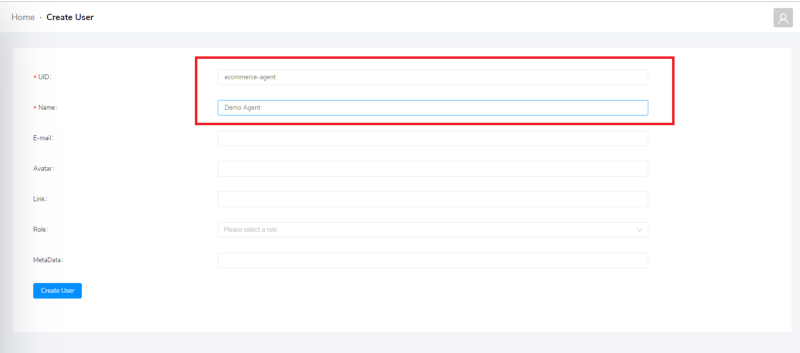
For the user ID, I wrote “ecommerce-agent” and for the name, I wrote “Demo Agent”. I recommend you use the same values if you’re following along. In any case, take note of the user ID because you’ll need to reference it later.
Before we move on from the dashboard and on to the code, we should create a CometChat full access key.
On the same page, click the API Keys tab then Create API Key:
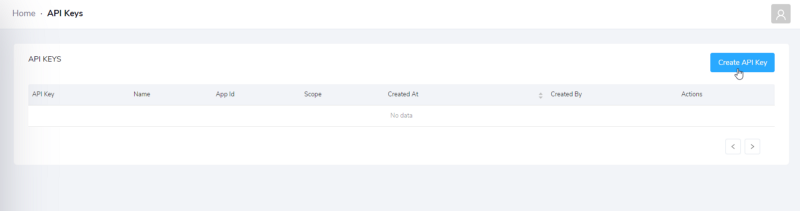
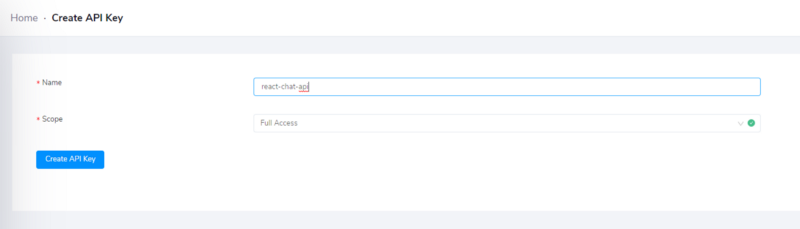
I called my key “react-chat-api” but it doesn’t really matter what you write here.
Note your API key and app ID because, like the agent user ID, you’ll need them both later.
Setting up Express
In the previous step, we created a full access key, which we can use to create CometChat users dynamically. While we could do this on the client, that would mean sharing our private full access key in public, which is a no go.
To avoid this problem, we’ll create a simple Express server that:
- Creates CometChat user using the full access key
- Returns authentication tokens (more on this later)
- Returns a list of CometChat users, for use later in the dashboard
Alright, let’s start.
First, create a new empty directory for your Express app and run `npm init -y`:
mkdir react-express-chat-widget
cd react-express-chat-widget
npm init -y
Next, install Express and axios:
npm install express axiosThen, in a file called sever.js paste:
const express = require('express');
const axios = require('axios');
const app = express();

// enter CometChat Pro configurations here
const appID = '{appID}';
const apiKey = '{apiKey}';
const agentUID = '{agentUID}';

const url = 'https://api.cometchat.com/v1';

const headers = {
  'Content-Type': 'application/json',
  appid: appID,
  apikey: apiKey,
};
In the above file, we:
- Store our application credentials and agent user ID, which we created earlier
- Define the CometChat API
urlfor convenient access - Create a
headersobject with ourappIDandapiKey. We'll send this header with every request to CometChat
In the same file, let’s now define a route to handle creating new CometChat users.
In order to create a new user, we need to send a POST request with the UID and name for the user.
In this tutorial, we will hard-code the same name for all customers — we’ll call every customer “customer” — but the UID has to be unique. For the UID, we can use new Date().getTime() to generate a random ID.
Add the following code to server.js:
app.get('/api/create', (req, res) => {
  // data for new user
  const data = {
  // you can use your own logic to generate random UID and name
  // only uid has to be unique
    uid: new Date().getTime(),
    name: 'customer',
  };
  axios
    .post(`${url}/users`, JSON.stringify(data), {
      headers,
    })
    .then(response => {
    // user is created, fetch auth token
      requestAuthToken(response.data.data.uid)
        .then(token => {
          console.log('Success:' + JSON.stringify(token));
          // token is returned to client
          res.json(token);
        })
        .catch(error => console.error('Error:', error));
    })
    .catch(error => console.error('Error:', error));
});

// this function will fetch token
const requestAuthToken = uid => {
  return new Promise((resolve, reject) => {
    axios
      .post(`${url}/users/${uid}/auth_tokens`, null, {
        headers,
      })
      .then(response => {
        console.log('New Auth Token:', response.data);
        resolve(response.data.data);
      })
      .catch(error => reject(error));
  });
};
When this route is called, Express will:
- Send a POST request to https://api.cometchat.com/v1/users/ with the correct
headersand information about the new user - Fetch an authentication token for the new user
- And, finally, return it to the caller
We also created a function called requestAuthToken to help with fetching the authentication token.
Next, in the same file, let’s create an authentication route we can call to create tokens for returning users:
//...

app.get('/api/auth', (req, res) => {
  const uid = req.query.uid;
  // if you have your own login method, call it here.
  // then call CometChat for auth token
  requestAuthToken(uid)
    .then(token => {
      console.log('Success:' + JSON.stringify(token));
      res.json(token);
    })
    .catch(error => console.error('Error:', error));
});

//...
Finally, let’s create a function to return a list of users, excluding the agent.
We’ll call this endpoint from the dashboard later to show a list of users the agent can talk with (of course, the agent doesn’t want to talk to themselves, so we filter them from the list):
//...

app.get('/api/users', (req, res) => {
  axios
    .get(`${url}/users`, {
      headers,
    })
    .then(response => {
      const { data } = response.data;
      const filterAgentData = data.filter(data => {
      // filter agent out from the list of users
        return data.uid !== agentUID;
      });
      res.json(filterAgentData);
    })
    .catch(error => console.error('Error:', error));
});
//...
At the very bottom of server.js, run the server:
const PORT = process.env.PORT || 5000;
app.listen(PORT, () => {
  console.log(`Listening on port ${PORT}`);
});
If you’ve been following along, this is what server.js should look like by now:
const express = require('express');
const axios = require('axios');
const app = express();

const appID = '{appID}';
const apiKey = '{apiKey}';
const agentUID = '{agentUID}';

const url = 'https://api.cometchat.com/v1';

const headers = {
  'Content-Type': 'application/json',
  appid: appID,
  apikey: apiKey,
};

app.get('/api/create', (req, res) => {
  const data = {
    uid: new Date().getTime(),
    name: 'customer',
  };
  axios
    .post(`${url}/users`, JSON.stringify(data), {
      headers,
    })
    .then(response => {
      requestAuthToken(response.data.data.uid)
        .then(token => {
          console.log('Success:' + JSON.stringify(token));
          res.json(token);
        })
        .catch(error => console.error('Error:', error));
    })
    .catch(error => console.error('Error:', error));
});

app.get('/api/auth', (req, res) => {
  const uid = req.query.uid;
  requestAuthToken(uid)
    .then(token => {
      console.log('Success:' + JSON.stringify(token));
      res.json(token);
    })
    .catch(error => console.error('Error:', error));
});

const requestAuthToken = uid => {
  return new Promise((resolve, reject) => {
    axios
      .post(`${url}/users/${uid}/auth_tokens`, null, {
        headers,
      })
      .then(response => {
        console.log('New Auth Token:', response.data);
        resolve(response.data.data);
      })
      .catch(error => reject(error));
  });
};

app.get('/api/users', (req, res) => {
  axios
    .get(`${url}/users`, {
      headers,
    })
    .then(response => {
      const { data } = response.data;
      const filterAgentData = data.filter(data => {
        return data.uid !== agentUID;
      });
      res.json(filterAgentData);
    })
    .catch(error => console.error('Error:', error));
});

const PORT = process.env.PORT || 5000;
app.listen(PORT, () => {
  console.log(`Listening on port ${PORT}`);
});
In a terminal window, run node server.js and look out for a message that says "Listening on port 5000". Now would be a good time to test the end-points with curl or Postman but we'll trust they work and move on to the client.
Setting up the react app
Inside your directory, run npx create-react-app to scaffold a new React application:
npx create-react-app clientYour folder structure should look like this:
|-- express-react-chat-widget
    |-- package-lock.json
    |-- package.json
    |-- server.js
    |-- client
        |-- .gitignore
        |-- package-lock.json
        |-- package.json
        |-- public
        |-- src
With your React application in place, navigate to the client directory install the following modules:
cd client
npm install @cometchat-pro/chat react-chat-widget react-router-dom bootstrap react-md-spinner
Create React app is really useful to bootstrap a React app, but it also generates a lot of files we don’t need (test files, and so on).
Before we jump into the code, remove everything in the client/src directory - we will start from scratch.
To begin, create a config.js file with your app ID and agent UID inside:
// client/src/config.js
const config = {
  appID: '{appID}',
  agentUID: '{agentUID}',
}
export default config;
This is a bit of boilerplate we can use to reference our CometChat credentials from anywhere.
While we’re dealing with boilerplate, let’s also take this opportunity to create an index.css file:
body {
  margin: 0;
  padding: 0;
  font-family: -apple-system, BlinkMacSystemFont, "Segoe UI", "Roboto", "Oxygen",
    "Ubuntu", "Cantarell", "Fira Sans", "Droid Sans", "Helvetica Neue",
    sans-serif;
  -webkit-font-smoothing: antialiased;
  -moz-osx-font-smoothing: grayscale;
}

code {
  font-family: source-code-pro, Menlo, Monaco, Consolas, "Courier New", monospace;
}

.message {
  overflow: hidden;
}

.balon1 {
  float: right;
  background: #35cce6;
  border-radius: 10px;
}

.balon2 {
  float: left;
  background: #f4f7f9;
  border-radius: 10px;
}
We will reference this later from the dashboard.
Now, in a file called index.js paste the following:
import React from 'react';
import ReactDOM from 'react-dom';
import 'bootstrap/dist/css/bootstrap.css';
import './index.css';
import App from './App';
import { CometChat } from '@cometchat-pro/chat';
import config from './config';

CometChat.init(config.appID)
ReactDOM.render(<App />, document.getElementById('root'));
Here, we import Bootstrap, CometChat, and the config file we just created before initialising CometChat and rendering our App.
If you’re following along, you’ll have noticed we haven’t defined App yet - let's do that now.
In a file called App.js:
import React from 'react';
import { BrowserRouter as Router, Route, Link } from 'react-router-dom';
import Client from './Client';
import Agent from './Agent';

const App = () => {
  return (
    <Router>
      <React.Fragment>
        <ul>
          <li>
            <Link to='/'>Client Home</Link>
          </li>
          <li>
            <Link to='/agent'>Agent Dashboard</Link>
          </li>
        </ul>
        <hr />
        <Route exact path='/' component={Client} />
        <Route path='/agent' component={Agent} />
      </React.Fragment>
    </Router>
  );
}
export default App;
Here, we define two routes:
- The
/or"Customer home"route for the customer to chat with the agent - And the
/agentor"Agent Dashboard"route for quick and convenient access to the dashboard
Let’s tackle the customer-facing component first. We’ll call this the client component.
Creating the client component
Our client component will have two main responsibilities:
- Create a new CometChat user through our Express server when a customer first connects
- Send and receive messages in real-time.
Create a file called Client.js and paste the following:
// Client.js

import React, {Component} from 'react';
import { Widget, addResponseMessage, addUserMessage, dropMessages } from 'react-chat-widget';
import { CometChat } from '@cometchat-pro/chat';
import config from './config';
import 'react-chat-widget/lib/styles.css';

const agentUID = config.agentUID;
const CUSTOMER_MESSAGE_LISTENER_KEY = "client-listener";
const limit = 30;

class Client extends Component {
  componentDidMount() {
    addResponseMessage('Welcome to our store!');
    addResponseMessage('Are you looking for anything in particular?');
  }

  render() {
    return (
      <div className='App'>
        <Widget
          handleNewUserMessage={this.handleNewUserMessage}
          title='My E-commerce Live Chat'
          subtitle='Ready to help you'
        />
      </div>
    );
  }

  createUser = async () => {
    const response = await fetch(`/api/create`)
    const result = await response.json()
    return result;
  }

  handleNewUserMessage = newMessage => {
    console.log(`New message incoming! ${newMessage}`);
    var textMessage = new CometChat.TextMessage(
      agentUID,
      newMessage,
      CometChat.MESSAGE_TYPE.TEXT,
      CometChat.RECEIVER_TYPE.USER
    );
    let uid = localStorage.getItem("cc-uid");
    if (uid === null) {
    // no uid, create user
      this.createUser().then(
        result => {
          console.log('auth token fetched', result);
          localStorage.setItem("cc-uid",result.uid)
          // do login
          CometChat.login(result.authToken)
          .then(user => {
            console.log("Login successfully:", { user });
            CometChat.sendMessage(textMessage).then(
              message => {
                console.log('Message sent successfully:', message);
              },
              error => {
                console.log('Message sending failed with error:', error);
              }
            );
            // create listener
            CometChat.addMessageListener(
              CUSTOMER_MESSAGE_LISTENER_KEY,
              new CometChat.MessageListener({
                onTextMessageReceived: message => {
                  console.log("Incoming Message Log", { message });
                  addResponseMessage(message.text);
                }
              })
            );
          })
      },
      error => {
        console.log('Initialization failed with error:', error);
      })
    } else {
      // we have uid, do send
      CometChat.sendMessage(textMessage).then(
        message => {
          console.log('Message sent successfully:', message);
        },
        error => {
          console.log('Message sending failed with error:', error);
        }
      );
    }
  };
  componentWillUnmount() {
    CometChat.removeMessageListener(CUSTOMER_MESSAGE_LISTENER_KEY);
    CometChat.logout();
    dropMessages();
  }
}

export default Client;
Woah, that is a lot of new code. Let’s break it down.
The render function is simple enough, it mainly boils down to rendering the react-chat-widget.
Most of the code is dedicated to handling new message sent by the customer in the function called handleNewUserMessage.
In a nutshell, we first check to see if customer UID exists in localStorage. If it does, we will use this UID to log the user in and send messages. Otherwise, we call createUser() and use the returned value to login. This createUser function calls the endpoint we defined earlier in the tutorial.
Finally, in a React lifecycle function called componentWillUnmount, we remember to remove the message listener.
Before moving on, here’s a little tip: In the above code, rather than typing server url and port ("localhost:5000/users" or something like that) in our front-end, we can instead add a proxy option to package.json. This will allow us to write /users" instead of //localhost:5000/users":
"browserslist": [
  ">0.2%",
  "not dead",
  "not ie <= 11",
  "not op_mini all"
],
"proxy": "http://localhost:5000"
Here is what the application should look like:
As you can see, you can send and receive messages, but if we refresh our page, the chat messages will all disappear and that’s no good.
To solve this issue, we’ll setup the componentDidMount method to look for customer UID in localStorage, so that when customers refresh the page, they can continue chatting from where they left off.
Once found, we’ll use this UID to initiate a chain of methods to login, fetch previous messages and create listener for incoming messages.
componentDidMount() {
  addResponseMessage('Welcome to our store!');
  addResponseMessage('Are you looking for anything in particular?');

  let uid = localStorage.getItem("cc-uid");
  // check for uid, if exist then get auth token
 if ( uid !== null) {
   this.fetchAuthToken(uid).then(
     result => {
       console.log('auth token fetched', result);
       // SDK login
       CometChat.login(result.authToken)
       .then( user => {
         console.log("Login successfully:", { user });
         // listen to incoming message and fetch previous messages
         this.createMessageListener();
         this.fetchPreviousMessages();

      })
     },
     error => {
       console.log('Initialization failed with error:', error);
     }
   );
 }
}

// The functions used above

fetchAuthToken = async uid => {
  const response = await fetch(`/api/auth?uid=${uid}`)
  const result = await response.json()
  return result;
}

createMessageListener = () => {
  CometChat.addMessageListener(
    CUSTOMER_MESSAGE_LISTENER_KEY,
    new CometChat.MessageListener({
      onTextMessageReceived: message => {
        console.log("Incoming Message Log", { message });
        addResponseMessage(message.text);
      }
    })
  );
}

fetchPreviousMessages = () => {
  var messagesRequest = new CometChat.MessagesRequestBuilder()
  .setUID(agentUID)
  .setLimit(limit)
  .build();
  messagesRequest.fetchPrevious().then(
    messages => {
      console.log("Message list fetched:", messages);
      // add messages to the widget chat bubbles
      messages.forEach( message => {
        if(message.receiver !== agentUID){
          addResponseMessage(message.text);
        } else {
          addUserMessage(message.text)
        }
      });
    },
    error => {
      console.log("Message fetching failed with error:", error);
    }
  );
}
Now if we refresh our page, the app will try to login to CometChat and fetch previous messages automatically by looking for our customer UID from the localStorage. Good stuff!
There’s still a small problem, though. As it stands right now, there is still no way for an agent to reply to customer’s messages.
We will solve this problem by building the agent dashboard, where our agent can view and reply chat messages from customers.
We’re finished with the Client.js file, so you can grab a coffee before moving on to code the Agent.js file ☕
Creating the agent component
The main function of the agent dashboard is to grab all customers from CometChat Pro and display any incoming message from new customer into the customer list chat for agents to click on and reply. The core functionality is very similar to the client:

With CometChat, you could easily create multiple agents but to keep things simple and avoid user management, we have only one agent, which we created earlier.
Create a component called Agent.js and set the initial state:
import React, {Component} from 'react';
import {CometChat} from '@cometchat-pro/chat';
import MDSpinner from "react-md-spinner";
import config from './config';

const agentUID = config.agentUID;
const AGENT_MESSAGE_LISTENER_KEY = 'agent-listener'
const limit = 30;

class Agent extends Component {
  state = {
    customers: [],
    selectedCustomer: '',
    chat: [],
    chatIsLoading: false,
    customerIsLoading:true
  }
}
In the same file, create a componentDidMount method:
componentDidMount(){
  this.fetchAuthToken(agentUID).then(
    authToken => {
      console.log('auth token fetched', authToken);
      CometChat.login(authToken)
      .then( user => {
        console.log("Login successfully:", { user });
        // after login, fetch all users
        // put them into customer state
        this.fetchUsers().then(result => {
          this.setState({
            customers: result,
            customerIsLoading: false
          })
        });

        CometChat.addMessageListener(
          AGENT_MESSAGE_LISTENER_KEY,
          new CometChat.MessageListener({
            onTextMessageReceived: message => {
              let {customers, selectedCustomer, chat} = this.state;
              console.log("Incoming Message Log", { message });
              // check incoming message
              // if from the same customer agent is currently chatting
              // push a new chat item into chat state
              if(selectedCustomer === message.sender.uid){
                chat.push(message);
                this.setState({
                  chat
                })
              } else {
              // if new customer, push a new customer into customer state
                let aRegisteredCustomer = customers.filter( customer => {
                 return customer.uid === message.sender.uid });
                if(!aRegisteredCustomer.length){
                  customers.push(message.sender)
                  this.setState({
                    customers
                  })
                }
              }
            }
          })
        );
     })
    },
    error => {
      console.log('Initialization failed with error:', error);
    }
  );
}

fetchUsers = async () => {
  const response = await fetch(`/api/users`)
  const result = await response.json()
  return result;
}
There’s a lot happening in the above code, here’s a rundown to help you understand:
- First, we automatically login our agent and fetch all users for the agent to chat with from the server
- Next, we create an incoming message listener. Every time a message is received in the selected conversation, we push it to the chat state which, in turn, updates the UI
- If the incoming message is not from the currently selected conversation, we check to see if the new message is from registered customer. If not, we push that new customer to the customer state.
You’ll probably recognise the Express API we create to get a list of registered users. We use this to populate the list of users on the left-hand-side of the dashboard. We will position the list to the left-hand-side using a combination of Bootstrap classes and the index.css file we defined earlier.
Next, let’s create the render function. It will render a conversation interface, styled with Bootstrap. To make the code easier to follow, we will separate CustomerList and ChatBox into their own components, which you can define in the same file:
render() {
  return(
    <div className='container-fluid'>
      <div className='row'>
        <div className='col-md-2'></div>
        <div className="col-md-8 h-100pr border rounded">
          <div className='row'>
            <div className='col-lg-4 col-xs-12 bg-light' style={{ height: 658 }}>
            <div className='row p-3'><h2>Customer List</h2></div>
            <div className='row ml-0 mr-0 h-75 bg-white border rounded'
            style={{ height: '100%', overflow:'auto' }}>
            {/* The CustomerList component */}
            <CustomerList {...this.state} selectCustomer={this.selectCustomer}/>
            </div>
            </div>
            <div className='col-lg-8 col-xs-12 bg-light'  style={{ height: 658 }}>
              <div className='row p-3 bg-white'>
                <h2>Who you gonna chat with?</h2>
              </div>
              <div className='row pt-5 bg-white'
              style={{ height: 530, overflow:'auto' }}>
              {/* The ChatBox component */}
              <ChatBox {...this.state} />
              </div>
              <div className="row bg-light" style={{ bottom: 0, width: '100%' }}>
              <form className="row m-0 p-0 w-100" onSubmit={this.handleSubmit}>

              <div className="col-9 m-0 p-1">
                <input id="text"
                  className="mw-100 border rounded form-control"
                  type="text"
                  name="text"
                  ref="message"
                  placeholder="Type a message..."/>
              </div>
              <div className="col-3 m-0 p-1">
                <button className="btn btn-outline-secondary rounded border w-100"
                  title="Send"
                  style={{ paddingRight: 16 }}>Send</button>
              </div>
              </form>
              </div>
            </div>
          </div>
        </div>
      </div>
    </div>
  )
}
Chatbox component:
class ChatBox extends Component {
  render(){
    const {chat, chatIsLoading} = this.props;
    if (chatIsLoading) {
      return (
        <div className='col-xl-12 my-auto text-center'>
          <MDSpinner size='72'/>
        </div>
      )
    }
    else {
    // simple mapping of array from props
      return (
        <div className='col-xl-12'>
          {
            chat
            .map(chat =>
              <div key={chat.id} className="message">
                <div className={
                  `${chat.receiver !== agentUID ? 'balon1': 'balon2'} p-3 m-1`
                  }>
                  {chat.text}
                </div>
              </div>)
          }
        </div>
      )
    }
  }
}
CustomerList component:
class CustomerList extends Component {
  render(){
    const {customers, customerIsLoading, selectedCustomer} = this.props;
    if (customerIsLoading) {
      return (
        <div className='col-xl-12 my-auto text-center'>
          <MDSpinner size='72'/>
        </div>
      )
    }
    else {
      // simple mapping of array from props
      return (
        <ul className="list-group list-group-flush w-100">
          {
            customers
            .map(customer =>
              <li
                key={customer.uid}
                className={
                  `list-group-item ${customer.uid === selectedCustomer ? 'active':''}`
                }
                onClick={ () => this.props.selectCustomer(customer.uid) }>
                  {customer.name}
              </li>)
          }
        </ul>
      )
    }
  }
}
That makes up the foundation for our UI, but we still can’t send messages.
To send messages, we have to create a handler for when the agent submits a new message. How to send messages should be familiar to you now because we’ll make the the same sendMessage call that we made in the Client component as well.
handleSubmit = event => {
  event.preventDefault();
  let message = this.refs.message.value;
  var textMessage = new CometChat.TextMessage(
    this.state.selectedCustomer,
    message,
    CometChat.MESSAGE_TYPE.TEXT,
    CometChat.RECEIVER_TYPE.USER
  );

  CometChat.sendMessage(textMessage).then(
    message => {
      let {chat} = this.state;
      console.log('Message sent successfully:', message);
      chat.push(message);
      this.setState({
        chat
      })
    },
    error => {
      console.log('Message sending failed with error:', error);
    }
  );
  this.refs.message.value='';
}
We’ll also want to enable the agent to see historical messages like we did for the customer:
selectCustomer = uid => {
  this.setState({
    selectedCustomer: uid
  }, ()=> {this.fetchPreviousMessage(uid)})
}

fetchPreviousMessage = uid => {
  this.setState({
    hat: [],
    chatIsLoading: true
  }, () => {
    var messagesRequest = new CometChat.MessagesRequestBuilder()
    .setUID(uid)
    .setLimit(limit)
    .build();
    messagesRequest.fetchPrevious().then(
       messages => {
        console.log("Message list fetched:", messages);
        this.setState({
          chat: messages,
            chatIsLoading: false
        })
      },
      error => {
        console.log("Message fetching failed with error:", error);
      }
    );
  });
}
Remember to remove the message listener when the component unmounts:
componentWillUnmount(){
  CometChat.removeMessageListener(AGENT_MESSAGE_LISTENER_KEY);
  CometChat.logout();
}
If you have any trouble, you can reference the complete Agent file here on GitHub.
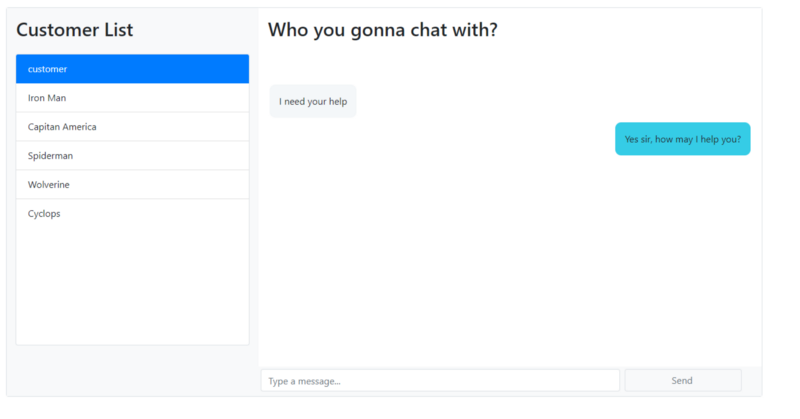
Check out the final product:

If you’re wondering where those superhero users came from, they are automatically created by CometChat Pro when you create a new app. Don’t forget to delete them before using the app in production.
Now both the support agent and your customers are ready to chat with each other. You can open Client Home and Agent Dashboard in separate windows and try it out.
Congratulations!
Conclusion
We’ve made our very own live chat widget for React application, and it took no time at all! Indeed, CometChat Pro enables you to send and receive message by only writing a few lines of code. You don’t need to deal with creating your own chat server and architecture. It also has more capabilities than just making a chat widget.
If you wanted to expand this application, try enabling customers to send media messages with CometChat.
If you enjoyed this article and want to take your JavaScript skills to the next level, I recommend you check out my new book Beginning Modern JavaScript here.
The book is designed to be easy to understand and accessible to anyone looking to learn JavaScript. It provides a step-by-step gentle guide that will help you understand how to use JavaScript to create a dynamic application.
Here's my promise: You will actually feel like you understand what you're doing with JavaScript.
Until next time!