by Andrei Anisimov
How to build a TodoMVC app with React and 8base GraphQL API
Requirements
Introduction
In this tutorial I’ll show you how to quickly create a GraphQL API using 8base and connect to it from a React app. 8base is a Developer Acceleration Platform offering a plethora of features to help front-end developers build applications faster and simpler than ever before. With 8base, there is no need to rely on back-end developers or DevOps!
Using the 8base platform, you can build your GraphQL backend using a simple GUI that allows you to perform actions such as:
- Define your data schema: create tables/ table relationships
- Upload files
- Define roles
- Manage various projects using “Workspaces”
- Design GraphQL queries and mutations using the API explorer
I believe that the best way to illustrate the utility of GraphQL is to show interested developers how it can be integrated with projects they are already working on. By connecting a simple Todo MVC app to a GraphQL backend, we’ll learn how to:
- Define data tables in 8base to create a GraphQL API
- Write queries using GraphQL
- Access your data from a React.js front-end
Intended Audience
This tutorial is aimed mostly toward users who don’t have much prior experience with GraphQL. If you are familiar with GraphQL, connecting to your 8base backend should be a somewhat familiar process. We encourage you to follow this tutorial, and see how a static React application comes to life by connecting it to a dynamic GraphQL API.
Preparing the Environment/ 8base UI
In this tutorial, we will only use a few features offered by 8base, but I highly encourage you to explore the entirety of the platform and utilize other tools in the suite.
- Create an account on 8base (It’s free for small teams. You will be asked to verify your email and then redirected to the 8base UI).
- Once you are in the 8base UI, simply navigate to “Data” and click on “New Table” to start building your backend. After your new table is loaded, you’ll be taken to the Schema in order to begin defining fields. Let’s take a look around and note a couple of things. On the left, you’ll see there are
System TablesandYour Tables. Every new 8base workspace automatically comes prepackaged with a number of built-in Tables. These tables are used to handle things like Files, Settings, and Permissions and can all be accessed through the 8base GraphQL API. For now, the only system table that is exposed via the UI is Users, but you can find a complete list of 8base system tables by using the querytablesListin theAPI Explorer. - Go ahead and create a table
Todowith fieldstext(field type: TEXT),completed(field type: SWITCH, format: Yes/No). Switch is a particularly interesting field type. At first, it may seem like a boolean value, but the switch field is actually able to handle multiple options, and therefore allows for a lot of flexibility. However, for the sake of this project, we will simply be using Yes/No. - Next, copy the API endpoint URL (available on the bottom left) — this is your main line of communication between your front end and your 8base backend (you’ll need it later where it says
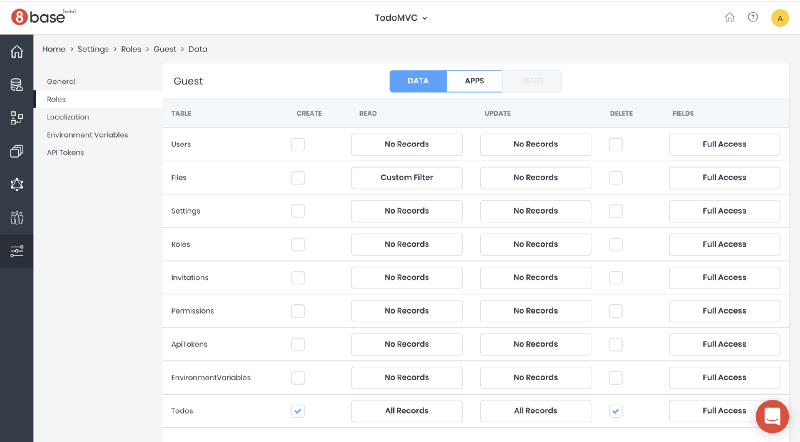
8BASE_API_URL). - Finally, for the purpose of this tutorial we’re going to allow open access to Guests by default so that dealing with authentication is optional. To allow guest access to your new Todo table, navigate to Settings > Roles > Guest and check the appropriate boxes under Todo. All unauthenticated users who access your API endpoint are given the ro
le ofGuest by default. Authentication is not covered in this tutorial. You can see how authentication should be handled in more detail here.
Now that you’ve prepared your backend, let’s head over to the 8base TodoMVC repo to prepare our client application.
- Clone the TodoMVC repo and run
git checkout workshopto switch into theworkshopbranch.
The master branch contains the completed code for this project so you will be unable to follow along with the tutorial if you don’t complete this step.
- Install dependencies:
yarn add @8base/app-provider graphql graphql-tag react-apollo && yarn
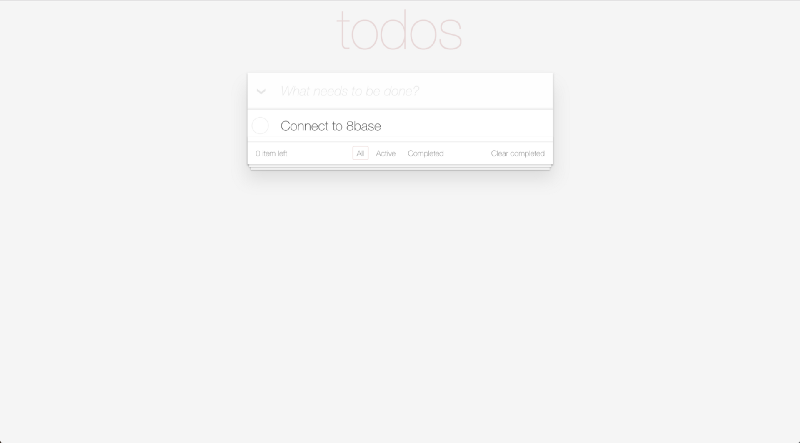
- Test that the app works without backend:
yarn start
- (Optional) Setup VS Code Apollo GraphQL extension: Create the file
apollo.config.jsin the root of the project with the following content (replace8BASE_API_URLwith your API endpoint URL):
module.exports = { client: { service: { name: '8base', url: '8BASE_API_URL', }, includes: [ "src/*.{ts,tsx,js,jsx}" ] },};The Apollo GraphQL extension for VS code provides validation and autocomplete for writing GraphQL queries.
Connecting the Backend
The application repo that we set up has the following code built in, so you can focus on understanding what’s going on. In instances where you have to add code, just uncomment what is specified. In instances where the code has to be removed, the specified code is appended by the comment //Remove this in the code base.
Note that all relevant code in this tutorial will be placed in the file src/App.js — this is not best practice using React but has been done this way to simplify the tutorial.
- Import GraphQL-related dependencies
You’ll see here not only are we importing gql and graphql, but we are also importing EightBaseAppProvider from the 8base SDK. The 8base SDK makes integration with 8base and GraphQL simple. We've done this by taking a lot of the boilerplate/setup-code and packaging it inside the SDK, so all the developer needs to do is wrap their application in the <EightBaseAppProvider> tag and pass it the appropriate props to allow data access to all the child components. EightBaseAppProvider uses Apollo Client, so if you are familiar with it already, there is nothing new to learn.
2. Initialize EightBaseAppProvider
You need to provide a function as a child of EightBaseAppProvider that will tell React what we want to render. We can use the loading property to display a loader while the application is being initialized. During the initialization, EightBaseAppProvider loads the 8base table schema which gives you access to all properties of the data model inside your front end code. We'll touch on this feature more in-depth in a future tutorial.
3. Add a Query to Fetch todos
- Query and HOC
In the code above, we are creating a Higher-Order Component (HOC) using the graphql() function provided by react-apollo.
From react-apollo — The graphql() function is the most important thing exported by react-apollo. With this function you can create higher-order components that can execute queries and update reactively based on the data in your Apollo store. The graphql() function returns a function which will “enhance” any component with reactive GraphQL capabilities. This follows the React higher-order component pattern which is also used by react-redux’s connect function.Essentially, by using graphql() we are able to write the code to query our backend in one place and inject this functionality into multiple components rather than writing it everywhere we want to be able to use it.
The graphql function takes a query as its first parameter, config as the second, and the return value is a HOC that should be executed with the desired component as an argument. Note that in our example, we use the config parameter ingraphql() to specify that our data will be accessible as props.todos rather than props.data.todosList.items.
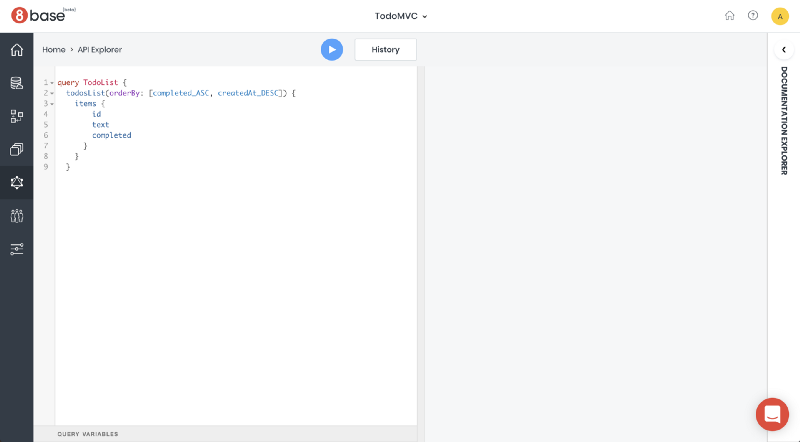
As for our TODO_LIST_QUERY, we've already given you the appropriate syntax, but typically we might design our queries in the 8base API Explorer. If you navigate to the API Explorer and copy/paste the TODO_LIST_QUERY, you can see what data will be returned. Experiment with this query and see other ways that data can be returned.
- Wrap
MainandFooterintowithTodos
Ultimately in our example, we want to display all the data from our 8base backend in the Main component and the Footer component. In the code above we are using the compose() function provided by the lodash library to chain multiple Higher-Order Components together, giving our target components the functionality from each HOC. You can read more about how the compose() function works here.
- Remove the code that passes down the
todosprop to theMainandFootercomponents
When we first set up our application, all Todos were held in state because we were not connected to a backend. Our components still need to access the todos props, but we no longer have to pass it down explicitly because they are provided by withTodos.
4. Add a Query to Create a todo
Here we are repeating the process we took previously to query our 8base backend. But this time we are using GraphQL mutation to create a Todo and then calling refetchQueries to update the state of our application with our newly added data. This will allow new data to populate throughout the application without having to make a separate request to our backend.
- Wrap
Header
The syntax above illustrates the enhancement of the Header component using our HOC. Note that withCreateTodo acts as a function, the Header component is passed to the function as an argument and the enhanced component is then set to the variable Header to be used in our application.
- Remove
createTodofromHeader
5. Add a Query to update todos
- Mutation and HOC
- Wrap
MaininwithToggleTodo
- Remove
toggleTodofromMain
Above we’ve repeated the previous pattern to add functionality to the Main component. This will give the user the ability to toggle Todos as complete or incomplete.
6. Add a Query to mark all todos as complete
- We only need a new HOC, we can reuse the mutation. All mutations in the loop will be batched in a single request.
- Wrap
MaininwithToggleAllTodos
- Remove
toggleAllTodosfromMain
7. Add a Query to delete todos
- Mutation and HOC
- Wrap
MaininwithRemoveTodo
- Remove
removeTodofromMain
As you can see, once you understand the basic pattern of enhancing components using the graphql() HOC, it becomes fairly simple to write new queries that can be easily accessed throughout your application.
Finally, test that your application works properly by navigating to the root directory and running yarn start.
You should now be able to create, update and destroy Todos that are persisted to the database.
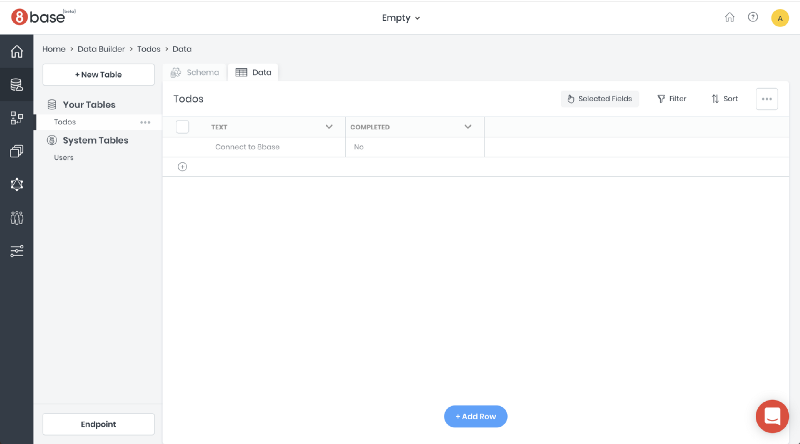
- To see 8base working in action, open up your 8base workspace in a separate tab and open the Data Viewer on the Todos table. You should see all the data from your application in this window. Create new Todos in your application and refresh the page to see them in your database!
8base is currently working on implementations using other frameworks and libraries. We currently have examples using React and React-Native as well as more simple examples using CURL, Node, and Vanilla JS. Feel free to visit our Docs, send a message on our website, or reach out to me personally with feedback on your experience with 8base.
Completed example with 8base backend connected can be found in the master branch.
To get started with 8base or simply learn more information, visit www.8base.com, docs.8base.com, follow us on Twitter at @8baseinc, or email us directly at info@8base.com.
Originally published at blog.8base.com on February 22, 2019.