by Harini Janakiraman
Day 23: How to build an app with ARKit and Unity featuring Harry Potter PortKey
Augmented Reality. The future screams of it. The present is full of it: filters, games, and AR apps are popping up daily. Imagine a world where everywhere you look there are visual data aids to augment your comprehension.
Now, I would rather go all in on VR, especially after seeing Ready Player One. Oh how I wish I could be transported to Oasis right now! However, AR has more real world use cases from furniture shopping to building industrial factories — the possibilities are endless.
Augmented reality will be an essential part of your daily life. It will change everything.— Tim Cook
Now, these claims have to hold the test of time (powerful use cases, realistic visuals, processing speed of hardware, and so on). Until then, Mobile AR is possibly the test bed for developers, before a headset or something similar is part of your everyday tech, along with a community of AR developers and a bevy apps.
Today we will be using Apple’s ARKit (which has made AR dev so much easier to explore) to get our feet wet and experiment with AR. We will build a basic superimposing object app in “additive” AR style to the camera view. To make things interesting, we will be placing Harry Potter PortKeys as our AR objects, which will transport you to fantasy land (this part is left to your imagination for now. I will be building a more comprehensive version of the app in the next part of this AR series, so stay tuned!).

What is a Portkey?
(For muggles, here is the definition *wink wink*):
A Portkey, in Harry Potter world, is an enchanted object which, when touched, will instantly transport a person from point A to point B. The object is usually a worthless piece of junk and is randomly placed around so as not to attract attention.
Project (around 3 hours)
In this tutorial, you’ll learn to build a Unity app with ARKit. We’ll add an augmented reality layer featuring Harry Potter PortKeys. Most of the time you spend will be on installations, so grab your coffee and get ready!
Step 1: Installation
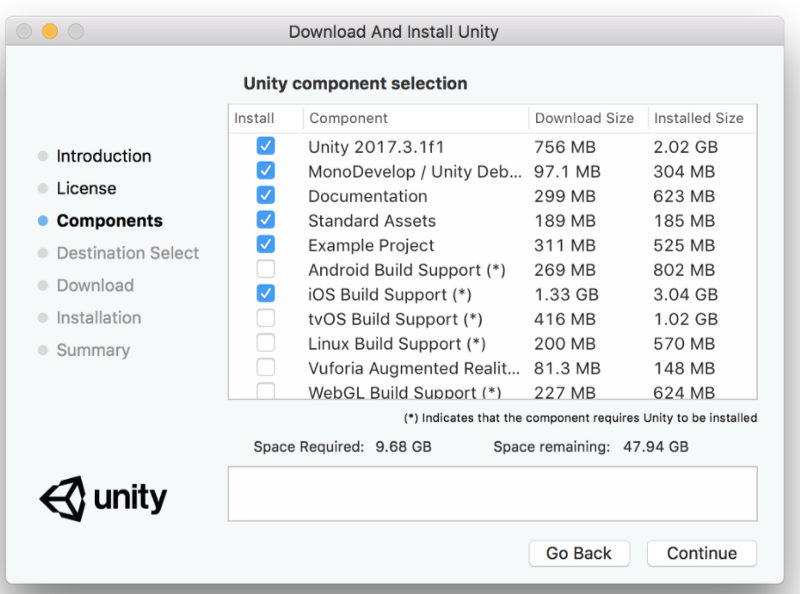
In case you don’t have it already, download and install the latest version of Xcode for your Mac and Unity.
Install the personal free version of Unity, but make sure “iOS build Support” is checked.
You will also need a iOS developer account and iPhone, preferably, to take the AR app you build out for a spin.
Step 2: Setup a Unity project with ARKit plugin
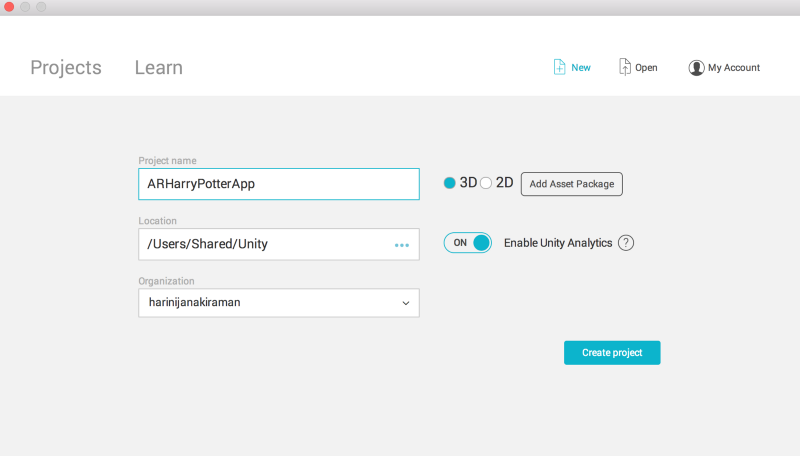
Create a new 3D project called “ARHarryPotterApp”.
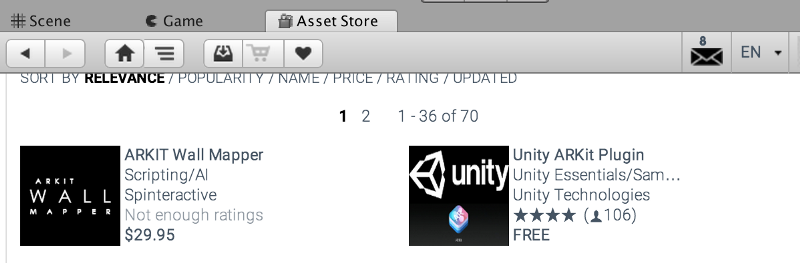
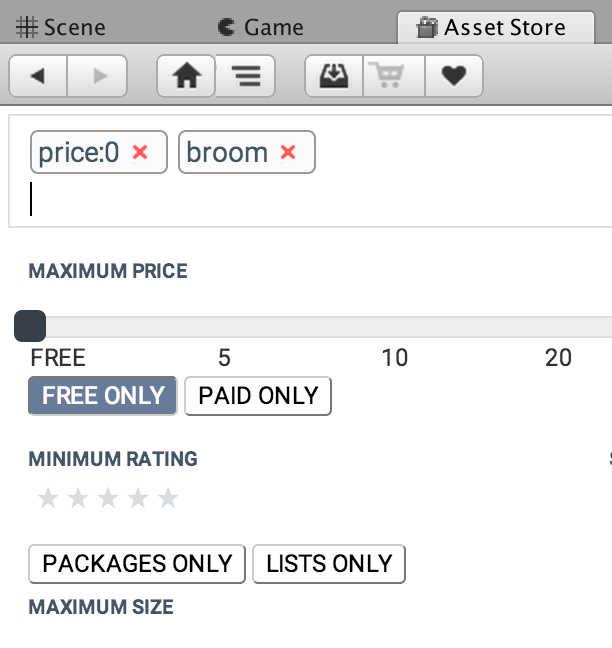
Once the project is created, from the “Asset Store” tab, download ARKit into your project.
Step 3: Create the AR scene and add assets
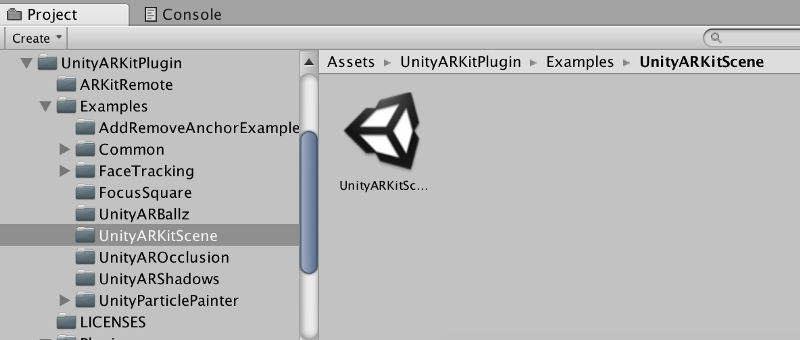
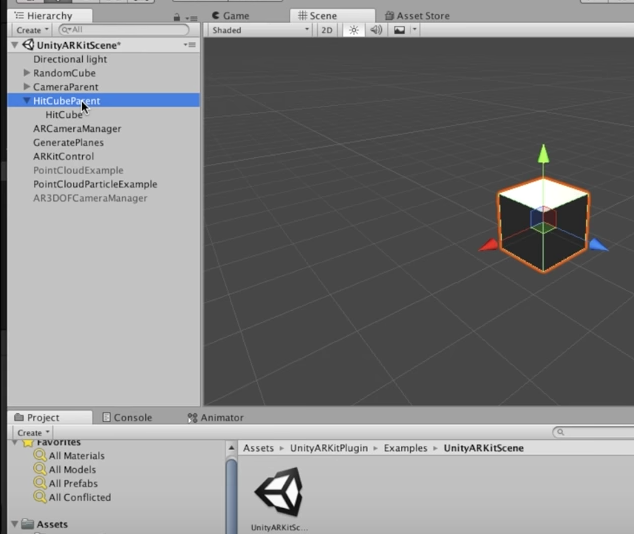
Let’s start off with an example scene that comes packaged with the downloaded ARKit asset. Navigate to the example scene on the left panel and double click open “UnityARKitScene”.
This will open up a basic cube asset placed in the “Scene” tab, which is your field of view. The “HitCube” asset here can easily to be replaced with any asset of your choice to create your own unique augmented reality scene.
There are several properties of each asset shown on the Inspector panel on the right, such as shadow/lighting/rending and so on. We will not go into detail about these properties here (but I’ll discuss them more in an upcoming post).

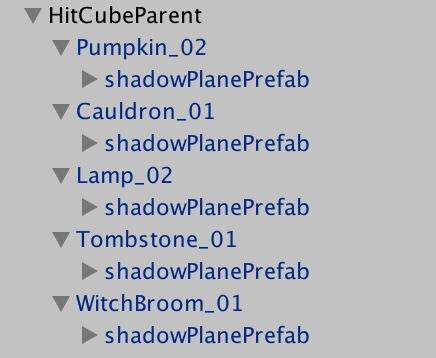
You need to watch out for two things here in the example. They’ll need to be repeated for any new asset added to the scene:
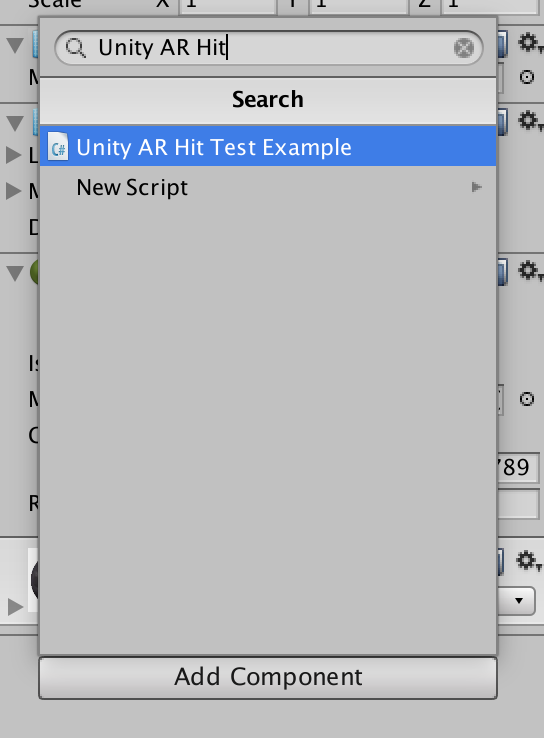
- On the inspector pane, Add “Unity AR Hit Test Example” component and attach it to a script.
- Drag and drop “HitCubeParent” on the left panel onto the “Hit Transform” in the inspector panel on the right in the “Unity AR Hit Test Example” component.
Make sure you complete these two steps for any new asset added to the scene, as this helps place the object in the horizontal plane.
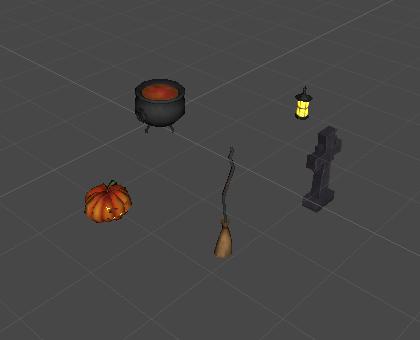
For our app, we will place random Harry Potter PortKeys in the scene from the free “Halloween Pack” downloaded from the asset store.

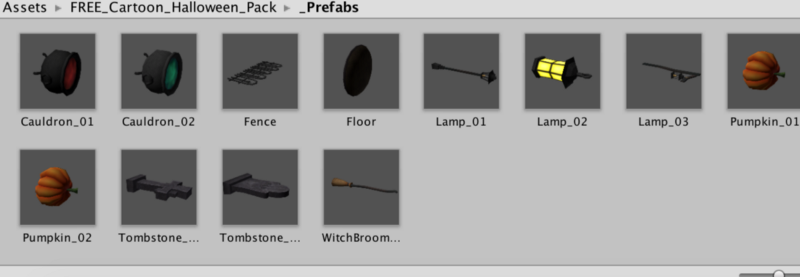
Place the assets that you fancy in the scene and make sure you add the components “Unity AR Hit Test Example” and “Hit Transform” to each of these assets as shown below.
Step 4: Building the app
Finally, now it’s time to build the app. Select File -> Build Settings. Check “Unity ARKitScene” and select iOS platform, and then click “Switch Platform”. This will import assets and setup the stage.
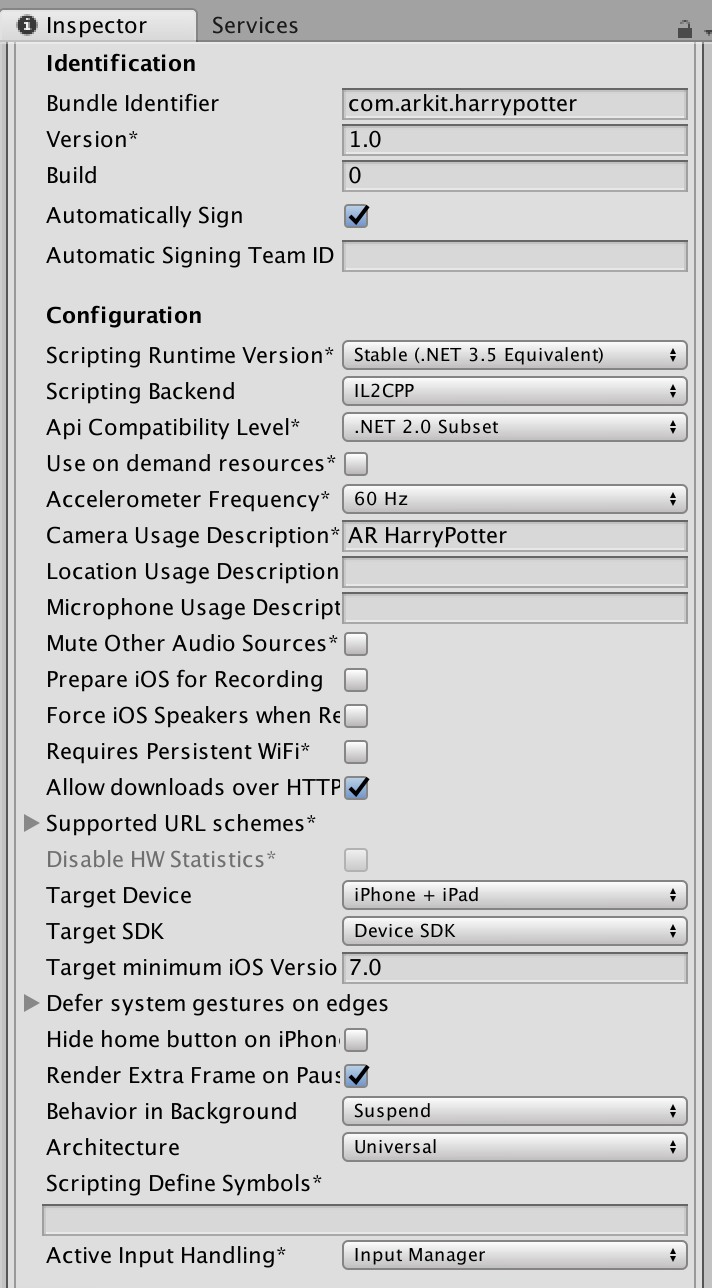
You can then click player settings and check the inspector to make sure “Target device”, “Target min iOS version”, and “sdk” are all set up as you want through your system settings.
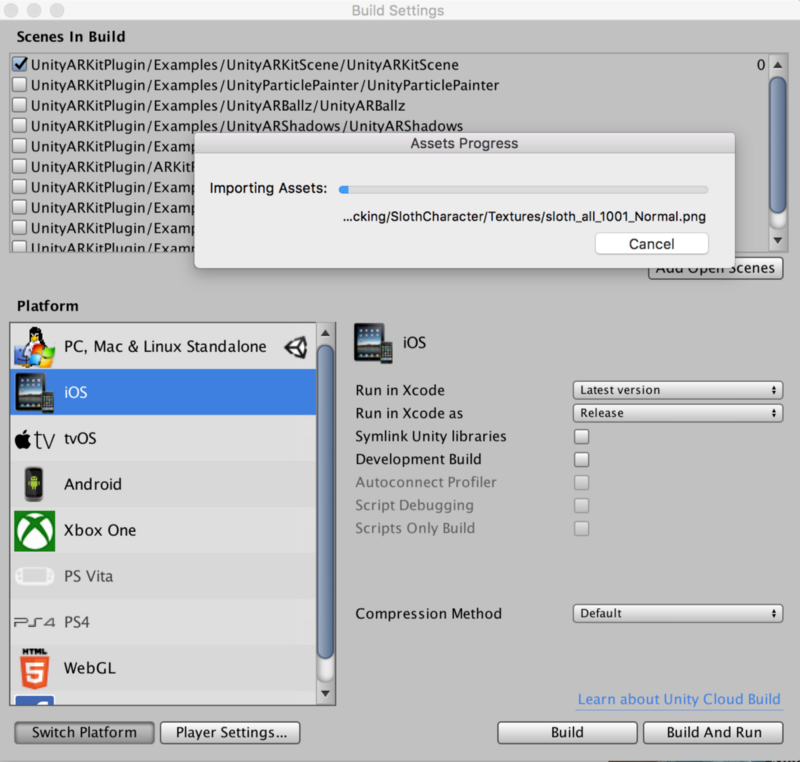

At this point, you are ready to “Build” the app and select your destination directory…this could take a while.
Step 5: Run your very first AR app
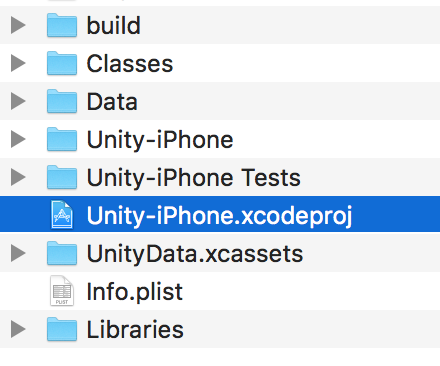
Once the build is complete, open the xcodeproj from the destination folder of the build. Connect your iPhone (with compatible iOS and xcode versions), sign the project to your Team (you will need an iOS dev account), and launch the app.

Violà, your very first AR app is ready! Look around in the field of view, spot the Harry Potter PortKeys, and be transported away to a magical land ;)
If you enjoyed this, please clap ? so others can see it as well! Follow me on Twitter @HariniLabs or Medium to get the latest updates on other stories or just to say Hi :)
PS: Sign up for my newsletter here to be the first to get fresh new content and it’s filled with a dose of inspiration from the world of #WomenInTech and yes men can signup too!