by Ayusch Jain
How to build an Augmented Reality Android App with ARCore and Android Studio

This article was originally posted here
In the previous post, I explained what ARCore is and how it helps developers build awesome augmented reality apps without the need to understand OpenGL or Matrix maths.
If you haven’t checked it out yet, I highly recommend doing so before moving ahead with this article and diving into ARCore app development.
Overview
According to Wikipedia, ARCore is a software development kit developed by Google that allows for augmented reality applications to be built.
ARCore uses three key technologies to integrate virtual content with the real environment:
- Motion Tracking: it allows the phone to understand its position relative to the world.
- Environmental understanding: This allows the phone to detect the size and location of all type of surfaces, vertical, horizontal and angled.
- Light Estimation: it allows the phone to estimate the environment’s current lighting conditions.
Getting Started
To get started with ARCore app development, you first need to enable ARCore in your project. This is simple as we will be using Android Studio and Sceneform SDK. There are two major operations Sceneform performs automatically:
- Checking for availability of ARCore
- Asking for camera permission
You don’t need to bother with these two steps when creating an ARCore app using Sceneform SDK. But you do need to include Sceneform SDK in your project.
Create a new Android Studio project and select an empty activity.
Add the following dependency to your project level build.gradle file:
dependencies { classpath 'com.google.ar.sceneform:plugin:1.5.0'}Add the following to your app level build.gradle file:
implementation "com.google.ar.sceneform.ux:sceneform-ux:1.5.0"Now sync project with Gradle files and wait for the build to finish. This will install the Sceneform SDK to the project and Sceneform plugin to AndroidStudio. It will help you to view the .sfb files. These files are the 3D models which are rendered in your camera. It also helps you in importing, viewing, and building 3D assets.
Building your first ARCore app
Now with our Android Studio setup complete and Sceneform SDK installed, we can get started with writing our very first ARCore app.
First, we need to add the Sceneform fragment to our layout file. This will be the Scene where we place all our 3D models. It takes care of the camera initialization and permission handling.
Head over to your main layout file. In my case it is activity_main.xml and add the Sceneform fragment:
<?xml version="1.0" encoding="utf-8"?><FrameLayout xmlns:android="http://schemas.android.com/apk/res/android" xmlns:tools="http://schemas.android.com/tools" android:layout_width="match_parent" android:layout_height="match_parent" tools:context=".MainActivity"> <fragment android:name="com.google.ar.sceneform.ux.ArFragment" android:id="@+id/ux_fragment" android:layout_width="match_parent" android:layout_height="match_parent" /></FrameLayout>I’ve set the width and height to match parent as this will cover my entire activity. You can choose the dimensions according to your requirements.
Compatibility Check
This is all that you need to do in the layout file. Now head over to the java file, in my case which is MainActivity.java. Add the method below in your class:
public static boolean checkIsSupportedDeviceOrFinish(final Activity activity) { if (Build.VERSION.SDK_INT < Build.VERSION_CODES.N) { Log.e(TAG, "Sceneform requires Android N or later"); Toast.makeText(activity, "Sceneform requires Android N or later", Toast.LENGTH_LONG).show(); activity.finish(); return false; } String openGlVersionString = ((ActivityManager) activity.getSystemService(Context.ACTIVITY_SERVICE)) .getDeviceConfigurationInfo() .getGlEsVersion(); if (Double.parseDouble(openGlVersionString) < MIN_OPENGL_VERSION) { Log.e(TAG, "Sceneform requires OpenGL ES 3.0 later"); Toast.makeText(activity, "Sceneform requires OpenGL ES 3.0 or later", Toast.LENGTH_LONG) .show(); activity.finish(); return false; } return true;}This method checks whether your device can support Sceneform SDK or not. The SDK requires Android API level 27 or newer and OpenGL ES version 3.0 or newer. If a device does not support these two, the Scene would not be rendered and your application will show a blank screen.
Although, you can still continue to deliver all the other features of your app which don’t require the Sceneform SDK.
Now with the device compatibility check complete, we shall build our 3D model and attach it to the scene.
Adding the assets
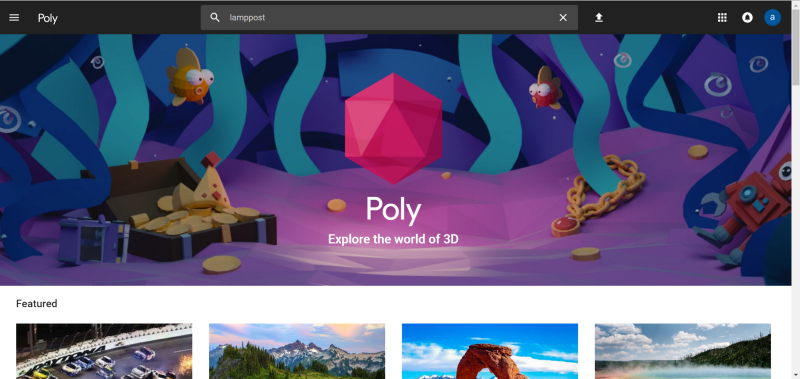
You will need to add the 3D models which will be rendered on your screen. Now you can build these models yourself if you are familiar with 3D model creation. Or, you can visit Poly.
There you’ll find a huge repository of 3D assets to choose from. They are free to download. Just credit the creator and you are good to go.

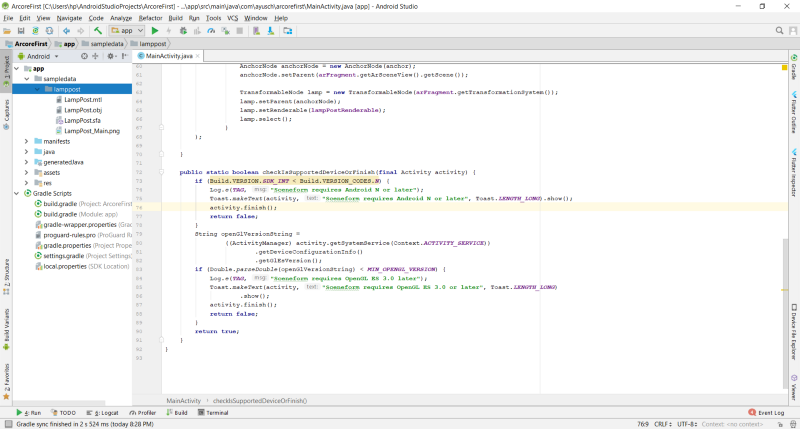
In the Android Studio, expand your app folder available on the left-hand side project pane. You’ll notice a “sampledata” folder. This folder will hold all of your 3D model assets. Create a folder for your model inside the sample data folder.
When you download the zip file from poly, you will most probably find 3 files.
- .mtl file
- .obj file
- .png file
Most important of these 3 is the .obj file. It is your actual model. Place all the 3 files inside sampledata -> “your model’s folder”.

Now right click on the .obj file. The first option would be to Import Sceneform Asset. Click on it, do not change the default settings, just click finish on the next window. Your gradle will sync to include the asset in the assets folder. Once the gradle build finishes, you are good to go.
You’ve finished importing a 3D asset used by Sceneform in your project. Next, let’s build the asset from our code and include it in the scene.
Building the Model
Add the following code to your MainActivity.java file (or whatever it is in your case). Don’t worry, I’ll explain all the code line by line:
private static final String TAG = MainActivity.class.getSimpleName();private static final double MIN_OPENGL_VERSION = 3.0;ArFragment arFragment;ModelRenderable lampPostRenderable;@Override@SuppressWarnings({"AndroidApiChecker", "FutureReturnValueIgnored"})protected void onCreate(Bundle savedInstanceState) { super.onCreate(savedInstanceState); if (!checkIsSupportedDeviceOrFinish(this)) { return; } setContentView(R.layout.activity_main); arFragment = (ArFragment) getSupportFragmentManager().findFragmentById(R.id.ux_fragment); ModelRenderable.builder() .setSource(this, Uri.parse("LampPost.sfb")) .build() .thenAccept(renderable -> lampPostRenderable = renderable) .exceptionally(throwable -> { Toast toast = Toast.makeText(this, "Unable to load andy renderable", Toast.LENGTH_LONG); toast.setGravity(Gravity.CENTER, 0, 0); toast.show(); return null; });}First, we find the arFragment that we included in the layout file. This fragment is responsible for hosting the scene. You can think of it as the container of our scene.
Next, we are using the ModelRenderable class to build our model. With the help of setSource method, we load our model from the .sfb file. This file was generated when we imported the assets. thenAccept method receives the model once it is built. We set the loaded model to our lampPostRenderable.
For error handling, we have .exceptionally method. It is called in case an exception is thrown.
All this happens asynchronously, hence you don’t need to worry about multi-threading or deal with handlers XD
With the model loaded and stored in the lampPostRenderable variable, we’ll now add it to our scene.
Adding the Model to Scene
The arFragment hosts our scene and will receive the tap events. So we need to set the onTap listener to our fragment to register the tap and place an object accordingly. Add the following code to onCreate method:
arFragment.setOnTapArPlaneListener( (HitResult hitresult, Plane plane, MotionEvent motionevent) -> { if (lampPostRenderable == null){ return; } Anchor anchor = hitresult.createAnchor(); AnchorNode anchorNode = new AnchorNode(anchor); anchorNode.setParent(arFragment.getArSceneView().getScene()); TransformableNode lamp = new TransformableNode(arFragment.getTransformationSystem()); lamp.setParent(anchorNode); lamp.setRenderable(lampPostRenderable); lamp.select(); });We set the onTapArPlaneListener to our AR fragment. Next what you see is the Java 8 syntax, in case you are not familiar with it, I would recommend checking out this guide.
First, we create our anchor from the HitResult using hitresult.createAnchor() and store it in an Anchor object.
Next, create a node out of this anchor. It will be called AnchorNode. It will be attached to the scene by calling the setParent method on it and passing the scene from the fragment.
Now we create a TransformableNode which will be our lamppost and set it to the anchor spot or our anchor node. The node still doesn’t have any information about the object it has to render. We’ll pass that object using lamp.setRenderable method which takes in a renderable as it’s parameter. Finally call lamp.select();
Phew!! Too much terminology there, but don’t worry, I’ll explain it all.
- Scene: This is the place where all your 3D objects will be rendered. This scene is hosted by the AR Fragment which we included in the layout. An anchor node is attached to this screen which acts as the root of the tree and all the other objects are rendered as its objects.
- HitResult: This is an imaginary line (or a ray) coming from infinity which gives the point of intersection of itself with a real-world object.
- Anchor: An anchor is a fixed location and orientation in the real world. It can be understood as the x,y,z coordinate in the 3D space. You can get an anchor’s post information from it. Pose is the position and orientation of the object in the scene. This is used to transform the object’s local coordinate space into real-world coordinate space.
- AnchorNode: This is the node that automatically positions itself in the world. This is the first node that gets set when the plane is detected.
- TransformableNode: It is a node that can be interacted with. It can be moved around, scaled rotated and much more. In this example, we can scale the lamp and rotate it. Hence the name Transformable.
There is no rocket science here. It’s really simple. The entire scene can be viewed as a graph with Scene as the parent, AnchorNode as its child and then branching out different nodes/objects to be rendered on the screen.
Your final MainActivity.java must look something like this:
package com.ayusch.arcorefirst;import android.app.Activity;import android.app.ActivityManager;import android.content.Context;import android.net.Uri;import android.os.Build;import android.support.v7.app.AppCompatActivity;import android.os.Bundle;import android.util.Log;import android.view.Gravity;import android.view.MotionEvent;import android.widget.Toast;import com.google.ar.core.Anchor;import com.google.ar.core.HitResult;import com.google.ar.core.Plane;import com.google.ar.sceneform.AnchorNode;import com.google.ar.sceneform.rendering.ModelRenderable;import com.google.ar.sceneform.ux.ArFragment;import com.google.ar.sceneform.ux.TransformableNode;public class MainActivity extends AppCompatActivity { private static final String TAG = MainActivity.class.getSimpleName(); private static final double MIN_OPENGL_VERSION = 3.0; ArFragment arFragment; ModelRenderable lampPostRenderable; @Override @SuppressWarnings({"AndroidApiChecker", "FutureReturnValueIgnored"}) protected void onCreate(Bundle savedInstanceState) { super.onCreate(savedInstanceState); if (!checkIsSupportedDeviceOrFinish(this)) { return; } setContentView(R.layout.activity_main); arFragment = (ArFragment) getSupportFragmentManager().findFragmentById(R.id.ux_fragment); ModelRenderable.builder() .setSource(this, Uri.parse("LampPost.sfb")) .build() .thenAccept(renderable -> lampPostRenderable = renderable) .exceptionally(throwable -> { Toast toast = Toast.makeText(this, "Unable to load andy renderable", Toast.LENGTH_LONG); toast.setGravity(Gravity.CENTER, 0, 0); toast.show(); return null; }); arFragment.setOnTapArPlaneListener( (HitResult hitresult, Plane plane, MotionEvent motionevent) -> { if (lampPostRenderable == null){ return; } Anchor anchor = hitresult.createAnchor(); AnchorNode anchorNode = new AnchorNode(anchor); anchorNode.setParent(arFragment.getArSceneView().getScene()); TransformableNode lamp = new TransformableNode(arFragment.getTransformationSystem()); lamp.setParent(anchorNode); lamp.setRenderable(lampPostRenderable); lamp.select(); } ); } public static boolean checkIsSupportedDeviceOrFinish(final Activity activity) { if (Build.VERSION.SDK_INT < Build.VERSION_CODES.N) { Log.e(TAG, "Sceneform requires Android N or later"); Toast.makeText(activity, "Sceneform requires Android N or later", Toast.LENGTH_LONG).show(); activity.finish(); return false; } String openGlVersionString = ((ActivityManager) activity.getSystemService(Context.ACTIVITY_SERVICE)) .getDeviceConfigurationInfo() .getGlEsVersion(); if (Double.parseDouble(openGlVersionString) < MIN_OPENGL_VERSION) { Log.e(TAG, "Sceneform requires OpenGL ES 3.0 later"); Toast.makeText(activity, "Sceneform requires OpenGL ES 3.0 or later", Toast.LENGTH_LONG) .show(); activity.finish(); return false; } return true; }}Congratulations!! You’ve just completed your first ARCore app. Start adding objects and see them come alive in the real world!
This was your first look into how to create a simple ARCore app from scratch with Android studio. In the next tutorial, I would be going deeper into ARCore and adding more functionality to the app.
If you have any suggestions or any topic you would want a tutorial on, just mention in the comments section and I’ll be happy to oblige.
Like what you read? Don’t forget to share this post on Facebook, Whatsapp and LinkedIn.
You can follow me on LinkedIn, Quora, Twitter and Instagram where I answer questions related to Mobile Development, especially Android and Flutter.
