
One thing I struggled with when I started learning React was testing my web apps in a way that is both useful and intuitive. I used Enzyme with Jest to shallow render a component every time I wanted to test it.
Of course, I was absolutely abusing the snapshot testing feature.
Well, at least I wrote a test right?
You might have heard somewhere that writing unit and integration tests will improve the quality of the software you write. Having bad tests, on the other hand, breeds false confidence.
Recently, I attended a workshop through workshop.me with Kent C. Dodds where he taught us how to write better integration tests for React applications.
He also tricked us into using his new testing library, in favor of its emphasis on testing the application in the same way that a user would encounter it.
In this article, we will learn to exercise TDD in order to build solid React applications by creating a comment feed. Of course, this process applies to just about all software development, not just React or JavaScript apps.
Getting Started
We’re going to start off by running create-react-app and installing the dependencies. My assumption is that if you’re reading an article about testing applications, you’re probably already a familiar with installing and starting up JavaScript projects. I’ll be using yarn rather than npm here.
create-react-app comment-feedcd comment-feedyarnAs it stands, we can remove all of the files in the src directory except for index.js. Then, right inside the src folder, create a new folder called components and another folder called containers.
For testing utilities, I am going to build this app using Kent’s React Testing Library. It is a lightweight test utility that encourages the developer to test their application in the same way that it’ll be used.
Like Enzyme, it exports a render function, but this render function always does a full mount of your component. It exports helper methods allowing you to locate elements by label or text or even test IDs. Enzyme does that as well with its mount API, but the abstraction it creates actually offers more options, many of which allow you to get away with testing implementation details.
We don’t want to test implementation details anymore. We want to render a component and see if the right things happen when we click or change something on the UI. That’s it! No more directly checking props or state or class names.
Let’s install them and get to work.
yarn add react-testing-libraryBuilding the Comment Feed with TDD
Let’s do this first component TDD-style. Fire up your test runner.
yarn test --watchInside the containers folder, we are going to add a file called CommentFeed.js. Alongside it, add a file called CommentFeed.test.js. For the very first test, let’s verify that users can create comments. Too soon? Okay, since we don’t have any code yet, we’ll start with a smaller test. Let’s check that we can render the feed.
Some notes on react-testing-library
First, let’s note the render function here. It is similar to the way react-dom renders a component onto the DOM, but it returns an object which we can destructure to get some neat test helpers. In this case, we get queryByText, which, given some text we expect to see on the DOM, will return that HTML element.
The React Testing Library docs have a hierarchy that should help you decide which query or get method to use. Generally, the order goes like this:
getByLabelText(form inputs)getByPlaceholderText(only if your input doesn’t have a label — less accessible!)getByText(buttons and headers)getByAltText(images)getByTestId(use this for things like dynamic text or otherwise odd elements you want to test)
Each of these has an associated queryByFoo that does the same, except won’t fail your test when it doesn’t find an element. Use these if you’re just testing for the existence of an element.
If none of these get you exactly what you’re looking for, the render method also returns the DOM element mapped to the container property, so you can use it like container.querySelector(‘body #root’).
The First Implementation Code
Now, the implementation will look fairly simple. We just need to make sure that “Comment Feed” is in the component.
It could be worse — I mean, I was about to write this whole article while styling components. Fortunately, tests don’t care too much for styles, so we can focus on our application logic.
This next test will verify that we can render comments. But we don’t even have any comments, so let’s add in that component too. After the test though.
I’m also going to create a props object to store the data we may reuse in these tests.
In this case, I am checking that the number of comments is equal to the number of items passed into the CommentFeed. It’s trivial, but the failure of the test gives us the opportunity to create the Comment.js file.
This green lights our test suite so we can proceed without fear. All hail TDD, the savior of our kind. It works when we give it an empty array, of course. But what if we give it some real objects?
We must update our implementation to actually render stuff. Simple enough now that know where we’re going, right?
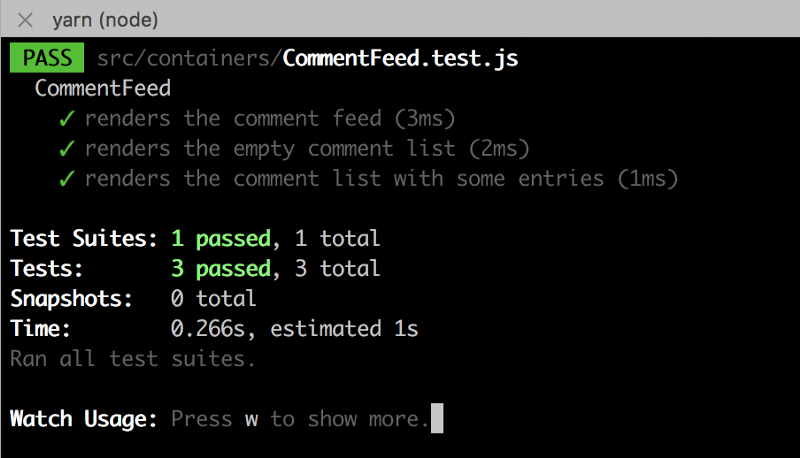
Ah look at that, our test is once again passing. Here’s a neat shot of its beauty.
Notice how I never once said we should fire up our program with yarn start? We’re going to keep it that way for a while. The point is, you must feel the code with your mind.
The styling is just what’s on the outside — it’s what is on the inside that counts.
Just in case you want to start the app though, update index.js to the following:
Add Comment Form
This is where things start getting more fun. This is where we go from sleepily checking for the existence of DOM nodes to actually doing stuff with that and validating behavior. All that other stuff was a warmup.
Let’s start by describing what I want from this form. It should:
- contain a text input for the author
- contain a text input for then comment itself
- have a submit button
- eventually call the API or whatever service handles creating and storing the comment.
We can take down this list in a single integration test. For the previous test cases we took it rather slowly, but now we’re going to pick up the pace and try to nail it in one fell swoop.
Notice how our test suite is developing? We went from hard-coding props inside their own test cases to creating a factory for them.
Arrange, Act, Assert
This following integration test can be broken into three parts: arrange, act, and assert.
- Arrange: create props and other fixtures for the test case
- Act: simulate changes to the elements such as text inputs or button clicks
- Assert: assert that the desired functions were invoked the right number of times, and with the correct arguments
There are some assumptions made about the code, like the naming of our labels or the fact that we will have a createComment prop.
When finding inputs, we want to try to find them by their labels. This prioritizes accessibility when we’re building our applications. The easiest way to grab the form is by using container.querySelector.
Next, we must assign new values to the inputs and simulate the change to update their state. This step may feel a little strange, since normally we type one character at a time, updating the component’s state for each new character.
This test behaves more like the behavior of copy/paste, going from empty string to ‘Socrates’. No breaking issues for now, but we may want to make note of that in case it comes up later.
After submitting the form, we can make assertions on things like which props were invoked and with what arguments. We could also use this moment to verify that the form inputs cleared.
Is it intimidating? No need to fear, my child, walk this way. Start by adding the form to your render function.
I could break this form into its own separate component, but I will refrain for now. Instead, I’ll add it to my “Refactor Wish List” I keep beside my desk.
This is the way of TDD. When something seems like it can be refactored, make a note of it and move on. Refactor only when the presence of an abstraction benefits you and doesn’t feel unnecessary.
Remember when we refactored our test suite by creating the createProps factory? Just like that. We can refactor tests, too.
Now, let’s add in the handleChange and handleSubmit class methods. These get fired when we change an input or submit our form. I will also initialize our state.
And that did it. Our tests are passing and we have something that sort of resembles a real application. How does our coverage look?
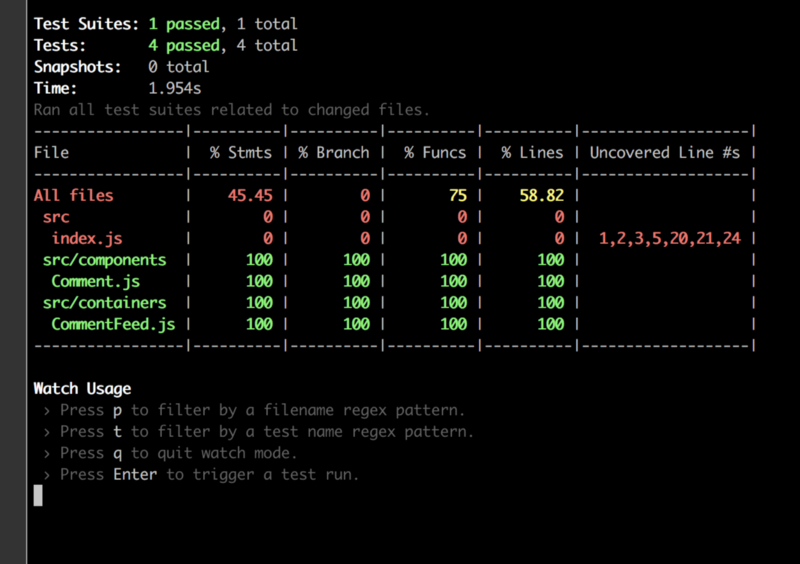
Not bad. If we ignore all of the setups that go inside index.js, we have a fully covered web application with respect to lines executed.
Of course, there are probably other cases we want to test in order to verify that the application is working as we intend. That coverage number is just something your boss can brag about when they’re talking to the other cohorts.
Liking Comments
How about we check that we can like a comment? This may be a good time to establish some concept of authentication within our application. But we’ll not jump too far just yet. Let’s first update our props factory to add an auth field along with IDs for the comments we generate.
The user who is “authenticated” will have their auth property passed down through the application. Any actions that are relevant to whether they are authenticated will be noted.
In many applications, this property may contain some sort of access token or cookie that is sent up when making requests to the server.
On the client, the presence of this property lets the application know that they can let the user view their profile or other protected routes.
In this testing example, however, we will not fiddle too hard with authentication. Imagine a scenario like this: When you enter a chatroom, you give your screen name. From that point on, you are in charge of every comment that uses this screen name, despite who else signed in with that name.
While it is not a great solution, even in this contrived example, we are only concerned with testing that the CommentFeed component behaves as it should. We are not concerned with how our users are logged in.
In other words, we may have a totally different login component that handles the authentication of a particular user, thus sending them through hoops of fire and fury in order to derive the almighty auth property that lets them wreak havoc in our application.
Let’s “like” a comment. Add this next test case and then update the props factory to include likeComment.
And now for the implementation, we’ll start by updating the Comment component to have a like button as well as a data-testid attribute so we can locate it.
I put the test ID directly on the button so that we can immediately simulate a click on it without having to nest query selectors. I also attached an onClick handler to the button so that it calls the onLike function passed down to it.
Now we just add this class method to our CommentFeed:
You may wonder why we don’t simply pass the likeComment prop directly to the Comment component. Why do we make it a class property?
In this case, because it is rather simple, we don’t have to build this abstraction. In the future, we may decide to add other onClick handlers that, for example, handle analytics events or initiate a subscription to that post’s future comments.
Being able to bundle multiple different function calls in the handleLike method of this container component has its advantages. We could also use this method to update the state of the component after a successful “Like” if we so choose.
Disliking Comments
At this point we have working tests for rendering, creating, and liking comments. Of course, we haven’t implemented the logic that actually does that — we’re not updating the store or writing to a database.
You might also notice that the logic we’re testing is fragile and not terribly applicable to a real-world comment feed. For example, what if we tried to like a comment we already liked? Will it increment the likes count indefinitely, or will it unlike it? Can I like my own comments?
I’ll leave extending the functionality of the components to your imagination, but a good start would be to write a new test case. Here’s one that builds off the assumption that we would like to implement disliking a comment we already liked:
Notice that this comment feed we’re building allows me to like my own comments. Who does that?
I have updated the Comment component with some logic to determine whether or not the current user has liked the comment.
Well I cheated a little bit: where we were passing author to the onLike function before, I changed to currentUser, which is the auth prop passed down to the Comment component.
After all, it wouldn’t make sense for the comment’s author to show up when someone else likes their comment.
I realized this because I was vigorously writing tests. Had I just been coding by coincidence this might’ve slipped past me until one of my coworkers berated me for my ignorance!
But there is no ignorance here, just tests and the code that follows. Be sure to update the CommentFeed so that it expects to pass down the auth property. For the onClick handlers we can omit passing around the auth property, since we can derive that from the auth property in the parent’s handleLike and handleDislike methods.
Wrapping up
Hopefully, your test suite is looking like an unlit Christmas tree.
There are so many different routes we can take at this, it can get a little overwhelming. Every time you get an idea for something, just write it down, either on paper or in a new test block.
For example, say you actually want to implement handleLike and handleDislike in one single class method, but you have other priorities right now. You can do this by documenting in a test case like so:
This doesn’t mean you need to write an entirely new test. You could also update the previous two cases. But the point is, you can use your test runner as a more imperative “To Do” list for your application.
Helpful Links
There are a few great pieces of content out there that deal with testing at large. Here are some in particular that inspired this article as well as my own practices.
- “Introducing the React Testing Library" by Kent C. Dodds. It’s a good idea to understand the philosophy behind this testing library.
- “Software Testing Anti-patterns" by Kostis Kapelonis. An extremely in-depth article that discusses unit and integration testing. Also how not to do them.
- “Test Driven Development by Example" by Kent Beck. This is a physical book that discusses TDD patterns. It is not too long and it is written conversationally, making it easy to digest.
I hope that’ll tide you over for a while.
Curious for more posts or witty remarks? If you enjoyed this article, give me some claps and follow me on Medium, Github, and Twitter!