by Nezar Assawiel
How to create and connect to Google Cloud Virtual Machine with SSH

Google Cloud offers many tools and services. One of these services is creating highly customizable virtual machines. If you are not familiar with what a virtual machine is, here is a definition from Microsoft:
A virtual machine is a computer file, typically called an image, that behaves like an actual computer. In other words, creating a computer within a computer. It runs in a window, much like any other program, giving the end user the same experience on a virtual machine as they would have on the host operating system itself. The virtual machine is sandboxed from the rest of the system, meaning that the software inside a virtual machine can’t escape or tamper with the computer itself.
Virtual machines are needed in many situations to test applications against other operating systems, to access virus-infected data, or to experiment with other operating systems. You can install virtual machines on your computer. You can also create them in the cloud and simply connect to them.
In this tutorial, I will walk you through how to create a virtual machine in Google Cloud. We can connect to it with SSH from your computer.
- If you don’t have one already, create a Google Cloud account from here.
You will get $300 credit to play around with for a year! It is more than enough to learn and play with everything Google Cloud offers.
2. Create a new project or use an existing one. You can create a new project called project1, for example, as in the following gif:

3. Now you are set to create a virtual machine. Go to the top left corner of your Google Cloud home page, click on the triple bar icon ≡ and select Compute Engine ->VM instance and click Create.
Enter whatever name you want in the Name field as shown below:
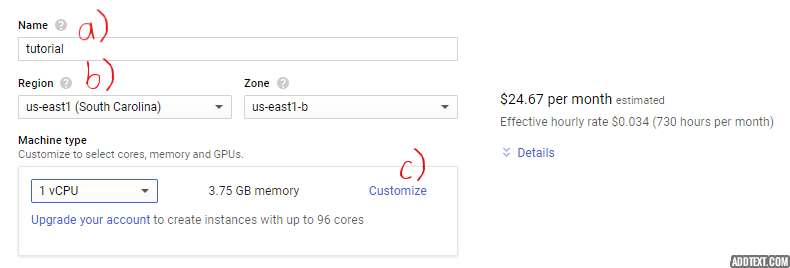
Keep the default region and zone. Any region/zone will do for this tutorial. If you are curious about what they mean, you can read Google Cloud’s documentation about them here.
You can keep default machine type or click Customize to select the number of CPU cores, memory, and GPUs you would like your virtual machine to have. You will see the cost on the right side changes!
For your first experiments with Google Cloud, you can be conservative with the $300 credit for some actual work. In such a case, you can choose the following configuration:
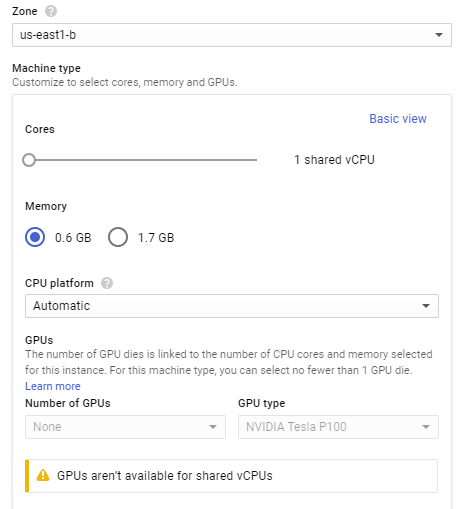
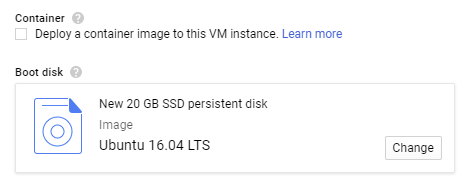
Next choose a boot disk. For example, you can choose 20 GB, SSD, Ubuntu 16.04 LTS as shown below:
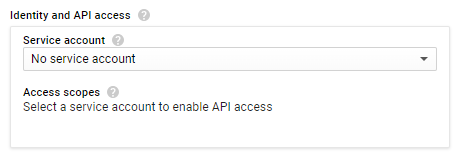
Then set the Service Account under Identity and API access to No service account as shown below:
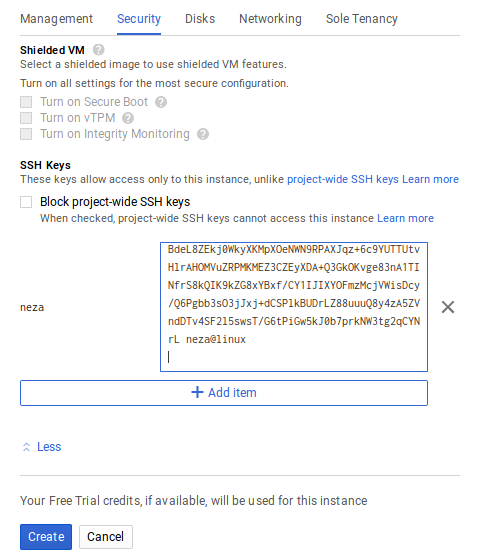
Finally, go to the Security tab under Firewall. You will see an SSH Key field as shown below:
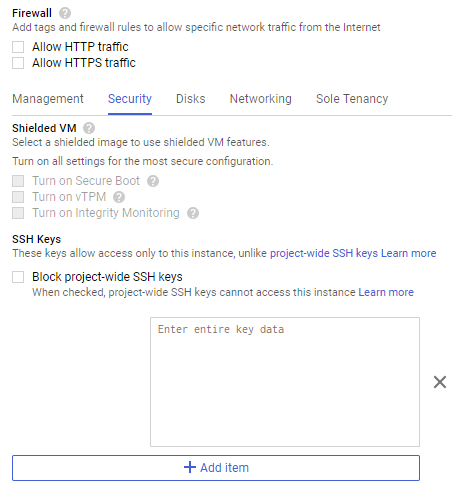
This where you are going to connect your computer to the virtual machine using your SSH Key!
If you are not familiar with SSH (Secure Shell) and why you may want to use it, it is a network protocol that provides encrypted data communication between two computers (your computer and Google’s servers, in this case) which are connected over an insecure network (the Internet here).
To establish an SSH connection, you may need an application that can do that, depending on your operating system. Follow the rest of this post depending on your operating system (Windows or Mac/Linux).
Windows
I recommend PuTTY. It is an open-source and easy to use SSH client. You can download PuTTY and install it from here.
After installing PuTTY, open PuTTY Key Generator and click create. It will generate a random key by you moving the mouse over the blank area. After it is done, you will get something like this:
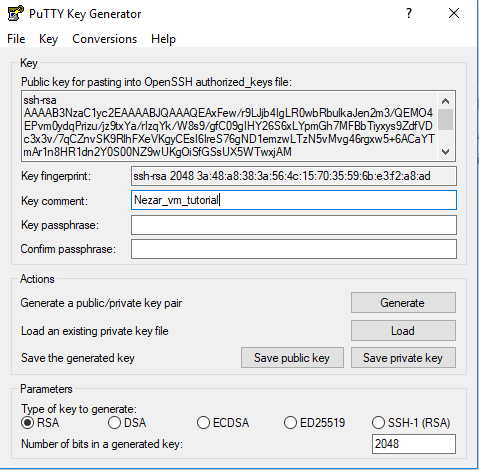
Change the key comment field to something recognizable and easy to type, as this will become a user name later!
Then save both the public and private keys by clicking the corresponding icons shown in the picture above.
Highlight the whole Key field from the PuTTY Key Generator, and copy and paste it in the key data field in Google Cloud:
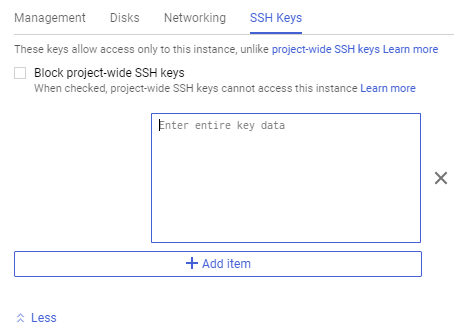
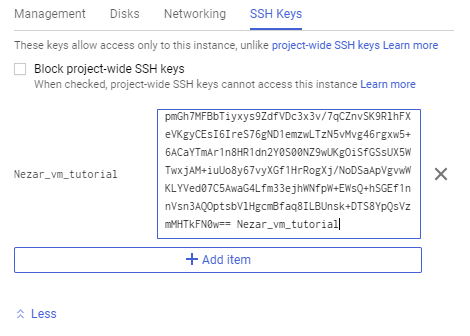
Click create and wait for the virtual machine instance to be created.
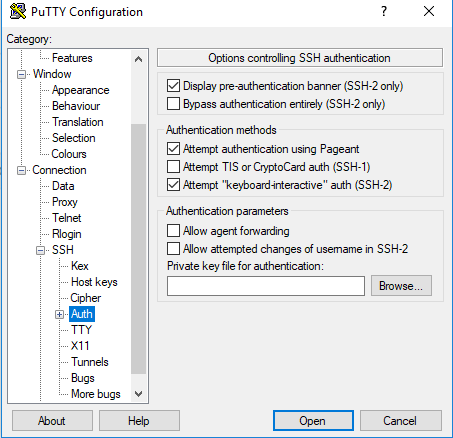
In the meantime, you can go to PuTTY. Go to SSH ->Auth and browse for the private key file that you saved.
Next, go to Google Cloud and copy the external IP from the virtual machine instance that you just created as shown below:

And paste it on the Host field under Sessions in PuTTY and hit Enter:
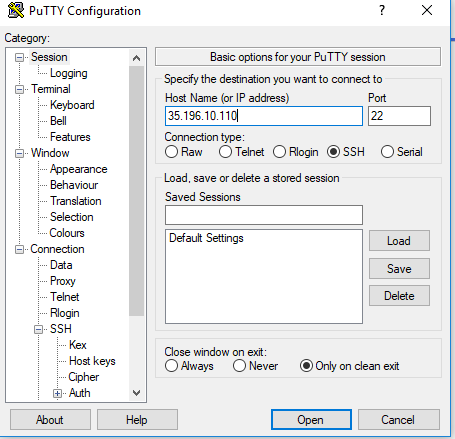
Note: you might get an error message. Ignore it and click yes. (It just says the key is not already in the registry. Are you sure you want to connect?)
Then enter the username you created when generating the key (key comment above). Boom! you are in the virtual machine that you just created.
You can install python and Google APIs on it, for example, to start making some magic! Don’t forget to shut it down in Google Cloud after you are done to be economic with your credit :)
Mac/Linux
Mac and Linux support SSH connection natively. You just need to generate an SSH key pair (public key/private key) to connect securely to the virtual machine.
The private key is equivalent to a password. Thus, it is kept private, residing on your computer, and should not be shared with any entity. The public key is shared with the computer or server to which you want to establish the connection. To generate the SSH key pair to connect securely to the virtual machine, follow these steps:
Enter the following command in Terminal: ssh-keygen -t rsa . It will start the key generation process. You will be prompted to choose the location to store the SSH key pair. Press ENTER to accept the default location as shown below:

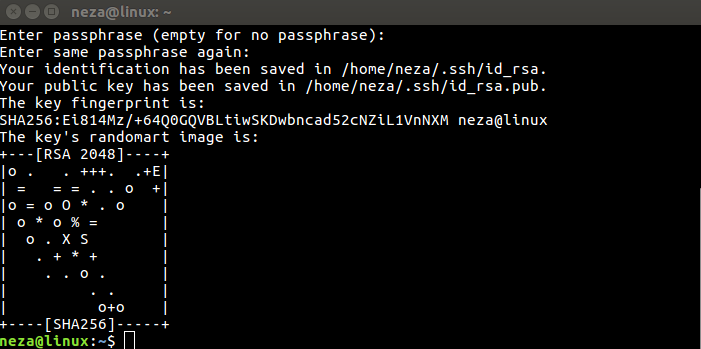
Next, choose a password for your login to the virtual machine or hit ENTER if you wish not to use a password. The private key (i.e. identification) and the public key will be generated as shown below:
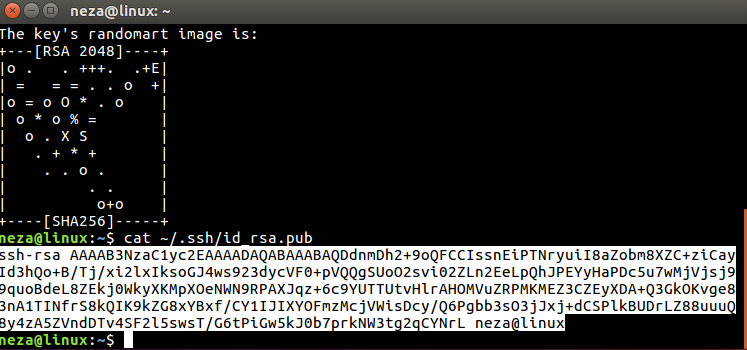
Now run the following command: cat ~/.ssh/id_rsa.pub . It will display the public key in the terminal as shown below. Highlight and copy this key:
and paste it in the SSH key field in Google Cloud and hit Create:
Now you can use the External IP of the virtual machine you just created:

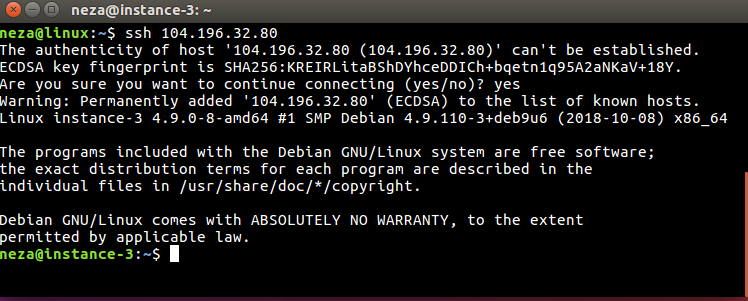
to ssh to it as follows:

You will get “The authenticity of host…etc.” warning as shown in the picture below. This is normal. Whenever SSH connects to a system it hasn’t seen before, it will generate a warning like this. Reply yes to connect, and bingo! You are in the virtual machine, as you can see from host name instance-3. To exit the virtual machine, just type exit.
Don’t forget to shut the virtual machine in Google Cloud after you are done to save that $300 credit!
Originally published at assawiel.com/blog on December 23, 2017. Updated: Oct 10, 2018
