
by Youssouf El Azizi
How to create your own auto direct message Twitter bot for free ?

Creating a welcome message for your new followers in Twitter is the first step to getting more people to engage with your tweets and links. As you might know, there are many online services that help you send auto direct messages (DMs) to your new followers. But I think it’s crazy how online services charge between $5 to $15 for a simple tool that creates bots, when you can build your own for free.
In this article, I will introduce my own Twitter bot that I built to send a welcome message to my new followers on Twitter. I’ll also show you how it has worked very well for me for six months.
By the end of this article, you’ll be able to build your own Twitter auto DM, from creating your message to deploying the bot, all for free!
This article consists of two sections. In the first section, I describe step-by-step how the script works and how you can easily contribute with other Twitter bot services. The second section is the step-by-step tutorial that tells you how to deploy and use the bot without even needing to know Node.js.
What do you need?
To develop this bot, we need:
- Node.js installed
- Twit : Twitter API Client for node (REST & Streaming API)
- Github Account
- Twitter Account
- Heroku Account to deploy the bot.
If you are not familiar with Nodejs, or maybe you are not a programmer, you can fork the project from GitHub and use it as your own.
Let’s get started.
Secont 1: Use Node.js
If you have already cloned the project to your computer, you will see this structure:
$ cd twitter-bot$ tree . .├── config.js├── index.js├── LICENSE├── package.json├── Procfile├── README.md└── src ├── AutoDM.js └── Twit.jsAs you can see, the project is a simple Node.js app with an index.js file as an entry point:
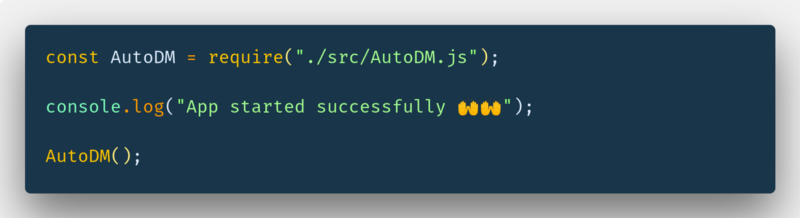
The index file is a simple script that imports and calls the AutoDM function.
To make the app more fun, I added a simple message that shows when the app has started successfully.
As I have already mentioned, I use the Twit package to connect to the Twitter API. To do that, we need to create a simple Twitter app and init the Twit instance with your App config like the following:
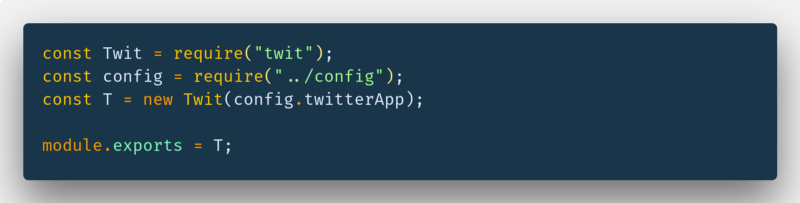
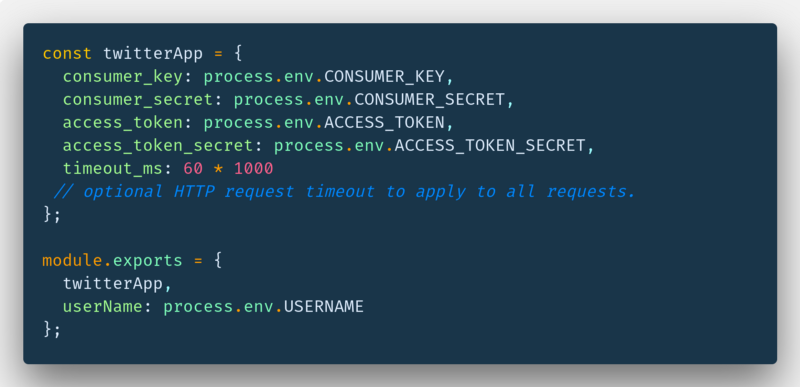
process.env.XXXXXXX is an environment variable that we need to add to our Heroku app in the deployment step.
Now the fun part is to Create the AutoDM function:
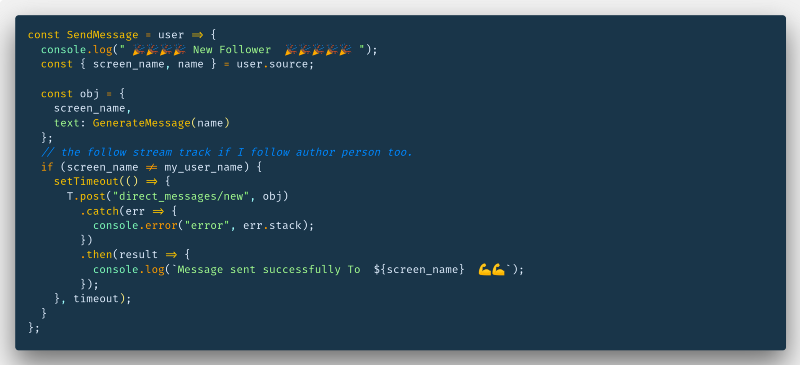
As you can see below, the AutoDM is a simple arrow function. It listens to the stream follow event from the twitter API, and executes the SendMessage function.
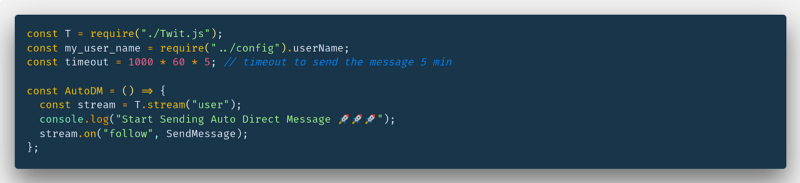
The sendMessge function gets, as a parameter, the user who follows you (screen_name). We need to create an obj with screen_name and a text message. We then send a post request to the Twitter API to send a DM to @screen_nameas per the following:
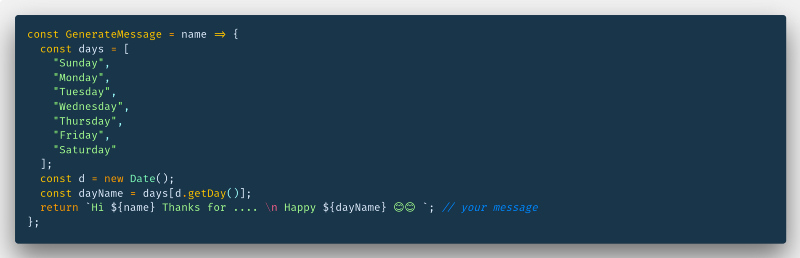
Now, think about how you would like to introduce yourself. You can modify the existing GenerateMessage function to create your own welcome message. Don’t forget to add some pleasantries in there — those increase the chance that the user clicks your link, or responds to your message.
It is easy, isn’t it? You can read more code from the Github repo.
Perhaps you are not convinced by the file structure of the project or why we can’t just use a simple file to do all this stuff. You’re right to wonder, but we are using this project structure to simplify contributing to the project. You can easily create a simple Twitter service like following or retweeting by exporting a function like autoDM in a new file and call it in the index file. So if you have any ideas to develop new services, feel free to create PRs or issue to request new services.
Create your Own Twitter Bot ?
Step 1: Github.
Fork the project repo in GitHub https://github.com/yjose/twitter-bot. You can give the repo a star to show your support.
Now, customize your welcome message by updating the GenerateMessage function and commit your changes.
Step 2 : Twitter
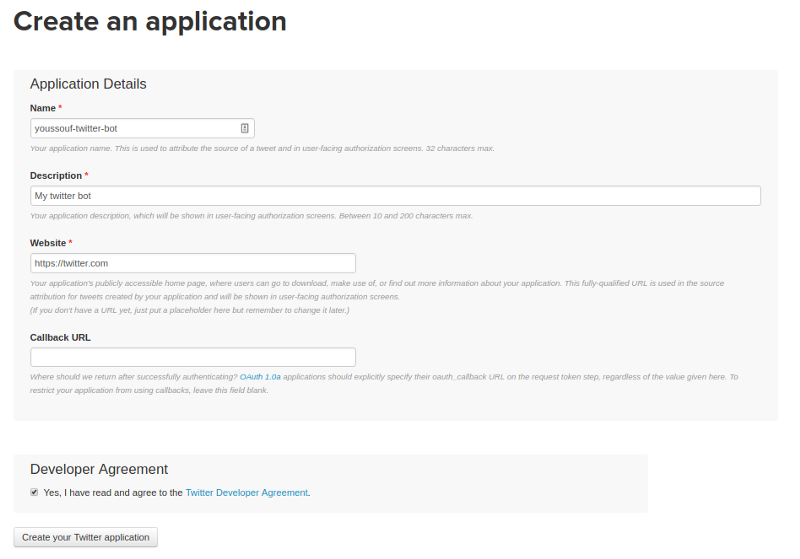
Create a Twitter app. Go to https://apps.twitter.com/, click to the button Create New App, and then complete all the fields as following:
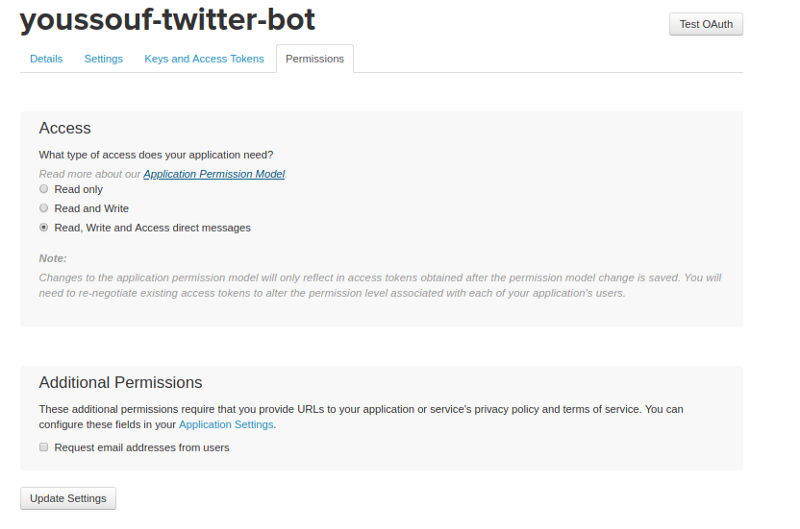
Go to the Permissions section and give the app the access to send Direct messages by checking the option Read,Write and Access direct messages.
Go to the tab Key and Access Tokens then click the Generate Access Token button at the bottom of the page.
Now copy all your keys Consumer Key, Consumer Secret , Access Token and Access Token Secret. We need to add all of them later as Heroku vars.
Step 3: Heroku
- Create a Heroku account. It’s free!
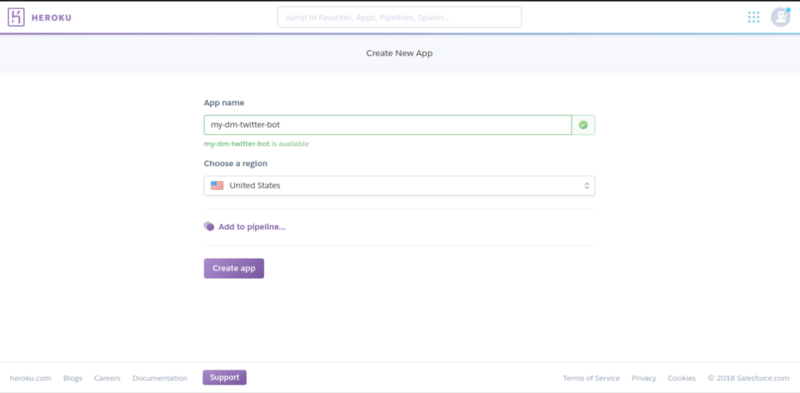
- Connect to your Heroku account and create a new app by clicking the
Newbutton, then theCreate new Appoption. - Choose your app name, then click
Create App
Choose Github as the Deployment method then click the connect button.
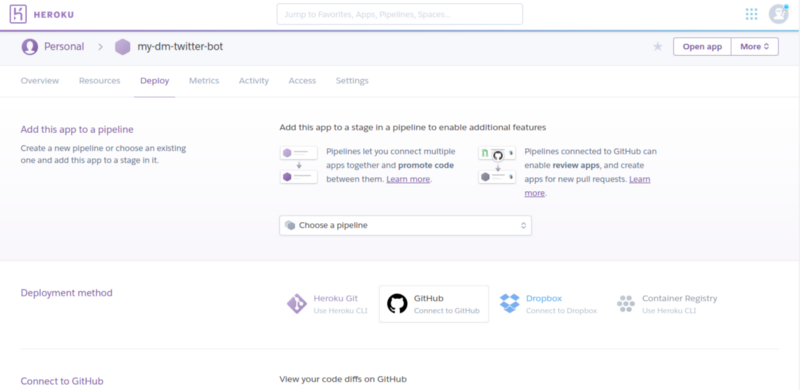
Type your bot repo name: `twitter-bot ` in your case.

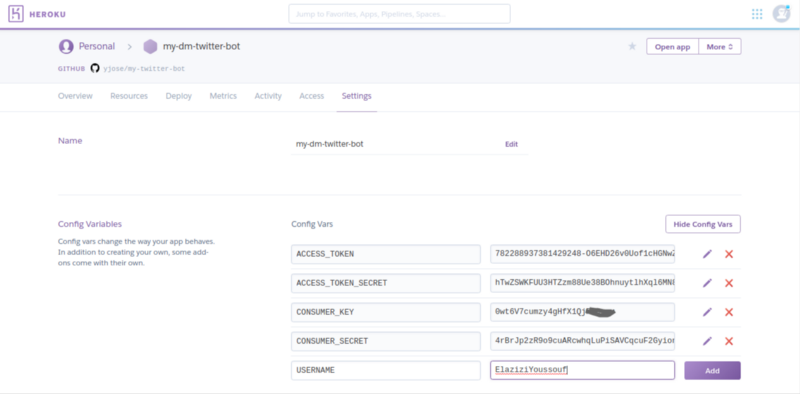
Now you need to add all keys as Heroku vars on the tab settings, and configure the Variables section.
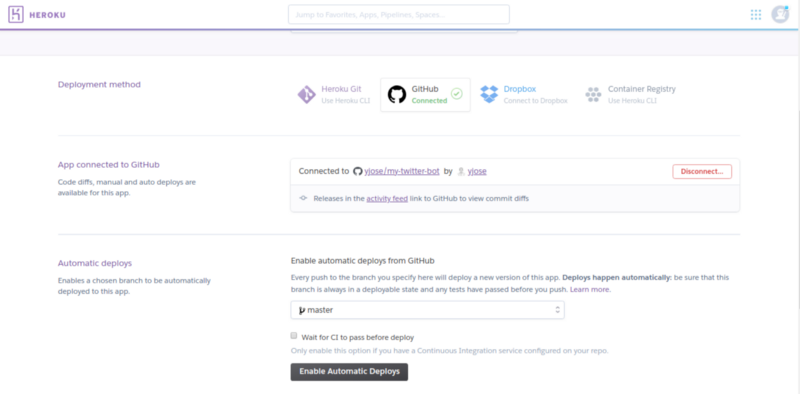
Return to the deploy section and click enable automatic deploys, then the deploy branch button to deploy your app for the first time.
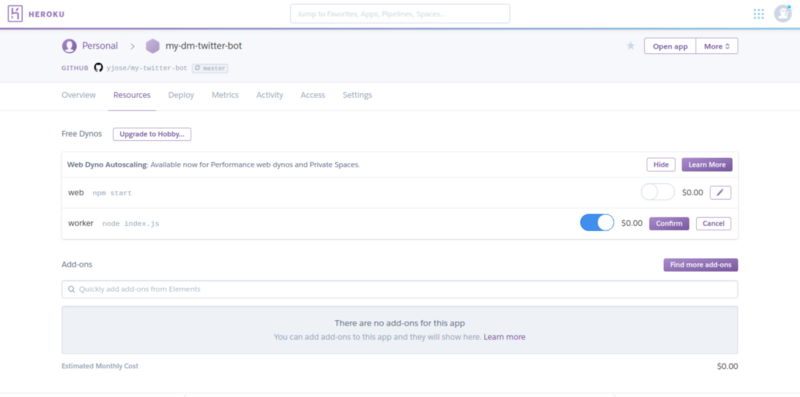
Go to the resources section, activate the worker dyno, and disable the web dyno.
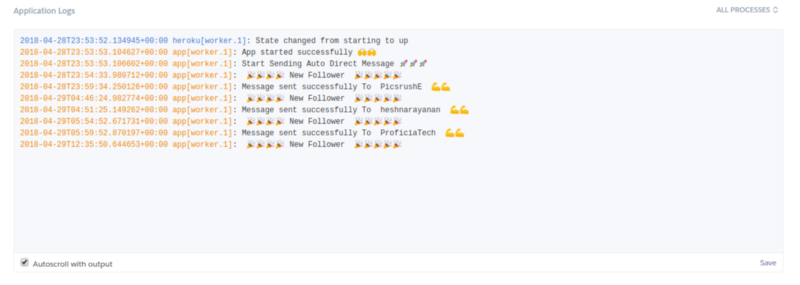
To know if your app has been started successfully, click the more button at the top right of the page and then click view logs option. You will find a simple console with some output similar to this screenshot. I have some new followers and the message has been sent successfully ?.
Live Demo
To make sure that the project works perfectly, you need just to follow me and my Twitter bot will send you a welcome message ?.
If you have any problem implementing this tutorial, let me know in the comments.
Thanks for reading! If you think other people should read this post and use this project, clap for me, tweet, and share the post.
Remember to follow me on Medium so you can get notified about my future posts.
Read more stories https://elazizi.com/