
by Jacob Goh
How to customize your third party React components

Component libraries make our lives easier.
But as developers, you might often find yourselves in situations where third party components don’t provide the functionality or customization capability the project needs.
We are left with 2 choices:
- Write the component from scratch yourself
- Customize the third party components
What to choose depends on the component and the situation that you are in.
Apparently, some components are not customizable, and some feature requirements are not feasible. But most of the time, customizing third party components is the less time-consuming option. Here’s how.
Before we start
For example, we are going to customize the react-bootstrap-typeahead component.
Here’s the starter if you want to follow along https://stackblitz.com/edit/react-hznpca
1. Overwriting CSS
This is fairly straightforward.
Just find out what the component’s CSS classes are and overwrite them with new CSS.
Example
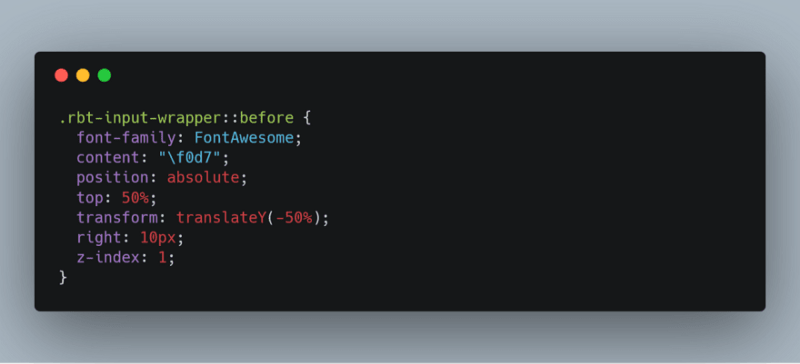
Goal: Add a dropdown icon to the input box, so that it looks like a drop-down.
Just add Font Awesome to index.html

and add this CSS to style.css
Demo: https://stackblitz.com/edit/react-wdjptx
2. Wrapper Component
This is where you can alter the default behavior of the third party component.
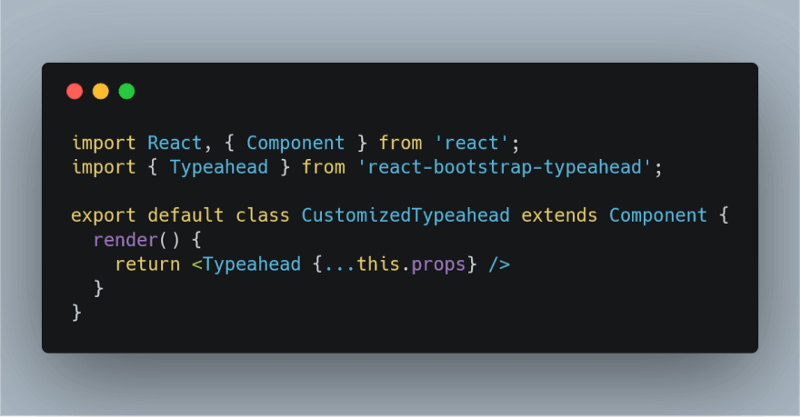
Start by creating a wrapper component CustomizedTypeahead and replace Typeahead with it.
https://stackblitz.com/edit/react-rwyjmm
This wrapper component has no effect for now. It’s simply passing props down to the Typeahead component.
We are going to customize the component behavior by making changes to props.
Example: Setting Default Props
Goal: Adding default props
Let’s start with the simplest customization.
Let’s say we want all the CustomizedTypeahead to have the clearButton props enabled by default.
We can do so by:
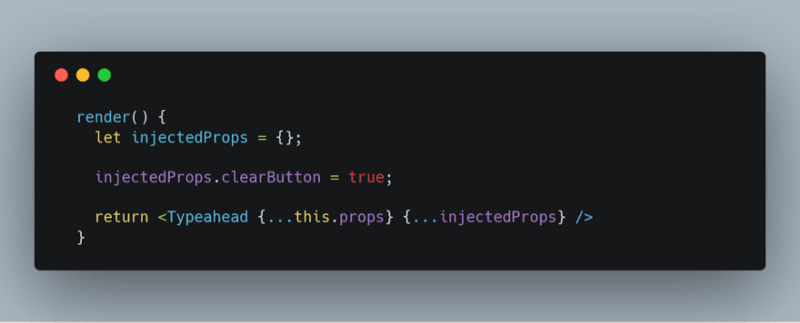
This is equivalent to:

We create injectedProps and will put all the props modification inside to make the code manageable.
Demo: https://stackblitz.com/edit/react-tk9pau
Example: Modifying Props
Goal: To sort all options by alphabetic order
We are receiving options, which is an array of objects, and labelKey, which tells us that the option's label should be optionObject[labelKey]. Our goal is to sort optionObject[labelKey] by alphabetic order.
We can do so by using Array.prototype.sort() to sort the options array.
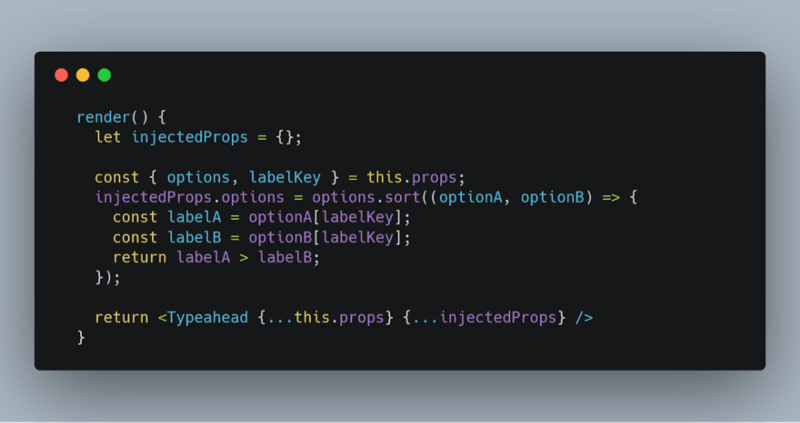
This way, the options in injectedProps will overwrite the original options in props. That's how we can sort all options by alphabetic order by default.
Demo: https://stackblitz.com/edit/react-cqv5vz
Example: Intercepting Event Listeners
Goal: When the user selects an option, if the user has selected both “California” and “Texas” together, alert the user and clear the selection (for no particular reason other than for this demo).
This is the fun part where you can do lots of customization.
Basically, this is how it will work:
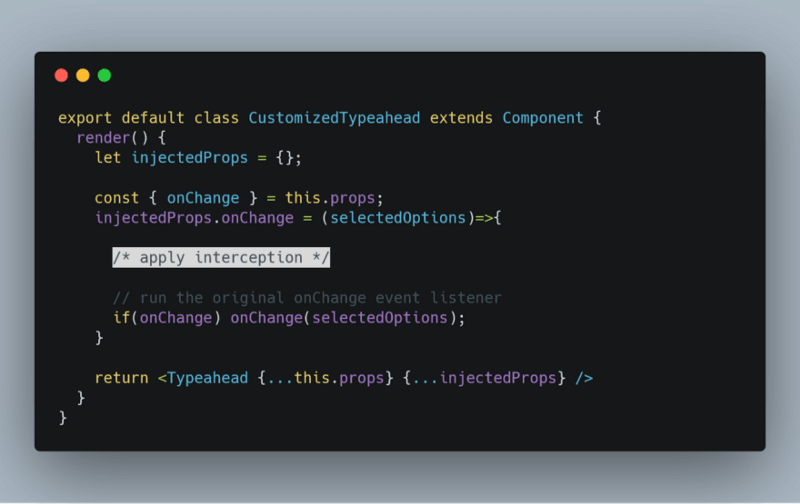
Note the if(onChange) onChange(selectedOptions);. This makes sure that the original onChange event listener continues to run after we intercept it.
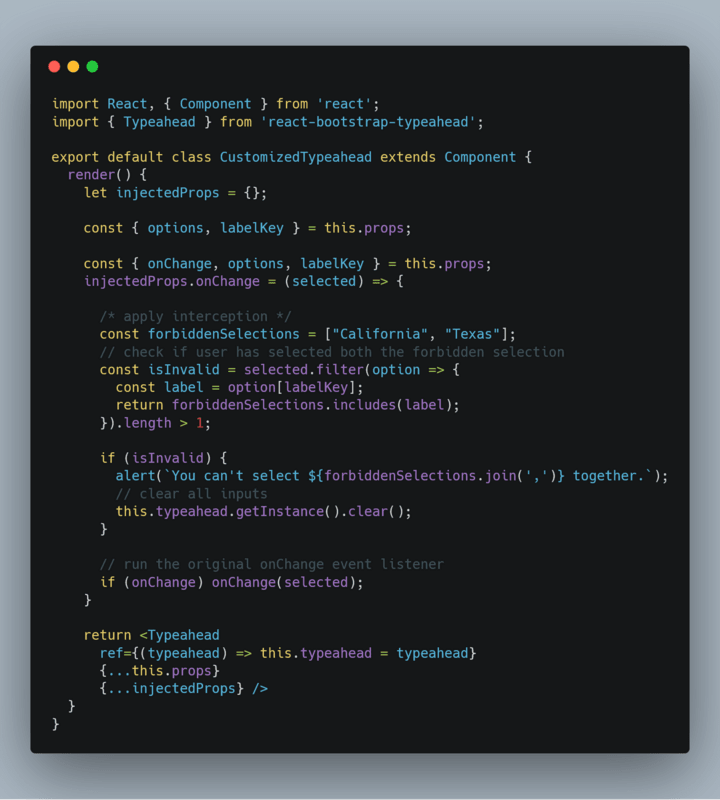
Here’s what we did in the code above:
- We create an
onChangefunction that is of the same structure of the defaultonChangefunction. It's a function that receives an array of selected options. - We scan through the selected options and check if it’s valid.
- If it’s invalid, show an alert and clear the input
- Run the original
onChangeevent listener
Demo: https://stackblitz.com/edit/react-ravwmw
3. Modifying the source code
Caution: Don’t overuse this! This is your last resort. You should only do this if there is no other choice.
If none of the above works for you, the choices you have are now limited to:
- Find another component library
- Write your own component from scratch
- Modify the component’s source code
It’s actually not uncommon that you might have to modify a package’s source code to fit a project’s needs. Especially if you’ve found a bug in a package and you need it fixed urgently.
But there are a few cons:
- Some packages use different languages like CoffeeScript or Typescript. If you don’t know the language, you don’t know how to edit it.
- It can be time-consuming to study the source code and figure out where exactly to put your modification.
- You may unintentionally break some part of the package.
- When the package updates, you would need to apply the update manually.
If you decide to go ahead and make some modifications to the source code, here’s how.
1. Fork the Github Repository
In our example case, go to https://github.com/ericgio/react-bootstrap-typeahead and fork the repo to your own GitHub account.
2. Clone the repo to your machine
3. Make the modification
4. Push the repo to your GitHub account
5. Install your repo as a dependency
After you fork the repo, your GitHub repo’s URL should be https://github.com/<your GitHub username>/react-bootstrap-typeahead.
You can install this git repo as a dependency by executing this command:
npm i https://github.com/<your GitHub username>/react-bootstrap-typeaheadAfter installation, you should see this in package.json:
"dependencies": { "react-bootstrap-typeahead": "git+https://github.com/<your github username>/react-bootstrap-typeahead.git" }Conclusion
We talked about three ways to customize your third party React components.
- Overwriting CSS
- Using Wrapper Component
- Modifying the source code
Hopefully, this makes your life as a React developer easier.
In the meantime, let’s all take a moment and be grateful to all the open source creators/contributors out there. Without these open source packages, we wouldn’t be able to move as fast as we do today.
What’s your experience with third party component libraries? What other methods would you use to customize them? Leave a comment!
Originally published at dev.to.