

Introduction
In this article, we will learn how to deploy an ASP.NET Core hosted Blazor application with the help of IIS 10 on a Windows 10 machine. We will be using Visual Studio 2017 to publish the app and SQL Server 2014 to handle DB operations. We will also troubleshoot some of the common hosting issues for a Blazor application.
Prerequisites
- Install IIS in your machine
- Install URL Rewrite module from here
Please refer to my previous article, How to create a cascading DropDownList in Blazor using EF Core, to create the application that we will be deploying in this tutorial.
Installing .NET Core hosting bundle
Since we are going to deploy an ASP.NET Core hosted Blazor application, the first step is to install the .NET Core hosting bundle in our machine.
Follow the below steps to download the .NET Core hosting bundle:
Step 1
Open https://www.microsoft.com/net/download/all
Step 2
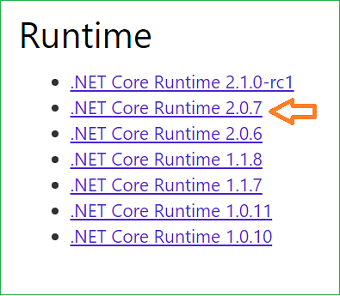
Select the latest non-preview .NET Core runtime from the list. For this tutorial, we will select .NET Core Runtime 2.0.7.
Refer to the image below:
Step 3
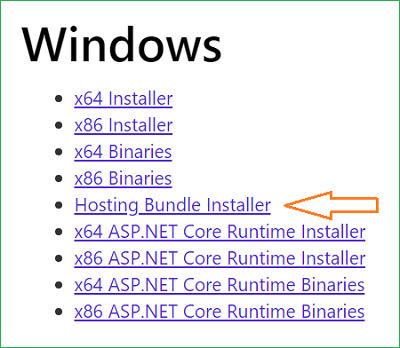
On the .NET Core runtime download page, scroll down to Windows section, select the “Hosting Bundle Installer” link to download the “.NET Core Hosting Bundle”. Refer to the image below:
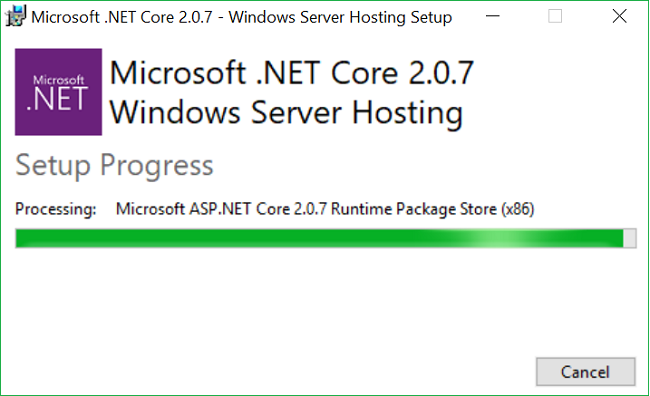
Once the download is finished, double-click to start installing it. You will see a window similar to the one shown below:
Important Note
- The .NET Core hosting bundle should be installed only after installing IIS. If you the bundle before installing IIS then you need to repair the bundle after installing IIS so that it will update its dependencies for IIS.
- Restart the machine after installing the .NET Core hosting bundle.
Publishing the Blazor application
Once the .NET Core hosting bundle installation is successful and you have restarted your machine, open the Blazor application solution using VS 2017.
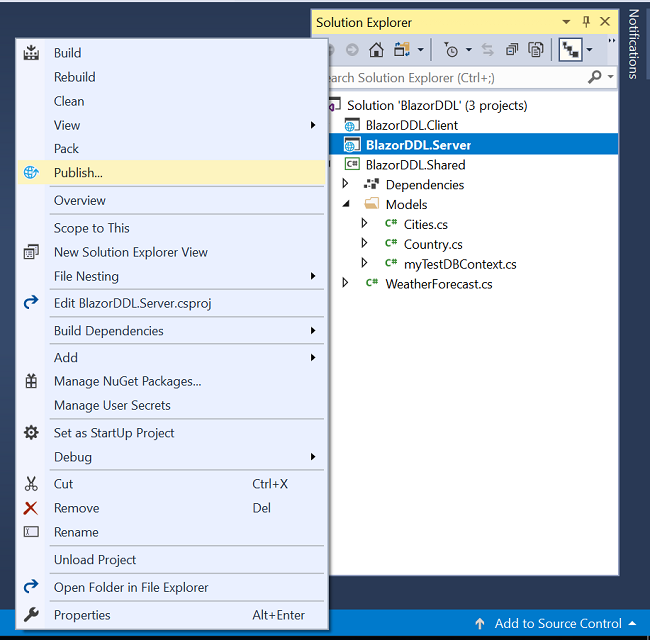
Right click on the Server project of your solution and click publish. In this case it will be BlazorDDL.Server >> Publish.
You will see a screen similar to what’s shown below. Select Folder from the left menu and provide a folder path. You can provide any folder path where you want to publish your app.
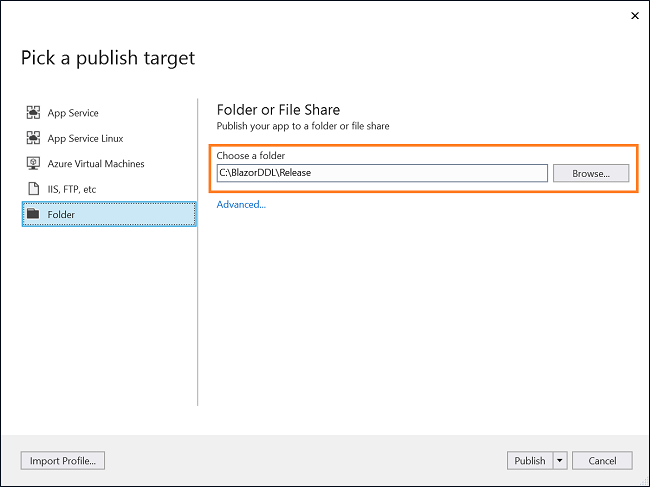
Click on publish. Visual Studio will start publishing your application. If there are no build errors, then your application will be published successfully to the folder you have mentioned.
After the publishing is successful, we will move on to configure IIS.
Configuring IIS
Open IIS and right click on Sites >> Add Web Site.
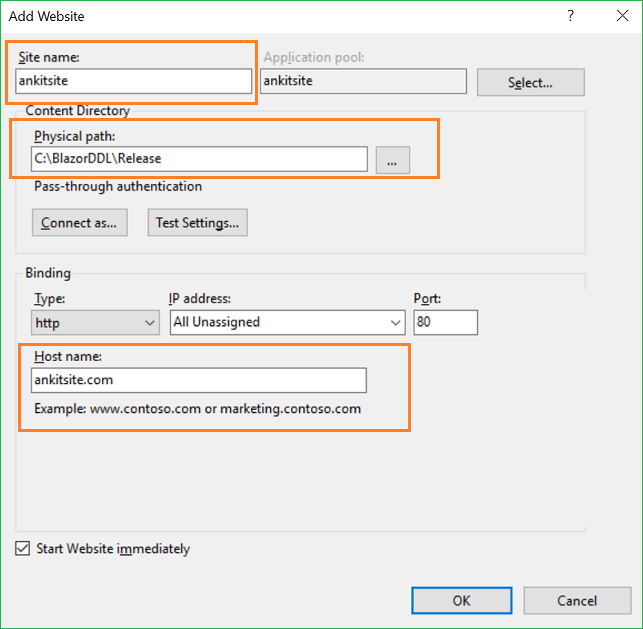
An “Add Website” pop up box will open. Here we need to furnish details in three fields
- Site name: Put any name of your choice. Here I will put “ankitsite”.
- Physical Path: The path to the folder where you have published your application.
- Host name: This is the name we put in browser to access our application. We will put ankitsite.com for this demo.
Click on OK to create the website. Refer to the image below:
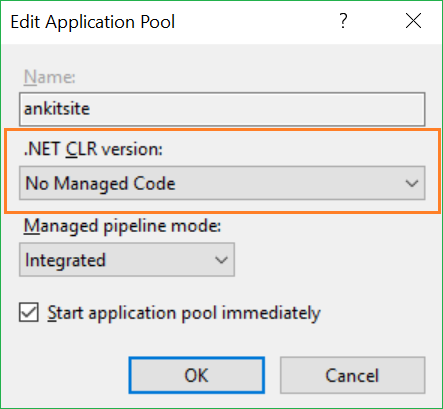
The next step is to configure the “Application Pool” for our site. The application pool name will be same as the “Site name” we provided in the last step. Therefore, in this case the application pool name will be “ankitsite”.
Click to “Application Pools” from the left panel and double click on the pool “ankitsite”. It will open an “edit application pool” window. Select “No Managed Code” from the .NET CLR version dropdown. Refer to the image below:
Here is the whole process of configuring IIS explained in a gif image.

Configuring the DNS host
The last step is to configure our DNS host file.
Navigate to the C:\Windows\System32\drivers\etc path in your machine and open the “hosts” file using any text editor.
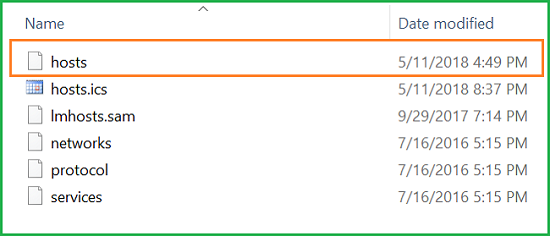
We need to add the hostname that we provided in IIS against the localhost IP address. Refer to the image below:
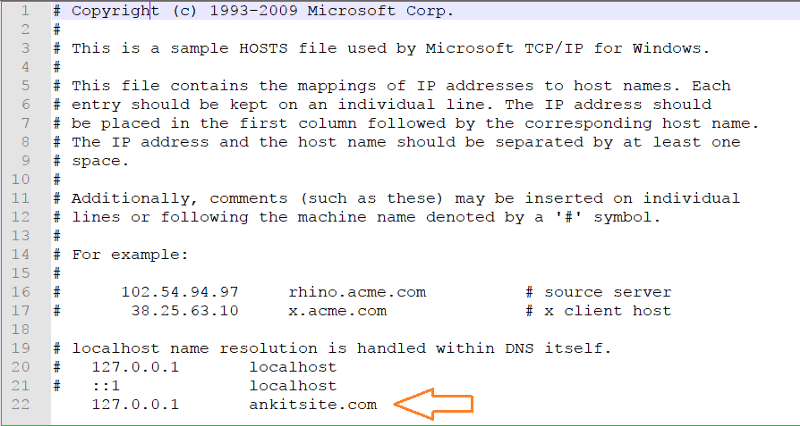
And now we have successfully hosted a Blazor application on IIS.
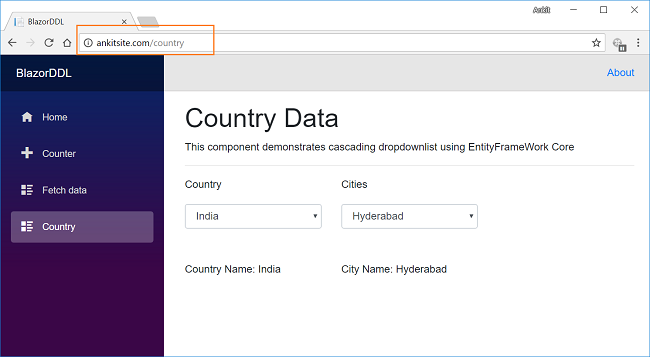
Execution Demo
Open any browser on your machine and enter the hostname you have configured. You can see that the application will open in the browser window.
Troubleshooting common hosting issues
In this section, we will look into some of the common problems that you can face while hosting a Blazor application.
- You are unable to open the website and get a DNS not found error
Check if the hostname is configured correctly in the host file. Make sure that your machine is not connected to any VPN server. Also, if you are using any Web proxy, then disable it.
2. HTTP Error 500.19 — Internal Server Error — The requested page cannot be accessed because the related configuration data for the page is invalid.
This error message is clear. The publish folder is inaccessible because of insufficient permissions. Grant Read permission to the IIS_IUSRS group on the publish folder so that it can access the Web.config file.
3. The website is loading but data is not getting populated, and you get a 500 Internal server error
Make sure that your connection string is in the correct format. The user id that you have specified in your connection string should have db_datareader and db_datawriter permissions. If the issue persists, then provide the user with db_owner permission.
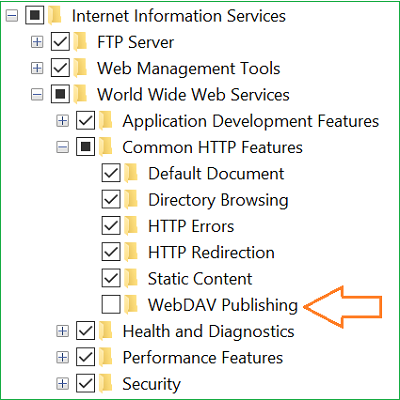
4. The data is not getting populated and you get an “operation not allowed” exception.
This issue generally appears when you try to do a PUT, POST or DELETE operation in your web API. To mitigate this issue we need to alter the IIS setup configuration.
Navigate to Control Panel >> Turn Windows feature on or off. Then navigate to Internet Information Services >> World Wide Web Services >> Common HTTP Features and uncheck the “WebDAV Publishing” option and click ok. Refer to the image below:
5. “Failed to load <web API> : No ‘Access-Control-Allow-Origin’ header is present on the requested resource.
The cause of this error is that the client and the server of the application are not on the same port. The browser will restrict the application to make web API calls due to same-origin policy. To resolve this issue, you need to enable Cross-Origin Requests (CORS) in your application. Please refer to the Microsoft documents on Enable Cross-Origin Requests (CORS) in ASP.NET Core.
When you republish the application, do not forget to refresh your website as well as the application pool in IIS.
Conclusion
In this article, we learned how to deploy a Blazor application on IIS on a Windows machine. We also learned how to resolve some of the common hosting issues while deploying a Blazor application.
Get my book Blazor Quick Start Guide to learn more about Blazor.
You can check out my other articles on Blazor here.
You can also find this article at C# Corner.
See Also
- ASP.NET Core — Getting Started With Blazor
- ASP.NET Core — CRUD Using Blazor And Entity Framework Core
- ASP.NET Core — CRUD Using Angular 5 And Entity Framework Core
- ASP.NET Core — CRUD With React.js And Entity Framework Core
- ASP.NET Core — Using Highcharts With Angular 5
Originally published at https://ankitsharmablogs.com/