by Emmanuel Yusufu
How to deploy a Node.js application to Amazon Web Services using Docker
Plug: Originally published at Zeolearn magazine.
For many more useful developer content like this article, visit the Zeolearn blog. The blog features articles centered on web/software development: AngularJS, ReactJS, NodeJS, Django, and Data Science (including machine learning, data science, Python, and deep learning).
Table of Contents
1. Introduction
2. Prerequisites
3. A quick primer on Docker and AWS
4. What we’ll be deploying
5. Creating a Dockerfile
6. Building a docker image
7. Running a docker container
8. Creating the Registry (ECR) and uploading the app image to it
9. Creating a new task definition
10. Creating a cluster
11. Creating a service to run it
12. Conclusion
1. Introduction
Writing code that does stuff is something most developers are familiar with. Sometimes, we need to take the responsibility of a SysAdmin or DevOps engineer and deploy our codebase to production where it will help a business solve problems for customers.
In this tutorial, I’ll show you how to dockerize a Node.js application and deploy it to Amazon Web Service (AWS) using Amazon ECR (Elastic Container Registry) and ECS (Elastic container service).
2. Prerequisites
To follow through this tutorial, you’ll need the following:
- Node and Npm: Follow this link to install the latest versions.
- Basic knowledge of Node.js.
- Docker: The installation provides Docker Engine, Docker CLI client, and other cool stuff. Follow the instructions for your operating system. To check if the installation worked, fire this on the terminal:
docker --versionThe command above should display the version number. If it doesn’t, the installation didn’t complete properly.
4. AWS account: Sign up for a free tier. There is a waiting period to verify your phone number and bank card. After this, you will have access to the console.
5. AWS CLI: Follow the instructions for your OS. You need Python installed.
3. A quick primer on Docker and AWS
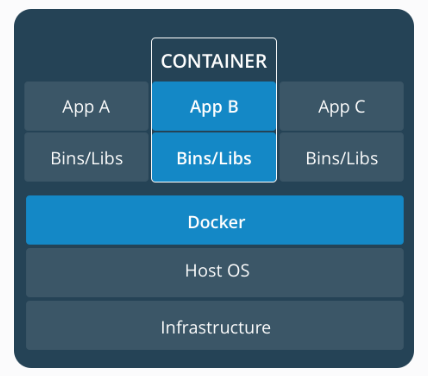
Docker is an open source software that allows you to pack an application together with the required dependencies and environment in a ‘Container’ that you can ship and run anywhere. It is independent of platforms or hardware, and therefore the containerized application can run in any environment in an isolated fashion.
Docker containers solve many issues, such as when an app works on a co-worker’s computer but doesn’t run on yours, or it works in the local development environment but doesn’t work when you deploy it to a server.
Amazon Web Services (AWS) offers a reliable, scalable, and inexpensive cloud computing service for businesses. As I mentioned before, this tutorial will focus on using the ECR and ECS services.
4. What we’ll be deploying
Let’s quickly build a sample app that we’ll use for the purpose of this tutorial. It going to be very simple Node.js app.
Enter the following in your terminal:
// create a new directory
mkdir sample-nodejs-app

// change to new directory
cd sample-nodejs-app

// Initialize npm
npm init -y

// install express
npm install express

// create an server.js file
touch server.js
Open server.js and paste the code below into it:
// server.js

const express = require('express')
const app = express()

app.get('/', (req, res) => {
    res.send('Hello world from a Node.js app!')
})

app.listen(3000, () => {
    console.log('Server is up on 3000')
})
Start the app with:
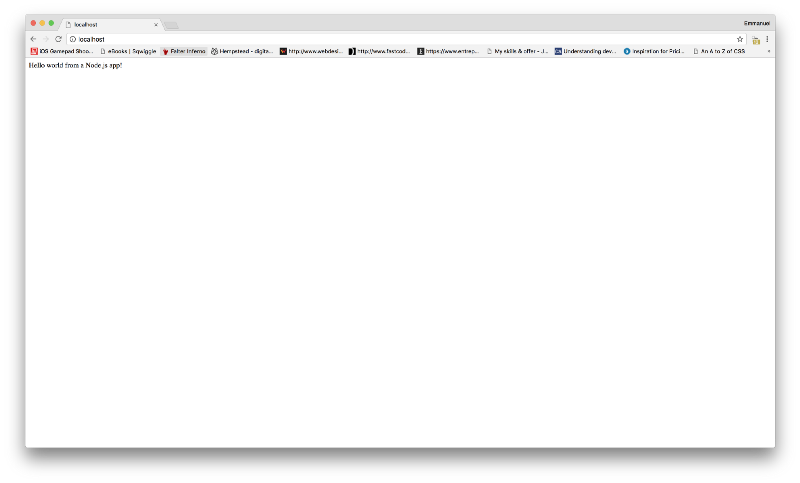
node server.jsAccess it on http://localhost:3000. You should get Hello world from a Node.js app! displayed in your browser. The complete code is available on GitHub.
Now let’s take our very important app to production ?.
5. Creating a Dockerfile
We are going to start dockerizing the app by creating a single file called a Dockerfile in the base of our project directory.
The Dockerfile is the blueprint from which our images are built. And then images turn into containers, in which we run our apps.
Every Dockerfile starts with a base image as its foundation. There are two ways to approach creating your Dockerfile:
- Use a plain OS base image (For example, Ubuntu OS, Debian, CentOS etc.) and install an application environment in it such as Node.js OR
- Use an environment-ready base image to get an OS image with an application environment already installed.
We will proceed with the second approach. We can use the official Node.js image hosted on Dockerhub which is based on Alpine Linux.
Write this in the Dockerfile:
FROM node:8-alpine
RUN mkdir -p /usr/src/app
WORKDIR /usr/src/app
COPY . .
RUN npm install
EXPOSE 3000
CMD [ "node", "server.js" ]
Let’s walk through this line by line to see what is happening here, and why.
FROM node:8-alpineHere, we are building our Docker image using the official Node.js image from Dockerhub (a repository for base images).
- Start our Dockerfile with a
FROMstatement. This is where you specify your base image. - The
RUNstatement will allow us to execute a command for anything you want to do. We created a subdirectory/usr/src/appthat will hold our application code within the docker image. WORKDIRinstruction establishes the subdirectory we created as the working directory for anyRUN,CMD,ENTRYPOINT,COPYandADDinstructions that follow it in theDockerfile./usr/src/appis our working directory.COPYlets us copy files from a source to a destination. We copied the contents of our node application code (server.jsandpackage.json) from our current directory to the working directory in our docker image.- The
EXPOSEinstruction informs Docker that the container listens on the specified network ports at runtime. We specified port 3000. - Last but not least, the
CMDstatement specifies the command to start our application. This tells Docker how to run your application. Here we usenode server.jswhich is typically how files are run in Node.js.
With this completed file, we are now ready to build a new Docker image.
6. Building a docker image
Make sure you have Docker up and running. Now that we have defined our Dockerfile, let’s build the image with a title using -t:
docker build -t sample-nodejs-app .This will output hashes, and alphanumeric strings that identify containers and images saying “Successfully built” on the last line:
Sending build context to Docker daemon  1.966MB
Step 1/7 : FROM node:6-alpine
 ---> 998971a692ca
Step 2/7 : RUN mkdir -p /usr/src/app
 ---> Using cache
 ---> f1aa1c112188
Step 3/7 : WORKDIR /usr/src/app
 ---> Using cache
 ---> b4421b83357b
Step 4/7 : COPY . .
 ---> 836112e1d526
Step 5/7 : RUN npm install
 ---> Running in 1c6b36b5381c
npm WARN sample-nodejs-app@1.0.0 No description
npm WARN sample-nodejs-app@1.0.0 No repository field.
Removing intermediate container 1c6b36b5381c
 ---> 93999e6c807f
Step 6/7 : EXPOSE 3000
 ---> Running in 7419020927f1
Removing intermediate container 7419020927f1
 ---> ed4ac8a31f83
Step 7/7 : CMD [ "node", "server.js" ]
 ---> Running in c77d34f4c873
Removing intermediate container c77d34f4c873
 ---> eaf97859f909
Successfully built eaf97859f909

// dont expect the same values from your terminal.
7. Running a Docker Container
We’ve built the docker image. To see previously created images, run:
docker imagesYou should see the image we just created as the most recent based on time:

Copy the image Id. To run the container, we write on the terminal:
docker run -p 80:3000 {image-id}

// fill with your image-id
By default, Docker containers can make connections to the outside world, but the outside world cannot connect to containers. -p publishes all exposed ports to the host interfaces. Here we publish the app to port 80:3000. Because we are running Docker locally, go to http://localhost to view.
At any moment, you can check running Docker containers by typing:
docker container lsFinally, you can stop the container from running by:
docker stop {image-id}Leave the Docker daemon running.
8. Create Registry (ECR) and upload the app image to it
Amazon Elastic Container Registry (ECR) is a fully-managed Docker container registry that makes it easy for developers to store, manage, and deploy Docker container images. Amazon ECR is integrated with Amazon Elastic Container Service (ECS), simplifying your development to production workflow.
The keyword “Elastic” means you can scale the capacity or reduce it as desired.
Steps:
- Go to the AWS console and sign in.
- Select the EC2 container service and Get started
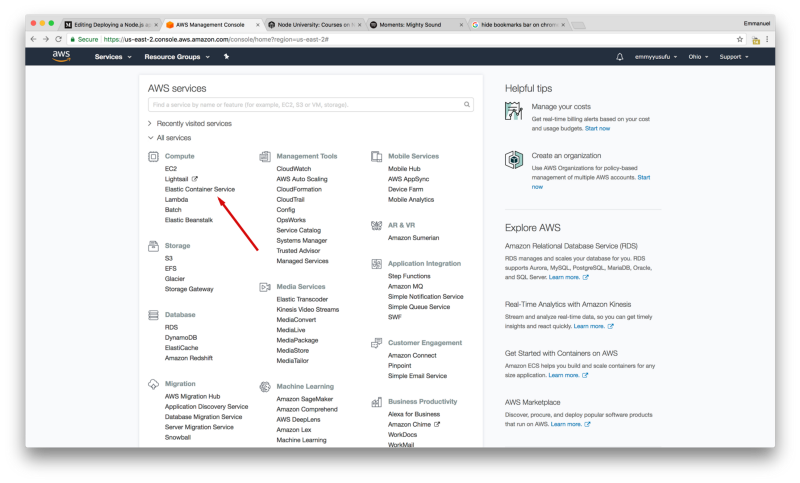
3. The first run page shows, scroll down and click cancel > enter ECS dashboard.
4. To ensure your CLI can connect with your AWS account, run on the terminal:
aws configureIf your AWS CLI was properly installed, aws configure will ask for the following:
$ aws configure
AWS Access Key ID [None]: accesskey
AWS Secret Access Key [None]: secretkey
Default region name [None]: us-west-2
Default output format [None]:
Get the security credentials from your AWS account under your username > Access keys. Run aws configure again and fill correctly.
4. Create a new repository and enter a name (preferably with the same container name as in your local dev environment for consistency).
For example, use sample-nodejs-app.

Follow the 5 instructions from the AWS console for building, tagging, and pushing Docker images:
Note: The arguments of the following are mine and will differ from yours, so just follow the steps outlined on your console.
- Retrieve the Docker login command that you can use to authenticate your Docker client to your registry:
Note: If you receive an “Unknown options: - no-include-email” error, install the latest version of the AWS CLI. Learn more here.
aws ecr get-login --no-include-email --region us-east-22. Run the docker login command that was returned in the previous step (just copy and paste). Note: If you are using Windows PowerShell, run the following command instead:
Invoke-Expression -Command (aws ecr get-login --no-include-email --region us-east-2)It should output: Login Succeeded.
3. Build your Docker image using the following command. For information on building a Docker file from scratch, see the instructions here. You can skip this step since our image is already built:
docker build -t sample-nodejs-app .4. With a completed build, tag your image with a keyword (For example, latest) so you can push the image to this repository:
docker tag sample-nodejs-app:latest 559908478199.dkr.ecr.us-east-2.amazonaws.com/sample-nodejs-app:latest5. Run the following command to push this image to your newly created AWS repository:
docker push 559908478199.dkr.ecr.us-east-2.amazonaws.com/sample-nodejs-app:latest9. Create a new task definition
Tasks function like the docker run command of the Docker CLI but for multiple containers. They define:
- Container images (to use)
- Volumes (if any)
- Networks Environment variables
- Port mappings
From Task Definitions in the ECS dashboard, press on the Create new Task Definition (ECS) button:
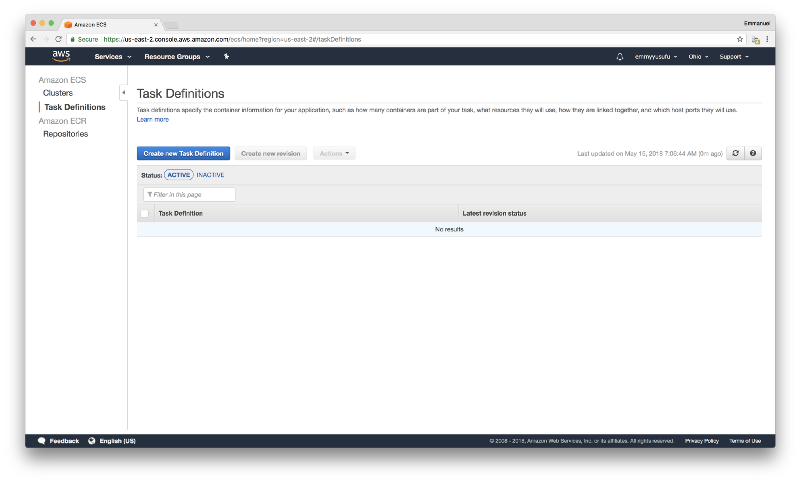
Set a task name and use the following steps:
- Add Container: sample-nodejs-app (the one we pushed).
- Image: the URL to your container. Mine is
559908478199.dkr.ecr.us-east-2.amazonaws.com/sample-nodejs-app - Soft limit: 512
- Map 80 (host) to 3000 (container) for sample-nodejs-app
- Env Variables:
NODE_ENV: production
10. Create a Cluster
A cluster is the place where AWS containers run. They use configurations similar to EC2 instances. Define the following:
- Cluster name: demo-nodejs-app-cluster
- EC2 instance type: t2.micro
(Note: you select the instances based on the size of your application. Here we’ve selected the smallest. Your selection affects how much money you are billed at the end of the month. Visit here for more information). Thank you Nicholas Kolatsis for pointing out that the previous selection of m4.large was expensive for this tutorial.
- Number of instances: 1
- EBS storage: 22
- Key pair: None
- VPC: New
When the process is complete, you may choose to click on “View cluster.”
11. Create a service to run it
Go to Task Definition > click demo-nodejs-app > click on the latest revision.
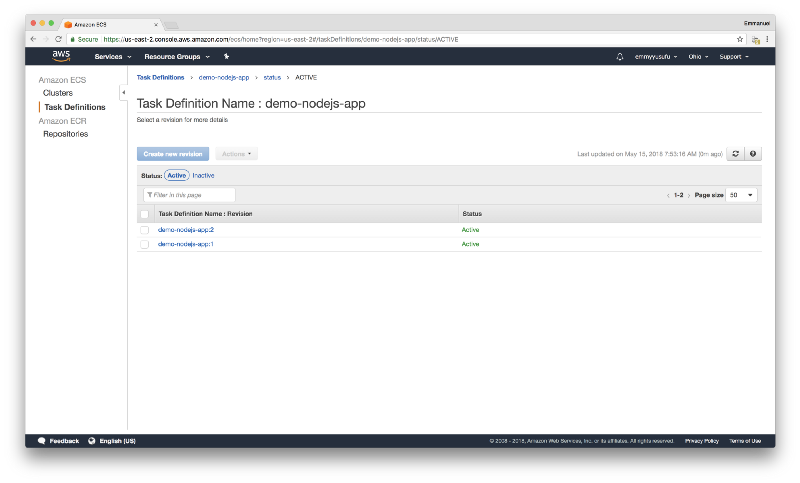
Inside of the task definition, click on the actions dropdown and select Create servcie
Use the following:
- Launch type: EC2
- Service name: demo-nodejs-app-service
- Number of tasks: 1
Skip through options and click Create service and View service.
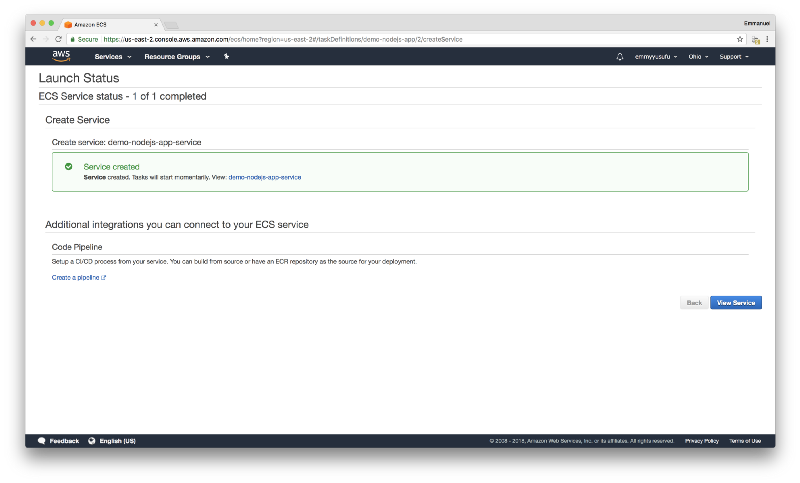
You’ll see its status as PENDING. Give it a little time and it will indicate RUNNING.
Go to Cluster (through a link from the service we just created) > EC2 instances > Click on the container instance to reveal the public DNS.
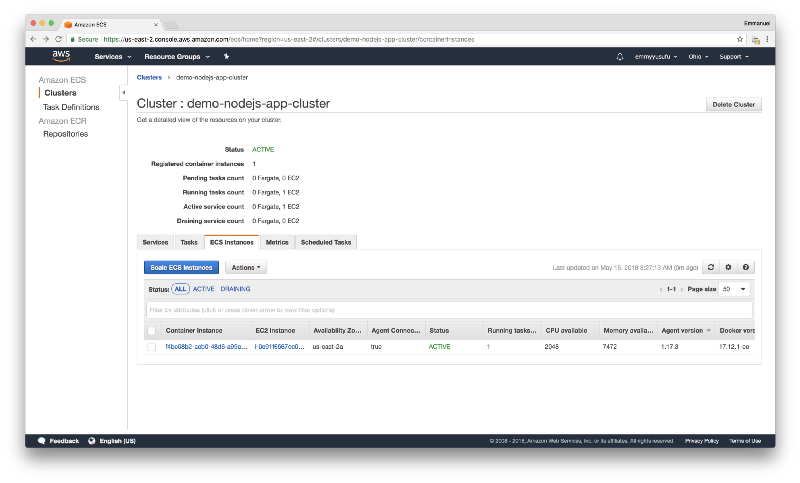
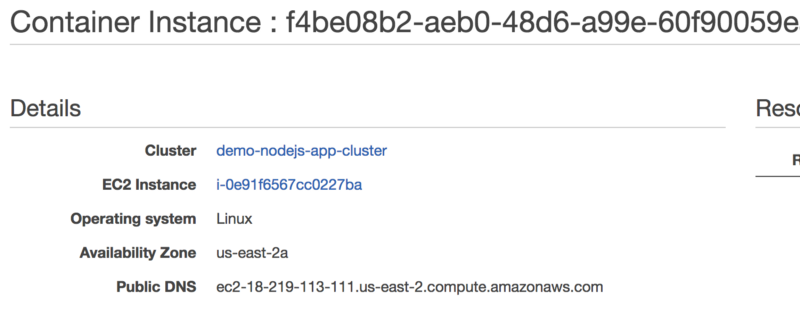
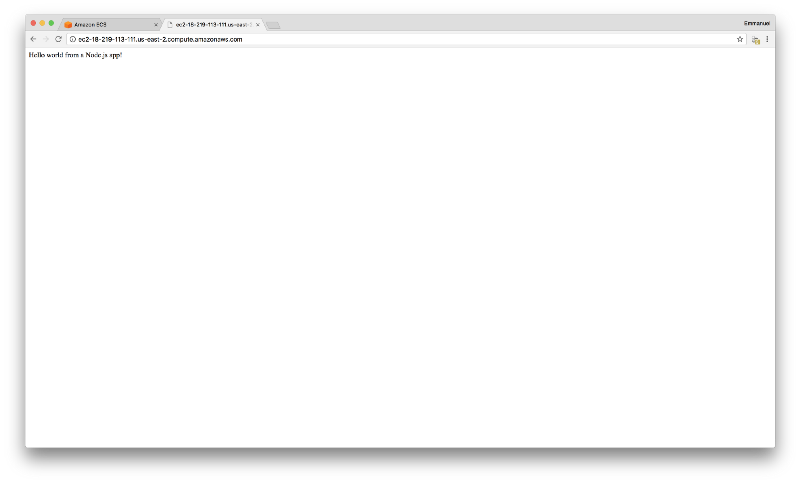
Visit the public DNS to view our app! Mine is ec2–18–219–113–111.us-east-2.compute.amazonaws.com
12. Conclusion.
Congrats on finishing this post! Grab the code for the Docker part from Github.
Feel free to support me (devapparel.co) and look good while at it. Also, Comment or Share this post. Thanks for reading!
Plug: Again, for many more quality content like this, visit Zeolearn blog.