
by Rohit Ramname
How to deploy a NodeJS app to Heroku from Github (without installing Heroku on your machine)

As a web developer, nothing is more satisfying that being able to show (and show off) your work to the word. Not only through the images or videos on Twitter, but letting them actually interact with it — especially if you are working on some cool side projects or applying for a position.
And fortunately, now with all the cloud providers, sharing your work is a must and is a basic step on your journey.
In this demo, we will be looking at how to deploy your cool NodeJS app to Heroku. By the end of this demo, we will have a basic Hello World app running on a public domain that can be accessed by anyone.
For this demo, I assume that you have Node installed on your machine. If not, you can download from the Nodejs.org website. The steps are simple and can be found online easily.
You will also need a GitHub account to host our code online. If you don’t have an account, you can create one for free on Github.com. With a free account, you can create unlimited public repositories. We will be using the Git version control system to push our changes to Github
STEP 1: Create that Cool App
Now let’s create that Cool Node App that you have been thinking about.
Create a folder on your local machine and give it a name (of your choice), say MyCoolApp.
Add a file with the name package.json and paste the below content. This file is basic information of our package. (This can also be created by typing command npm init and accepting all default settings.)
{
  "name": "coolnodeapp",
  "version": "1.0.0",
  "description": "node app ",
  "main": "app.js",
  "scripts": {
  "start": "node app.js"
},
  "repository": {
  "type": "git",
  "url": ""
},
  "author": "",
  "license": "ISC",
  "bugs": {
  "url": ""
},
  "homepage": ""
}One very important change to notice is this line:
"start": "node app.js"After the deployment, Heroku will run this command to start your application.
Add a file, app.js, and paste the below code. This will be the starting point of our app.
const http = require('http');
const port = process.env.PORT || 3000

const server = http.createServer((req, res) => {
  res.statusCode = 200;
  res.setHeader('Content-Type', 'text/html');
  res.end('<h1>Hello World</h1>');
});

server.listen(port,() => {
  console.log(`Server running at port `+port);
});This code is basically opening a port on the local server and serving some HTML.
Please note the most important code block here:
const port = process.env.PORT || 3000This is extremely important when you want to deploy your application to the cloud. The application server is started on a random port on the cloud. If you hard code a port number, like in all Getting Started guides, and deploy to the cloud, the specific port number may not be available. The application will never start. So it’s better to get the port number assigned by the cloud instance and start the HTTP server.
Save the file and run the below command in the command prompt window (which is open inside the folder):
node app.jsWith this, Node will start the server and show the below message:

Now, if we open http://localhost:3000/ in the browser, we will see this:
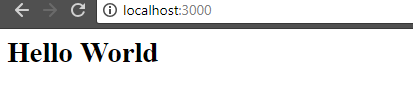
Cool! We just created a basic NodeJs app.
STEP 2: Push to GitHub
Now want to upload our code to GitHub. This way, we will be able to edit our code from anywhere and also deploy the committed changes to the cloud instantly.
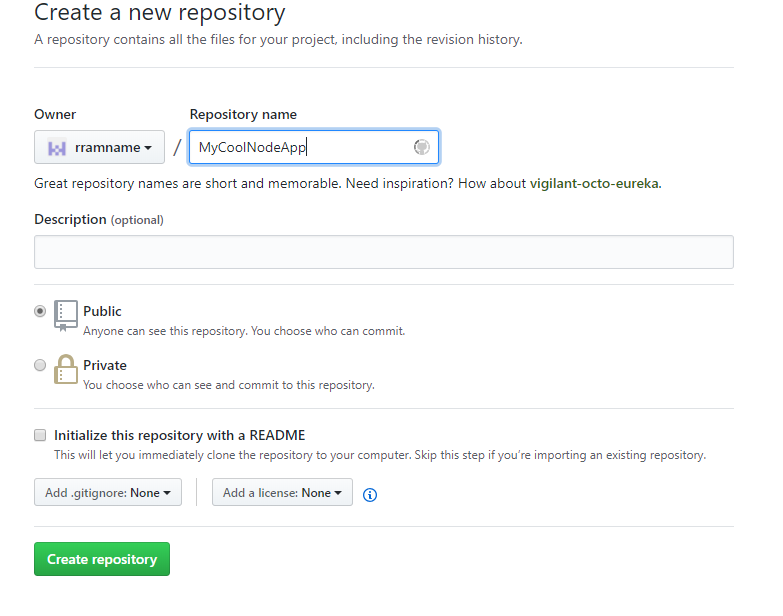
Let’s create a Repository on GitHub by clicking New Repository.
Give it a name, some description, and click Create repository:
GitHub will create a repository and give you some commands that you can run locally so that you can clone your local folder with your GitHub repository.
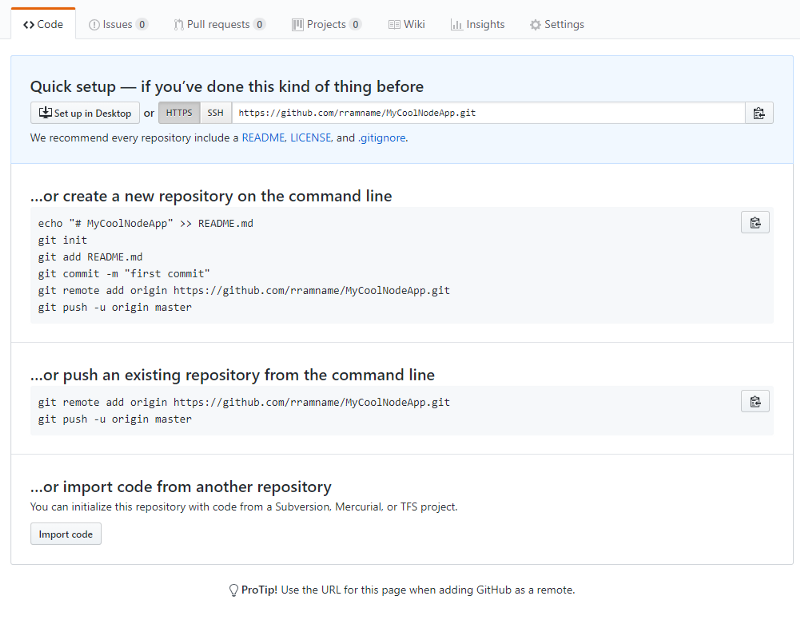
In the command prompt, run below commands in this sequence.
- Initialize the Git repository at the root level:
git init2. Add all the files to your local Git (staging). Notice the last dot:
git add . 3. Commit your changes to your local Git:
git commit -m “first commit”4. Link to your GitHub repository. (Please change the URL to point to your repository.)
git remote add origin https://github.com/rramname/MyCoolNodeApp.git5. And push your change:
git push — set-upstream origin masterYou should see messages like below at the command promp.
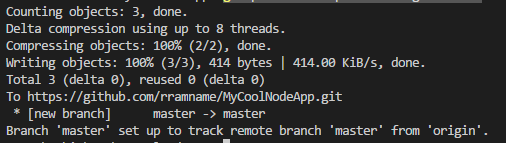
Now if you open GitHub and refresh the repository, you should be able to see the code.

STEP 3: Deploy to Heroku
Now comes the fun, the reason you have survived all this: deployment.
If you don’t have an account with Heroku, you can open a free one by filling out this simple form. (And here, you don’t need to provided Credit Card information :) )
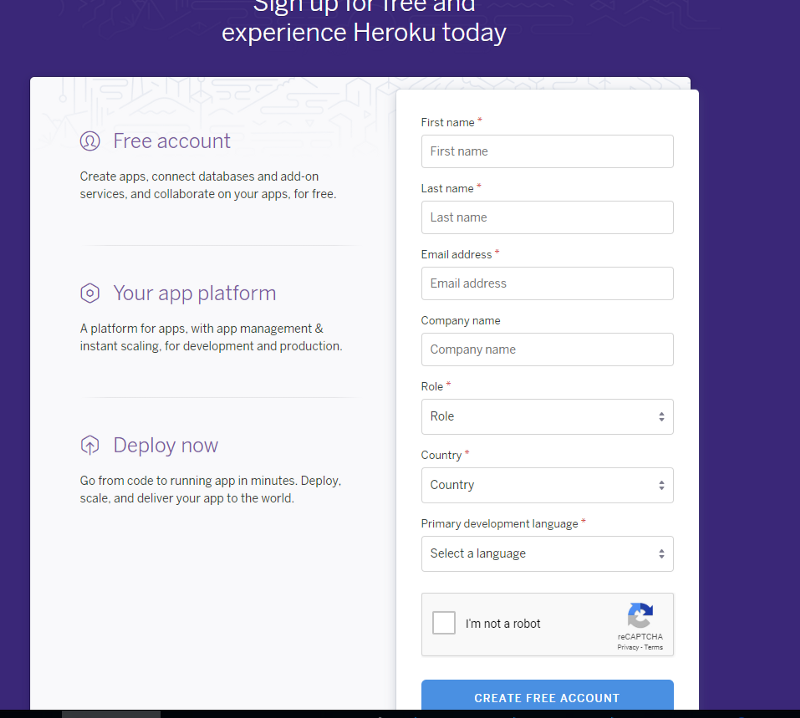
Once you have your account ready, login with your credentials.
Click New on the top right corner and select “Create new app”.
Give your app a name (This will be included in the public URL for your application) and click Create app.
This step will take you to the dashboard of your app. Open Deploy tab and scroll to the “Deployment method” section.
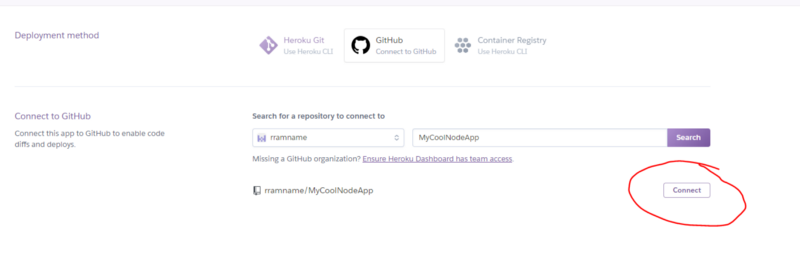
Select GitHub as the method.
It will show a “Connect to GitHub” option where we can provide our GitHub repository. If you are doing it for the first time, Heroku will ask permission to access your GitHub account.
Here, you can search for your GitHub repository and click connect:
If it’s able to find and connect to the GitHub repository, the Deployment section will show up where you can select if you want Automatic Deployment (as soon as the changes are pushed to GitHub, Heroku will pick them up and deploy) or Manual Deployment.
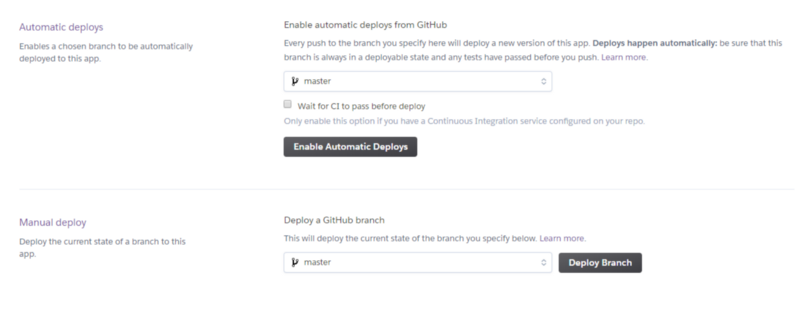
Click Enable Automatic Deploys (because it’s less overhead for demo apps :) ). You can also select the GitHub branch if you need to, but for this demo we will deploy from the master branch.
Now we need to tell Heroku that our app is a NodeJs app. For that, we will need the NodeJs build back.
Open the Settings tab and locate Buildpacks and click “Add buildpack”.
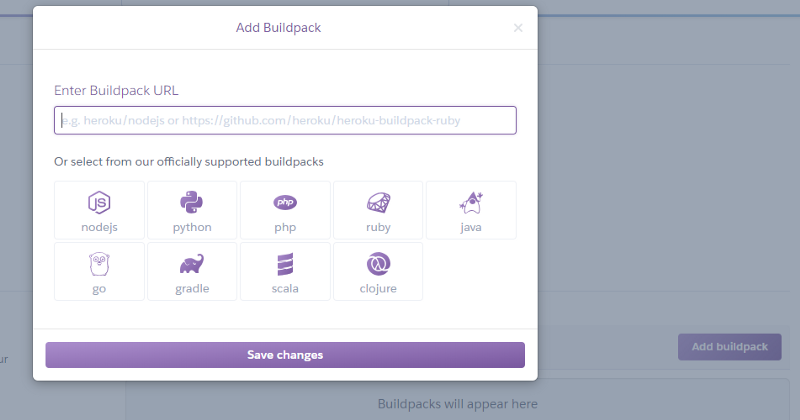
Select nodejs from the options and click Save changes.
Now, go back to the Deploy tab, and click Deploy Branch at the bottom.
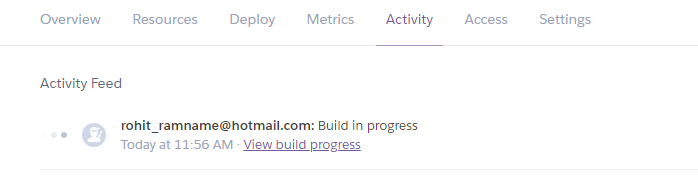
Heroku will take the code and host it. Open the Activity tab and there you can see the progress:
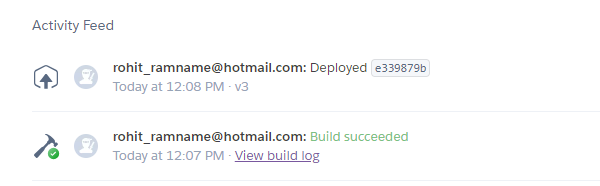
And that’s it!
Open the settings tab and scroll down to the Domains and certificates section. Here, you can see the URL of your app that was just deployed. Copy and paste that URL in the browser and… Hoooorah!!
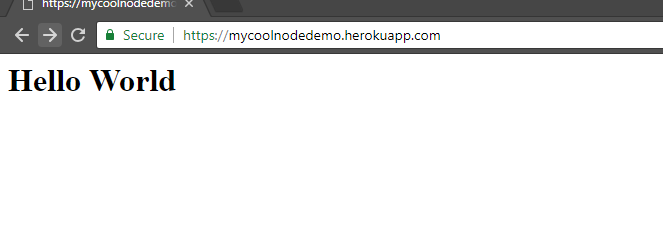
We just created our own web application that can be accessed over the internet.
Great!
Please go ahead and share with others!
Happy Hosting :)