
by Margarita Obraztsova
How to streamline your React.js development process using Webpack 4

In the real world of development, we have to add new features very quickly. In this tutorial, I will show you everything you can do to streamline this process and reach 120% of your dev speed.
Why, you might ask?
Because doing manual work is extremely counter-productive when it comes to programming. We want to automate as much as possible. So I will show you what parts of the development process with React we can adjust using Webpack v4.6.0.
I will not cover the first steps of setting up the webpack configuration, since I have already done it in my previous post. There, I described how to configure Webpack in greater detail. I will assume you are already familiar with the Webpack configuration basics, so we can start with a ready setup.
Setting up Webpack
In your webpack.config.js, enter the following code:
// webpack v4const path = require('path');const HtmlWebpackPlugin = require('html-webpack-plugin');const WebpackMd5Hash = require('webpack-md5-hash');const CleanWebpackPlugin = require('clean-webpack-plugin');module.exports = { entry: { main: './src/index.js' }, output: { path: path.resolve(__dirname, 'dist'), filename: '[name].[chunkhash].js' }, module: { rules: [ { test: /\.js$/, exclude: /node_modules/, use: { loader: "babel-loader" } } ] }, plugins: [ new CleanWebpackPlugin('dist', {} ), new HtmlWebpackPlugin({ inject: false, hash: true, template: './src/index.html', filename: 'index.html' }), new WebpackMd5Hash() ]};and in your package.json:
{ "name": "post", "version": "1.0.0", "description": "", "main": "index.js", "scripts": { "build": "webpack --mode production", "dev": "webpack --mode development" }, "author": "", "license": "ISC", "devDependencies": { "babel-cli": "^6.26.0", "babel-core": "^6.26.0", "babel-loader": "^7.1.4", "babel-preset-env": "^1.6.1", "babel-preset-react": "^6.24.1", "babel-runtime": "^6.26.0", "clean-webpack-plugin": "^0.1.19", "html-webpack-plugin": "^3.2.0", "react": "^16.3.2", "react-dom": "^16.3.2", "webpack": "^4.6.0", "webpack-cli": "^2.0.13", "webpack-md5-hash": "0.0.6" }}Now you can download your node modules:
npm iand add src/ folder to your project with index.html and index.js
First in src/index.html:
<html> <head> </head> <body> <div id="app"></div> <script src="<%= htmlWebpackPlugin.files.chunks.main.entry %>"></script> </body></html>and then in src/index.js:
console.log("hello, world");Let’s run the dev script:
npm run devThere you have it: it compiled! Now let’s configure React for it, too.
Setting up your React project
Since React uses special syntax called JSX, we need to transpile our code. If we go to babel’s website, it has the preset for React.
npm install --save-dev babel-cli babel-preset-reactOur .babelrc file should look like this:
{ "presets": ["env", "react"]}Add some app initialisation to your index.js:
import React from 'react';import { render } from 'react-dom';class App extends React.Component {render() { return ( <div> 'Hello world!' </div> ); }}render(<App />, document.getElementById('app'));and run the dev script:
npm run devIf you managed to generate a ./dist folder with index.html and a main file with a hash, you have done great! We have our app compiling!
Setting up web-dev-server
Technically, we do not have to do this, since there are many node-based servers for front-end apps out there. But I recommend webpack-dev-server because it is designed to work with Webpack, and it supports a bunch of nice features such as hot module replacement, source maps, and so on.
As they mention in the official documentation page:
Use webpack with a development server that provides live reloading. This should be used for development only.
Here is where it might get a bit confusing: how do you make webpack-dev-server only work for dev mode?
npm i webpack-dev-server --save-devin your package.json, adjust
"scripts": { "dev": "webpack-dev-server --mode development --open", "build": "webpack --mode production"}Now it should launch a server and automatically open your browser tab with your app.
Your package.json looks like this at this point:
{ “name”: “post”, “version”: “1.0.0”, “description”: “”, “main”: “index.js”, “scripts”: { "dev": "webpack-dev-server --mode development --open", "build": "webpack --mode production" }, “author”: “”, “license”: “ISC”, “devDependencies”: { “babel-cli”: “6.26.0”, “babel-core”: “6.26.0”, “babel-loader”: “7.1.4”, “babel-preset-env”: “1.6.1”, “babel-preset-react”: “6.24.1”, “babel-runtime”: “6.26.0”, “clean-webpack-plugin”: “0.1.19”, “html-webpack-plugin”: “3.2.0”, “react”: “16.3.2”, “react-dom”: “16.3.2”, “webpack”: “4.6.0”, “webpack-cli”: “2.0.13”, “webpack-dev-server”: “3.1.3”, “webpack-md5-hash”: “0.0.6” }}Now if you try to modify something in your app, the browser should automatically refresh the page.
Next, you need to download React devtools as a Chrome extension.

This way you can debug your app from the Chrome console much more easily.
ESLint configuration
Why do we need it? Well, generally we do not have to use it. But ESLint is a handy tool. In our case, it will render our code (in the editor and terminal, and on the browser) and highlight our mistakes, typos, and errors if we have any. This is called linting.
ESLint is an open-source JavaScript linting utility originally created by Nicholas C. Zakas in June 2013. There are alternatives to it, but so far it works great with ES6 and React, finds common problems, and integrates with other parts of the ecosystem.
For now, let’s install it locally for our own new project. Of course, ESLint at this point has a large number of settings. You can read more about them on the official website.
npm install eslint --save-dev./node_modules/.bin/eslint --initThe last command will create a config file. You will be prompted to choose among three options:
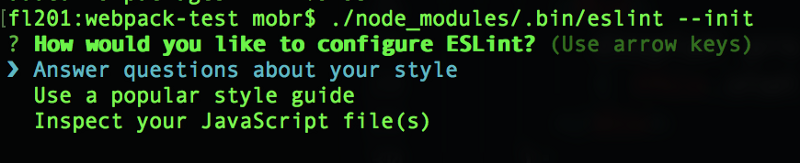
In this tutorial, I chose the first one: answering questions. Here are my answers:
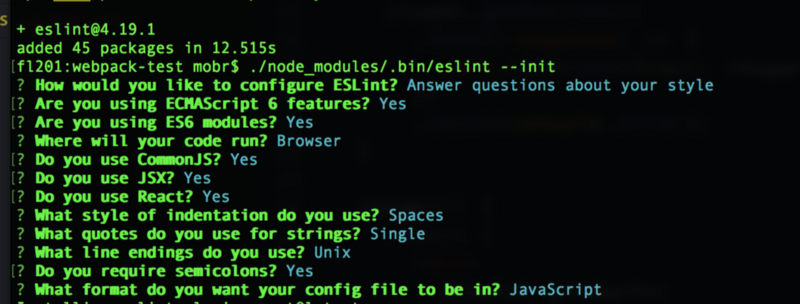
This will add .eslintrc.js file to your project directory. My generated file looks like this:
module.exports = { "env": { "browser": true, "commonjs": true, "es6": true }, "extends": "eslint:recommended", "parserOptions": { "ecmaFeatures": { "experimentalObjectRestSpread": true, "jsx": true }, "sourceType": "module" }, "plugins": [ "react" ], "rules": { "indent": [ "error", 4 ], "linebreak-style": [ "error", "unix" ], "quotes": [ "error", "single" ], "semi": [ "error", "always" ] }};Nothing happens so far. Although this is a perfectly valid config, it is not enough — we have to integrate it with Webpack and our text editor for it to work. As I mentioned, we can have it in the code editor, terminal (as a linter), or as a precommit hook. We will configure it for our editor for now.
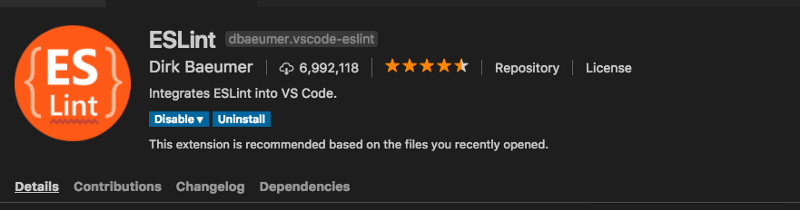
Setup for Visual Studio Code
In case you are wondering, ESLint has a plugin for almost every major code editor, including Visual Studio Code, Visual Studio, SublimeText, Atom, WebStorm, and even vim. So go ahead and download the version for your own text editor. I will be using VS Code in this demo.
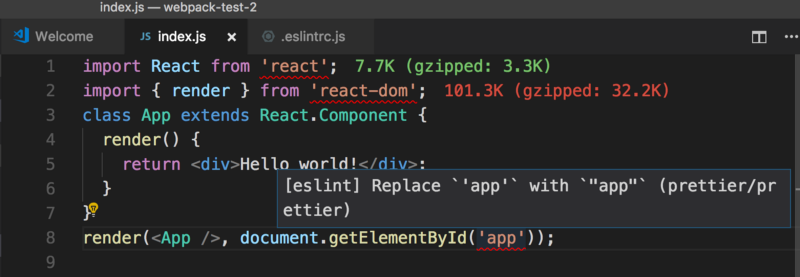
Now we can see some code errors appear. This is because the project has a configuration file that lints the code and complains when some rules are not obeyed.
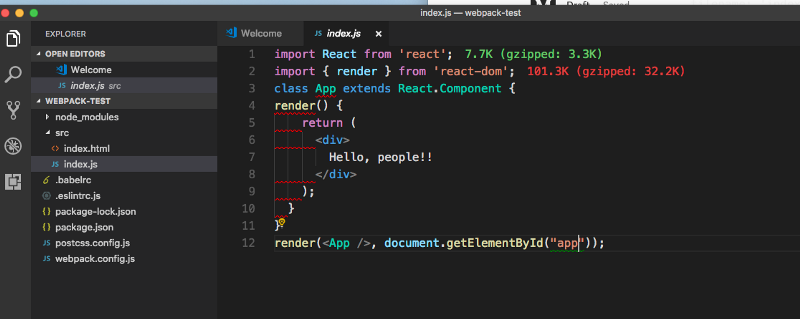
You can debug it manually by checking the error message, or you can take advantage of it and just press save and it will automatically fix things.
You can now go and adjust the ESLint settings:
module.exports = { "env": { "browser": true, "commonjs": true, "es6": true }, "extends": ["eslint:recommended", "plugin:react/recommended"], "parserOptions": { "ecmaFeatures": { "experimentalObjectRestSpread": true, "jsx": true }, "sourceType": "module" }, "plugins": [ "react" ], "rules": { "indent": [ "error", 2 ], "linebreak-style": [ "error", "unix" ], "quotes": [ "warn", "single" ], "semi": [ "error", "always" ] }};This will not break the build if you included double quotes by mistake instead of single quotes. It will also add some checks for JSX.
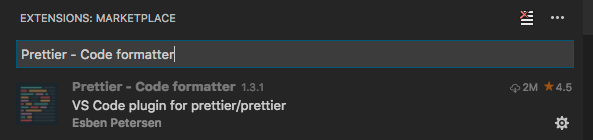
Add Prettier

Prettier is one of the most popular formatters nowadays, and it is well-accepted by the coding community. It can be added to ESLint, your editor, and also installed as a pre-commit hook.
Once you install it, you can try to check your code again. If we write some weird indentation and press save, it should automatically format the code now.
That is not enough yet. In order for ESLint to work synched and not emit the same errors twice, or even have rules conflicts, you need to integrate it with your ESLint.
npm i --save-dev prettier eslint-plugin-prettierIn the official docs, they recommend that you use yarn , but npm will do for now. To your .eslintrc.json file add:
... sourceType: "module"},plugins: ["react", "prettier"],extends: ["eslint:recommended", "plugin:react/recommended"],rules: { indent: ["error", 2], "linebreak-style": ["error", "unix"], quotes: ["warn", "single"], semi: ["error", "always"], "prettier/prettier": "error"}...Now we want to extend our ESLint rules to include prettier rules:
npm i --save-dev eslint-config-prettierand add some extends to your eslint config:
...extends: [ "eslint:recommended", "plugin:react/recommended", "prettier", "plugin:prettier/recommended"]...
Let’s add some more configurations to it. You should do this in order to avoid mismatches between default Prettier rules and your ESLint rules, like the one I have now:
Prettier borrows ESLint’s override format. This allows you to apply configuration to specific files.
You can now create a config file for it in the form of a .js file.
nano prettier.config.jsNow, paste in that file:
module.exports = { printWidth: 80, tabWidth: 2, semi: true, singleQuote: true, bracketSpacing: true};
Now when you press save, you see your code being automatically formatted. Isn’t that way prettier? Pun very much intended.
My package.json looks like this:
{ "name": "post", "version": "1.0.0", "description": "", "main": "index.js", "scripts": { "build": "webpack --mode production", "dev": "webpack-dev-server --mode development --open" }, "author": "", "license": "ISC", "devDependencies": { "babel-cli": "^6.26.0", "babel-core": "^6.26.0", "babel-loader": "^7.1.4", "babel-preset-env": "^1.6.1", "babel-preset-react": "^6.24.1", "babel-runtime": "^6.26.0", "clean-webpack-plugin": "^0.1.19", "eslint": "^4.19.1", "eslint-config-prettier": "^2.9.0", "eslint-plugin-prettier": "^2.6.0", "eslint-plugin-react": "^7.7.0", "html-webpack-plugin": "^3.2.0", "prettier": "^1.12.1", "react": "^16.3.2", "react-dom": "^16.3.2", "webpack": "^4.6.0", "webpack-cli": "^2.0.13", "webpack-dev-server": "^3.1.4", "webpack-md5-hash": "0.0.6" }}Now that we have this all set up, let’s quickly recap: ESLint watches your code for errors, and Prettier is a style formatting tool. ESLint has many more ways to catch errors, while Prettier formats your code nicely.
// webpack v4const path = require('path');const HtmlWebpackPlugin = require('html-webpack-plugin');const WebpackMd5Hash = require('webpack-md5-hash');const CleanWebpackPlugin = require('clean-webpack-plugin');module.exports = { entry: { main: './src/index.js' }, output: { path: path.resolve(__dirname, 'dist'), filename: '[name].[chunkhash].js' }, module: { rules: [ { test: /\.js$/, exclude: /node_modules/, use: { loader: "babel-loader" } } ] }, plugins: [ new CleanWebpackPlugin('dist', {} ), new HtmlWebpackPlugin({ inject: false, hash: true, template: './src/index.html', filename: 'index.html' }), new WebpackMd5Hash() ]};Issue: Prettier does not automatically format code in Visual Studio Code
A few people have pointed out that VS Code does not work with Prettier.
If your Prettier plugin does not format the code automatically on save, you ca fix it by adding this code to VS Code settings:
"[javascript]": { "editor.formatOnSave": true }as described here.
Adding ESLint loader to your pipeline
Since ESLint is configured in the project, it will also complain in your terminal once you run dev server.

Note: Although it is possible to do, at this moment I do not recommend using ESLint as a loader. It will break source map setup, which I described in greater details in my previous article How to solve Webpack problems. The Practical Case. I will show how to set it up here, in case the guys have already fixed the bug they had.
Webpack has its own ESLint loader.
npm install eslint-loader --save-devYou have to add ESLint to rules. When using with transpiling loaders (like babel-loader), make sure they are in the correct order (bottom to top). Otherwise, the files will be checked after being processed by babel-loader
...module: { rules: [ { test: /\.js$/, exclude: /node_modules/, use: [{ loader: "babel-loader" }, { loader: "eslint-loader" }] } ]},...
Here are some possible issues you might have:
- add an unused variable to your index file
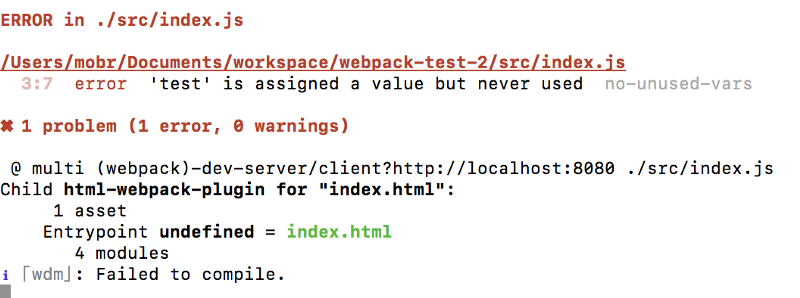
If you stumble upon this error (no-unused-vars), it is pretty well explained in this issue on GitHub and here.
We can solve this problem by adding some rules, explained here and here.
As you might have noticed, you get the no-unused-vars error here. You need to make it a warning and not a error, because this way it way easier to do fast development. You need to add a new rule to your ESLint so that you do not get the default error.
You can read about this setup more here and here.
...semi: ['error', 'always'],'no-unused-vars': [ 'warn', { vars: 'all', args: 'none', ignoreRestSiblings: false }],'prettier/prettier': 'error'}...This way we will get pretty error and warning messages.
I like the idea of having an auto fix feature, but let’s be clear: I am not the biggest fan of having things magically change. To avoid that situation we can commit autofix for now.
Pre commit hook
People are usually very careful when it comes to using Git tools. But I assure you, this one is very easy and straightforward. Pre commit hooks with Prettier are used so that teams have consistent codebase style across every project file, and nobody can commit unstyled code. Setup Git integration for your project like this:
git initgit add .nano .gitignore (add your node_modules there)git commit -m "First commit"git remote add origin your origingit push -u origin masterHere are some great articles on git hooks and using Prettier.
For people who say you can only do it locally — no, that’s not true!
You can do it using lint-stage tool from this repository by Andrey Okonetchnikov.
Adding propTypes
Let’s create a new component in our app. So far, our index.js looks like this:
import React from 'react';import { render } from 'react-dom';class App extends React.Component { render() { return <div>Hello</div>; }}render(<App />, document.getElementById('app'));We will create a new component called Hello.js for demo purposes.
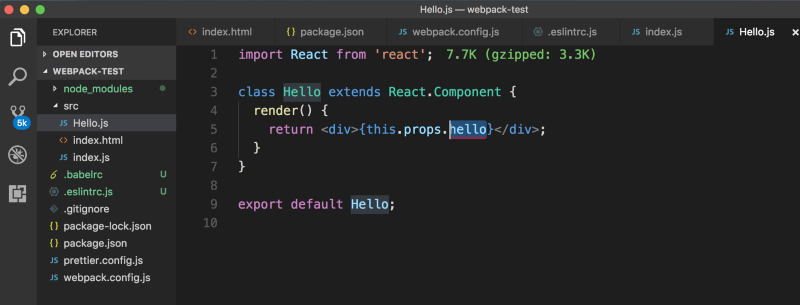
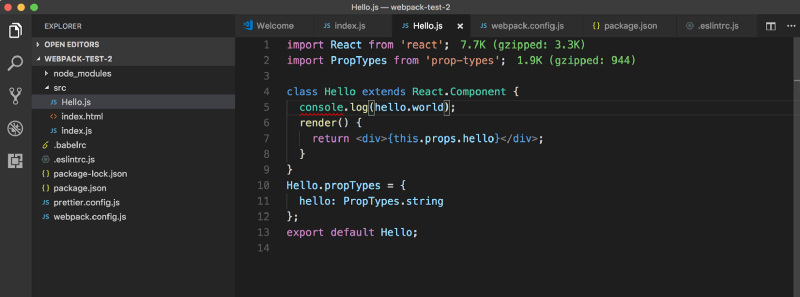
import React from 'react';class Hello extends React.Component { render() { return <div>{this.props.hello}</div>; }}export default Hello;Now import it to your index.js file:
import React from 'react';import { render } from 'react-dom';import Hello from './Hello';class App extends React.Component { render() { return ( <div> <Hello hello={'Hello, world! And the people of the world!'} /> </div> ); }}render(<App />, document.getElementById('app'));We were supposed to see the element, but ESLint complains:
Error: [eslint] ‘hello’ is missing in props validation (react/prop-types)
In React v16, it is mandatory to add prop types in order to avoid type confusion. You can read more about it here.
import React from 'react';import PropTypes from 'prop-types';class Hello extends React.Component { render() { return <div>{this.props.hello}</div>; }}Hello.propTypes = { hello: PropTypes.string};export default Hello;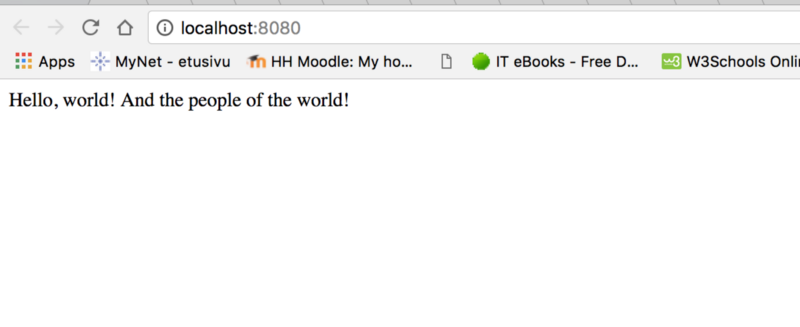
Hot module replacement
Now that you have your code checked, it is time to add more components to your React app. So far you only have two, but in most cases you have dozens.
Of course, recompiling the entire app on refresh every time you change something in your project is not an option. You need a faster way to do it.
So let’s add hot module replacement, aka HMR. In the documentation, it is described as:
Hot Module Replacement (HMR) exchanges, adds, or removes modules while an application is running, without a full reload. This can significantly speed up development in a few ways:
Retain application state which is lost during a full reload.
Save valuable development time by only updating what’s changed.
Tweak styling faster — almost comparable to changing styles in the browser’s debugger.
I am not going into the technicalities of how it works here: that would be the subject of a separate post. But here is how to configure it:
...output: { path: path.resolve(__dirname, 'dist'), filename: '[name].[chunkhash].js'},devServer: { contentBase: './dist', hot: true},module: { rules: [...Solving small issues with HMR

We had to replace chunkhash with hash, because evidently webpack has fixed that issue since the last time. Now we have hot module replacement working!
...module.exports = { entry: { main: './src/index.js' }, output: { path: path.resolve(__dirname, 'dist'), filename: '[name].[hash].js' }, devServer: { contentBase: './dist',...Solving bugs
If we run the dev script here:
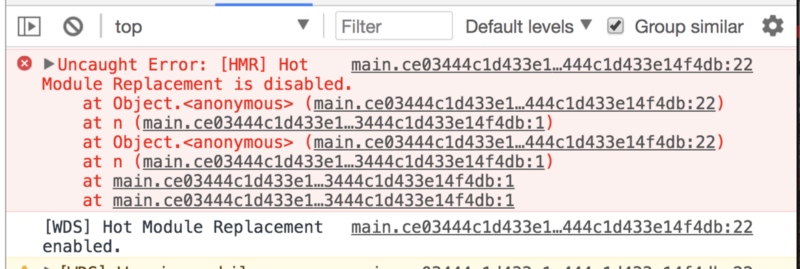
then use tips from this issue to fix it.
Next, add — hot flag to dev script in package.json:
..."scripts": { "build": "webpack --mode production", "dev": "webpack-dev-server --hot"}...Source maps:
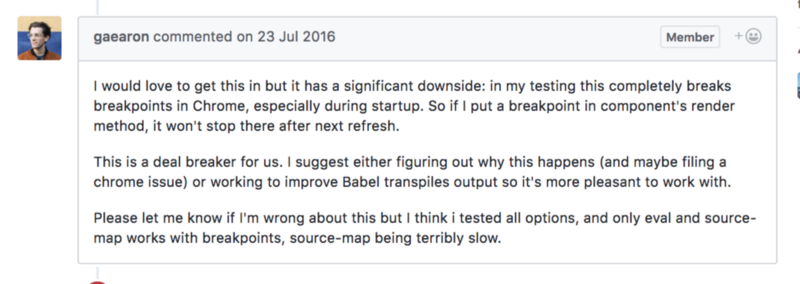
As I mentioned above, source maps will not work together with ESLint loader. I have filed an issue here.
Usually, you would not want them in your project anyway (since you want to debug your project from ESLint error messages). They are also known for making HMR slower.
You can read about it more here and here.
But if you want source maps anyway, the easiest way to add them is through the devtools option.
...module.exports = { entry: { main: './src/index.js' }, output: { path: path.resolve(__dirname, 'dist'), filename: '[name].[hash].js' }, devtool: 'inline-source-map', devServer: { contentBase: './dist', hot: true }, ...Note: source maps will not work until you specify the environment the right way. You can read about my process of debugging here. Below I will provide you with a spoiler and explanation of how I solved that issue.
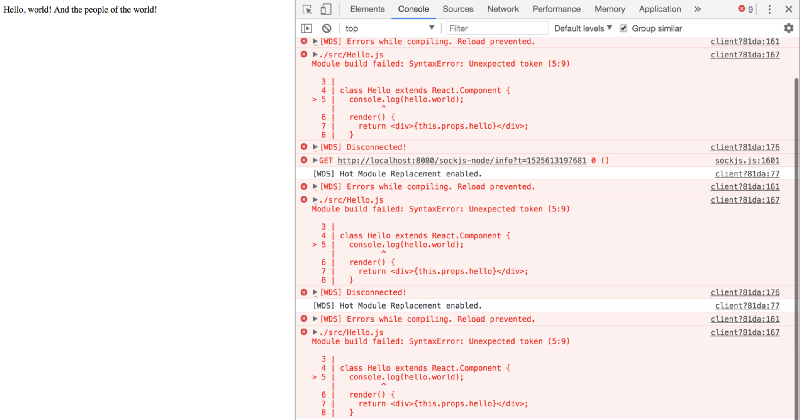
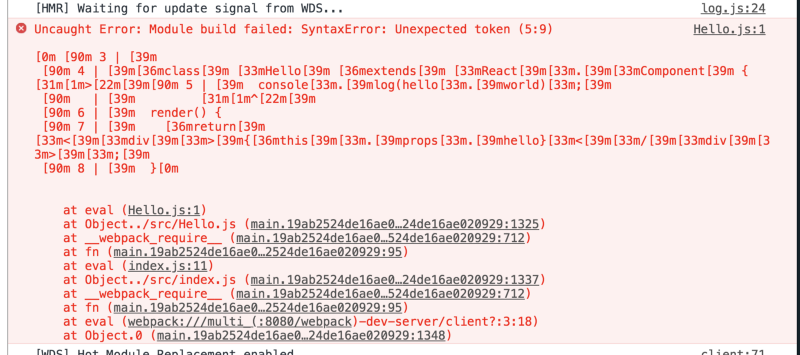
If we now go and create an error in our code, this will be displayed in the console and will point us to the right place:
…or so we thought. But nope:
You need to change the environment variable like this:
..."main": "index.js","scripts": { "build": "webpack --mode=production", "start": "NODE_ENV=development webpack-dev-server --mode=development --hot"},"author": ""...webpack.config.js
...devtool: 'inline-source-map',devServer: { contentBase: './dist', open: true}...Now it works!
Now you have successfully setup the development environment for your project!
Lets recap:
- We set up webpack
- We created our first React component
- We included ESLint to check the code for mistakes
- We set up hot module replacement
- We (maybe) added source maps
Note: since a lot of npm dependencies might change by the time you read this, the same config might not work for you. I kindly ask you to leave your errors in the comments below so that I can edit it later.
Please, Subscribe and Clap for this article! Thanks!
More materials:
SurviveJS — Webpack
After weeks failing at configuring webpack, I stumbled upon SurviveJS book while looking for yet another tutorial…survivejs.comA Beginner’s Guide to Webpack 4 and Module Bundling — SitePoint
Webpack is a module bundler. Its main purpose is to bundle JavaScript files for usage in a browser, yet it is also…www.sitepoint.com