
by Denis Nuțiu
How to get started with FreeRTOS and ESP8266

Recently, I purchased a NodeMCU from AliExpress for about $4. The reason I did this was to find out what all the fuss is about with ESP8266.
NodeMCU is an open source IoT platform. It includes firmware which runs on the ESP8266 Wi-Fi SoC from Espressif Systems, and hardware which is based on the ESP-12 module.
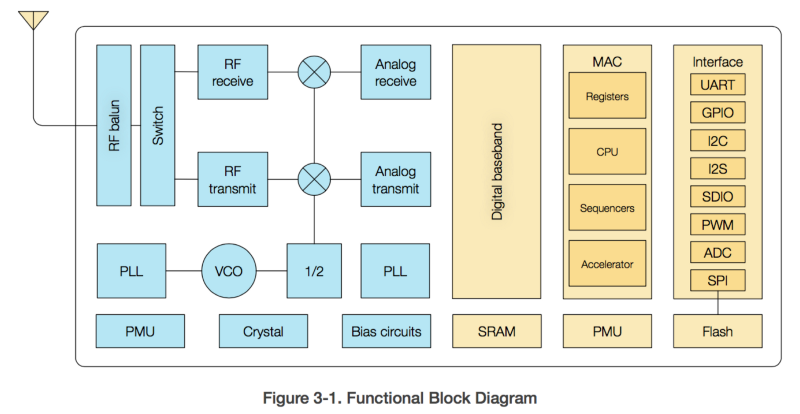
Compared to the Arduino UNO, my ESP8266 totally knocks it out of the park when it comes to CPU power and price.
The ESP8266 is 500% faster and 82% cheaper than the Arduino. The ESP8266 also has WiFi connectivity.
I was very surprised when I visited the Espressif website for the ESP8266. There’s lots of documentation and resources that you can use. For example, there’s an Android application which tells your ESP8266 to connect to your WiFi. The app sends the SSID and password as packets, the ESP8266 sniffs them, and then it connects to your WiFi. This is called SmartConfig, and was invented by Texas Instruments.
In this article, I will guide you to setup and run the Smart Config example from the Espressif RTOS SDK.
Here’s the things you’ll need:
- A modern computer.
- A NodeMCU board with ESP12-E
- VirtualBox (https://www.virtualbox.org/wiki/Downloads)
- Ubuntu Server LTS (https://www.ubuntu.com/download/server)
Configuring VirtualBox for development
- Download VirtualBox and install Ubuntu Server. This should be easy to do, but if you don’t know how, Google it or have a look at this graphic step by step guide. Installing an OS is a nice skill to have. (Tip: When VirtualBox prompts you to select the disk, make it dynamically allocated and at least 50GB in size. This will save you some headaches further down the line.)
- Make sure that you can access the internet from within the virtual machine and configure the DNS server:
To configure the DNS server, have a look at this example.
Example: dns-nameservers 8.8.8.8 8.8.4.4 If you can ping Google, then you’re good to go!3. (Optional) Install OpenSSH and Samba server. This will make your life much easier.
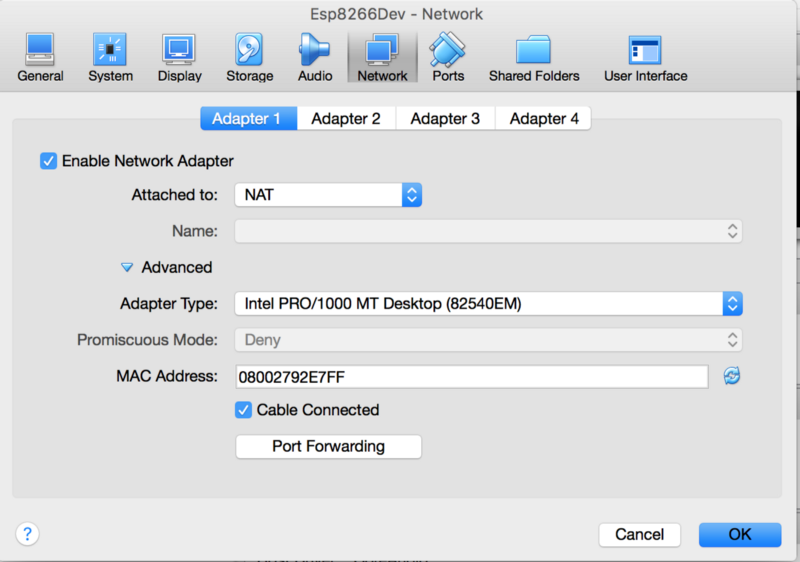
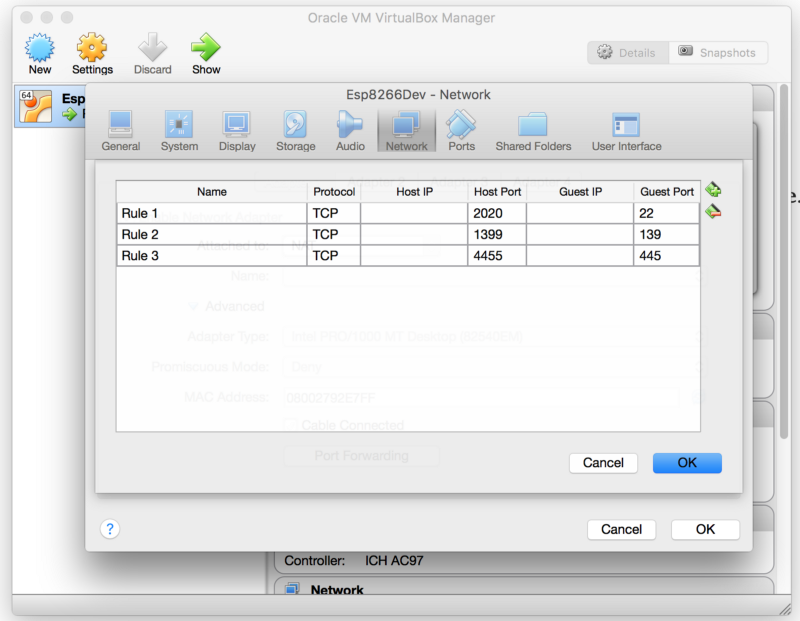
4. (Optional) Enable port forwarding. In order to SSH directly into your virtual machine, you need to enable port forwarding. For example, to map the port 2222 on your host machine to the port 22 of your virtual machine.
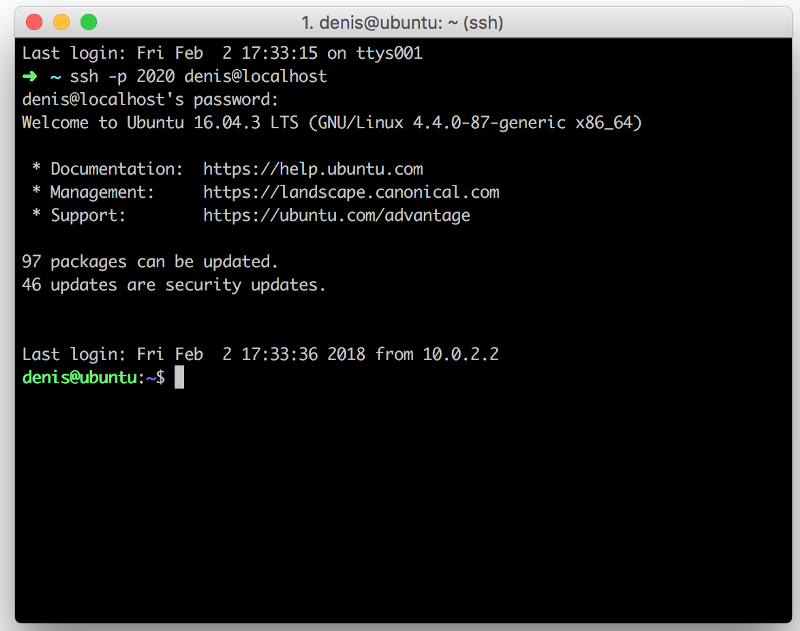
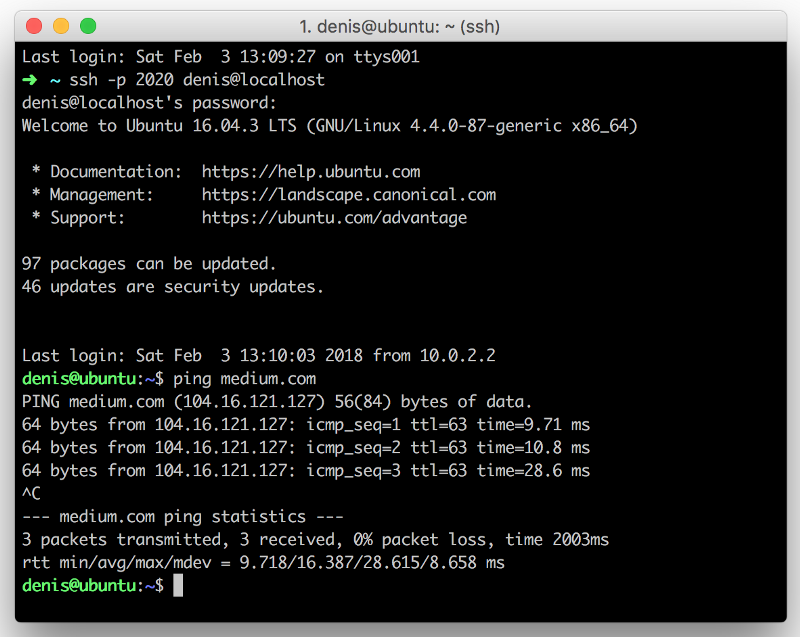
If you have enabled port forwarding, you can now SSH into your virtual machine from your Host machine as in the figure below.
Note: If you’re on Windows, you need Putty in order to SSH into the virtual machine.
5. Plug in your NodeMCU and execute the following command:
tail -f /var/log/kern.log
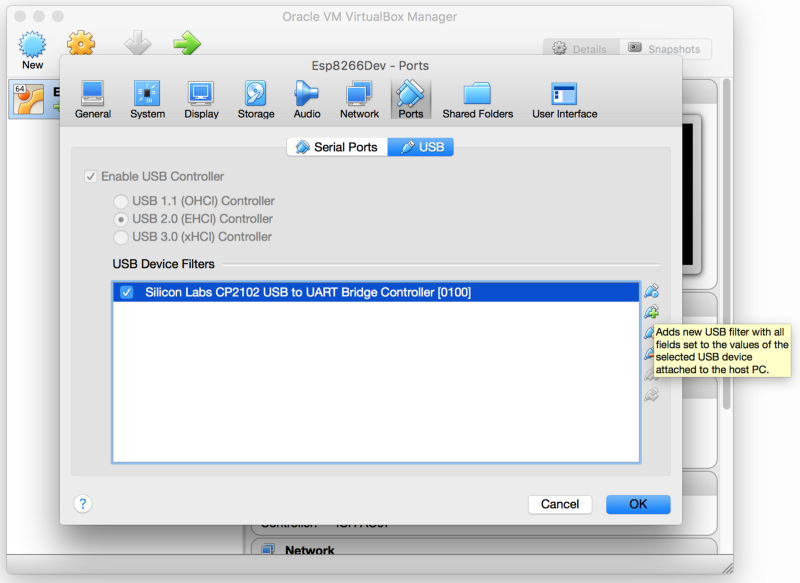
This should reveal to you that the device has been identified as /dev/ttyUSB0. If nothing happens, then you need to add the USB to the virtual machine. After adding the USB, unplug and plug your device in again.
If you’ve reached this point and every thing is working, congratulations! You’re now ready to compile the SDK and run the SmartConfig example. You can even shoot me a tweet at https://twitter.com/metonymyqt
Compiling the SDK and flashing the board
- Install the required packages (as below). This info is also available on the SDK’s readme.md.
sudo apt-get install make unrar-free autoconf automake libtool gcc g++ gperf flex bison texinfo gawk ncurses-dev libexpat-dev python-dev python python-serial sed git unzip bash help2man wget bzip2 libtool-bin2. Create a new folder and navigate into it: mkdir Development && cd Development
3. Clone the Open SDK: https://github.com/pfalcon/esp-open-sdk
git clone --recursive https://github.com/pfalcon/esp-open-sdk.git
3. Run make: make
Warning: This step will take a while to finish so please be patient. On my virtual machine it completed after 50 minutes. On yours it might take more or less, but before you run, make make sure that you’re connected to the internet and DNS is properly configured. The best way to check this is to execute a ping to Google or some other site if Google is blocked in your region.
If your ping is successful, you can minimize the windows and watch an episode of your favorite TV show. Come back after about 40 minutes (but make sure your computer doesn’t go to sleep).
After the SDK has been built successfully, you’ll see a message telling you to put something in your path. To do so, execute the following:
echo 'export PATH=/home/denis/Development/esp-open-sdk/xtensa-lx106-elf/bin:$PATH' >> ~/.profileThe command will append the string to the ~/.profile file. Now please run the following command:
xtensa-lx106-elf-gcc --version
If the command executes successfully, then you’re good to go!
4. Test your board
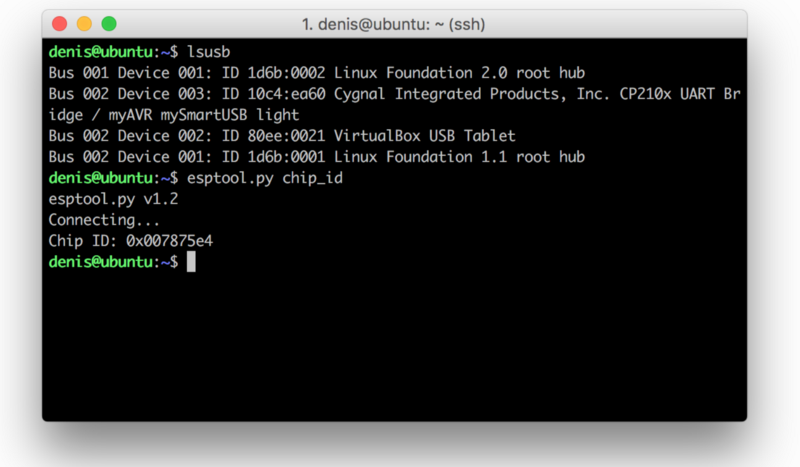
Plug your NodeMCU and run lsusb to verify that your device is connected. After that, run esptool.py chip_id. You should now see the board’s chip id.
5. Clone ESP8266_RTOS_SDK
git clone https://github.com/espressif/ESP8266_RTOS_SDK.git6. Export the SDK path and SDK/BIN path using the commands below.
echo 'export SDK_PATH=/home/denis/Development/ESP8266_RTOS_SDK' >> ~/.profileecho 'export BIN_PATH=/home/denis/Development/ESP8266_RTOS_SDK/bin' >> ~/.profile7. Compile the SmartConfig example
cd /home/denis/Development/ESP8266_RTOS_SDK/examples/smart_config/chmod +x ./gen_misc.sh./gen_misc.shNow accept the default values until you’re asked for SPI_SIZE_MAP. This is where you select 4 because the NodeMCU has a flash size of 32Mbit and this translates to 4MB. You can also select SPI_SPEED 3=80Mhz
You’ll see something like this:
!!!SDK_PATH: /home/denis/Development/ESP8266_RTOS_SDKBIN_PATH: /home/denis/Development/ESP8266_RTOS_SDK/binNo boot needed.Generate eagle.flash.bin and eagle.irom0text.bin successully in BIN_PATHeagle.flash.bin — — — →0x00000eagle.irom0text.bin — →0x20000!!!8. Flash the board
cd $BIN_PATHesptool.py erase_flashesptool.py write_flash 0x00000 $BIN_PATH/eagle.flash.bin 0x20000 $BIN_PATH/eagle.irom0text.bin 0x3FC000 $BIN_PATH/esp_init_data_default.binNow, if you reset the board, you should see no LED blinking.
9. Use the Phone Application
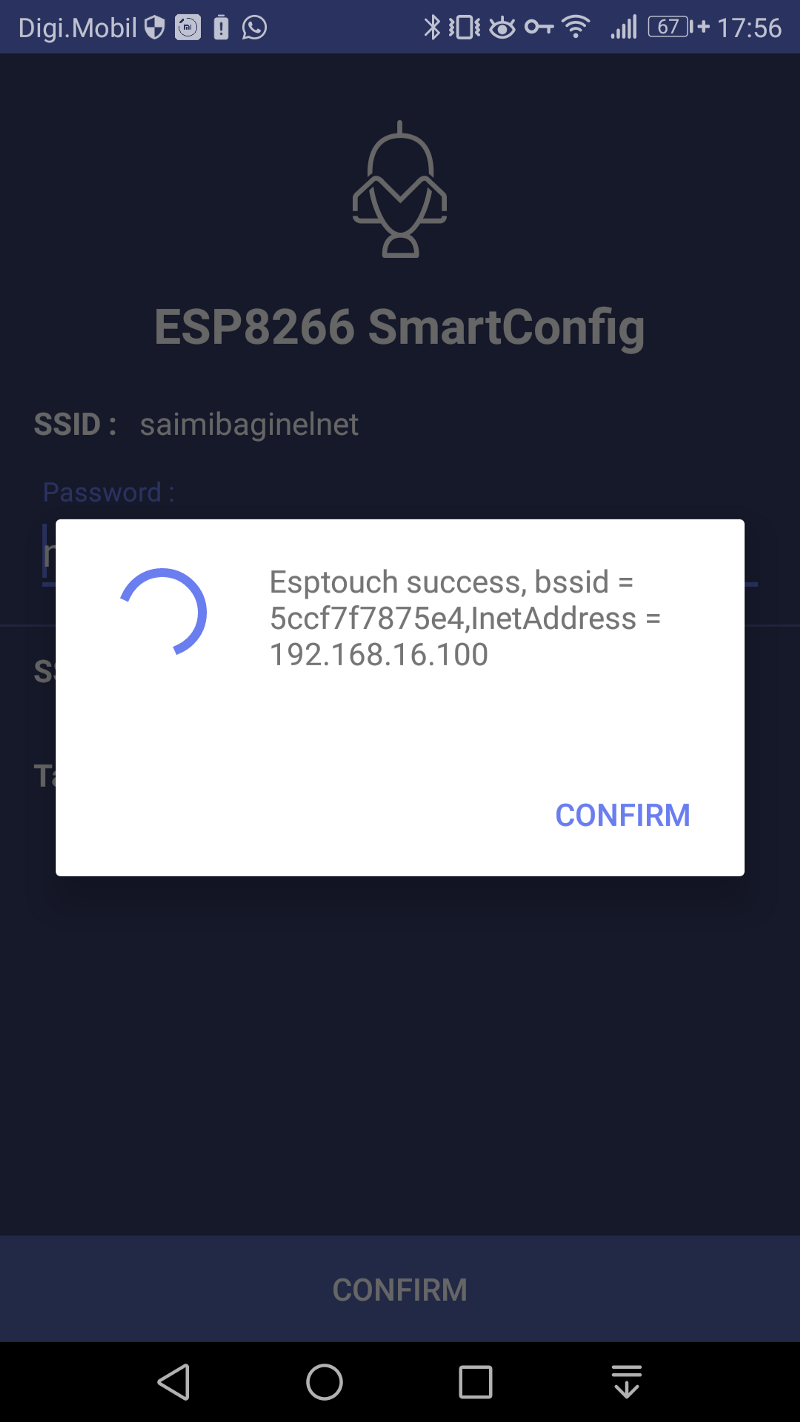
Open the Application, make sure that you’re connected to a WiFi AP, enter your password, and press confirm. After a few seconds the ESP8266 should connect to your AP. That’s it. Congratulations for reaching the end!
If you want to develop more using the ESP8266-RTOS-SDK, please visit the official websites. You’ll find a lot of resources and documentation there. Also, please take a look at the other examples found in the SDK folder.
Thank you very much for your time reading this. If you want to reach out to me, you can do so on Twitter: MetonymyQT