
by Tom Schweers
How to go from idea to URL quickly with React.js and Heroku

When I was first starting out as a developer, the one thing that I wanted to do was get a web application live. I wanted it online for the world to see. I didn’t care about how it looked, what features it had, or even if anyone would ever see it or use it. My only desire was to understand the entire end-to-end process. I wanted to know how a bunch of files and folders translated into a living, breathing application on the internet.
Not coming from an engineering background, I had no idea how any of that worked. All I knew was how to code some stuff in JSFiddle or something similar. I knew how to hack up nice little front-end features for my clients. My only real experience was configuring SaaS applications which is programming within a pre-built application. So naturally, I wanted to go deeper…

Long story short, I am writing this article for those of you out there in a similar situation. Someone who wants a simple and easy way to get your application online. This lets you focus on actually building out the functionality, and not the infrastructure.
Getting Started
There are plenty of boilerplates out there. In my experience they can be a bit overcomplicated, especially for novice developers. I’ve tried my hand at the Vue.js starter app, the MEAN stack app, and even the create-react-app. All took some hacking to get them to the point where I would be comfortable beginning the actual development of my application. However, I found Facebook’s create-react-app to be the easiest to setup. My boilerplate was originally derived from it.
React-Boilerplate
I initially created the react-boilerplate just for myself. Then I thought maybe if others found it useful then that would be even better. So if you’re following along, navigate to the link above which will take you to my GitHub repository.
The first (and easiest) thing you can do here is to scroll to the very bottom of the page and click the Deploy to Heroku button.

Heroku will first prompt you to create an account if you haven’t already. Go ahead and do this, you won’t regret it (and it’s free). After that, you will get a screen prompting you to create a new app.
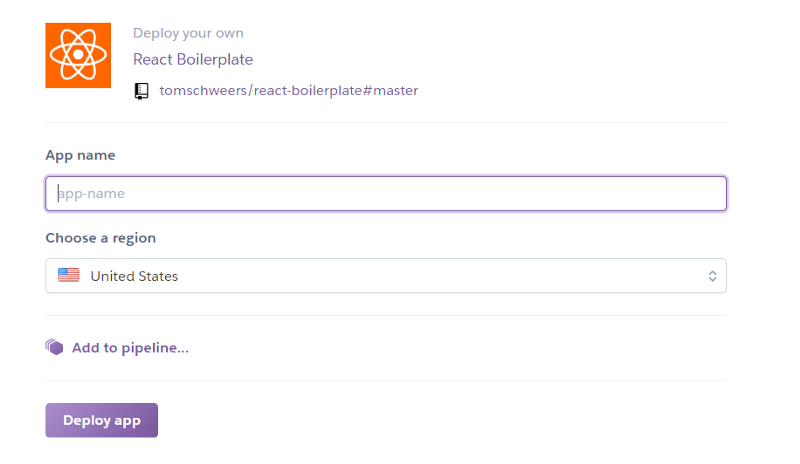
Type in a name for your app. The name must be unique across the entire Heroku platform, not just your account. Then click Deploy app.
Heroku
If you are not familiar with Heroku, it is a PaaS application that takes care of all of the behind the scenes stuff for you. Heroku makes the processes of deploying, configuring, scaling, tuning and managing apps as simple and straightforward as possible.
Heroku is a cloud platform that lets companies build, deliver, monitor and scale apps — we’re the fastest way to go from idea to URL, bypassing all those infrastructure headaches.
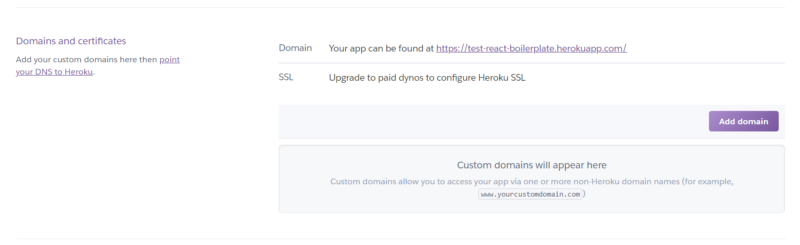
By following the instructions above, you just successfully deployed an application to the internet. To see your app, go to the Settings tab and scroll down to the Domains and certificates section. There you will see a link to your live app.
App Features
Now you could have done this with any starter app [boilerplate]. Because you used the react-boilerplate you have a couple of notable features ready to go. I wanted to include the bare minimum so that it would be easy to understand, but enough to be able to get started on future ideas quickly.
- The folder structure is organized and easy to understand. The app was built specifically to get a project going quickly. There is not too much bloat and component structure makes sense. More on how to build components below.
- React-Sidebar. This sidebar menu is responsive, modern and optimized for mobile browsing. Open the demo app on your phone and try sliding the menu closed with your finger; alternatively you can tap outside of the menu. This is by far the best sidebar I’ve come across for React.js.
- React-FontAwesome. This package provides you with beautiful, scalable, free SVG icons for your React.js application. Check out my personal website to see a few of them live in the top right corner. I’ve added the package to the boilerplate, but it doesn’t actually import any icons. All you have to do is uncomment the code in the App.js file to start importing.
- Depcheck. This is a command line tool used to scan your app for unused dependencies. It will tell you which packages are not being used so you can delete them. I find this extremely useful when experimenting with JavaScript packages. My sporadic mind will import packages all day, discarding them once I realize they don’t do exactly what I want.
And that’s it! Look over the README.md in my repository for a bit more information on features or how to configure them.
Downloading the Code
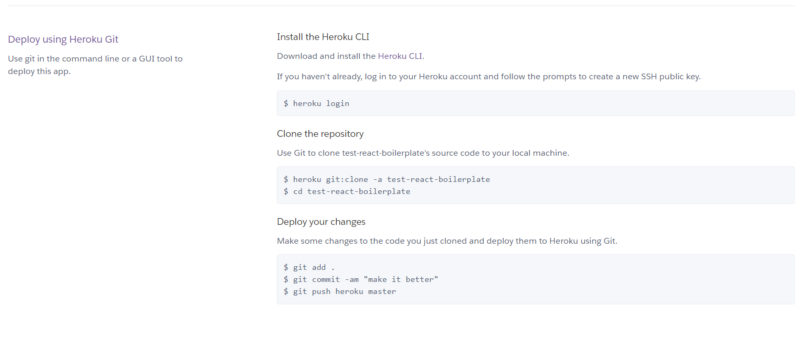
Heroku provides a very easy way to get the source code of the application you just deployed. All you have to do is follow the instructions on the Deploy tab inside your app using the Heroku CLI.
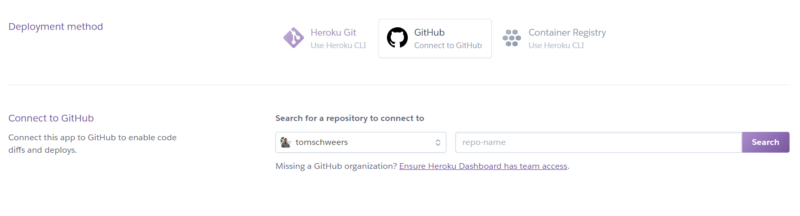
Alternatively if you would rather not use the Heroku CLI, you can clone or download the react-boilerplate repository directly from GitHub and create a new repository yourself. Then change the Deployment method to GitHub and search for your new repository.
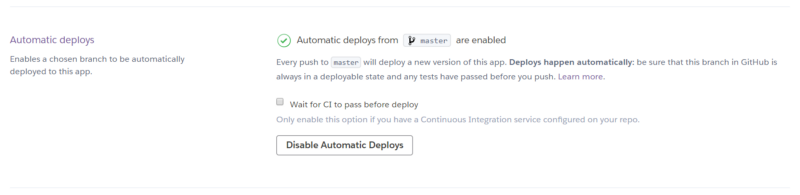
You can also enable automatic deployments. When you push commits to your repository, your Heroku site will update automatically.
Adding Pages and Components
At this point, you should have your own folder of files connected to your Heroku application. Building pages and components is really simple and I will show you how. This tutorial assumes you know the basics of ES6 and React.js. Screenshots are of my text editor — Visual Studio Code (highly recommended).
First, navigate to the Home.js file.
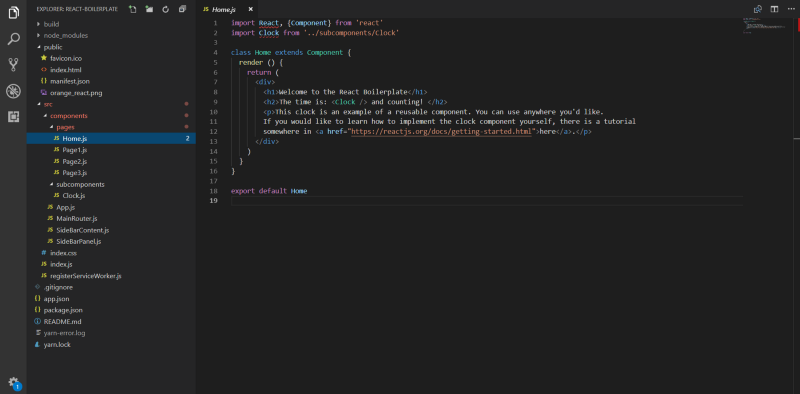
Here you can make changes to your home page. As you can see, I am importing a Clock component as an example. I am keeping smaller components that make up the application’s pages in the subcomponents folder.
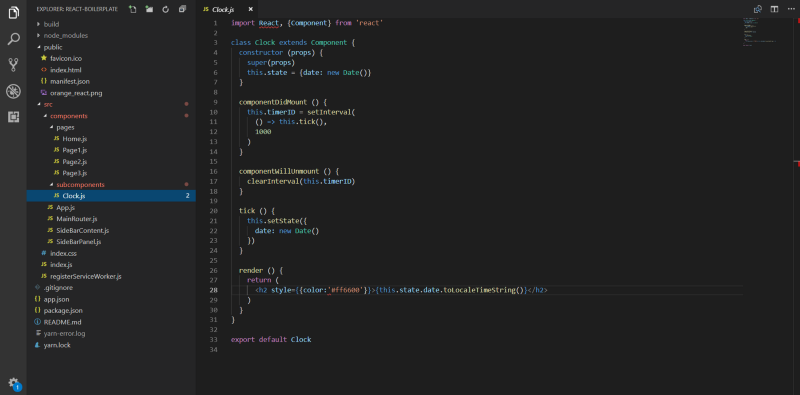
Subcomponents are the reusable building blocks to your pages. Put buttons, tables, graphs, animations, forms and other reusable components in this folder. Construct your pages in the pages folder and import them to MainRouter.js.
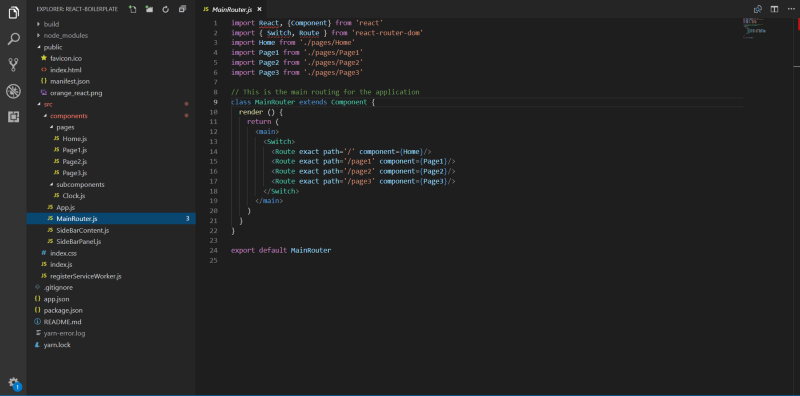
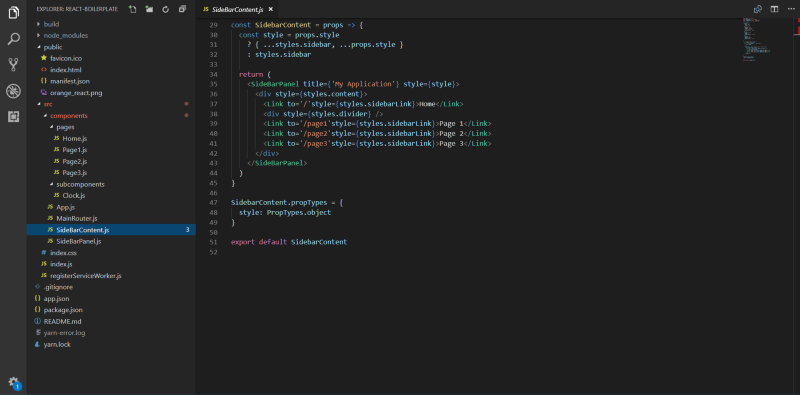
This file is what routes your pages files to the specified URL paths. You can name your URL paths whatever you like, I just added a few sample paths to demonstrate. After that, add links to your pages in the SideBarContent.js file so that your users can navigate them.
And that’s it!
These links will now show up in the sidebar navigation of your app and be routed to the pages that you specified above. To add a new page to your app you only need to follow those three simple steps. The App.js file and SideBarPanel.js file don’t need to be touched and you can focus on building the actual content of your application.
Conclusion
You now have a fully functional development app with desktop and mobile-optimized navigation and routing. You can now build components and pages without worrying about the structure of the application. Show your web application to anyone just by sending them the custom Heroku link.
The next step is to set up a custom domain name and get the app ready for real traffic. Let me know in the comments if you found this tutorial helpful or have any questions.