
by Abdul Kadir
How to lint away your troubles in Sublime

Sublime is a lightweight text editor and is quite popular among many web developers. Now I know there are many sophisticated IDEs in the market with intellisense, code completion, and whatnot. But this post is for those who have remained loyal to their favorite text editors! So if you use Sublime for your projects, then you might enjoy some of the nifty features it offers. Linting is one of them.
Let’s start off by defining the term “Linting”.
Linting is the process of checking your code for potential errors. This could be either the syntax or the code style.
The linting process can be done during three stages of development:
- Via your editor (live linting)
- Through the build process
- Using a pre-commit hook in version control
In this post, we will explore live linting in the editor. There are many popular linters out there for JavaScript like JSHint, JSCS, and ESLint. I’ll be using ESLint, because ESLint supports ES6 code, is highly extensible, and is very easy to use. If you’re interested, you can look at the comparisons between the different linters over here!
Step 1
You need to first install the ESLint npm package. The command is as follows:
npm install -g eslintThe ‘-g’ option is to install the package on the global. Install ‘npm’ if you do not already have it installed. A file will open up in Sublime asking you to download two other plugins. You need to install these plugins using Sublime’s Package Control.
Open up the package control using command/ctrl + shift + P and select the ‘Package Control: Install Package’ option. Then download the two plugins.
- SublimeLinter-eslint
- SublimeLinter-contrib-eslint
SublimeLinter is the framework that provides linting. It does not come with support for different languages. The language-specific Linter must be installed separately.
The Sublime-contrib-eslint plugin acts as an interface between ESLint and the SublimeLinter. You can check the installation procedure on their main website if you get stuck anywhere.
After successfully installing the plugins, you need to reset your editor for the changes to take effect. Now we will see ESLint in action!
Step 2
Phew! Those were a lot of installations. Now, finally, you can check out the awesomeness of Linting! Open up your file in Sublime and behold the power…but wait nothing’s happened. Why is that? Don’t fret. You have installed everything correctly, but ESLint by itself does not do anything. You need to provide the basic configuration, and it is a very straightforward process. Here’s how:
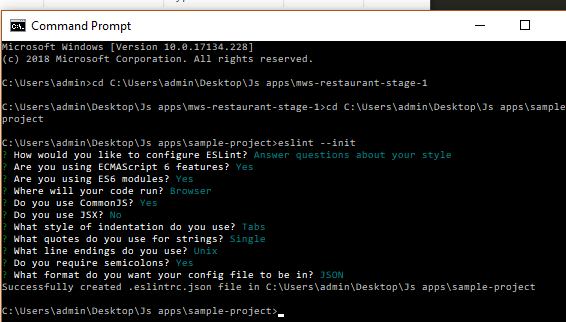
- Fire up the terminal program in the home directory of your project
- Type this command
eslint --initA prompt shows up asking you a few questions about your coding preferences and an ‘.eslintrc’ file is generated for you. This file contains the rules that you have just selected. You can add extra configurations should you choose to do so.
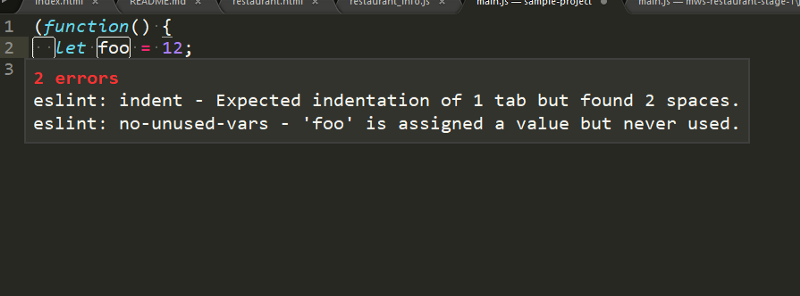
As you can see, ESLint is complaining about the indentation and the fact that the foo variable is not used anywhere. You can check any error or warning by hovering over the highlighted portion of the code or checking the message in Sublime’s status bar at the bottom.
So that was it! I hope you were able to follow along. Linting is a pretty cool tool to detect errors in your code. It ensures that you follow code guidelines and write clean code at all times. I hope you all found this post helpful, and as always, happy coding!