
by Harshita Arora
How to make something with Swift Playgrounds

Just a few days ago, I finished my WWDC 2018 scholarship submission. It was so much fun creating Alice in codeLand. This was my first year applying for WWDC scholarships, and I hope to get in!
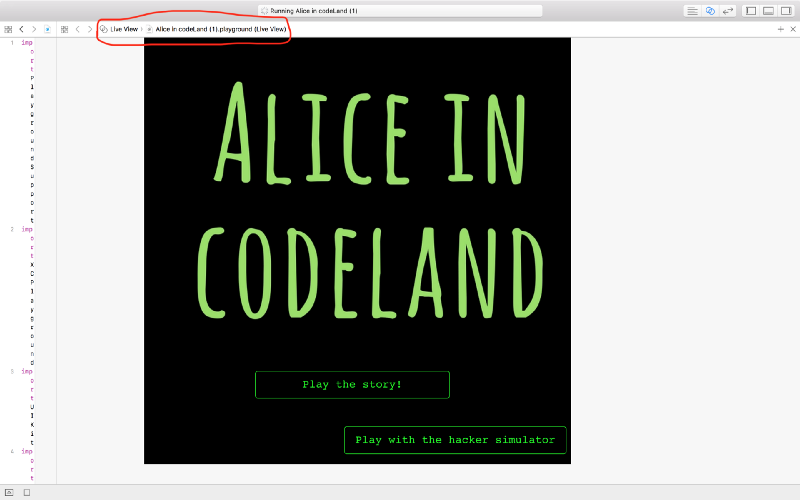
Alice in codeLand is a three-in-one. It’s a hacker/coding simulator that looks like the Mac OS terminal that you can play with offline. It’s also a funny story of a hacker named Alice who tried gaining unauthorized access to Apple’s WWDC portal after succeeding at hacking into toothtube.com (a video sharing platform for toothpaste reviews) and macaroonsarethebest.com (a social platform for macaroon lovers like myself). And finally, it’s a technical demonstration of SQL injections (a hacking technique) for people to learn about information security and the step-by-step process for SQL injections after finding out if a website is vulnerable or not.
Since 2017, Apple has put forth the challenge to scholarship applicants of creating an interactive experience in Swift Playgrounds.
When I started out, I was pretty confused. I’d never made a thing in Playgrounds before, as I’ve always worked with Xcode projects (that let you create the real iOS apps). I had only ever used Playgrounds when I started learning Swift to learn and code basic programming concepts. The instructors in the my online courses were using it, but those courses were only two weeks long, and I never created any graphics or animations in them.
So it took some time to get familiar with Playgrounds. In hindsight, I could have saved half the time had I known where to look for the right answers and how to get started working with them.
So this post is for all the future WWDC scholarship applicants, because it seems Apple will continue to give this task for the scholarship every year. Even if you have nothing to do with WWDC scholarships, I think Swift Playgrounds is an awesome tool for building and prototyping something quickly.
Note: This post assumes you have a background in Swift and iOS frameworks like UIKit. If you’ve built iOS apps before, that’d be a huge bonus!
Let’s start!
So what are Swift Playgrounds, and why bother?
Swift Playgrounds is an iPad app introduced by Apple in 2014 that helps you learn to code in Swift. It’s also a tool in Xcode to create Playgrounds. You can run Playgrounds created in Xcode on an iPad and vice-versa.
The difference between the iPad app and the Xcode tool is that on the iPad, the Playgrounds you create can access features like the camera, touch screen, and so on. But while running a Playground on Xcode, you can’t do that. More about Swift Playgrounds here.
While the concepts and examples in this post use Xcode, the Playgrounds can be created and run on the iPad app as well.
Some concepts to learn
1. How to run/play Playgrounds, and getting started with them
You can download open-sourced Playgrounds here, here, and here. In order to play them, click on Assistant Editor in Xcode and select the “Live View” if it’s not automatically selected.
A live view is where the output or the results of your code are displayed. When you create some object in your code that you want to be displayed in the live view, you need to assign the Live View property of the Playground page to that object.
Now, here’s the code to assign the Live View property of the Playground Page to a UIView object. You can also assign either a class or a view controller.
You’d have to import the framework PlaygroundSupport for that, and UIKit as well.
let view = UIView(frame: CGRect(x: 0, y:0, width: 1024, height: 768)PlaygroundPage.current.live = view In the navigation pane, you’ll see there’s two folders: Sources (for all the auxiliary code) and Resources (for all image and audio assets).
From my experience, dragging a Swift file from the Object library doesn’t work in Playgrounds for some reason. Instead, right-click on the Sources folder and click on “New file” to create a new Swift file.
2. How do you create a view?
Playgrounds don’t have Storyboards. You can create a view (UIView) of any size (max 1024 x 768) programmatically.
I created one in the example above.
3. What is PlaygroundSupport?
PlaygroundSupport is a framework for doing things like accessing a playground page and managing its execution, managing live views, and sharing and accessing persistent data.
Basically, you need to import this framework to be able to assign the live view property of the playground page to an object you created.
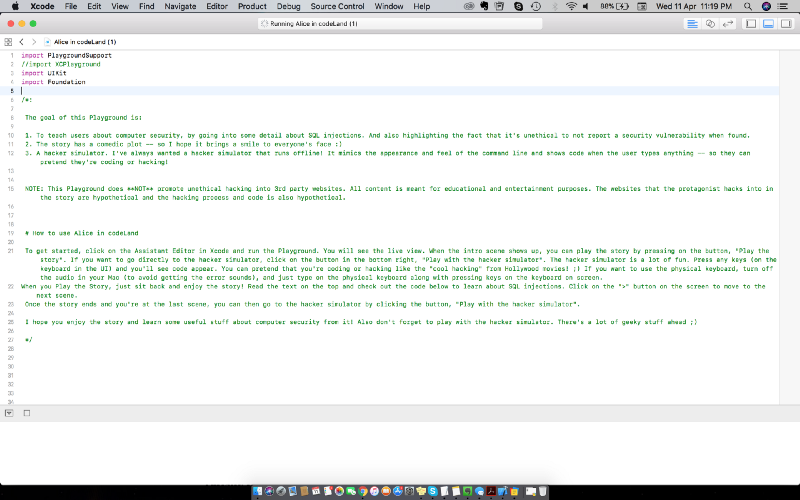
4. Creating Rich Documentation with Markup
Swift Playgrounds lets you create beautiful documentation (that is easier to read than the regular comments) using a language called Markup.
The basic syntax for Markup for rich documentation is as follows:
- Use “//: stuff” for single comments, which if you notice, means just an additional “:” after the // (which is used for regular comments).
- Use “/*: stuff */” for multi-line comments.
- Prefix a line with a hashtag, for example, “#stuff” to create a heading.
- Wrap text inside an asterisk, for example, “*stuff*” to display in italics.
- Wrap text inside two asterisks, for example, “**stuff**” to display in bold.
After you’ve written the content in the syntax, it’s in the raw markup format. And to display it in the rendered markup format (the real rich documentation), go to the Editor, and under “Playground Settings,” select “Render Documentation.”
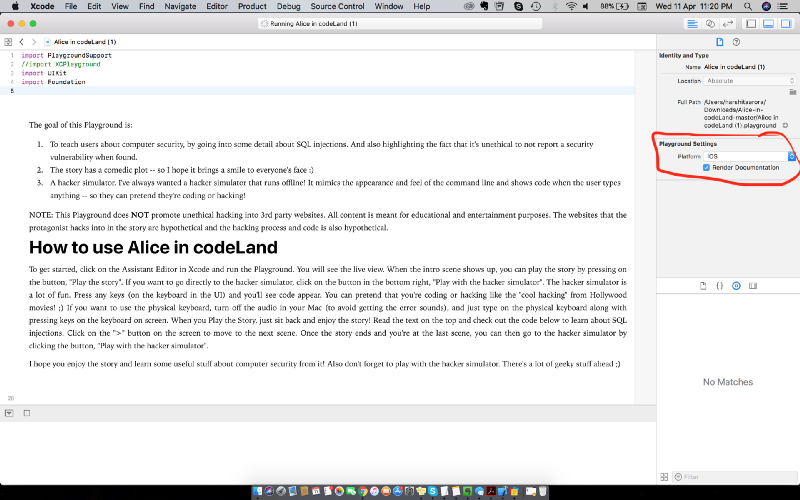
Read more about Markup here.
Getting started by building a simple Playground
Alright, let’s get our hands dirty by writing some code! Let’s create a hacker simulator like hackertyper.com! :-D
Let’s start with creating our background for the hacker simulator. Then using the shouldChangeTextIn method, we’ll change the text displayed in the text view to strings from an array with the code we want to be displayed when the user enters any text. This essentially creates a hacker simulator that makes code appear on the screen after pressing any keys.
import PlaygroundSupportimport UIKitlet arrayOfStrings = ["Alices-MacBook-Pro:~ Alice$", "override func viewDidLoad() {", "super.viewDidLoad()", "makeBackgroundGradient()", "addGradientToPortfolio()", "addGradientToTopBar()", "addGradientToTopBar()", "setupPopup()", "addTradeButton.titleLabel?.minimumScaleFactor = 0.5;", "addTradeButton.titleLabel?.minimumScaleFactor = 0.5;"]var variableThatChanges : Int = 0let frameOfMainView = CGRect(x: 0, y: 0, width: 1024, height: 768)class MainViewController: UIViewController, UITextViewDelegate {override func viewDidLoad() {let view = UITextView(frame: CGRect(x: 0, y:0, width: 1024, height: 768))self.view.frame = frameOfMainViewview.backgroundColor = .blackview.textColor = .greenview.font = UIFont(name: "Courier", size: 20)view.isEditable = trueview.delegate = self self.view.addSubview(view)} func textView(_ textView: UITextView,shouldChangeTextIn range: NSRange,replacementText text: String) -> Bool {if variableThatChanges == (arrayOfStrings.count - 1){variableThatChanges = 0}let text = textView.text ?? ""textView.text = text + "\n" + arrayOfStrings[variableThatChanges]variableThatChanges += 1return false}}let master = MainViewController()master.preferredContentSize = frameOfMainView.sizePlaygroundPage.current.liveView = masterHere’s the code above. Copy-paste it in a Playground. Run the live view, and you’ll see a black background. Click anywhere on the background, and you’ll see a keyboard pop out in the UI. Press any keys on it and it’ll show you the code from the strings.
There you go — you’ve made a basic hacker simulator in under 50 lines of code! Now it’s your turn to go get creative with Playgrounds! ;)
Some awesome resources to check out to learn more
- Apple documentation.
- WWDC session videos. Check out this, this, this, and this, in that order.
- Playgrounds in depth at RWDevCon 2017.
- The Kaseys video
- Code tutsplus tutorial
- WWDC 2017 and WWDC 2018 submissions. Also, awesome Swift Playgrounds to check out and get ideas from.
- A short chapter from a great book.
That’s it for now! Follow me on Medium or Twitter. Download an app I created! Check out an awesome startup I’m advising! :)