
by Karan Asher
How to make your own Python dev-server with Raspberry Pi
In simple terms, Raspberry Pi is a super cheap ($40) Linux based computer. That’s it. Seriously.
It can do whatever you can imagine a normal Linux computer can do, such as browse the web, write code, edit documents, and connect to I/O devices such a thumb drive, mouse, keyboard, etc. This tutorial will be focused on learning how to make your own Python dev-server with Raspberry Pi.
Step 0. Define the goal
Before we begin, it is important to understand what is it that we are trying to build. By the end of the tutorial, you will be able to run a basic website (using Flask) off of a Raspberry Pi on your local home network.
The goal of this tutorial is to demonstrate how a Pi can be used as a dev-server, more specifically, the example will be to host a simple website (using Flask).
Step 1. State the assumptions
Here are some assumptions that this tutorial will make:
- You already have a Raspberry Pi set up with Raspbian OS. Here is a useful setup guide if you need one.
- The Pi is connected to your home WiFi (and that you know the Pi’s IP address).
- You will not require a screen going forward. assuming points 1 and 2 are complete.
We will use VS Code with the Remote VSCode extension to remotely create and edit files on the Pi. I definitely recommend that you use these two to follow along. Also, these will make working with remote files a lot easier, so that’s a plus.
Step 2. Find the Pi’s IP address
First, connect the Pi to a power supply, and ensure that it is correctly booted up and connected to the WiFi/Ethernet (basically, it needs to have an internet connection).
We will use ssh to connect to and communicate with the Pi. To do that remotely using a laptop, you need to know its IP address. This can be easily obtained using your ISP’s admin portal (usually available at http://192.168.0.1. Please note that this could be different for different ISPs.)
Usually, you should have your Pi connected to an address which may look similar to ‘192.168.0.12.’ Again, this will be different for different people. So please use the IP address that you found for your Pi in the admin portal. Going forward, this tutorial will use 192.168.0.12 as the Pi’s IP address.
Step 3. Connect to the Pi using ssh
Open VS Code and its built-in terminal window on your laptop. Connect to the Pi with an IP address of 192.188.0.12 using the following ssh command:
ssh -R 52698:localhost:52698 pi@192.168.0.12
The above command will set up a 2-way communication channel between your laptop and the Pi. If this is the first time you are connecting to the Pi, use raspberry as the password. You may be prompted to change your default password. It is highly recommended that you do so.

Step 4. Create a project directory
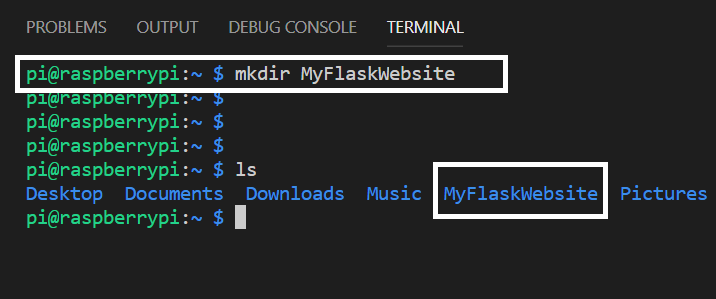
You should now be in the home directory of the Pi. Let’s create a directory for the website we wish to build. Use the following command to create the directory:
mkdir MyFlaskWebsite
Use the ‘ls’ command to verify that you can indeed see a new folder named MyFlaskWebsite.
Step 5. Install Flask
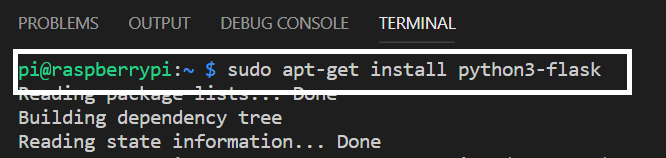
We will use Flask to create a simple website. Flask is a Python based micro web framework. It uses Jinja (Python based template engine) as its template engine which makes it very usable and powerful. Use the following command to install flask on the Pi:
sudo apt-get install python3-flask
Step 6. Write some basic code
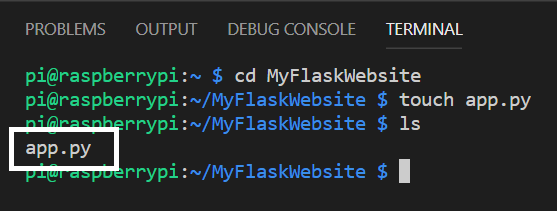
Now that Flask is installed, we can start creating files and writing some code. First, navigate to your newly created project directory (from step 4) by using the following command:
cd MyFlaskWebsite
All project files and folders will reside inside this ‘MyFlaskWebsite’ directory. Now, create your first code file (app.py) using the following command:
touch app.py
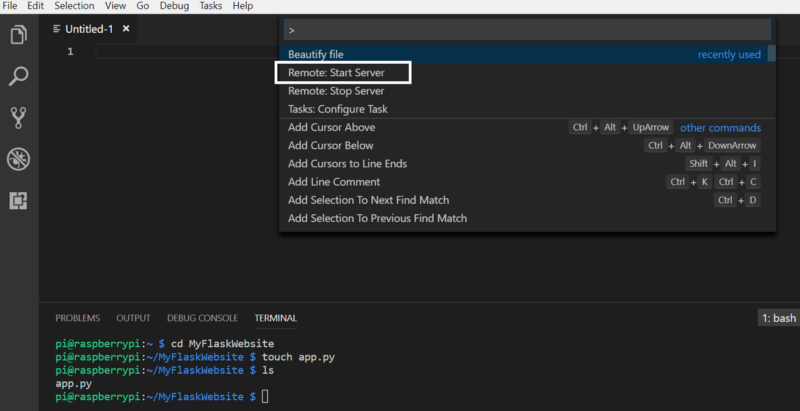
On checking the directory using the ‘ls’ command, you should be able to see this newly created file.
Now, press F1 and choose ‘Remote Start Server.’ This should allow you to remotely edit files on the Pi using your laptop.
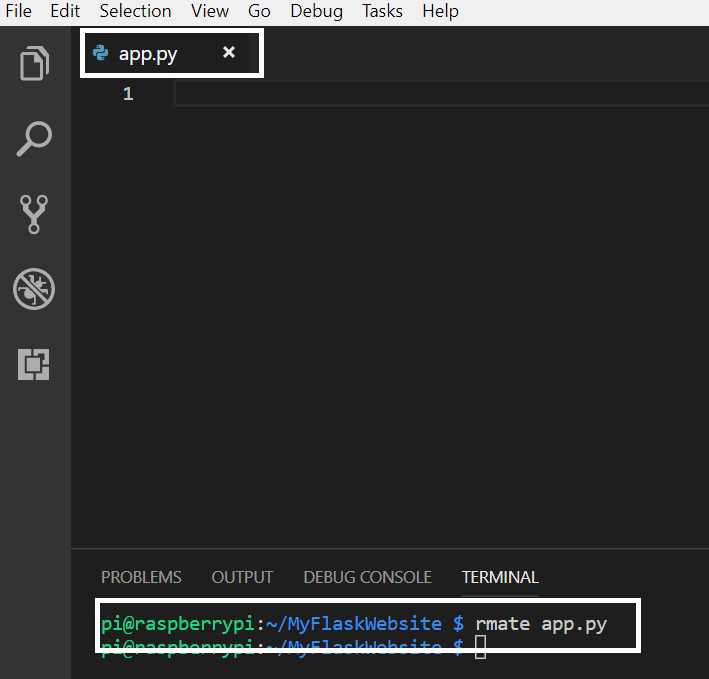
Next, use the following command to start editing the newly created app.py file. It might take a few seconds but the empty file should then be visible in the window right above.
rmate app.py
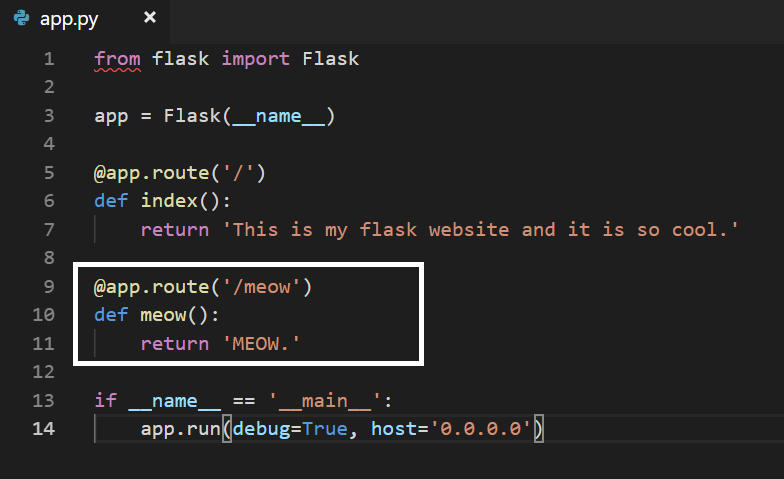
Type out the code shown in the below picture. Here, we have defined a route to the home page of the website which should display ‘This is my flask website and it is so cool.’ Note that setting the host to 0.0.0.0 allows this website to be accessible by all devices connected to the same network.
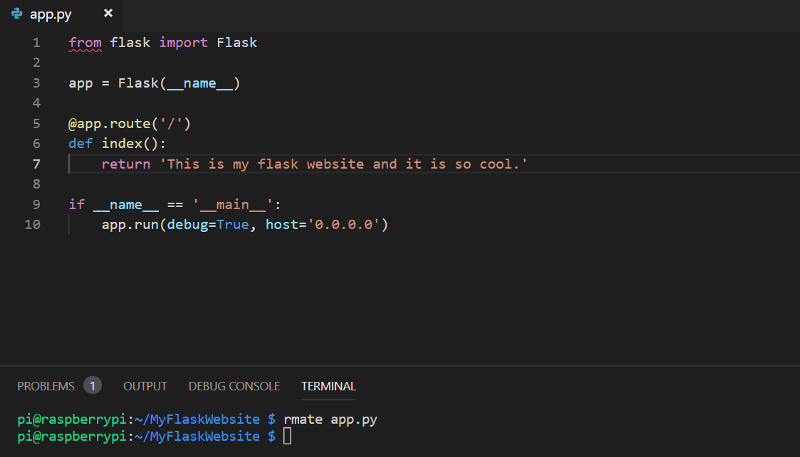
Save the file and use the following command to run the website on the Pi server:
python3 app.py

On receiving the above success message, open a new browser window on any device within your network and type out the Pi’s IP address (in this case, it is 192.168.0.12) followed by the port the dev-server is running on (5000.) So the complete address will be http://192.168.0.12:5000/
You should see the text ‘This is my flask website and it is so cool.’ on the webpage.
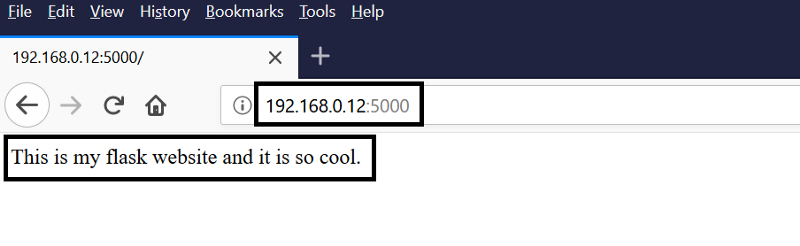
This confirms that your dev-server is active and is running the website you just created.
Step 7. Add more routes
Currently, the code consists of only 1 route which is the home page of the website. Add another route by typing out the following code. Note that you can dynamically make changes while the dev-server is running. It will automatically capture the delta (code change) and run a revised version once you refresh your browser window.
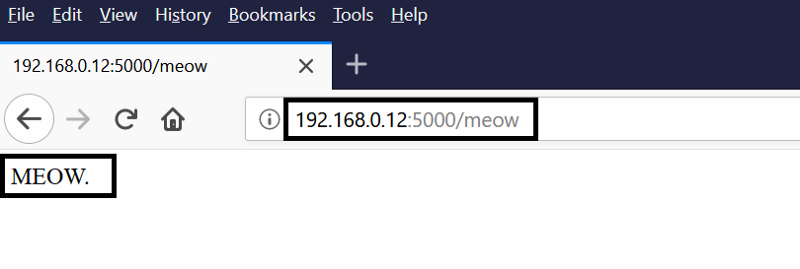
To check whether or not the new route works as expected, go to http://192.168.0.12:5000/meow and the webpage should ‘MEOW’ at you.
Step 8. Add structure to your code
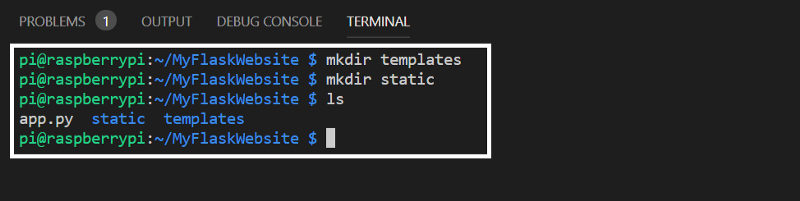
Now, adding more routes is cool but having the all the code in just 1 app.py file is not how a website should be structured. Usually, we would have a folder with HTML templates, a folder with static CSS files and another one for JS files. Let’s add these folders and move the code in appropriate folders to structure out code better. Use the following commands to create these directories:
mkdir templates
mkdir static
Use the ‘ls’ command to verify that these folders have been created.
Now, let’s create an HTML file for the homepage. Use the following commands to navigate to the templates directory. Then, create a new file named index.html and use rmate to edit the same:
cd templates
touch index.html
rmate index.html

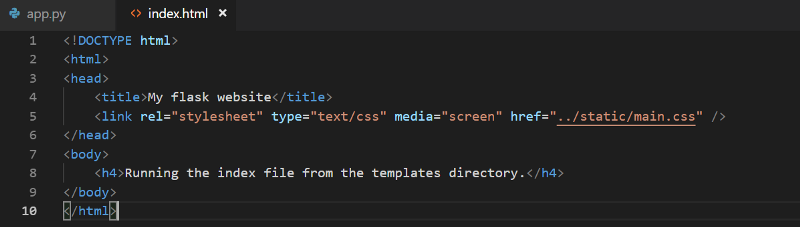
Write some basic HTML code for the homepage inside index.html.
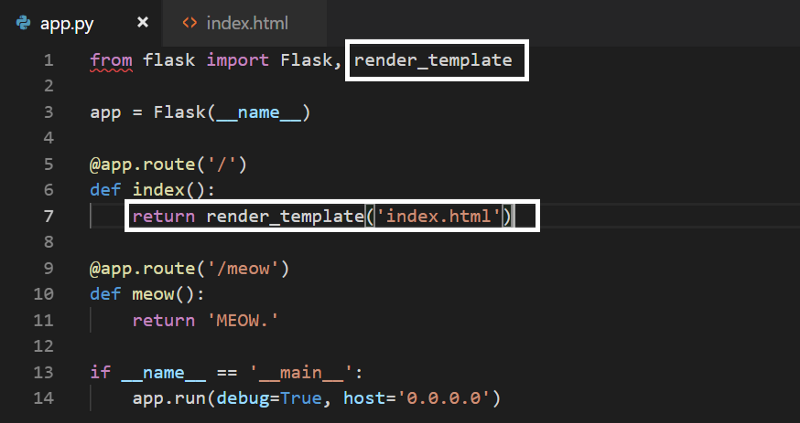
Make the following changes in app.py to use the index.html file. The below code will search for a file named index.html in the templates directory by default.
Navigate back to the project directory and run the website again.

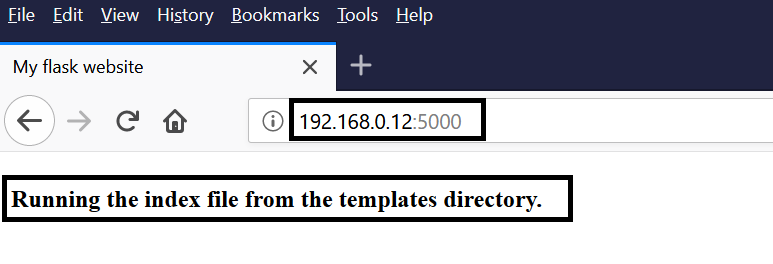
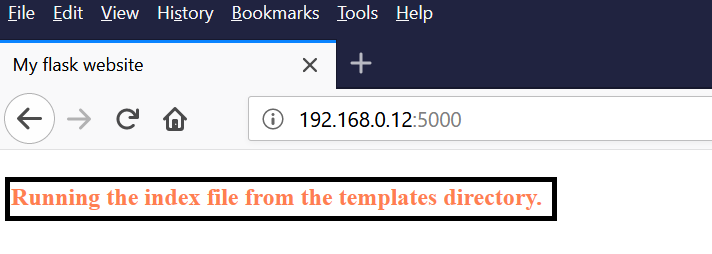
Go back to the home page and you should see the content you put inside of index.html.
Now add some styling by creating ‘main.css’ inside the static directory. As always, use the ‘cd’ command to change the directory, ‘touch’ command to create a new file, and ‘rmate’ command to edit the same file.

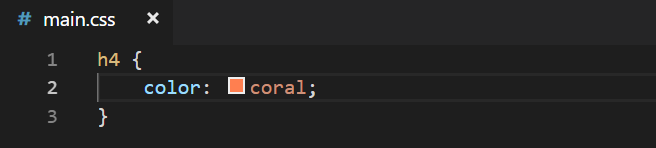
Add some styling to the h4 tag. Note that we currently have 1 h4 tag in index.html which the css is supposed to modify.
As always, test your changes by using the following command:
python3 app.py
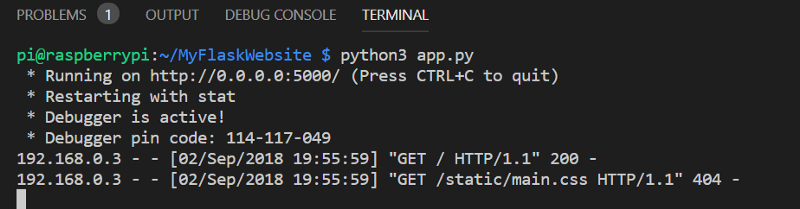
Notice how the text within the h4 tag gets colored according to the CSS.
Step 9. Take advantage of Jinja
Jinja in a Python based template engine which adds a lot of powerful features to webpages. Although this tutorial is not focused on learning Jinja, let’s just look at a simple example of how Jinja can be useful.
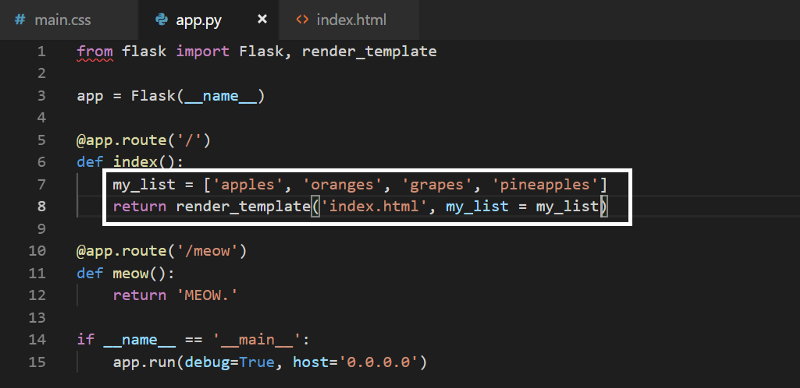
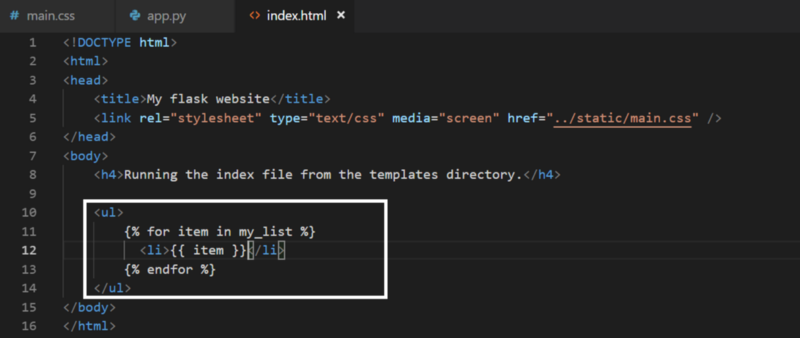
Let’s just create a list of fruits in app.py and pass it as a parameter to index.html. We will then have index.html display that list on the webpage. Make the following changes in app.py and index.html.
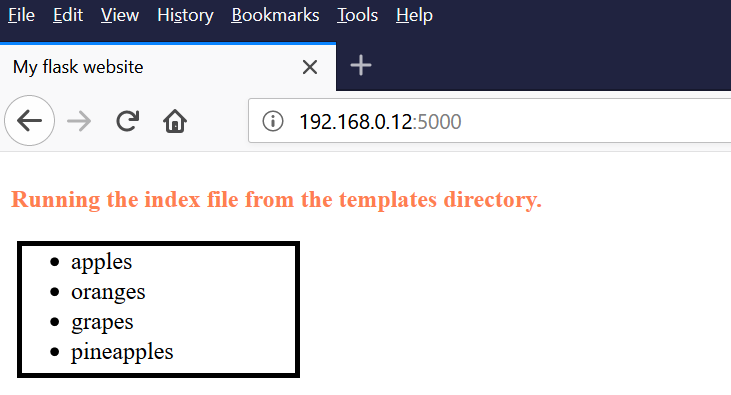
Refresh your webpage and you should see the list of fruits on screen.
This speaks to how powerful and useful Jinja can be. For more info on Jinja, please refer to this.
Step 10. Next steps
Now that you have a fully functional Python dev-server, the possibilities going forward are practically infinite. Here are a few useful next steps that you may consider for your project:
- Currently, the Pi is accessible only through the devices within your personal network. To expose the Pi to the outside world (access it through any device outside your personal network), you need something known as port forwarding. Basically, you need a domain name and a static IP address which is permanently assigned to the Pi. More info here and here.
- Most applications will require a database for basic CRUD operations. Python supports SQlite right out of the box. Learn how to use SQlite with Flask here and here.
- Here’s a cool Raspberry Pi starter kit on Amazon. The neat thing about this is that it has everything you need to get started and saves you the effort of searching individual items yourself.
- Since you are not using a screen, it is important that you use the shutdown command for the Pi using the terminal. This ensures that the Pi and the SD card are not damaged:
sudo shutdown -h now
#UntilNextTime.