
by Tirmidzi Faizal Aflahi
They laughed when I said Face Recognition was easy. But it can be.

Maybe you have seen it before. Maybe some of you use a face unlock feature that some phones have. This technology called Face Recognition is simply amazing. But, do you think it is hard to make an application based on that technology? It is actually not that hard. You can even make it with less than 10 lines of codes! Seriously. Here is my Face Recognition Tensorflow tutorial, special for you.
TL;DR
Here is the code, in case you don’t want to read the article. LOL.
from easyfacenet.simple import facenet

images = ['images/image1.jpg', 'images/image2.jpg', 'images/image3.jpg']
aligned = facenet.align_face(images)
comparisons = facenet.compare(aligned)

print("Is image 1 and 2 similar? ", bool(comparisons[0][1]))
print("Is image 1 and 3 similar? ", bool(comparisons[0][2]))
And it will output the following:
Is image 1 and 2 similar?  True
Is image 1 and 3 similar?  False
Wait, wait. No tensorflow? There is tensorflow of course. For this tutorial, I use an algorithm called Facenet that was developed with tensorflow. And while it is easy enough for me to use Facenet out of the box while coding tensorflow syntax, I don’t think most of you would be comfortable with that.
So, I decided to create another interface on top of Facenet, which I called Easy Facenet. To install the library, you can just type
pip install easyfacenetAnd you are good to go!
The article should not end like this, should it? Of course not.
Let me explain to you, line by line, the tutorial. At the same time, we’ll cover how Face Recognition works in the first place.
Face Recognition

So, how does Face Recognition work?
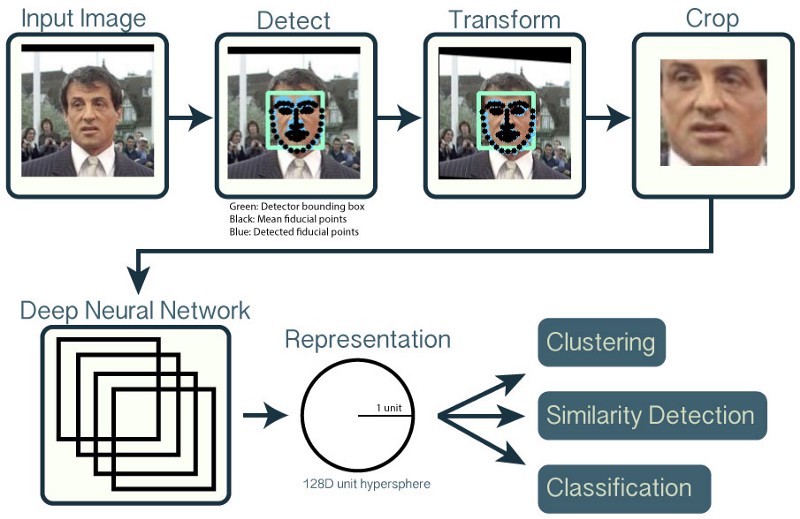
As you can see from the picture above, the steps are like this:
- Get an input image which should contain a face(s)
- You need to find where exactly the face is and put a bounding box around the face
- For consistency of the algorithm, you need to transform the picture, so that the position of mouth, nose, and eyes, are consistent for different pictures.
- Then crop it
- Input the cropped picture into the Facenet algorithm, which is a Deep Neural Network.
- It will output a vector representation of that face. It was 128-dimensional vector back then, it is 512-dimensional right now.
- Then you can do what you want with that representation. You can do classification, clustering, or just use a similarity computation between pictures.
Wow, that was a hell of a lot of stuff. Why is it so difficult? Well, basically you can group those 7 steps into 3 steps, which are,
- Alignment, input an image and output the aligned cropped face
- Embedding, input the face and output the representation
- Comparison, compare those representations — are they similar or not?
Because it’s only 3 simple steps, the code should be as simple as that, shouldn’t it?
Yes, it can be, using easyfacenet.
The simplest Face Recognition Tensorflow library available
Let’s break down the code bit by bit.
from easyfacenet.simple import facenetImport the facenet file from a simple module. There are three methods you can use inside the file. They are, align_face, embedding, and compare.
Easily, you can tell that each of these methods represents each step for Face Recognition.
images = ['images/image1.jpg', 'images/image2.jpg', 'images/image3.jpg']Now we can define the images. What are those images? Well, this.

And this.

And also this.

We got the images. Now the real deal.
Step 1. Alignment
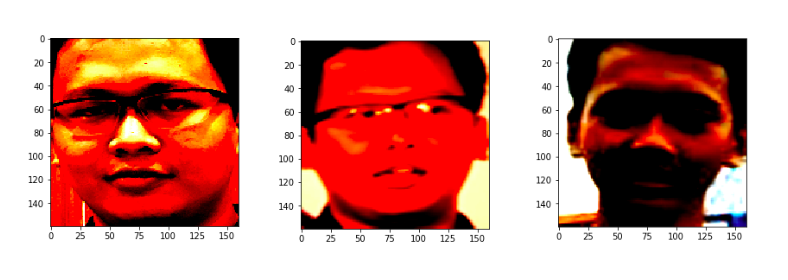
aligned = facenet.align_face(images)The library will try to find the face inside the image and crop the face as well as pre-whiten the face. Prewhitening will make the training easier at training time, so in inference time, you will also need to prewhiten the image.
The prewhitened aligned face will look like this.
Now, you are ready for the next step. Take a breather and chew slowly!
Step 2. Embeddings
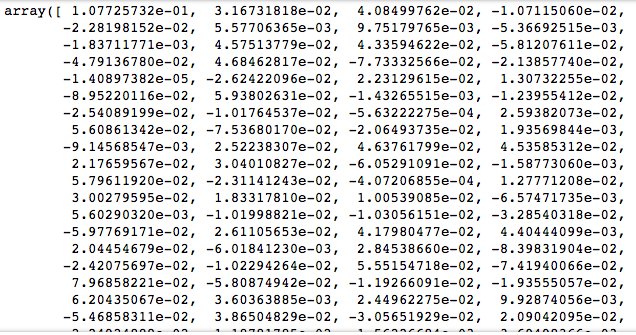
Wait, wait. I don’t see embeddings in the example above? Well, that’s because the compare method already called embedding inside. If you want to use embedding somehow, use this.
embeddings = facenet.embedding(aligned)The embeddings will look like this:
Step 3. Comparison
comparisons = facenet.compare(aligned)If you have 3 images, the comparisons variable will have 3 x 3 values. Which are permutations of each image compared to each other. In an example, if you want to get “is image 1 is similar to image 2?”, then
print("Is image 1 and 2 similar? ", bool(comparisons[0][1]))Is image 1 similar to image 3?
print("Is image 1 and 3 similar? ", bool(comparisons[0][2]))You didn’t forget already that the array is zero indexed, did you? Haha…
And, that’s it. You can get your comparison result just like that. The comparison technique I used is the cosine similarity. You can use any other similarity method you want. You can definitely use another method like clustering or classification. Something like the Siamese Network is the thing you need to look for.
What can you do next?

As I have said, this is the simplest Face Recognition Tensorflow library available. Therefore you can start to do your thing as quickly as possible.
If you are the hacky one, you can explore the library and create the real Face Recognition Tensorflow code. Take a look at the code here because that is the cornerstone of the library. Furthermore, extend the code or you can create your own functionality.
Final Thoughts
If you want to know about the paper behind this amazing technology, you can look here as well as here.
In conclusion, utilizing easyfacenet can help you tremendously in creating your face recognition project. Moreover, this Face Recognition library is maintained solely by me. It is easy for you if you want to ask for some kind of functionality.
As for the actual implementation for the other similarity method, I will bring you there in the next tutorial. Due to that reason, I will add the method exclusively inside the library.
Finally, if you want to read the original article, I originally published this on my blog post here at thedatamage. Of course, you can read many more posts from me there.