by Joanna Gaudyn
How to setup TinyMCE in your Rails app using Webpack

The popularity of using Webpack to deal with your assets in Rails is steadily increasing. Getting started is really straightforward. If you are starting a new app, you simply run rails new my_app --webpack and Rails takes care of the rest.
Thanks to the webpacker gem, adding Webpack to your existing application is also pretty uncomplicated. You add the gem to your Gemfile, bundle, and finally install webpacker:
gem 'webpacker', '~> 3.5'bundlebundle exec rails webpacker:installThis is pretty sweet. Now all you need to do is link your JavaScript pack and the CSS imported in it into the head of your application.html.haml:
<%= javascript_pack_tag 'application' %> <!-- js from app/javascript/packs/application.js --><%= stylesheet_pack_tag 'application' %> <!-- CSS imported via Wbpack -->Once this is done, you are ready to write your modern JavaScript code and make use of all the great libraries out there.
What is tinyMCE?
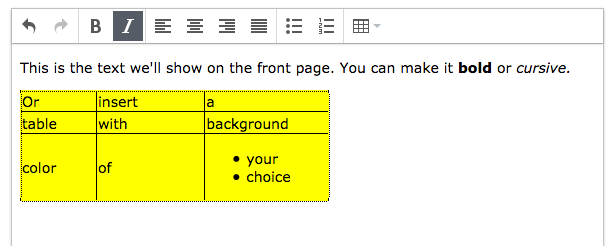
TinyMCE is a rich text editor in the cloud. To put it simply, it’s like Word that can be implemented into your app.
The project I am working on uses it to let admins edit the content of the front page. Thanks to TinyMCE, it isn’t necessary to build a separate admin interface for that purpose. But the editor’s usage can be much more versatile. Think, for example, of what Wordpress or Evernote allows you to do thanks to their build in tools.
Usage via CDN
We originally implemented the editor via CDN (e.g. linking the script in the head of our application.html.haml) like this:
!!!%html %head %meta ... <!-- some meta content --> %title ... <!-- MyApp --> = csrf_meta_tags %script{src: 'https://cloud.tinymce.com/stable/tinymce.min.js?apiKey=gexncjni90zx3qf0m5rr7kl8l40wd5yuly2xjza0g3kwrljt'} = stylesheet_link_tag 'application', media: 'all' = javascript_include_tag 'application' %body <!-- the usual body stuff -->This required adding a file with our customized function in app/assets/javascript/tinyMce.js. Note that we are also using jQuery.
$( document ).on('turbolinks:load', function() { tinyMCE.init({ selector: 'textarea.tinymce', // some other settings, like height, language, // order of buttons on your toolbar etc. plugins: [ 'table', 'lists' // whatever plugins you want to add ] });});In addition to that, we had to include a translation file (which is not necessary if you’re using English in your app). For everything to display correctly in production, you’ll also need to get a free Tiny Cloud API key .
Webpack and tinyMCE
Everything was working great for a couple of months, but we decided that it was time for the transition towards Webpack.
Webpack is supposed to make your life easier and, coupled with yarn, lets you focus on the important stuff. Say you want to use package A. It so happens, that package A relies on packages B and C. And package B depends on D, E and F. Rather than spending hours figuring out what the dependencies are and installing them all individually, what you want is to say yarn add package-A, and have it figured out for you. And this is almost the case.
This transition when it came to tinyMCE was way more painful than it should have been. And that’s why I decided to write this post. I hope it saves someone some time and frustration.
If you previously had tinyMCE implemented via CDN, you’d like to get rid of some stuff, to start clean. Remove the script link from application.html.haml. Then comment out the content of the tinyMce.js file (and the language file if you’re using one). I also decided to get rid of the jQuery dependency (in our case it meant removing gem 'jquery-rails' from the Gemfile, and in the app/assets/javascripts/application.js removing //= require jquery and replacing //= require jquery_ujs with //= require rails-ujs).
Note: Proceed with caution if you have more external libraries in your project that rely on jQuery (e.g. Bootstrap or Select2). Ultimately your goal would probably be to move all of them to Webpack, but the bigger the project, the more complex that task could be, so just bear it in mind. Nothing stops you from keeping your traditional implementation parallel with the Webpack one. In that case I would still recommend commenting it out for the time of tinyMCE implementation.
All these steps will ensure that things we’ll be implementing from now on work, and the old implementation doesn’t function as a fallback.
Step 1. If you want to use jQuery via webpack
Adding jQuery through Webpack is as simple as running yarn add jquery and adding the following code to the config/webpack/environment.js:
const { environment } = require('@rails/webpacker')const webpack = require('webpack')environment.plugins.prepend('Provide', new webpack.ProvidePlugin({ $: 'jquery', jQuery: 'jquery' }))module.exports = environmentStep 2. Get the tinyMCE package
That is also pretty straightforward: run yarn add tinymce.
Then create a new file where we’ll place our function. I ended up with app/javascript/vendor/tinyMce.js with the following content:
import tinymce from 'tinymce/tinymce';import 'tinymce/themes/modern/theme';import 'tinymce/plugins/table';import 'tinymce/plugins/lists';function tinyMce() { tinymce.init({ selector: 'textarea.tinymce', // some other settings, like height, language, // order of buttons on your toolbar etc. plugins: [ 'table', 'lists' ] });}// if you're using a language file, you can place its content hereexport { tinyMce };Step 3. Import everything to the application.js
We can import our function like so:
import { tinyMce } from "../vendor/tinyMce";
and then call it:
document.addEventListener(“turbolinks:load”, function () { tinyMce(); });As you can see, we also replaced the jQuery code with ES6.
Step 4. Get the tinyMCE skin to work
If you run your webpack-dev-server and rails s you might be surprised to see that your text editor is not there. One look in the console and you’ll see the following error:

This is because tinyMCE will not work without a skin, and pulling it in through Webpack requires its explicit import. We can do this by including this line in our tinyMce.js file, right after the other import statements. The path is relative to the node_modules folder:
import ‘tinymce/skins/lightgray/skin.min.css’;At this point you should have your editor working.
But… if you look into the console, you might be disappointed to see that you are still getting 2 errors:

Don’t despair! There is an easy fix. Just add skin: false to your function tinyMce() config and it should do the trick. This will prevent the default files from loading.
Congrats! You just got your tinyMCE up and running!