by Mike Sedzielewski
How to use your API-first platform to get your prototype production-ready
In the first part of this article, we laid out a way to build static-yet-dynamic websites using API-first platforms. This is one of many approaches you can use to quickly construct business application prototypes.
In this article, we’re going to take it to the next level. We want to harden the prototype so it’s ready to be pushed out into a production environment.

But to do so, we need to overcome some security concerns which are simply not present in static websites. How do we connect the four various building blocks of our application to get the business process automated? How can we achieve this without dropping the speed of iteration we have now? Meet Zapier.
But first — what have we build so far
In case you don’t remember, we’ve created a working skeleton of nostalgia.io — a marketplace for experts in technologies of the past. It’s a static website put together with some light UI and functionality, built on top of four API-first platforms (Contentful, Algolia, Timekit, and Voucherify).
To put it in a nutshell, the app allows you to browse technologies, (full-text) search for experts, find and book a consulting slot in their calendar, and finally make the checkout page validate and accept unique coupon codes.
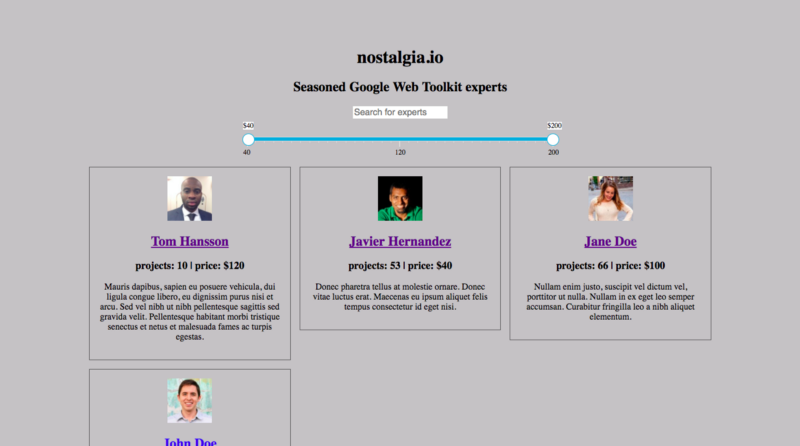
The happy path — when any Tom, Dick, or Harry enters the marketplace with his promo code and ends up with a confirmed booking at the discounted price — works pretty smoothly. Remember that you can see it in action and play around with the source code on this glitch repository.
But, we have still many unhappy paths. One of the most painful is adding a new expert. As for now, it entails several manual steps:
- Adding an expert entity to Contentful
- Propagating it to Algolia search
- Assigning a calendar resource in Timekit
- Marking a coupon as used so it’s not valid anymore
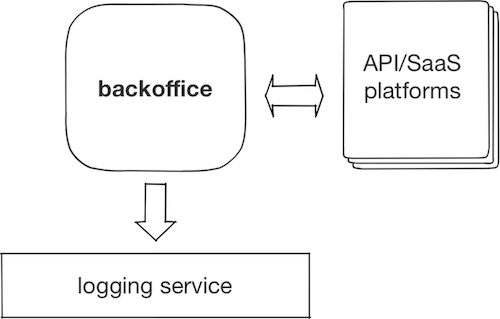
And the thing is that you cannot automate these operations using our current “static website” approach. This is because our API-providers do not allow (thank goodness) for this type of data management using publicly available API-keys. Each SaaS platform gives two kinds of authorization modes:
- Client-side: limited set of features to be used on web and mobile apps (the API key can be seen by everybody)
- Secret: full control access only to be used in the backend layer
Since we don’t have the backend yet, we need to figure out how to get around these limitations without the necessity of configuring backend frameworks and web server infrastructure.
Meet Zapier
“Zapier is a tool that allows you to connect apps you use every day to automate tasks and save time.” — Zapier’s getting started tutorial
Actually, you might have already dipped your toe in the Zaps wonderland when you wanted to automate some personal operations like “store the memes I approve in my Dropbox folder.” Yet you might’ve missed that, today, Zapier is more than that. It has come a long way since they started in 2011.
They’ve put a lot of effort into providing an enterprise-grade platform which gives the building blocks to glue various parts of your software platforms in a scalable way.
The literally thousands of plugins you can find in their marketplace make Zapier a powerful tool. Within an hour, you can quickly connect the myriad of popular software vendors, different departments, and eventually businesses as a whole. In the next section, we’ll show you how to harness the power of zaps by making Nostalgia marketplace more robust and secure.
Adding new experts to Contentful and Algolia
The first thing is to automatically create a new entity. To do so, we need an online form. We can build and host a simple web app which connects an HTML form with Contentful, but can we get it quicker somehow? Let’s knock on the Zapier Directory doors. After typing “forms” the first place on the list is occupied by Typeform. We check the description, it has everything we need, so let’s give it a try.
How does Zapier work in a nutshell?
Behind the scenes, it’s all about calling HTTP requests and catching webhooks. What Zapier provides is an authentication layer and an intuitive UI to map one data format into another. The mapping process comes down to invoking a series of connectors (Zaps) which fetch, convert, and push data down the pipeline. Every pipeline starts with a so-called trigger which is activated by a webhook. Let’s build one.
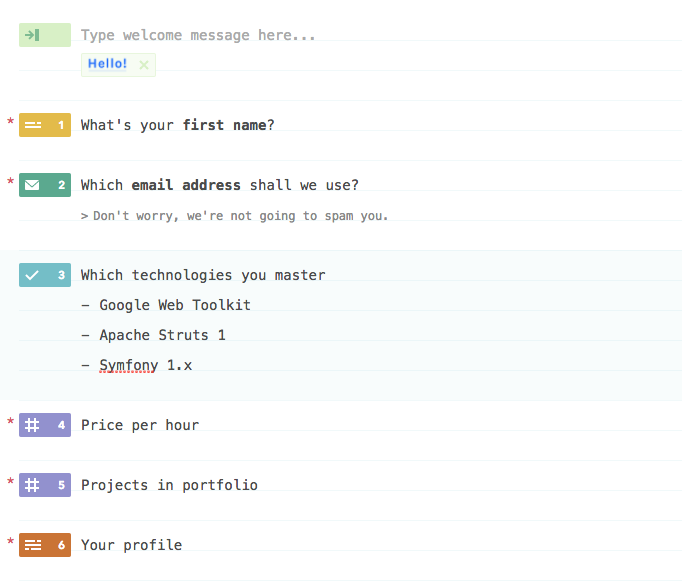
The first, tiny obstacle
Now, we planned to show how Typeform collects the data necessary to create an Expert, but we won’t. The reason is a strange one. The webhook hits Zapier properly, but the data format is somehow corrupted.
Although the text inputs were handled properly, we got stuck with the technology’s multi-select input. The values we put into the form just didn’t appear when the request payload appeared in Zapier. The same problem occurred when we changed from the multi-select to a set of three booleans.
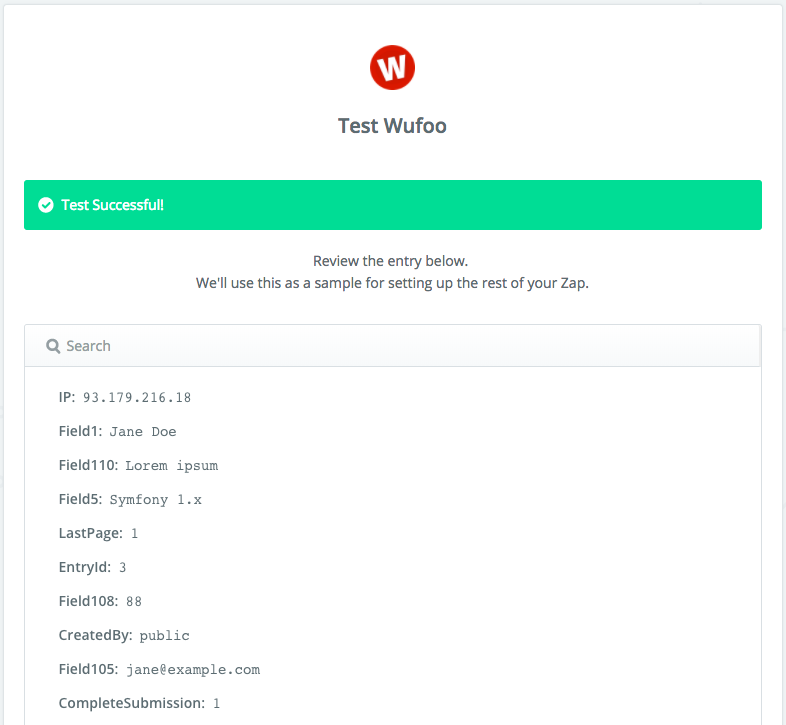
So, we decided to change the provider to SurveyMonkey — only to learn that sending the form contents to Zapier is available in the Annual Premium plan. Finally, we gave WuFoo forms a chance, and they worked great.
Although it took us a while to locate the problem, it was still faster to get the working form than building a webapp from scratch. As a general piece of advice, we suggest being more cautious when planning to use official Zaps now — even from recognizable providers.
The major obstacle…
After going through WuFoo Zap configuration, we made our setup listen to the expert form submit event. Let’s transform the data so that it fits the Contentful model.
Using the official Contentful Zap, the conversion is quite straightforward: You just take one field from the form and map it into a corresponding entity field, like in the picture below:

Until we want to map technologies. As you may remember, every expert can master many technologies. To map this one-to-many relationship properly, we should provide technology’s Contentful entity id within a specific object structure, something like:
{ sys: { type: “Link”, linkType: “Entry”, id: “5oKmKwfdjGO2cCaCkwamKW”}}instead of just plain names which come from the WuFoo forms. One might suggest that we could map the technology into a JSON object, but unfortunately, this isn’t possible. The Contentful Zap sends every field as a string. So, the payload that actually hits the Contentful API looks like:
{
  "fields": {
    "technologies": {
      "en-US": ["   { \n     \"sys\": {\n        \"type\": \"Link\",\n        \"linkType\": \"Entry\",\n        \"id\": \"5oKmKwfdjGO2cCaCkwamKW\"\n      }\n    }"]
    },
    "name": {
      "en-US": "Test Testowicz"
    }
  }
}
And causes a 422 error on the Contentful side.
…and how to overcome it
At this moment, we decided to check the next Zap in the pipeline to find out if there are other obstacles we hadn’t foreseen. It turned out that Algolia’s connector isn’t very mature. As the business is pushing on the prototype delivery, we came to the conclusion that we don’t want to waste more time testing these zaps. We decided to switch to manual flight mode.
Fortunately, Zapier comes with the Code zap. Introduced 2 years ago, it’s meant to perform non-standard operations using custom code in JavaScript and Python — including calling 3rd party APIs!
This is perfect for our “fast-iteration” approach. We get good old scripting capability and we still don’t have to set up the backend. Let’s see how it can help us with the Contentful issue.
The Code Zap in action
Let’s remove the Contentful Zap and put the Code in place. After choosing JavaScript, you should end up in the “Edit Template” view. Now we need to do three things:
- Map the data from the previous stage of the data pipeline (WuFoo zap) into variables you can use right in the code
- Use the variables to prepare the payload in the appropriate format
- Send the payload to Contentful with an HTTP call
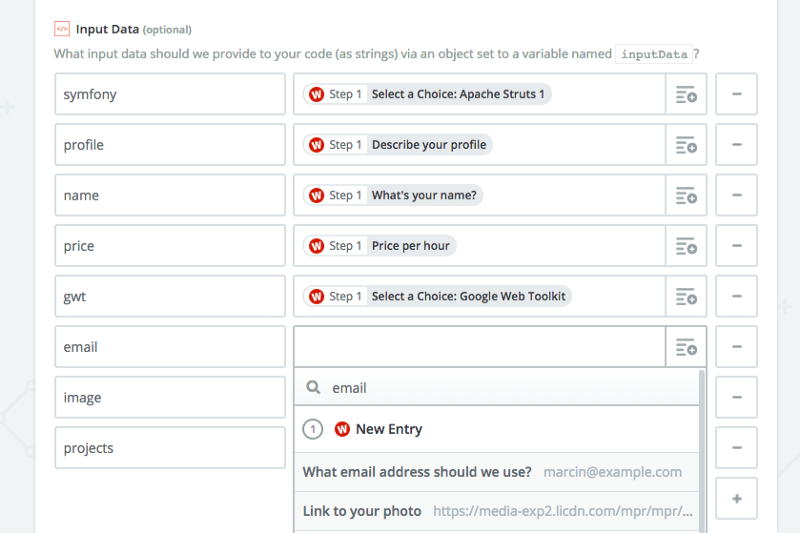
The first thing is super easy because the Input Data manager magically suggests the corresponding fields:
Once we have the inputs, nothing can stop us from sending the request manually. A quick look into Contentful’s API reference and here we are:
var technologies = [];

if (inputData.gwt) {
  technologies.push({
    sys: {
      type: "Link",
      linkType: "Entry",
      id: "7Dtej0GnXqw6cSIMmA6Cko"
    }
  });
}

if (inputData.symfony) {
  technologies.push({
    sys: {
      type: "Link",
      linkType: "Entry",
      id: "5S2iYV7inK6KyokCkwu4ss"
    }
  });
}

if (inputData.struts) {
  technologies.push({
    sys: {
      type: "Link",
      linkType: "Entry",
      id: "5oKmKwfdjGO2cCaCkwamKW"
    }
  });
}

fetch('https://api.contentful.com/spaces/n763nxcwuf4y/entries',{
  method: 'post',
  headers: {
    "Authorization": "Bearer <hidden>",
    "Content-Type": "application/vnd.contentful.management.v1+json",
    "X-Contentful-Content-Type": "expert"
  },
  body: JSON.stringify({
    fields: {
      name: {
        'en-US': inputData.name
      },
      price: {
        'en-US': parseInt(inputData.price)
      },
      projects: {
        'en-US': parseInt(inputData.projects)
      },
      description: {
        'en-US': inputData.profile
      },
      technologies: {
        'en-US': technologies
      }
    }
  })
})
.then(function(res) {
  return res.json();
})
.then(function(json) {
  var output = { expert: json }
  callback(null, output);
})
.catch(callback);Three things to pay attention to:
- Zapier supports fetch, but that’s the only modern JS feature. Under the hood, it runs Node v4
- You have to call `callback`, otherwise Zapier doesn’t know when the async process is finished
- There is a 1s timeout limit
Now, you can launch the test to see if the entity is persisted in Contentful.

Uploading an expert photo to Contentful
So far, we’ve managed to add an expert entity and assign them to the respective technologies. One important thing is missing — the photo.
Contentful stores photos (and other files) in a separate abstraction called Assets. The tricky thing about it is that you can’t just upload a photo when creating an entity (as we did in the previous step). The upload process looks like this:
- Create an asset object providing the link to the resource
- Trigger resource processing (in the case of images, it just downloads the file)
- Assign the asset to an expert entity
Sadly, although the official Zap seems to have this option, it’s not usable in our case. The reason behind this is that the Zap doesn’t return the asset id or any link after it’s been uploaded. In effect, we don’t know how to link an expert to an asset. What now? The Code zap strikes again!
Actually, we have to use it twice:
- The first request to create an asset
fetch('https://api.contentful.com/spaces/n763nxcwuf4y/assets',{
  method: 'post',
  headers: {
    "Authorization": "Bearer <hidden>",
    "Content-Type": "application/vnd.contentful.management.v1+json"
  },
  body: JSON.stringify({
    fields: {
      title: {
        'en-US': inputData.name
      },
      file: {
        'en-US': {
          "fileName": inputData.name+".jpg",
          "upload": inputData.pictureLink,
          "contentType": "image/jpeg"
        }
      }
    }
  })
})
.then(function(res) {
  return res.json();
})
.then(function(json) {
  callback(null, json)
})
.catch(callback);- The second one to download the image
var assetURL = "https://api.contentful.com/spaces/n763nxcwuf4y/assets/" + inputData.assetId + "/files/en-US/process";

fetch(assetURL, {
  method: 'put',
  headers: {
    "Authorization": "Bearer <hidden>",
    "X-Contentful-Version": "1"
  }
})
.then(function(res) {
  callback(null, []);
})
.catch(callback);
After you tested these requests separately, you can finally glue them using InputData and put them in front of the Zap creating an entity and after the WuFoo zap. All in all, we get the following pipeline:
Wufoo > Code (creating asset) > Code (processing asset) > Code (creating entity)
You might’ve noticed that the code in each zap follows the copy & paste & modify scheme. It’s easy to change the request details and shuffle the order of invocation. It’s not the power you’re used to, but Good Enough™ for the prototype stage.
Creating Timekit calendars
The time for implementing the bookings has finally come. As Timekit doesn’t provide any official Zaps, we’re forced to invite our good old friend again. You might remember that to get the calendar for an expert, you should create a resource in Timekit and then get the calendar instance assigned to it. Guess what, the Timekit API is so dev-friendly that they allow you to achieve it with a single request:
var email = inputData.email;

fetch('https://api.timekit.io/v2/resources?include=calendars', // notice the include param
{
  method: 'post',
  headers: {
    "Authorization" : "Basic <hidden>",
    "Content-Type": "application/json"
  },
  body: JSON.stringify({
    name: email,
    timezone: 'Europe/Warsaw'
  })
})
.then(function(res) {
  return res.json();
})
.then(function(resource) {
  callback(null, resource);
})
.catch(callback);Now you’ve probably got the idea of what’s next. We just need to put the zap in the right order to ensure the business process is covered. As we want to store Timekit links within an expert entity, we should place this Zap as in the pipeline below:
Wufoo > Code (creating asset) > Code (processing asset) > Code (creating calendar) > Code (creating entity)
Populating the full-text search
The last part of automating this step is to make experts searchable. If you don’t remember how we approached it with the help of Algolia, go to the first part to refresh your memory. Then, you can jump straight to the code:
var objects = {
	requests: []
};

if (inputData.gwt) {
	objects.requests.push({
		action: "addObject",
		body: {
			name: inputData.name,
			description: inputData.description,
			projects: inputData.projects,
			price: inputData.price,
			contentfulID: inputData.contentfulID,
			technologies: { name: "Google Web Toolkit" }
		}
	});
}

if (inputData.struts) {
	objects.requests.push({
		action: "addObject",
		body: {
			name: inputData.name,
			description: inputData.description,
			projects: inputData.projects,
			price: inputData.price,
			contentfulID: inputData.contentfulID,
			technologies: { name: "Apache Struts 1" }
		}
	});
}

if (inputData.symfony) {
	objects.requests.push({
		action: "addObject",
		body: {
			name: inputData.name,
			description: inputData.description,
			projects: inputData.projects,
			price: inputData.price,
			contentfulID: inputData.contentfulID,
			technologies: { name: "Symfony 1.x" }
		}
	});
}

fetch('https://N675AF3ESI.algolia.net/1/indexes/experts/batch',{
  method: 'post',
  headers: {
    "X-Algolia-API-Key" : "<hidden>",
    "X-Algolia-Application-Id" : "N675AF3ESI"
  },
  body: JSON.stringify(objects)
})
.then(function(res) {
  return res.json();
})
.then(function(resource) {
  callback(null, resource)
})
.catch(callback);When you configure this step, you’ll have the whole process covered:
- Somebody adds an expert through the form
- Our “software” creates a corresponding calendar in Timekit
- The expert entity is stored in Contentful (along with the photo)
- The expert becomes searchable by adding to the Algolia index
That’s it when it comes to the internal part of the Nostalgia process. Now, let’s give our coupons a chance to do the work and drive some customers towards us!
Redeeming coupons
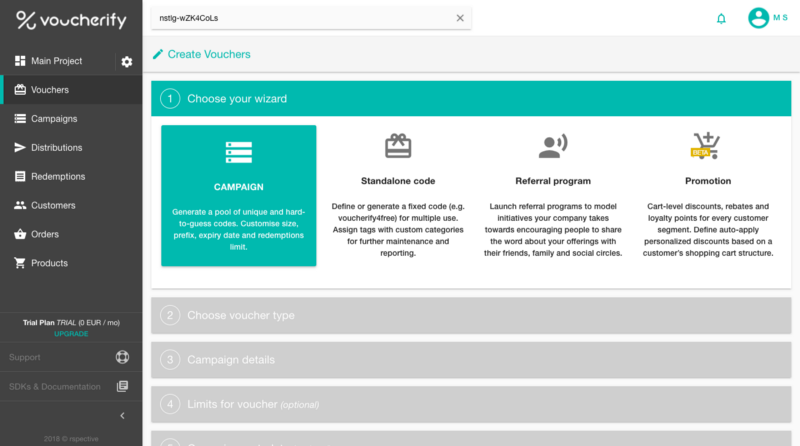
Let start off by recalling how Nostalgia coupons work. The marketing team has come up with 2 different campaigns with thousands of unique coupon codes:
- 25% off — examples: nstlg-CCAMIDFf, nstlg-wZK4CoLs, nstlg-V8eV9A3p
- $5 off — examples uub-nstlg, afl-nstlg, yeq-nstlg
Now, when you put one of them into the coupon box, the code gets validated against Voucherify API and the corresponding discount is applied. When you finally select the time slot and send the booking request to Timekit, under the hood, the code is sent along in the payload and gets persisted in a Timekit entity.
To prevent the unique code being used again, we need to mark it as redeemed in Voucherify. We could achieve this using the Voucherify widget (just replace the validate method with redeem), but we want to mark it as used only if the booking has been confirmed by the operations team (done in Timekit dashboard). As the business wants to switch from auto-confirmation to manual confirmation, we’re forced to leave the happy static-website environment and reach out to Zapier again.
Catching webhooks
As mentioned earlier, you’ll look for Timekit in Zap’s directory in vain. We have to find another way to be notified about a booking confirmation. Fortunately, the Webook zap lends a helpful hand here.
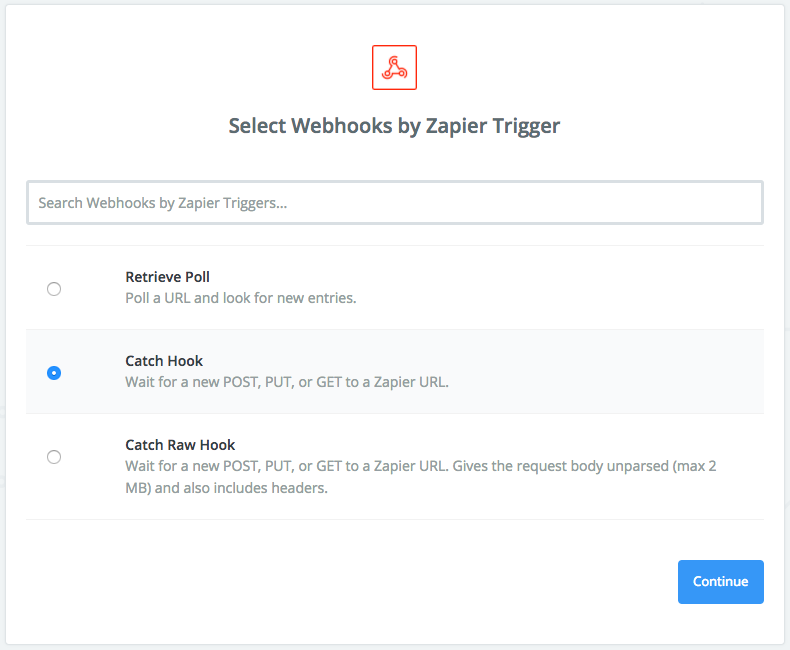
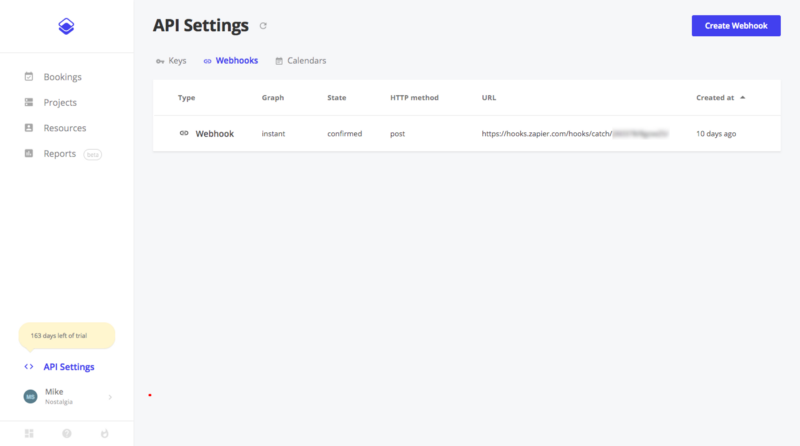
When you go through the 5-step configuration flow, you’ll get a unique endpoint URL which can be used to send notifications via HTTP requests. Your next task is to put it in a webhook callout in the Timekit under a specific event — in our case, it’s a booking confirmation.
The final touch — handling redemption
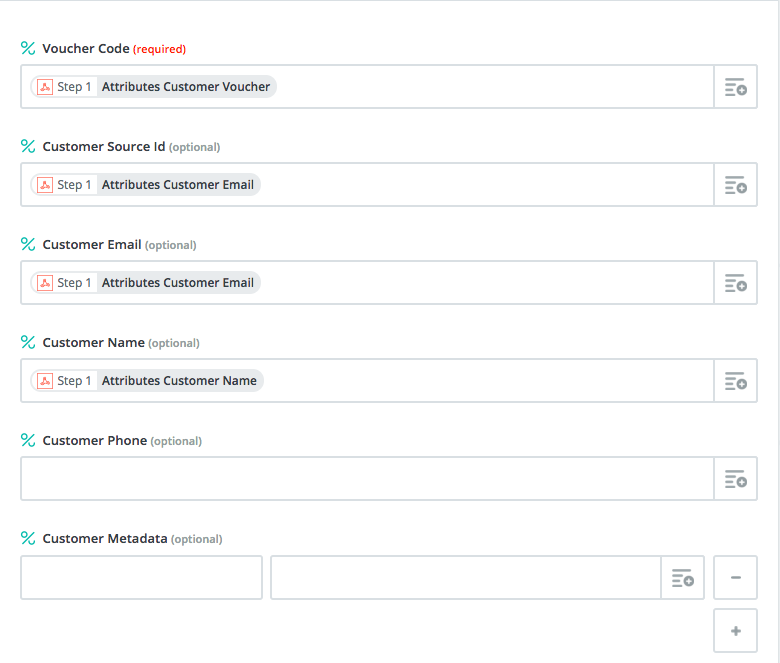
The very last step is to invoke the redeem method to mark the coupon as used. To do so, we can use the official Voucherify Zap. All you need to do is to authorize Zapier to invoke the redemption and map the customer details caught by the webhook zap into the proper structure:
After running some tests, we can see that Voucherify is tracking the coupon redemptions:

Now that the redemptions are handled properly, marketing can come up with new campaigns off the bat, and developer involvement isn’t necessary to generate, distribute, and accept new coupon codes.
Quick & dirty
Congrats! Within just these two Zapier pipelines, we have built four building blocks in a secure and production-ready way. We admit that the solution looks quick & dirty, but it works, and it’s been delivered in reasonable time.
Of course, we could’ve improved the code by removing duplicates and so on. But it’s a prototype anyway, and it’s gonna be rewritten when the business decides that the direction they want to run by early customers makes sense.
When you first go to the Zapier plugin directory, everything looks bright and shiny. But the devil, as they say, is in the details. To be honest, before we actually embarked on this post we’d been super optimistic about the Zapier setup. But while we were getting more and more into the details, we were facing issues with the zaps we’d planned to use. We have highlighted them so that you can avoid these on your way. And we have hopefully taught you how to leverage the lesser-known Zapier features to bridge the gaps.
Please, please, please remember that “API-first platforms <> Zapier” tandem isn’t a shiny hammer you can use to hit every possible nail. The thing we want to highlight is that sometimes there are faster and equally reliable ways of delivering a business result than writing code from scratch.
—
If you like these ideas and want to learn how to use the API wonderland to ship real life, battle-tested business applications, you might be interested in our recent series.