
by Jennifer Bland
How to use EJS Templating in a Node.js Application

EJS, embedded javascript, is a templating language. EJS combines data and a template to produce HTML. One of the most important features in EJS is its use of partials. Partials allow you to define something once, and then apply it to any page in your application.
I will show you how to create a simple Node.js application that uses EJS as the templating engine. Then we will create 2 pages for a website. We will use partials to build out our head, navigation, footer and content.
You can get the code for this example on github
File Structure
We will be creating a sample application that will have two pages: index and about.
Here is the file structure for the application we will be creating.
public — — style.css- routes — — index.js- views — — pages — — — — about.ejs — — — — index.ejs- partials — — — — 3columns.ejs — — — — footer.ejs — — — — head.ejs — — — — nav.ejs — — — — scripts.ejs- package.json- server.jsGetting Started
We will setup our package.json first. This file will contain all the modules we will be using in our application. We will be using:
- express
- ejs
{ “name”: “node_ejs_boilerplate”, “version”: “1.0.0”, “description”: “Boilerplate showing the use of ejs as view template engine in a Node.js application”, “author”: “Jennifer Bland”, “main”: “server.js”, “dependencies”: { “ejs”: “^2.4.1”, “express”: “^4.13.4” }}You can add the dependencies directly into your package.json or your can install the dependencies so that they are automatically added to the package.json. To manually install dependencies, enter this command:
npm install express ejs — saveIf you added dependencies by adding them to your package.json, you will need to install them by using this commend:
npm installServer.js
Now that we have all our dependencies installed, we need to build out application in server.js. Here is what our server.js file looks like.
‘use strict’;// ================================================================// get all the tools we need// ================================================================var express = require(‘express’);var routes = require(‘./routes/index.js’);var port = process.env.PORT || 3000;var app = express();// ================================================================// setup our express application// ================================================================app.use(‘/public’, express.static(process.cwd() + ‘/public’));app.set(‘view engine’, ‘ejs’);// ================================================================// setup routes// ================================================================routes(app);// ================================================================// start our server// ================================================================app.listen(port, function() { console.log(‘Server listening on port ‘ + port + ‘…’);});Our server will be listening on the port defined in process.env.PORT or 3000 if it is not defined.
We define a /public directory because this is how we will reach our stylesheet style.css located in the /public folder.
We define our templating engine to be ejs.
Routes
To make our application follow the structure of a node.js application I have put the routes for our index and about pages into their own file. This file is index.js in the routes folder.
Since I have put the routes in their own folder I need to gain access to them by requiring them in the server.js file.
We have 2 routes in our application
- / — this is a GET to display the homepage
- /about — this is a GET to display the about page
In the routes we use res.render to display the appropriate pages. The render command by default will look for files in a folder called views. We rely on this default and only add the path from within the views folder.
Here is our index.js file in the routes folder.
‘use strict’;module.exports = function(app) { app.get(‘/’, function(req, res) { res.render(‘pages/index’); }); app.get(‘/about’, function(req, res) { res.render(‘pages/about’); });};Configuring our partials
For our sample application, I am going to implement four partials.
- head — contains items found in the head section of a webpage
- nav — the navigation that will be displayed on every page
- footer — static footer with link to my website
- scripts- loading scripts like jQuery and Bootstrap
- 3columns — content that will be displayed on the homepage
Partials provide easy maintenance of your code. For example, if you create navigation on all of your pages, when you need to add a new entry to the navigation, you must then update every single page with this change.
The navigation partial will be inserted into every page that requires it. To add a new entry to the navigation, you need to just update the partial and it will automatically be applied to every page that contains the nav partial.
Here are the contents of all of our partials.
head.ejs
<! — views/partials/head.ejs →<head> <meta charset=”UTF-8"> <meta http-equiv=”X-UA-Compatible” content=”IE=edge”> <meta name=”viewport” content=”width=device-width, initial-scale=1"> <! — The above 3 meta tags *must* come first in the head; any other head content must come *after* these tags → <title>Demonstration of EJS templating in NodeJS Application</title> <! — STYLESHEETS → <! — CSS (load bootstrap from a CDN) → <link rel=”stylesheet” href=”https://maxcdn.bootstrapcdn.com/bootstrap/3.3.6/css/bootstrap.min.css"> <link rel=”stylesheet” href=”/public/style.css”></head>nav.ejs
<! — views/partials/nav.ejs →<nav class=”navbar navbar-inverse navbar-fixed-top” role=”navigation”> <div class=”container”><div class=”navbar-header”> <a class=”navbar-brand” href=”/”> <span class=”glyphicon glyphicon glyphicon-cog”></span> CodePrep.io </a> </div><ul class=”nav navbar-nav pull-right”> <li><a href=”/”>Home</a></li> <li><a href=”/about”>About</a></li> </ul></div></nav>footer.ejs
<! — views/partials/footer.ejs →<footer class=”footer”> <div class=”container”> <p class=”text-center text-muted”>© Copyright 2015 <a href=”http://www.codeprep.io">CodePrep.io</a></p> </div></footer>scripts.ejs
<! — views/partials/scripts.ejs →<! — jQuery (necessary for Bootstrap’s JavaScript plugins) →<script src=”https://ajax.googleapis.com/ajax/libs/jquery/1.11.3/jquery.min.js"></script><! — Bootstrap javascript file →<script src=”https://maxcdn.bootstrapcdn.com/bootstrap/3.3.6/js/bootstrap.min.js"></script>3columns.ejs
<! — views/partials/3columns.ejs →<section name=”content”> <div class=”container”> <h2 class=”text-center”>Sample Data</h2> <div class=”col-xs-12 col-md-4"> <p>Lorem ipsum dolor sit amet, consectetur adipiscing elit. Vestibulum eget iaculis lorem. Fusce elementum magna fringilla ipsum bibendum, vitae consectetur ligula interdum. Sed mauris diam, hendrerit eget suscipit vel, luctus at odio. Etiam pellentesque a metus et pharetra. Praesent dictum, libero id tempor malesuada, erat ex cursus nibh, ac hendrerit massa neque commodo metus. Integer porttitor ante eu varius interdum. Suspendisse quis iaculis erat. Fusce eu nisl id eros tempor posuere. Donec placerat orci orci, ut ultrices neque rutrum in. Nunc dignissim ante et risus rhoncus, vel feugiat mi vestibulum. Aliquam in dictum neque, non vestibulum lorem. Sed imperdiet dolor vitae felis iaculis, id sollicitudin lectus rhoncus. Maecenas ac dolor eget tortor rutrum commodo. Aliquam luctus iaculis mi id semper. Suspendisse sem nisi, convallis at dapibus in, convallis eu neque. Curabitur maximus magna et nulla ullamcorper facilisis.</p> </div> <div class=”col-xs-12 col-md-4"> <p>Lorem ipsum dolor sit amet, consectetur adipiscing elit. Vestibulum eget iaculis lorem. Fusce elementum magna fringilla ipsum bibendum, vitae consectetur ligula interdum. Sed mauris diam, hendrerit eget suscipit vel, luctus at odio. Etiam pellentesque a metus et pharetra. Praesent dictum, libero id tempor malesuada, erat ex cursus nibh, ac hendrerit massa neque commodo metus. Integer porttitor ante eu varius interdum. Suspendisse quis iaculis erat. Fusce eu nisl id eros tempor posuere. Donec placerat orci orci, ut ultrices neque rutrum in. Nunc dignissim ante et risus rhoncus, vel feugiat mi vestibulum. Aliquam in dictum neque, non vestibulum lorem. Sed imperdiet dolor vitae felis iaculis, id sollicitudin lectus rhoncus. Maecenas ac dolor eget tortor rutrum commodo. Aliquam luctus iaculis mi id semper. Suspendisse sem nisi, convallis at dapibus in, convallis eu neque. Curabitur maximus magna et nulla ullamcorper facilisis.</p> </div> <div class=”col-xs-12 col-md-4"> <p>Lorem ipsum dolor sit amet, consectetur adipiscing elit. Vestibulum eget iaculis lorem. Fusce elementum magna fringilla ipsum bibendum, vitae consectetur ligula interdum. Sed mauris diam, hendrerit eget suscipit vel, luctus at odio. Etiam pellentesque a metus et pharetra. Praesent dictum, libero id tempor malesuada, erat ex cursus nibh, ac hendrerit massa neque commodo metus. Integer porttitor ante eu varius interdum. Suspendisse quis iaculis erat. Fusce eu nisl id eros tempor posuere. Donec placerat orci orci, ut ultrices neque rutrum in. Nunc dignissim ante et risus rhoncus, vel feugiat mi vestibulum. Aliquam in dictum neque, non vestibulum lorem. Sed imperdiet dolor vitae felis iaculis, id sollicitudin lectus rhoncus. Maecenas ac dolor eget tortor rutrum commodo. Aliquam luctus iaculis mi id semper. Suspendisse sem nisi, convallis at dapibus in, convallis eu neque. Curabitur maximus magna et nulla ullamcorper facilisis.</p> </div> </div></section>Building our Pages
Our sample application has a homepage and an about page. We will need to create both of these pages. On these pages we will insert the appropriate partials we just created on the page.
We put all of our partials in a folder called partials within the views folder. We are going to create another folder in the views folder called pages. This folder will contain our homepage and about pages.
To insert a partial on a page we use this format:
<% include ../partials/head %>Here are the contents of our two pages:
index.ejs
<!DOCTYPE html><html lang=”en”><% include ../partials/head %><body><% include ../partials/nav %><section name=”jumbotron” > <div class=”jumbotron text-center”> <h1>CodePrep.io Presents</h1> <p>Using EJS templating with Node.js</p> </div> </section><% include ../partials/3columns %><% include ../partials/footer %><% include ../partials/scripts %></body></html>about.ejs
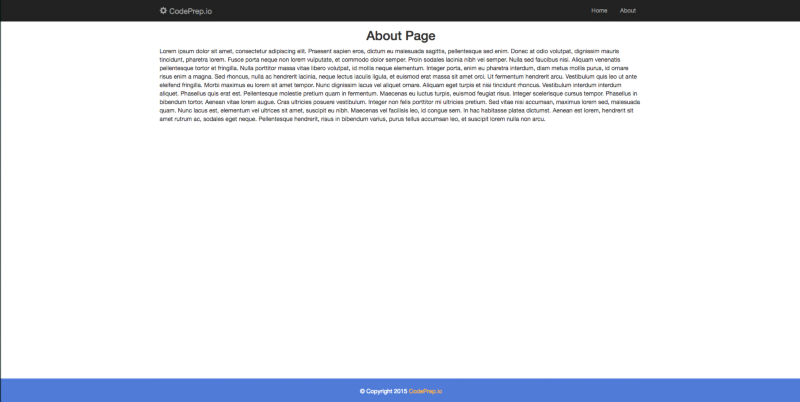
<!DOCTYPE html><html lang=”en”><% include ../partials/head %><body><% include ../partials/nav %><! — content for about page → <div class=”container” id=”about”> <div class=”row”> <h2 class=”text-center”>About Page</h2> <div class=”col-xs-12"> <p>Lorem ipsum dolor sit amet, consectetur adipiscing elit. Praesent sapien eros, dictum eu malesuada sagittis, pellentesque sed enim. Donec at odio volutpat, dignissim mauris tincidunt, pharetra lorem. Fusce porta neque non lorem vulputate, et commodo dolor semper. Proin sodales lacinia nibh vel semper. Nulla sed faucibus nisi. Aliquam venenatis pellentesque tortor et fringilla. Nulla porttitor massa vitae libero volutpat, id mollis neque elementum. Integer porta, enim eu pharetra interdum, diam metus mollis purus, id ornare risus enim a magna. Sed rhoncus, nulla ac hendrerit lacinia, neque lectus iaculis ligula, et euismod erat massa sit amet orci. Ut fermentum hendrerit arcu. Vestibulum quis leo ut ante eleifend fringilla.Morbi maximus eu lorem sit amet tempor. Nunc dignissim lacus vel aliquet ornare. Aliquam eget turpis et nisi tincidunt rhoncus. Vestibulum interdum interdum aliquet. Phasellus quis erat est. Pellentesque molestie pretium quam in fermentum. Maecenas eu luctus turpis, euismod feugiat risus. Integer scelerisque cursus tempor. Phasellus in bibendum tortor.Aenean vitae lorem augue. Cras ultricies posuere vestibulum. Integer non felis porttitor mi ultricies pretium. Sed vitae nisi accumsan, maximus lorem sed, malesuada quam. Nunc lacus est, elementum vel ultrices sit amet, suscipit eu nibh. Maecenas vel facilisis leo, id congue sem. In hac habitasse platea dictumst. Aenean est lorem, hendrerit sit amet rutrum ac, sodales eget neque. Pellentesque hendrerit, risus in bibendum varius, purus tellus accumsan leo, et suscipit lorem nulla non arcu.</p> </div></div> </div><! — end of content →<% include ../partials/footer %><% include ../partials/scripts %></body></html>Starting our Application
To start the application enter the following command:
node server.jsWhen our application starts it will display our homepage:
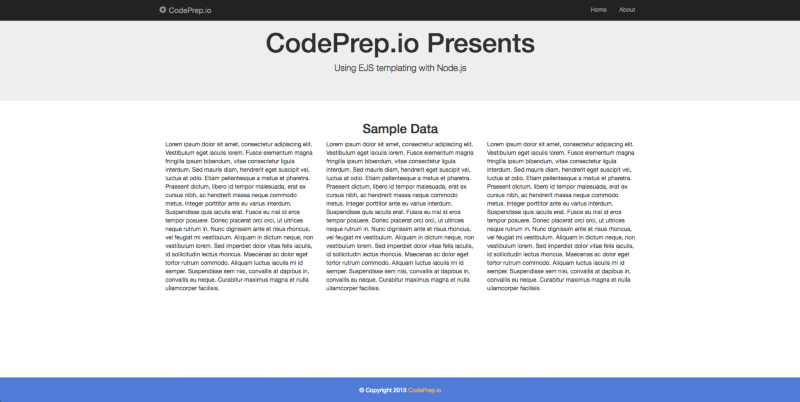
If you click on the about link in the navigation, you will see the about page:
Get the code
You can get the code for this example on github
More Articles
Thanks for reading my article. If you like it, please click on clap icon below so that others will find the article. Here are some more of my articles that you might be interested in:
Using Node.js & Express.js to save data to MongoDB Database
First Impressions Count — Why Doesn’t Your Github Repo Have a ReadMe File?
Why Company Culture is Important to Your Career as a Software Engineer