

Python is an incredibly versatile language. It’s considered to be a staple of modern development. It’s used for the simplest of scripts to complex machine learning and neural network training algorithms.
But perhaps the less-known usage of Python is its use as a web server. Overshadowed by more popular frameworks like as Node/Express and Ruby on Rails, Python is often overlooked as a web server choice for most developers.
Having a backend written in Python is really useful for several reasons, among which are:
- It’s easy to step up from learning Python as a regular scripting language to using it to make a backend.
- It’s best to use if you plan on serving parts of your application that are already written in Python (For example - submitting a form, evaluating input via a Tensorflow model, and returning the output to a use)
- It has a diverse ecosystem of packages and tools to help you with development, not to mention a great community of developers (since the language has been around so long)
The purpose of this article is to demonstrate how Python can be used to create a full stack web application. In this tutorial, I will be using Flask, a Python “microframework” to developing a web application.
I would be remiss not to mention that there are other more popular Python frameworks out there such as Django, but Flask is useful for the budding developer since it is bare bones and requires developers to create/utilize the components they need within the App based on their requirement (rather than calling some command line tool that generates 20 files automatically… lookin’ at you Ruby on Rails). Of course, I won’t be going through how to start a Web App completely from scratch, rather I’ll give you an intro to Flask and then move onto how you can use a project called flask-base to get upto speed quickly in the future.
Intro to Flask
Flask is a microframework (read as: It doesn’t come with much) for web development in Python. Before we do a deep(ish) dive, let’s cover some basic concepts of backend development.

Routes
Let’s imagine you’re visiting apple.com and want to go to the Mac section at apple.com/mac/. How do Apple’s servers know to serve you the specific page that shows the details about Mac devices. It is most likely because they have a web app running on a server that knows when someone looks up apple.com and goes to the /mac/ section of the website, handle that request and send some pages back. The logic behind figuring out what to do when someone goes to /mac/ is done by a route.
So when I visit apple.com (implied apple.com/), the / route handles what is shown. If I go to apple.com/purchase, there is a /purchase route. If I go to apple.com/purchase/1 where 1 is some item identifier, there most likely is a generic route handler /purchase/<int:item-id> that handles that request. Routes can handle both GET and POST requests as well.
Basic App
So how do we make a basic Flask app that has routes? Well, let’s take a look at the docs. Create a Python file called hello.py that contains the following.
from flask import Flask
app = Flask(__name__)

@app.route("/")
def hello():
	return "Hello World"
Let’s break down what’s happening here.
- We import our Flask dependency
- We create an instance of a Flask App. The argument passed into the Flask instantiator (
__name__) evaluates to a string that "names" the Flask App. When run from the command line,__name__ == "__main__". You can set the first argument to whatever you want. - We set up a route
/on our App that executes thehello()function immediately below it when that route is visited. Note that the function must return a string or a rendered template.
On the command line, let’s set up something called a virtual environment (it will help us isolate our development environment and package installations from the rest of our system).
- If you haven’t done so already, install pip via
easy_install pip(you may need to runsudoin front of this if you are on a Mac. - Run
pip install virtualenvto install virtualenv using pip - In the directory of your App, create your virtual environment by running
virtualenv venv(this creates a virtual environment in a folder calledvenvof the current directory). - Run
source venv/bin/activateto activate the virtual environment. This is specifically required to install packages into it. You can deactivate the virtual environment by runningdeactivatefrom the command line. Pretty simple.
Now that our virtual environment is installed and activated, let’s install Flask. It’s really simple, just run pip install Flask. We can then run the example from earlier by writing the following in our command line.
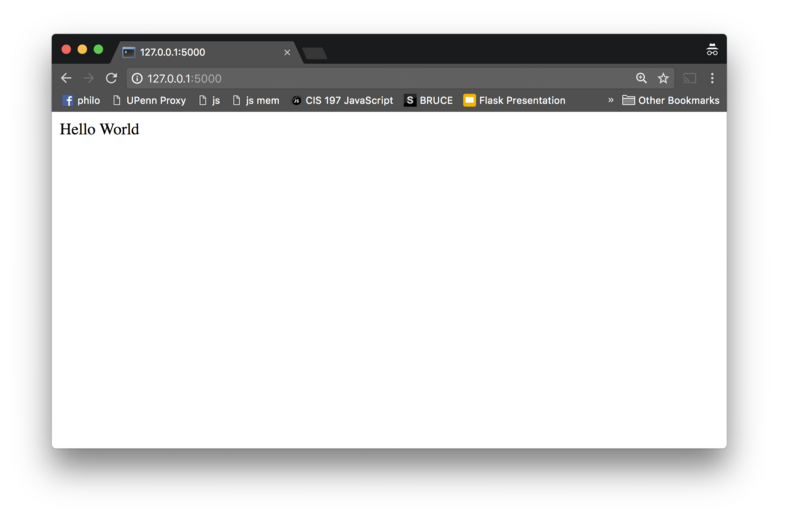
FLASK_APP=hello.py flask runYou should see something like * Running on http://localhost:5000/ in your terminal. And if you visit that link in your browser, you'll see a page with just Hello World.
Example App: Penn Club Review
Note: The code for this project can be found at this repository on GitHub.
Now let’s figure out some project to create in order to demonstrate the full capabilities of Flask. One recent project I came up with is a club rating app called “PennClubReview”.

I’m currently attending the University of Pennsylvania. One of the most common problems that freshmen on campus face is choosing which clubs to join on campus. This process is further complicated by the fact that some clubs are very competitive to get into, have multiple interview rounds, and require a large time commitment. Often, none of these aspects of clubs are discussed during club information sessions.

So, in order to combat this issue, we can create an app where
- An administrator can set survey questions for users to answer about clubs.
- Users can view average ratings for each survey question for each club
- Users can view individual responses for clubs. If a user chooses to submit another review, their previous response is overwritten.
- Users can suggest clubs for administrators to edit/approve to show in public (administrators should be notified via email when this happens)
- A user or admin needs to be able to edit their own account information.
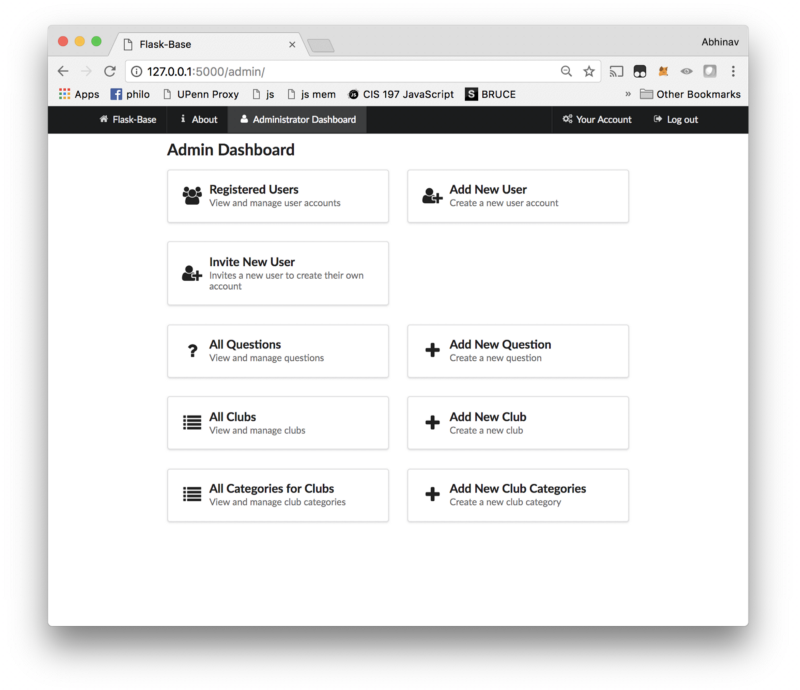
- An administrator should have the ability to add/remove users, survey questions, club categories and clubs from the system.
Breaking down App components
In order to develop this app, we’ll need to have some more components in addition to Flask, such as a backing database, a login management system, some way to organize routes, and handle emailing. We could code this from scratch. But, there is already an amazing boilerplate that can give you a great starting place.
Enter Flask-Base
Flask-base is a project that my friends and I developed as part of a student run nonprofit called Hack4Impact. We work with nonprofits over a semester to develop technical projects that help them accomplish their mission.
While working on so many projects, we found out that we would often be repeating the same code across all of our applications. So we decided to create a single code base containing the most common parts that any App we made would need. This code base would include:
- User authentication scheme
- Account management
- Blueprints (to handle routes)
- Backing database
- Emailing (with a redis queue)
It recently became fairly popular, garnering 1200+ GitHub stars over the course of a few months. This codebase is perfect for what we are trying to set up. You can find the GitHub repo containing the code for Flask base here.
App dev setup
First let’s clone flask-base. Follow the instructions on the README.md page. In a nutshell run the following.
git clone https://github.com/hack4impact/flask-base.git

cd flask-base

virtualenv  venv

source venv/bin/activate

pip install -r requirements.txt

python manage.py recreate_db

python manage.py setup_dev
OK. I’ll elaborate on what we’ve done here.
- Clone the repository from GitHub (i.e. download it) and then go into its directory.
- Create a new virtual environment and activate it.
- Read the package dependencies in the
requirements.txtfile and install all of them viapip. - Instantiate the database (recreate it) and also insert an administrator rule (via setup_dev).
Additionally, let’s create a running database migration. This will keep track of changes in our database models without needing to recreate our database (i.e. remove all the information and then rebuild the database from scratch). Migrations allow us to preserve information. We can do this via the command below.
To run the App, run honcho start -f Local (you'll need to install Honcho if you haven't already). If you have any issues, chances are they have been addressed in the README of flask-base already. Now you can visit localhost:5000 and pull up a running flask-base application.
To log into the App as an administrator, go to the login link and type in for the username flask-base-admin@example.com with a password password. You can then invite new users into the application from the administrator screen. Note that before you do so, you'll need to create a config.env file that contains the following two variables:
MAIL_PASSWORD=someSendGridPasswordMAIL_USERNAME=someSendGridUsernameUpon creation of a user account, the account remains unconfirmed until the new invited user clicks a link sent to their email. Additionally, a user can register for the App and will go through a similar authentication flow with regards to confirmation.
Look through the flask-base documentation to get a better sense of some of the capabilities of flask-base out of the box. For now, we’re going to move on to how we can use it to make our App.
Databases!
All our database logic is wrapped by the SQLAlchemy ORM so we don’t have to make very verbose database statements to run queries or add / delete records. All the database models (think of them as classes) are contained within the app/models folder. Let's think of some models that are needed for the application itself.
So we need to have a Club model that contains the name of the club (Datatype: String), a club description (Datatype: Text) and a variable is_confirmed (Datatype: Boolean) to keep track of whether a club that is suggested has been approved by an administrator to be shown. Additionally, we want some way to refer to the categories of a club, and another way to refer to the question answers that belong to a club.
Let’s think about how Clubs and Club Categories should relate to each other. We can think of it as follows. A club has many categories (e.g. a club can be a Social Impact and Tech club) and a club category can belong to many clubs (e.g. there can be many Tech clubs on campus). The only attribute this ClubCategory has a category_name (Datatype: String).
We can create this relationship (a many to many relationship), via an association table.
Club and Club Categories (Many to Many)
Now how do we encode that logic into flask-base? First, create a file called club.py in app/models. First let's create the Club and ClubCategory models.
So now we have two models, but they aren’t connected to each other. Each of them have individual attributes, but neither can be explicitly connected to each other. We make the connection via an association as I mentioned earlier. After the db import, add the following lines.
What this does is create a new association table (an intermediary between the Club and ClubCategory model). There are two columns in this table club_id and club_category_id which refer to the respective id’s of their respective models (note that the id attribute is a Primary Key within each model, i.e. the thing that is unique for each record). But within the association table, we refer to these Primary Keys as Foreign Keys (because they are refering to other tables). Additionally, we need to add a line to the Club model at the bottom.
categories = db.relationship( 'ClubCategory', secondary=club_category_assoc, backref='clubs')And this actually creates the bidirectional relationship between the Club and ClubCategory models and sets up a relationship between Club and ClubCategory using the club_category_assoc association table. The backref tells the ClubCategory model how to refer to the Club models. So, with a given club club, you can run club.categories to get an array of category object backs. With a given ClubCategory called category, you can get all the clubs in that category by doing category.clubs.
You can see this in action by doing the following:
In app/models/__init__.py add the line
And then run python manage.py shell. Run the following commands to interact with your database models (note that >;>> indicates an input you put in).
Questions and Answers (Many to One)
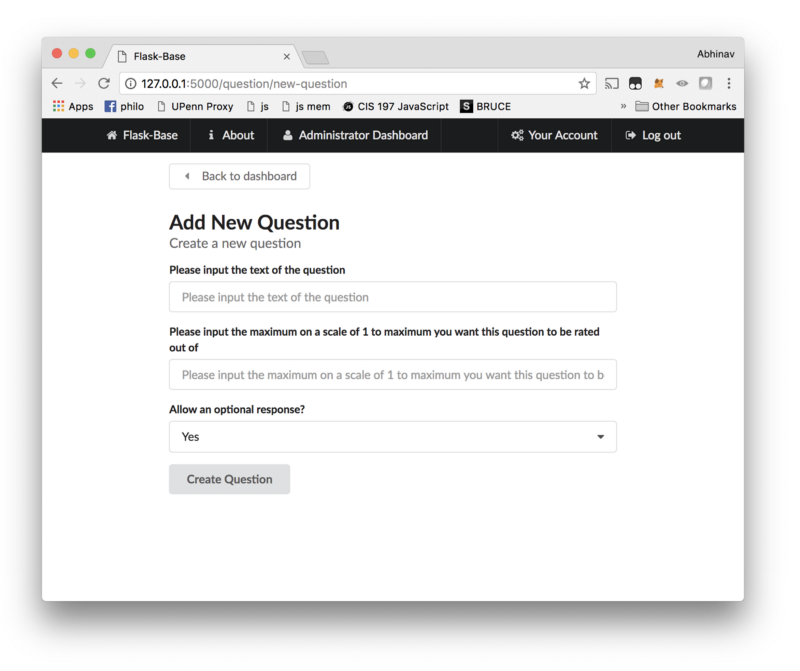
Great! We now have a working Club and ClubCategory model. Now let’s move onto the Question and Answer models. For a question, we need to keep track of the content of the question which will be a String containing the text of the question itself. We will also include a max_rating attribute that will contain the maximum rating an individual can give for the question. For example, if the question content is "Rate the community of the club 10 is the best", we could set max_rating to be 10. Additionally, we'll keep track of a boolean free_response to determine whether we will allow people to include an optional extra response that is long form. Lastly, we will need to have a relation to the Answer model. This will be a one to many relation because a question can have multiple answers but an answer can only have one question.
The Answer model will have the following attributes:
- an
answerattribute corresponding the the free text response of an answer (if the question allows a free text response) - a
ratingranging from 1 to whatever is the max rating for the question - a
user_idrelating to the user who wrote the question (once again a user can have many answers, but an answer can only have one user) - a
question_idreferring to thequestionthat the answer belongs to - a
club_idreferring to theclubthe answer belongs to
Let’s create a file question.py
Most of the stuff in here is fairly straightforward except for the last line. The last line connects the Question and Answer models. It says to set up a relationship with the Answer model which can refer to the Question model via the keyword question. Given an answer a, you can get the question via a.question and given a question q, you can get the answer associated with it via q.answers. Let's now set up the Answer model. Create a new file called answer.py in the models folder and paste in the following.
So this file is much longer, but recall that there are many things an answer is related to. Let’s start at the beginning, note that question_id refers to the Question model via the foreign key questions.id (the id column of the questions table (which contains records of instances of the Question model).
Note that we also have a user_id column that refers to a user. Let's go into user.py within the app/models folder and add the following line after the role_id declaration.
This statement uses very similar syntax to that of the Question model.
Also note that there is a club_id attribute that refers to the club the answer is associated with. Edit the club.py file to include the following line as the last attribute of the Club model.
Finally, add these two lines to __init__.py in app/models
And now we should be able to play around with our databases as follows.
Lastly, let’s address the newAnswer method. This method is used to insert new answers into the database while making sure that if a user has already answered that question, we delete it and insert the new response.
Once again, we can run python manage.py shell
There, we are now done with the models :)
Views
Now the database stuff is out of way, let’s create the way for users to interact with the application itself. First let’s set up some blueprints.
Blueprints
Blueprints are a great way to organize you flask application. It allows you to mount all routes that are associated with each other in a single file. For example, for all actions associated with an account, such as account management, user password reset, forgot password, etc. would be included in the account blueprint.
Each blueprint has a folder associated with it under app. For example, there is an account/ folder and a folder under templates containing the actual html templates that will be rendered to the user.
Let’s add some blueprints. Before the return app line of app/__init__.py add the following.
These calls create blueprints mounted at the url prefixes /club, /question, and /category respectively. Let's create the folders club, question, and category for each of the blueprints. Within each of the folders create the files __init__.py, forms.py, and views.py.
Club Forms and Views
I’ll walk through how to set up the views/templates for club blueprint. The other views are fairly easy to understand from the code.
So within the club view, we want to have a few different things to show
- If you are an administrator, you should be able to create a club and give it a name, description, and categories.
- If you are an administrator, you should be able to view all the clubs, including ones that aren’t confirmed.
- If you are an administator or user, you should be able to view an individual club’s information.
- If you are an administator, you should be able to edit a club’s information and delete a club.
Let’s first create a couple of forms within forms.py that we will then pass to our views, specifically the view that handles create a new club and the one that edits club information.
In forms.py for club add the following lines:
Flask-base uses wtforms to create forms. wtforms allows us to create forms in an object oriented manner where each form is a class.
So we create two forms, one called NewClubForm that extends the base wtforms Form class, and has 3 fields - name (Datatype: Text), desc (Datatype: Text) containing the description of the club, and categories (a multiple select dropdown). With the categories field, we query the ClubCategory model with a Lambda function (which is basically an anonymous function) for the category names and populate the category select field options with the results from that query.
Lastly, we have a submit field, so the submit button can be rendered.
Next, we have an EditClubForm which extends the NewClubForm field set by adding a new field called is_confirmed. Recall that is_confirmed in our Club model determines whether the given club instance can be shown or not shown to the public. We will be adding the function for a club to be suggested by users, and by default, suggested clubs are hidden until approved by an admin. We also overwrite the submit field to display the text "Edit Club".
In views.py under club/, we create a few routes.
/new-club(GET, POST) LOGIN PROTECTED: The renders and accepts data from form for creating a new club./clubs(GET) ADMIN PROTECTED: Renders all the clubs/<int:club_id>/(:info) (GET) LOGIN PROTECTED: Will render out info for a given club instancewith id = club_id and can access the route at /club/1 or /club/1/info./<int:club_id>/change-club-details (GET, POST) ADMIN PROTECTED: Render and accept data from form for editing club information./<int:club_id>/delete (GET) ADMIN PROTECTED: Render page to delete club/<int:club_id>/_delete (GET) ADMIN PROTECTED: Delete club with club id.
For the first route /new-club, we want to also allow regular users to create a new club, which is why we only login protect it. Let's see how we can make a route for this.
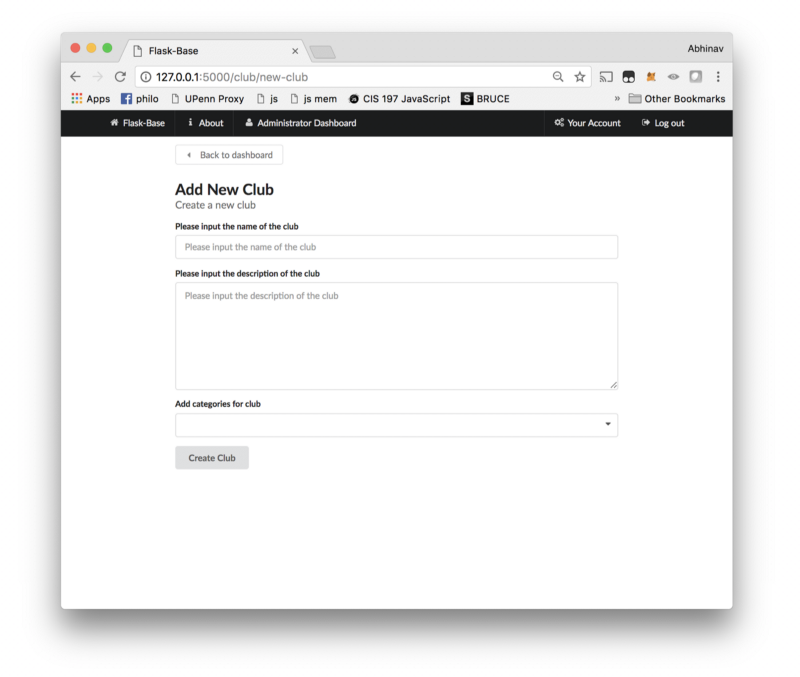
Breaking down the code. In line 1, we declare where the route will be accessible. For example, it will be on the club blueprint at the sub-route /new-club. The full URL it can be accessed at is basedomain.com/club/new-club.
We then put a route decorator @login_required on the route, this decorator will throw a 403 error if the user isn't logged in but will also allow the user to view the route if they are logged in.
Next, we define a method to handle requests to the route (note that this name must be unique). This method can be referred to by club.new_club in Jinja templating.
We then instantiate our NewClubForm we created earlier. In the following line, we check to see if the form submission was valid (note that this route will also accept POST requests to it) via the form.validate_on_submit() method. If it is, then we create a new Club instance with name, description, and categories corresponding to the form fields. Note for is_confirmed we set it equal to whether the current user is an administrator or not (because if a regular user submits to this form, we want the new club to not appear to everyone, hence we set is_confirmed to False). We then add the new club instance to the database session and commit the session.
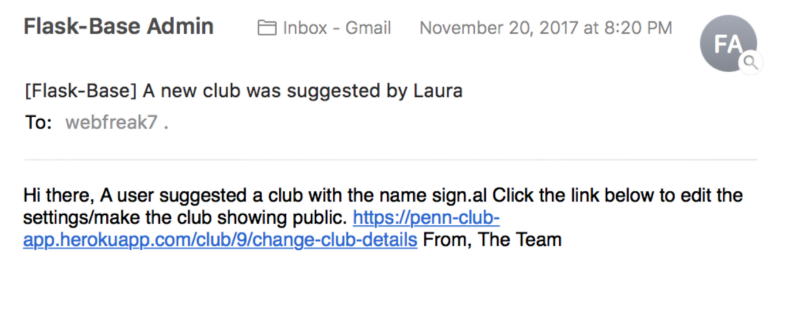
Lastly, if the user submitting the form is not an admin, we generate a link to send to the administrator of the form via email. This link should go directly to the admin change_club_details route which will allow the admin to toggle is_confirmed. We then look through the database for all users with an administrator role and add an emailing task to our redis queue. Within the get_queue() method, we enqueue the send_email job specifically, setting the recipient to the admin email, the subject equal to
add the club instance (to be used as a templating variable), and the link (also to be used as a templating variable).
We also pass the template which we create in app/templates/club/email/suggested_club.html and .txt. The content is as follows for the html file:
and for the .txt file
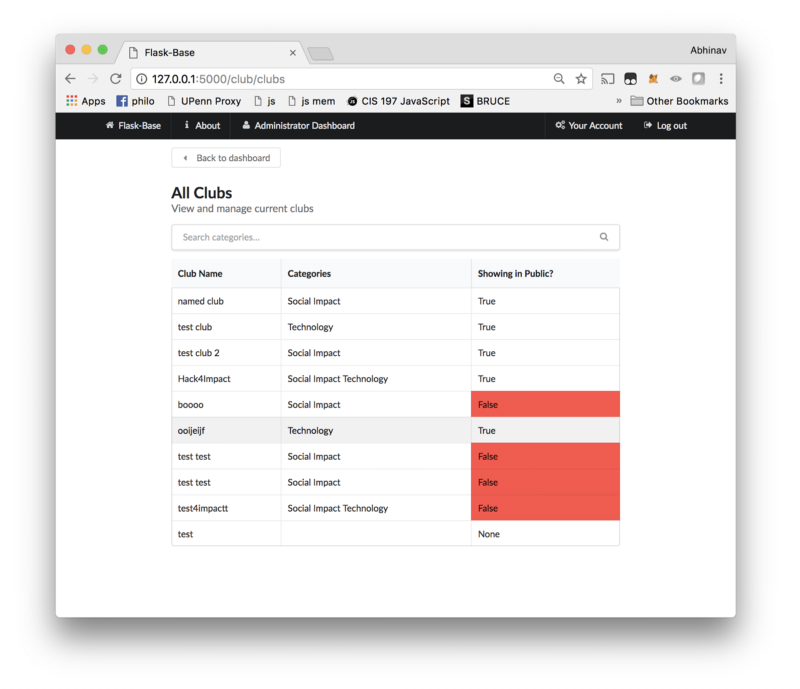
Next we will take care of the /clubs route that renders all the clubs in a table. For the route handler, we can just pass in all the clubs into a template.
And the club template we render is located at app/templates/club/clubs.html with the following content.
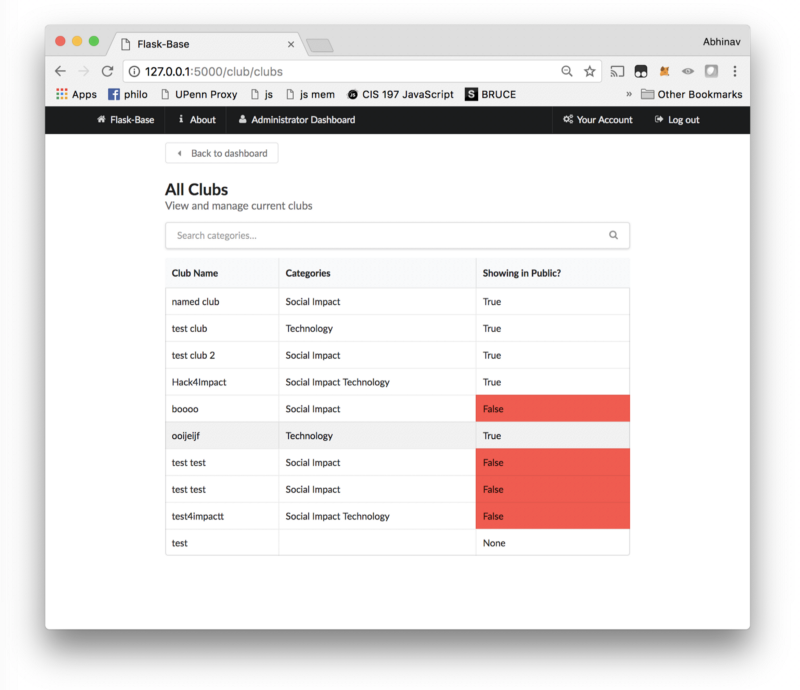
Most of this is fairly straightforward if you know Jinja (or any templating language). Basically, the for loop {% for c in clubs %} ... {% endfor %} will go through all the clubs and for each club, it will render the club name {{ c.name }} and the club categories.
Note that for each of the clubs rendered, we also include a line:
This links to the individual club info page for the given club instance that is rendered. Let’s move on to making that route.
Note that for this view we only need to pass in the club instance information to the manage_club view. We can do this easily via:
We can also set up a few other routes because our manage_club.html page actually does display multiple routes.
Let’s set up the /change-club-details route which just renders and accepts info from the EditClubForm form.
Note that when saving the club.is_confirmed field, we need to convert the string True and False values to their boolean counterparts as stated in the forms.py specification for EditClubForm. We do this via a custom defined function bool which is defined as follows:
The python default bool will return True if any string is defined, including False', hence we need to define our own function.
We also define the delete to render the delete page and the _delete function that actually deletes the club instance.
Note that for the _delete route, we have a redirect towards the clubs route that lists all the club instances.
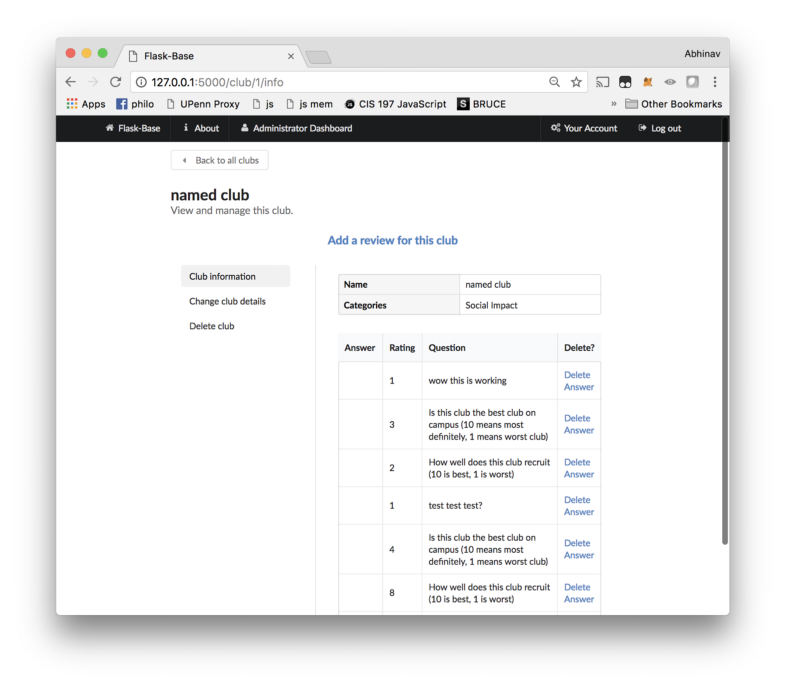
Now we move to the manage_club.html template at app/templates/club/manage_club.html. The content of that is as follows:

Let’s break down this file. On the first line we are just extending our base layout and then we import form macros. Macros are basically methods in Jinja.
We have a endpoints variable that will contain links to the different parts of the management page. In the navigation macro, we render all the individual elements of the list in the endpoints.
We also create a club_info macro that will contain the information related to the club and all the answers associated with the club by doing the following
Lastly, we actually write the logic for rendering the page within the {% block content %} ... {% endblock %} tags. We switch between the subpages to render by checking the request.endpoint to see if it is the deletion endpoint or if there is a form (in which case render the form). Otherwise, we just call the club_info macro. And we’re done with the club routes and views. Most of the other routes for category and questions follow a similar type of logic.
Main Views and Forms
The main route is the public facing part of the application. The route behaviors are as follows
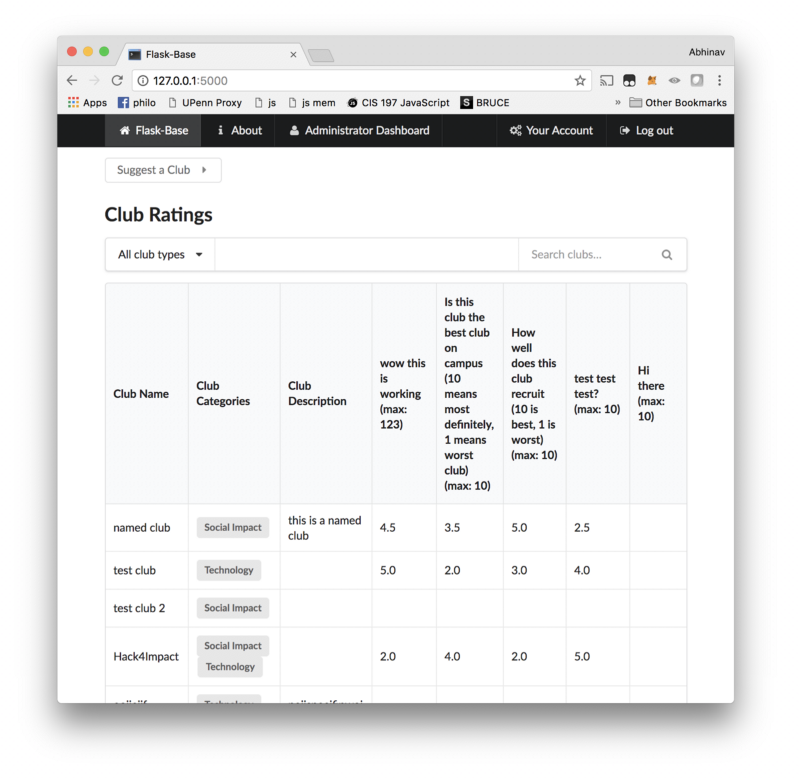
- / (GET): display all clubs, associated questions, and average ratings for each club per question in a table.
- /submit-review/<int:club_id> (GET, POST): Dynamically generate the form to submit a club review based on the questions in the `Question` db. Also accept data for the form and save as answers fo the club matching club_id.
The first route is very straightforward and matches the `/clubs` route we implemented earlier. The only difference is that the `questions` must also be passed in.
The most interesting part here is how to calculate the average rating and pass that into the route. I create a list called all_c and for each of the clubs, I create a club_obj containing basic information for the club.F or each of the answers for a club, I add a new property of the club_obj correponding to the question content, if one doesn't exist already. I append each of the ratings to a list and then iterate through each of the properties of the club_obj. If the property has a value that is of type list, then I replace that list with the average of the ratings in that list. I then append club_obj to all_c and pass that into the template.
Dyanamic Form Generation
For the submit-review route, I need to create a form dynamically based on the questions that I have in my Question model. The code is as follows:
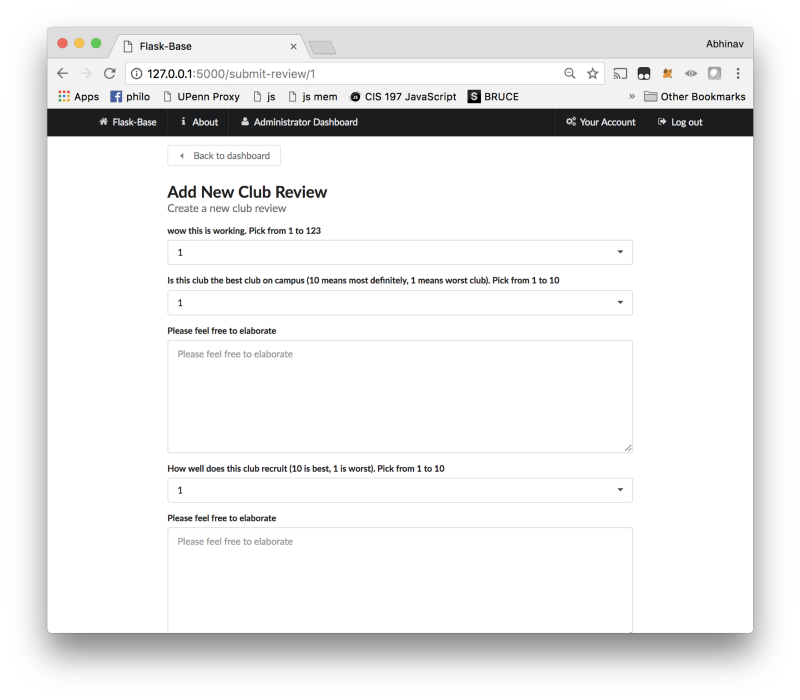
We first create a dummy form class that inherits from the base Form class. Then for each of the questions, we ceate new form fields setattr(F, ...) on the dummy form F. The setattr method takes as its second argument the name of the form field. We set this to the id of the question with _q appended to it corresponding to the rating and _resp corresponding to a free response if indicated. For the rating form field, we create a SelectField with choices from 1 to the max_rating.
To handle a form submission, we use the same if statement form.validate_on_submit() but instead of looking for specific named fields of the form, we instead iterate through all the fields of the form and create a new answer using the newAnswer method. This method will delete any previous response before adding a new one for the user if they responded for this club.
Launching
Now that most of the App is done, we can launch this app on Heroku.
If you’ve never signed up with Heroku
- Go to Heroku.com and sign up for an account
- Install the CLI
If you haven’t set up a git repo initially, run git init and log in with your Heroku account.
Then, git add all the relevant files (i.e. anything but config.env and venv/) and run pip freeze > requirements.txt to make sure that all the dependencies you have installed are included.
Run heroku create to make a new Heroku instance and run git push heroku master to add your files to the Heroku repository.
After that is done running, you’ll need to set some environment variables with the following command
Once that is done, run the following which will create the database on Heroku
and then the following command will create the administrator account.
You’ll also need to create a Redis togo instance to handle the task queue
and lastly run the following command which will tell Heroku to spin up a dyno (read as sub-server) that handles our Redis queue.
You can then run heroku open to open your running Heroku app in a separate window.
Extending the App & Conclusion
It’s pretty easy to copy the current application structure and extend it to add more information/routes to the App. Just view any of the previous routes that have been implemented. If, for some reason, you want to include a file upload of some type, you’ll need to integrate the App with Amazon S3 if you plan to run the app on Heroku (since it has an ephemeral file system).
Overall, flask-base provides a great starting point for making your flask application. Of course the backend may be fairly verbose to code, but as a result, it gives you very granular control over your app.