

When I first started building apps with Xcode, I thought Storyboards were magic. Dragging and dropping subviews into place was so simple, I never understood how people built views without them.
Eventually, I decided that to become a “master programmer,” I would need to learn how to construct views programmatically. One problem, writing constraints in code is a pain.
let horizontalConstraint = NSLayoutConstraint( item: newView, attribute: NSLayoutAttribute.centerX, relatedBy: NSLayoutRelation.equal, toItem: view, attribute: NSLayoutAttribute.centerX, multiplier: 1, constant: 0)That’s a horizontal constraint that will center a subview on the X axis of its superview. Not so easy to read not to mention writing that for every constraint gets old fast. Still, I wanted to ditch storyboards so I searched for an alternative. That’s when I found SnapKit.
SnapKit has a clear and concise API that makes writing constraints in the code a breeze. I’m going to go through a few really basic examples of what can be done in SnapKit.
I’ll be going over:
- Laying out a subview in its superview
- Laying out subviews relative to each other
- Updating and animating constraints
Getting started
Make sure you download SnapKit in your project. I use Cocoapods for 3rd party libraries.
Add pod 'SnapKit' to your Podfile and run pod install. Now write import SnapKit at the top of the file you want to use it in.
Laying out a subview in its superview
First off I’ll pin a subview to the edges of its superview:
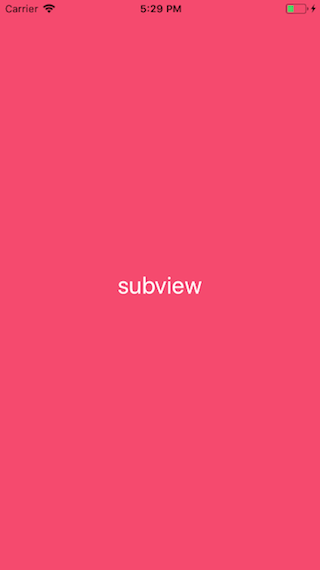
let subview = UIView()view.addSubview(subview)subview.snp.makeConstraints { (make) in make.top.equalTo(view) make.bottom.equalTo(view) make.left.equalTo(view) make.right.equalTo(view)}This will set constraints for the top, bottom, left, and right edges of the subview to the corresponding edges of its superview with a constant of 0.
Notice that I add the subview to the superview before I setting the subview’s constraints. If you write constraints for views that aren’t already added to the superview, it will throw a fatal runtime error when the view loads.
The SnapKit syntax is already a lot more readable than the standard library but it can be shortened. SnapKit provides an even more concise way to constrain a view to the edges of its superview:
let subview = UIView()view.addSubview(subview)subview.snp.makeConstraints { (make) in make.top.bottom.left.right.equalTo(view)}This will layout my subview the same way as the code above, but with one line instead of four.
I can also constrain the size of my subview. Below, I’m going to set the height and width of the subview and set it to the center of its superview:
subview.snp.makeConstraints { (make) in make.width.equalTo(200) make.height.equalTo(200) make.centerX.equalTo(view) make.centerY.equalTo(view)}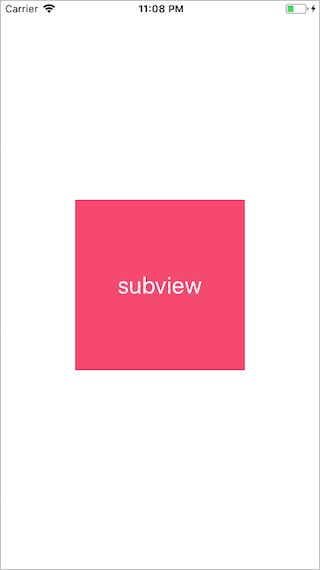
That example is pretty simple, but I repeated myself a lot. When setting constraints that have the same values, SnapKit allows me to chain constraints together like so:
subview.snp.makeConstraints { (make) in make.width.height.equalTo(200) make.centerX.centerY.equalTo(view)}This block will result in the same constraints as the one above. Just another way SnapKit helps to write cleaner code.
Laying out subviews relative to each other
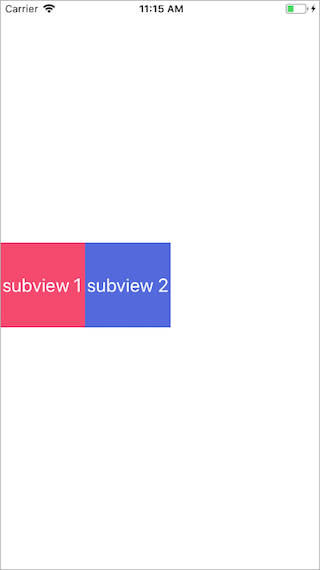
When adding many subviews to a single view, it’s likely that you’ll want to layout subviews in relation to each other. In this example, I will:
- Add
subview1and constrain it to the left edge its superview - Add
subview2and constrain it to the right edge of thesubview1
let subview1 = UIView()let subview2 = UIView()view.addSubview(subview1)view.addSubview(subview2)subview1.snp.makeConstraints { (make) in make.width.height.equalTo(100) make.left.equalTo(view)}subview2.snp.makeConstraints { (make) in make.width.height.equalTo(subview1) make.left.equalTo(subview1.snp.right)}Up until now, I’ve wanted my constraints to be equal to the corresponding constraint for the relative view. For example, in make.left.equalTo(view)SnapKit sets the left of subview1 to the left of view. SnapKit will automatically match the constraint I set if I do not specify otherwise.
For the left constraint of subview2, I want to set it to the right edge of subview1. If I wrote make.left.equalTo(subview1) SnapKit would set the left edge of subview2 to the left edge of subview1. Instead, I use the right edge of subview1 which I grab by writing subview1.snp.right.
I can access any constraint of a view’s layout by adding snp as seen above.
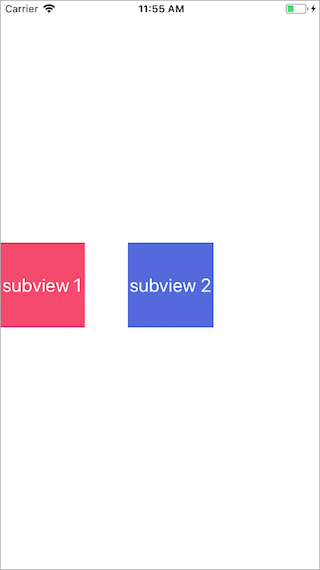
Now that I have subview2 to the right of subview1, I’ll create some space between them by adding an offset to subview2.
subview2.snp.makeConstraints { (make) in make.width.height.equalTo(subview1) make.left.equalTo(subview1.snp.right).offset(50)}An offset can be appended at the end of any equalTo() to change the constant of that constraint. Now subview2 will have a constant of 50 on its leftconstraint.
Updating and animating constraints
If you want your app to be the #NextBigThing everyone knows you’ll need to add a little flair! SnapKit provides a way to easily update constraints to create dynamic views.
Updating a constraint with SnapKit is almost identical to adding a new one. Here, I’ll update the constraint for subview1 from the previous example by changing the left edge constraint’s constant from 0 to 50:
subview1.snp.updateConstraints { (make) in make.left.equalTo(50)}And that’s it! My subview will update to the new constraints when the code block is run.

You probably noticed that subview2 moved when I updated subview1 even though I didn’t update its constraints.subview2 is constrained to the right edge of subview1. When subview1 gets moved, subview2 will continue to honor the left constraint it has with subview1.
Now I’ll add an animation to smooth out the transition. If you’ve ever animated a view before, this syntax will be familiar:
UIView.animate(withDuration: 0.3) { subview1.snp.updateConstraints { (make) in make.left.equalTo(50) } self.view.layoutIfNeeded()}When animating updates on my constraints, I need to call layoutIfNeeded()on the subview’s parent. If I’m animating more than one view at once, I will need to call layoutIfNeeded() on the subview’s closest common superview.

updateConstraints() can only update existing constraints. Attempting to update a constraint that isn’t already in place will result in a fatal run time error.
If you want to add new constraints to your subview, use remakeConstraints(). remakeConstraints() will remove any existing constraints you have set on that subview and allow you to add new ones.
You can also use deactivate() to remove a constraint. Below I create, set, and them remove a constraint using deactivate():
var constraint: Constraint!let subview = UIView()subview.snp.makeConstraints { (make) in constraint = make.height.equalTo(100).constraint}constraint.deactivate()You can also animate the removal of a constraint by deactivating it inside of an animation block.
So now you are a master of writing constraints programmatically. Storyboards seem like a joke now and there’s no reason to ever go back to them, right?

Not really. Storyboards and nibs are still the fastest way to put together a view controller, and, if you are working with non-developers, they are the best way to show what the app will look like without sending a beta version.
Personally, I use both. In the last app I built, I added constraints both in code with SnapKit and using Auto Layout on storyboards and nibs, sometimes on the same view. In the end, you’ll have to decide which works best for the view you are building.
Thanks so much for reading! If you liked this story, follow me on Twitter where I post articles about product management, engineering, and design.