by Yazed Jamal
How to build a matching game in your free time with Easel.js
Part of my journey in the programming world is learning about game development. I have tried several languages such as Java and C++, but in the end I would like to go with Javascript. I have built one game before using JS. The game is called Pong Ping, which is the clone for the game Pong. This game was built purely using native Javascript.
But today I would like to build a game based on a Javascript game framework called Easel.js. The game that I am going to build is actually a very simple game: we flip squares over, and if they are the same color, they will disappear. The game will finish when every color is matched. Here’s an example of the game in the video below, but they are using pictures.
Step 1
I will create the index.html file and make a reference to the easel.js library. I choose to use CDN (Content Deliver Network) for this purpose. I will also need to make reference to main.js where all my Javascript code will be.
#index.html<!DOCTYPE html><html><head> <title>Pairing Game</title> <script src="https://code.createjs.com/easeljs-0.8.2.min.js"></script><script src="js/main.js"></script></head><body onload="init()"> <canvas id="myCanvas" width="960" height="600"></canvas></body></html>I need to make sure all the DOM elements are fully loaded before the Javascripts could be executed, so I am using the onload method to bind the Javascript through the function init().
Step 2
I will then create the main.js file and setup the easel.js environment.
#js/main.jsvar squarHeight = 200;var squareWidth = 200;function init() { var stage = new createjs.Stage("myCanvas"); var square = drawSquare();stage.addChild(square); stage.update();}Easel is using a Class called Stage as a container to display any element to the canvas defined. Now I will draw a square through the function drawSquare. I will utilize all the available APIs from easel.js
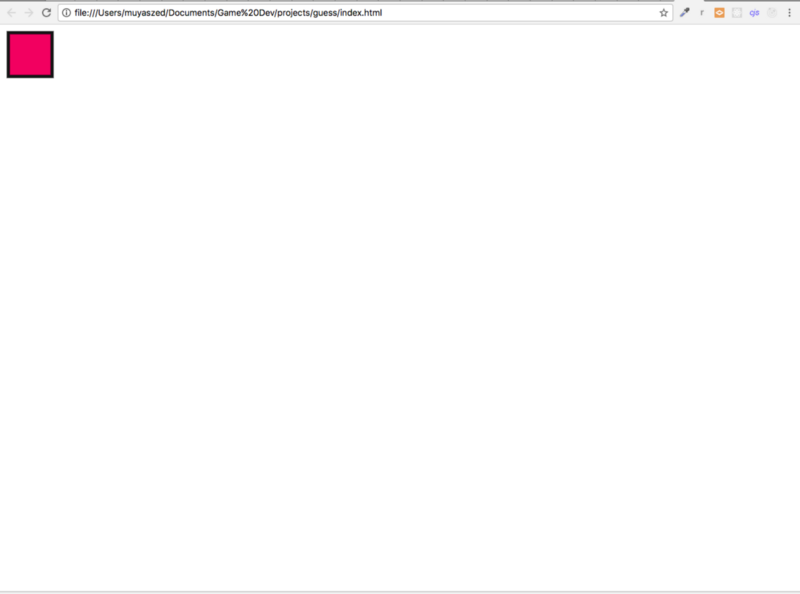
#js/main.jsfunction drawSquare() { var graphics = new createjs.Graphics().setStrokeStyle(5).beginStroke("rgba(20,20,20,1)") graphics.beginFill(randomColor()).rect(5,5,squareWidth,squareHeight); var shape = new createjs.Shape(graphics); return shape;}function randomColor() { var num1 = Math.floor(Math.random()*255); var num2 = Math.floor(Math.random()*255); var num3 = Math.floor(Math.random()*255); return "rgba("+num1+","+num2+","+num3+",1)"; }First I will define the stroke size I would like to use. Then I’ll apply the stroke with a specific color, define the color of the square, and create the square. The color of the square is a random color generated from the function randomColor. Below is how it will look in the browser.
Step 3
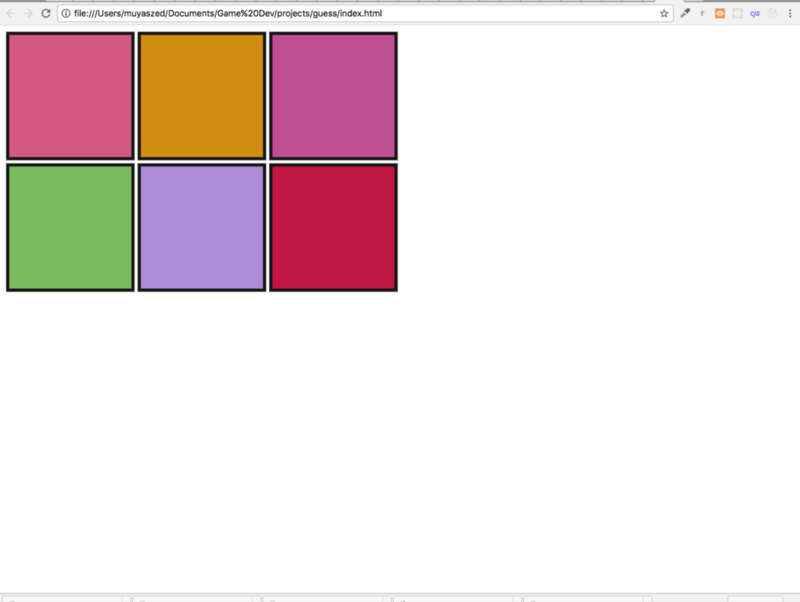
After I have successfully rendered a square with a random color, I need to design how many rows and columns there will be for the squares to fill in. I’ll also need to design the algorithm to render one square in each column and rows
#js/main.js##upated codesvar squarHeight = 200;var squareWidth = 200;var squareGap = 10;var column = 3;var row = 2;function init() { var stage = new createjs.Stage("myCanvas"); var square;for(i=0; i < column*row; i++) { square = drawSquare(); square.x = (squareWidth+squareGap)*(i%column); square.y = (squarHeight+squareGap)*Math.floor(i/column); stage.addChild(square); stage.update(); }}function drawSquare() { var graphics = new createjs.Graphics().setStrokeStyle(5).beginStroke("rgba(20,20,20,1)") graphics.beginFill(randomColor()).rect(5,5,squarHeight,squareWidth); var shape = new createjs.Shape(graphics); return shape;}function randomColor() { var num1 = Math.floor(Math.random()*255); var num2 = Math.floor(Math.random()*255); var num3 = Math.floor(Math.random()*255); return "rgba("+num1+","+num2+","+num3+",1)"; }From the above codes, I will get a rendered HTML something like this:
There are many ways of implementing the square rendering. We could use looping in a multi-dimensional array, or we could manipulate the square size with some mathematical function. In this case, I’ll use the later. But here is the algorithm if you would like to use the multi-dimensional method:
#alternativevar positionX =0; var positionY = 0;for(i=0;i<row;i++) { for(j=0;j<column;j++) { square = drawSquare(); square.x = positionX; square.y = positionY; stage.addChild(square); stage.update(); positionX += squareWidth+squareGap; console.log(positionX); } positionX = 0; positionY += squarHeight+squareGap; }Step 4
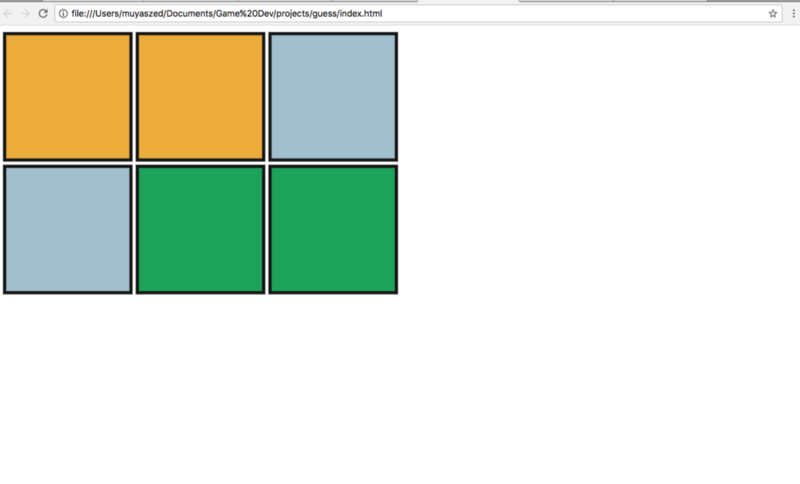
Again, the objective of this game is to match a pair of colors together. So I need to modify the code in order for it to generate groups of colors in pairs. To do that, I will use an if else logic to make sure the two similar colors are used during the square rendering.
#js/main.jsvar temp;var genOnce = false;function drawSquare() {var color = randomColor();var graphics = new createjs.Graphics().setStrokeStyle(5).beginStroke("rgba(20,20,20,1)") if(!genOnce) { graphics.beginFill(color).rect(5,5,squarHeight,squareWidth); temp = color; genOnce = true; }else { graphics.beginFill(temp).rect(5,5,squarHeight,squareWidth); genOnce = false; } var shape = new createjs.Shape(graphics); return shape;}This will render a group of squares something like this:
Step 5
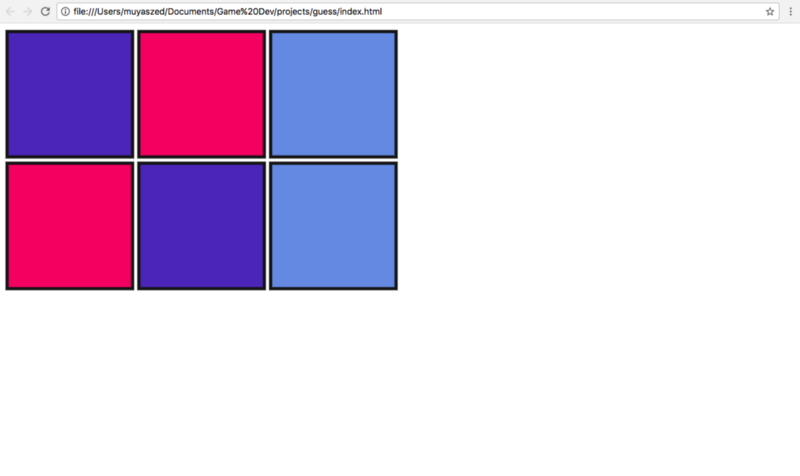
Next, I want each of the squares to be rendered in a random position so the pairs are separated from each other. This can be achieved by first creating an array consisting of all indices of the squares, then shuffling the array so the index number is randomly placed.
#js/main.jsvar squarePlacement = [];##function to generate array with all the squares indexfunction randomDoubleColor() { for(i=0; i<totalTiles;i++) { squarePlacement.push(i); } squarePlacement = shuffleArray(squarePlacement); return squarePlacement;}##function of the array random shufflingfunction shuffleArray(array) { for (var i = array.length - 1; i > 0; i--) { var j = Math.floor(Math.random() * (i + 1)); [array[i], array[j]] = [array[j], array[i]]; } return array;}Then I’ll need to change how I render the square. Instead of iterating through the length of total squares, I will iterate through the randomly shuffled array.
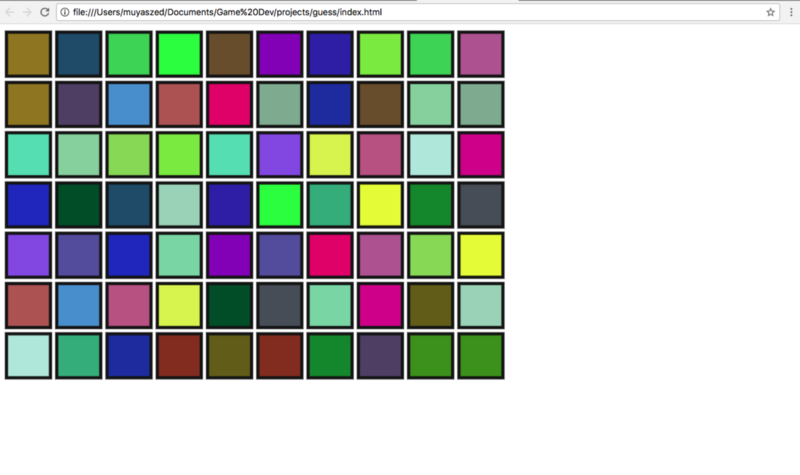
#js/main.jsfunction init() { var stage = new createjs.Stage("myCanvas"); var square; randomDoubleColor();for(i=0; i < squarePlacement.length; i++) { square = drawSquare(); square.x = (squareWidth+squareGap)*(squarePlacement[i]%column); square.y = (squarHeight+squareGap)*Math.floor(squarePlacement[i]/column); stage.addChild(square); stage.update(); }}This will get me a group of squares like this:
I can see the effect better if more squares are rendered:
Step 6
My goal is now to create a function that will compare two squares which will be selected subsequently.
#js/main.jsvar highlight = createjs.Graphics.getRGB(255, 0, 0);var tileChecked;I will start with defining a variable highlight. This will be used to highlight the first selected squares and a variable tileChecked to store the same square.
#js/main.jsfor(i=0; i < squarePlacement.length; i++) { square = drawSquare(); square.x = (squareWidth+squareGap)*(squarePlacement[i]%column); square.y = (squarHeight+squareGap)*Math.floor(squarePlacement[i]/column); stage.addChild(square); square.addEventListener("click", handleOnPress); stage.update(); }}I will then create an event listener which will respond to a mouse click and trigger the function defined, handleOnPress. Now I will define the function as follows:
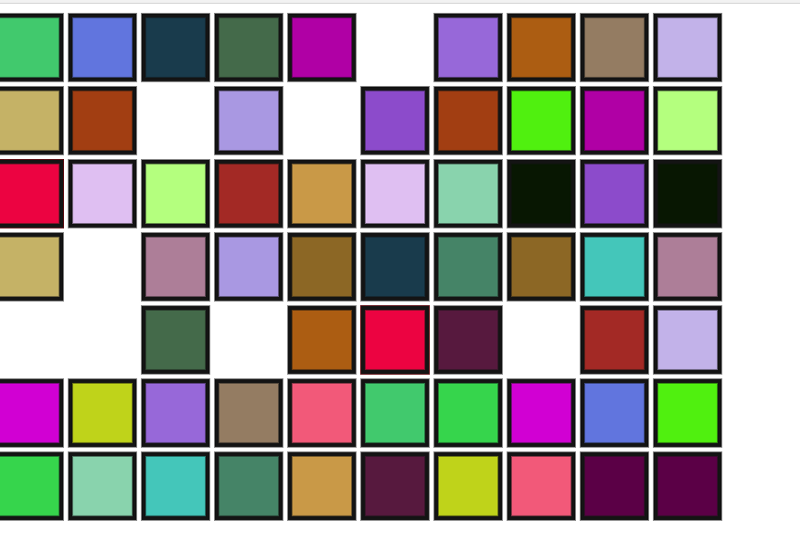
function handleOnPress(e) { var tile = e.target; if(!!tileChecked === false) { tile.graphics.setStrokeStyle(5).beginStroke(highlight).rect(5, 5, squareWidth, squarHeight); tileChecked = tile; }else { if(tileChecked.graphics._fill.style === tile.graphics._fill.style && tileChecked !== tile) { tileChecked.visible = false; tile.visible = false; }else { console.log("not match"); tileChecked.graphics.setStrokeStyle(5).beginStroke("rgba(20,20,20,1)").rect(5, 5, squareWidth, squarHeight); } tileChecked = null; } stage.update();}Basically the function will first check the variable tileChecked. If it is undefined, the selected square will be highlighted. The selected square object will be saved in the variable tileChecked. Otherwise (which I expect to happen on the second click), the color between the current selected square and the one which is stored in the variable tileChecked will be compared.
In this second comparison, if the color is a match, I will make both the squares disappear. If it is not a match, I will remove the highlight and reset the variable tileChecked to undefined.
Step 7
To create a real puzzle game, all of the colors should not be displayed. I will make the squares covered by grey squares, and when each is clicked, then it will reveal the color. So when it is not a match, the grey square will cover the box again.
To make it more playable, I will make sure other squares are not clickable during the comparison. I will also put some delay between when the second color is displayed and when both squares disappear or turn to grey. Some modification needs to be done in order for everything to work properly
function init() { var stage = new createjs.Stage("myCanvas"); randomDoubleColor();for(i=0; i < squarePlacement.length; i++) { var color =randomColor(); console.log(color); var square = drawSquare(color); console.log(square); square["color"] = square.graphics._fill.style; square.graphics._fill.style = "rgb(140, 136, 136)"; square.x = (squareWidth+squareGap)*(squarePlacement[i]%column); square.y = (squareHeight+squareGap)*Math.floor(squarePlacement[i]/column); stage.addChild(square); square.addEventListener("click", handleOnPress); stage.update(); } function handleOnPress(e) { var tile = e.target;tile.graphics.beginFill(tile.color).rect(5,5,squareHeight,squareWidth); console.log(tile.mouseEnabled); tile.mouseEnabled = false; console.log(tile.mouseEnabled);if(!!tileChecked === false) { tileChecked = tile; }else {stage.mouseChildren = false; tile.graphics.beginFill(tile.color).rect(5,5,squareHeight,squareWidth);setTimeout(function() { console.log("in"); console.log(tile); console.log(tileChecked); if(tileChecked.color === tile.color && tileChecked !== tile) { tileChecked.visible = false; tile.visible = false; }else { console.log("not match"); tile.graphics.beginFill("rgb(140, 136, 136)").rect(5,5,squareHeight,squareWidth); tileChecked.graphics.beginFill("rgb(140, 136, 136)").rect(5,5,squareHeight,squareWidth);} tile.mouseEnabled = true; tileChecked.mouseEnabled = true; stage.mouseChildren = true; tileChecked = null;stage.update(); }, 1000); } stage.update();}}function drawSquare(color) { var graphics = new createjs.Graphics().setStrokeStyle(5).beginStroke("rgba(20,20,20,1)")if(!genOnce) { graphics.beginFill(color).rect(5,5,squareHeight,squareWidth); temp = color; genOnce = true; }else { graphics.beginFill(temp).rect(5,5,squareHeight,squareWidth); genOnce = false; } var shape = new createjs.Shape(graphics); return shape;}Below is a video of the game in action:
This game can be enhanced further by adding the winning or losing rules, or maybe by adding a timer to record each player’s finishing time. At the moment I will stop development up until this point. The full code can be found on GitHub below, and anybody is free to use it for any other project.
muyaszed/Matching-game-using-Easel.js
Contribute to Matching-game-using-Easel.js development by creating an account on GitHub.github.com
Notes: There are probably many ways to implement this feature, but this way was easiest for me. Anybody is free to comment on any mistakes or improvements that I can apply. This guide is initially for me to learn and remember what I have done. Nonetheless anybody is welcome to follow this guide if you find it is helpful.