
by Kevin Kononenko
State in JavaScript explained by cooking a simple meal

If you have ever cooked a meal at home, then you can understand how to write stateful code using object-oriented programming methods in JavaScript.
When you start writing simple JavaScript programs, you don’t need to worry about the number of variables you are using, or how different functions and objects work together.
For example, most people start out by using a lot of global variables, or variables that are scoped at the top level of the file. They are not part of any individual class, object or function.
For example, this is a global variable called state:
let state = "global";But once your program starts to involve many different functions and/or objects, you will need to create a more rigorous set of rules for your code.
This is where the concept of state comes into play. State describes the status of the entire program or an individual object. It could be text, a number, a boolean, or another data type.
It’s a common tool for coordinating code. For example, once you update state, a bunch of different functions can instantly react to that change.
This article describes state in the context of React, a popular JavaScript library.
But guess what? Even state can give you headaches once your code gets complicated! Changing state can cause unintended consequences.
Let’s stop right there. State is a popular tool in object-oriented programming, or OOP. But many programmers prefer functional programming, which discourages state changes. JavaScript supports both paradigms.
Okay, that’s a lot of terminology at once. I wanted to find a way to show how OOP and functional programming can accomplish the same goals, even if functional programming does not use state.
This tutorial will show how you might cook a meal of spaghetti and sauce from an OOP and a functional perspective.
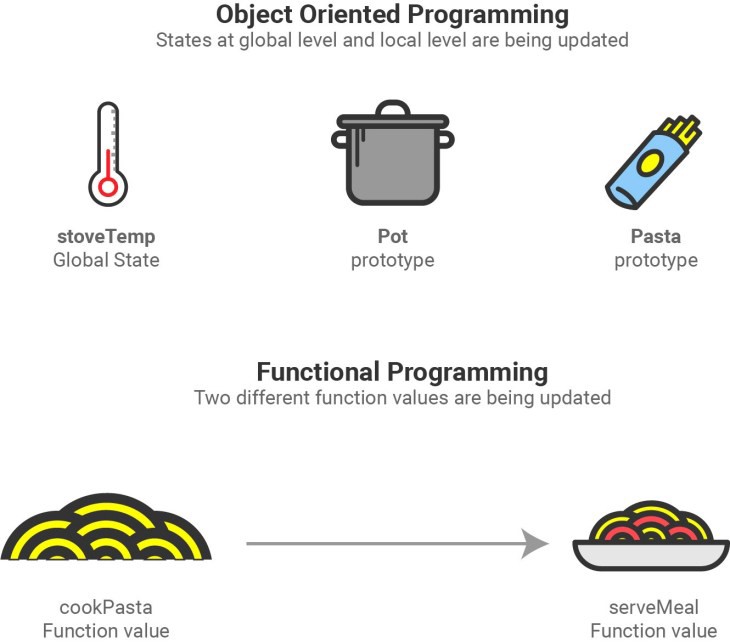
Here’s a quick preview of the two different approaches:
Let’s jump into it. In order to understand this tutorial, you just need to understand functions and objects in JavaScript.
Object-Oriented Method (Using State)
In the graphic above, we showed two different approaches to making this pasta dinner:
- A method that is focused on the state of the different tools, like the stove, the pot and the pasta.
- A method that is focused on the progression of the food itself, with no mention of state of the individual tools (pots, stoves etc.)
The object-oriented approach focuses on updating state, so our code will have state at two different levels:
- Global, or the state of this entire meal.
- Local for each object.
We are going to use ES6 syntax in this tutorial to create objects. Here’s an example of global state and the “Pot” prototype.
let stoveTemp = 500;function Pot(){ this.boilStatus = ''; this.startBoiling = function(){ if( stoveTemp > 400) this.boilStatus = "boiling"; }}let pastaPot = new Pot();pastaPot.startBoiling();console.log(pastaPot);// Pot { boilStatus = 'boiling'; }Note: I simplified the console.log statement to focus on the state update.
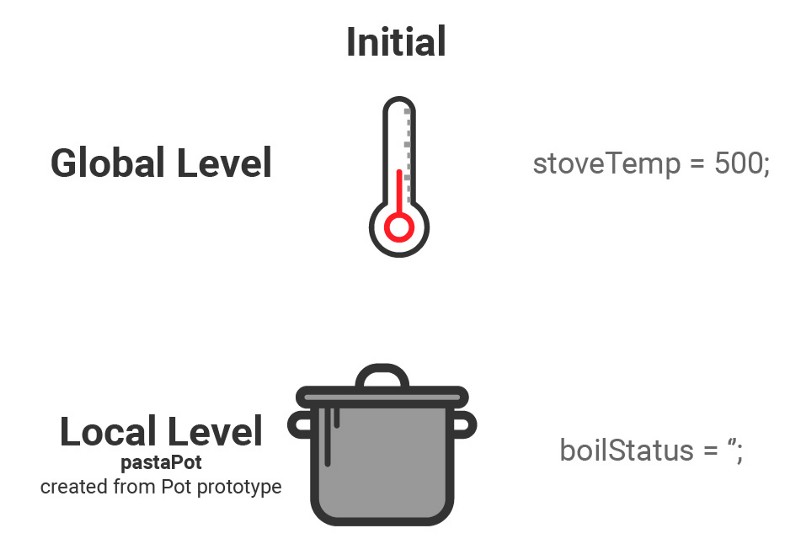
Here’s a visual representation of that logic:
Before
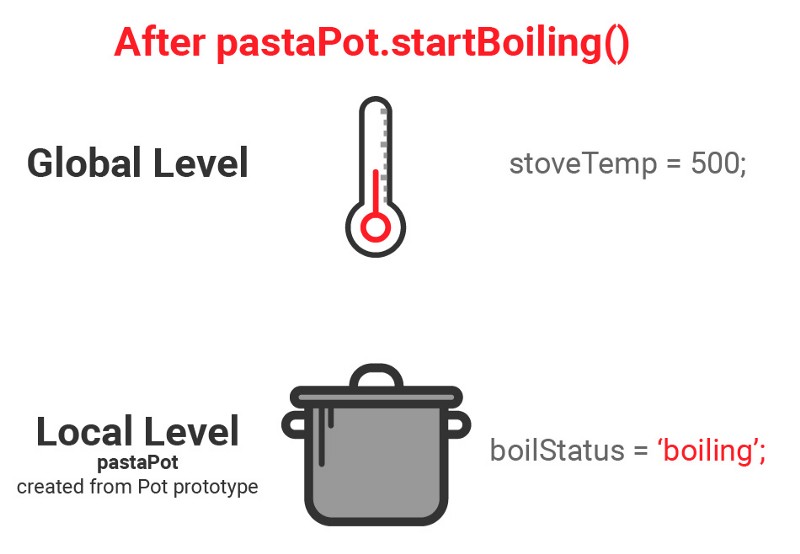
After
There are two states, and when the pastaPot is created via the Pot prototype, it initially has an empty boilStatus. But then, there is a state change.
We run pastaPot.startBoiling(), and now the boilStatus (local state) is “boiling”, since the global state of stoveTemp is over 400.
Now let’s go one step further. We will allow the pasta to become boiled due to the state of pastaPot.
Here’s the code we will add to the snippet above:
function Pasta (){ this.cookedStatus = false; this.addToPot = function (boilStatus){ if(boilStatus == "boiling") this.cookedStatus = true; }}let myMeal = new Pasta();myMeal.addToPot(pastaPot.boilStatus);console.log(myMeal.cookedStatus);// trueWoah! That’s a lot at once. Here’s what happened.
- We created a new prototype of “Pasta”, where every object will have a local state called
cookedStatus - We created a new instance of Pasta called
myMeal - We used the state from the
pastaPotobject that we created in the last snippet to determine if we should update the state calledcookedStatusinmyMealto cooked. - Since the state of
boilStatusinpastaPotwas “boiling”, our pasta is now cooked!
Here’s that process visually:
Before
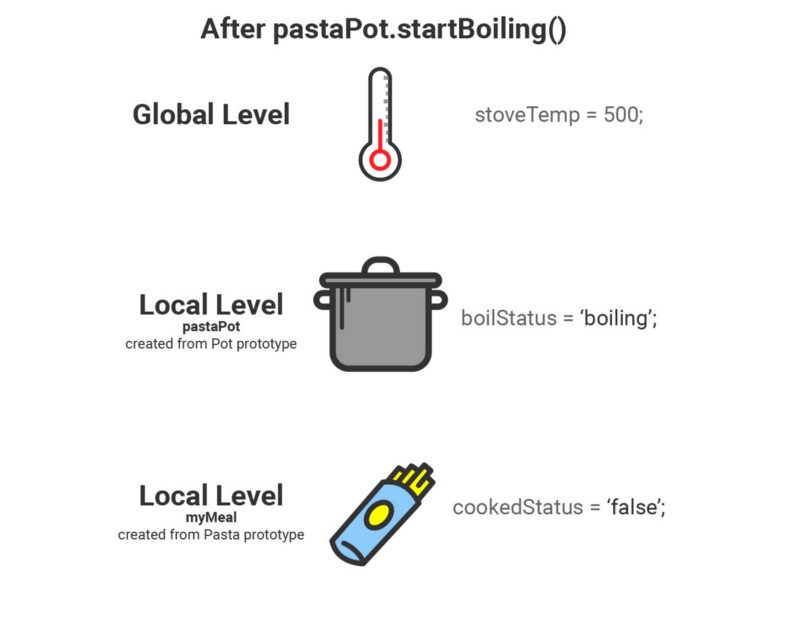
After
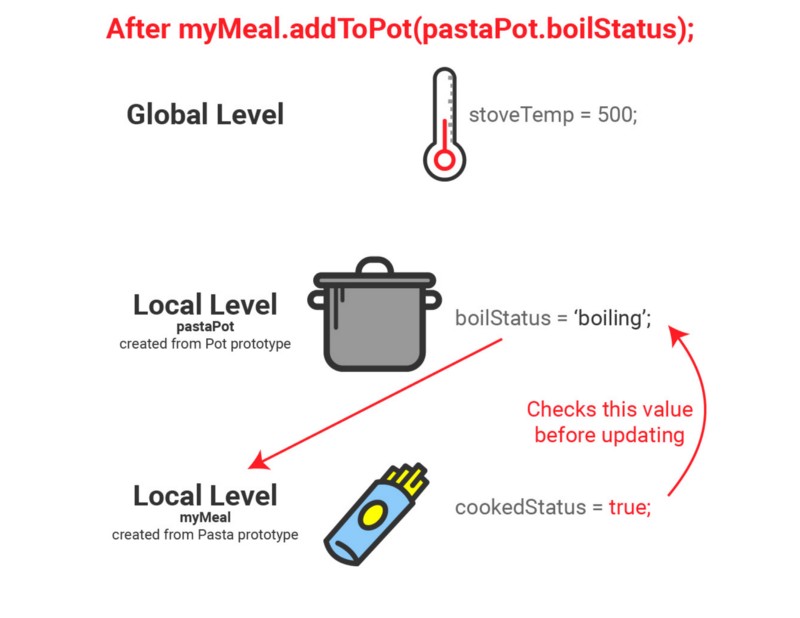
So, we now have the local state of one object, that depends on the local state of another object. And that local state depended on some global state! You can see how this can be challenging. But, it is at least easy to follow for now, since states are updated explicitly.
Functional Method (without state)
In order to fully understand state, you should be able to find a way to accomplish the same outcome as the code above without actually modifying state. This is where functional programming helps!
Functional programming has two core values that separate it from OOP: immutability and pure functions.
I am not going to go into too much depth on those topics, but if you want to learn more, I encourage you to check out this guide to functional programming in JavaScript.
Both of these principles discourage the use of state modification in your code. That means that we can’t use local or global state.
Functional programming instead encourages us to pass in parameters to individual functions. We can use outside variables, but we can’t use them as state.
Here’s an example of a function that will boil the pasta:
const stoveTemp = 500;const cookPasta = (temp) => { if(temp > 400) return 'cooked';}console.log(cookPasta(stoveTemp));// 'cooked'This code will successfully return a string of ‘cooked’. But notice — there is no object that we are updating. The function simply returns the value that will be used in the next step.
Instead, we are focused on the inputs and outputs of one function: cookPasta.
This perspective looks at the transformation of the food itself, rather than the tools that are used to cook it. It’s a little harder to visualize, but we don’t need to have the function depend on external state.
Here’s what it looks like:
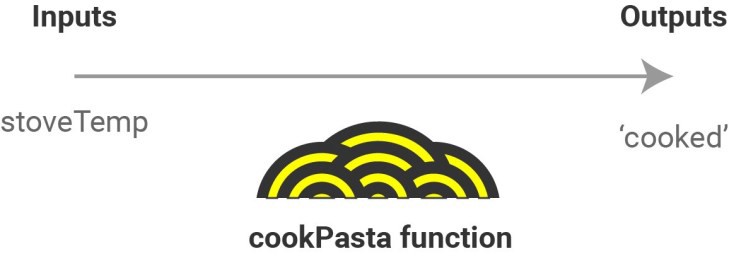
Think of it as a “timeline view” for the progress of the meal — this particular function just covers the first part, the transition from dry pasta to cooked pasta.
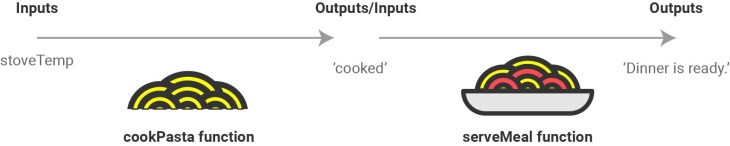
Now let’s cover the second part as the food is served. Here’s the code that will serve the meal. It will come after the code block above:
const serveMeal = (pasta) => { if (pasta == 'cooked') return 'Dinner is ready.'}console.log( serveMeal(cookPasta(stoveTemp)) );// 'Dinner is ready.'Now, we are delivering the results of the cookPasta function directly into the serveMeal function. Again, we are able to do this without changing state, or changing data structures.
Here’s a diagram that uses the “timeline view” to show how these two functions work together:
Interested In More Visual Tutorials?
If you enjoyed this guide, give it a “clap”!
And, if you would like to read more visual tutorials about HTML, CSS and JavaScript, check out the main CodeAnalogies site for 50+ tutorials.