by Chris Chuck
How to take off with WebAssembly for Go in React

With Go version 1.11, we now get an experimental version of WebAssembly. If you don’t know what WebAssembly is, don’t fret. In short, WebAssembly aims to bring high performance, assembly-like code into the browser. This allows developers to put more computationally intensive tasks into the browser, be it for a game or making some super cool animations.
So with that, I’m going to show you how to add Go-based WebAssembly to a React app! This guide assumes you have some familiarity with Webpack, Babel, and React. If you’re new to these technologies, I highly recommend you checkout this tutorial.
This tutorial will show you how to create a basic React app that utilizes WebAssembly for Go. In the near future, I’ll show you how to build a tic-tac-toe game in which the computer is 100% unbeatable and we’ll use WebAssembly to power the minimax algorithm (don’t worry, it sounds harder than it is!) ?
The code for this part (and future parts) will be on Github here.
Prerequisites and Initial Setup
Make sure you have Go 1.11 (minimum) and Node.js installed.
I am using Chrome version 69 and all current versions of Edge, Firefox, and Safari have WebAssembly support. However, results from this tutorial may vary based on version/browser.
Jumping right into it, create a folder and cd into it.
Inside that folder create a client and a server folder.
The React App
Let’s start with building the React App. It’s nothing more than a regular client side rendered app with a few extra bits added in!
First cd into the client folder and run npm init -y to initialize your package.json.
After that, run the following:
npm install --save react react-dom && npm install --save-dev @babel/core @babel/plugin-proposal-class-properties @babel/plugin-proposal-decorators @babel/plugin-syntax-dynamic-import @babel/polyfill @babel/preset-env @babel/preset-react add-asset-html-webpack-plugin babel-loader html-webpack-plugin webpack webpack-cli webpack-dev-serverOnce you do that, change the scripts portion of your package.json to the following:
"scripts": { "dev": "webpack-dev-server --mode development", "build": "webpack --mode production"},Next, in the client folder, create two files, a .babelrc and a webpack.config.js.
In the .babelrc paste the following:
{ "presets": [ ["@babel/preset-env", { "modules": false } ], "@babel/preset-react"], "plugins": [ "@babel/plugin-proposal-class-properties", ["@babel/plugin-proposal-decorators", { "legacy": true }], "@babel/plugin-syntax-dynamic-import" ]}And in the webpack.config.js paste the following:
Note the AddAssetHtmlPlugin which we are using to inject the wasm_exec.js file and init_go.js file into our app via a script tag. These must be in the order they are shown so that the wasm_exec.js file runs before init_go.js file. The wasm_exec.js simply sets up Go’s runtime on the browser and the init_go.js file gives us a global, workable Go object instance. But more on these files later.
Now create a src folder and add an index.js file, index.html file, init_go.js file, wasm_exec.js file, and a components folder with an app.js file in it. Your directory should look like so:
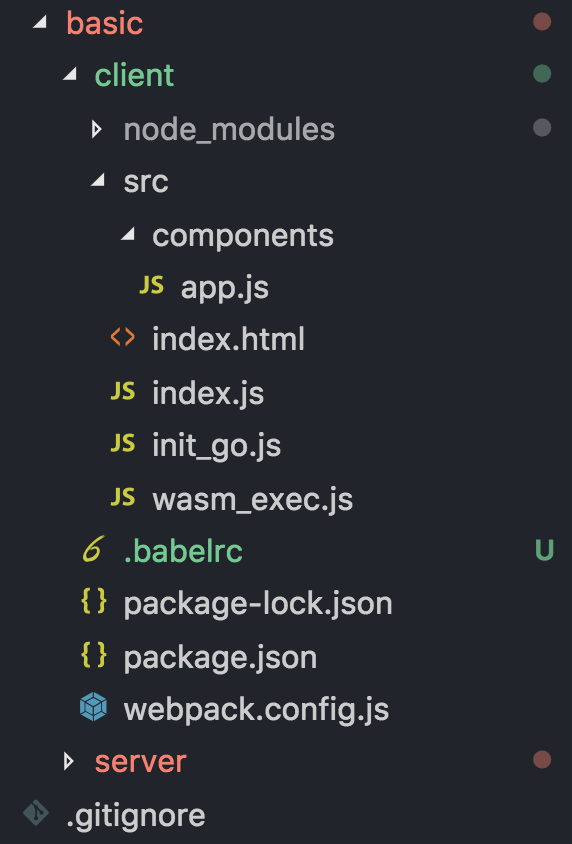
From here, add this to your index.html:
In the index.js add this:
And in your components/app.js file add the following:
Now we have an extremely basic React app!
WebAssembly on the Client
In the wasm_exec.js file, paste the code from here (omitted for brevity).
Like we said before, this just instantiates the basic runtime for Go in the client. It provides a global Go constructor that we’ll be using later.
Next we need to actually do something with that Go object. So in your init_go.js file, add the following:
All this does is create a new go object from the Go constructor we made earlier and bind it to global state.
Go ahead and run npm run dev and the navigate to localhost:8080 in the browser and you should see “Hello!” on your webpage. Not very interesting right? But what you don’t see is that we’ve injected our global go object!
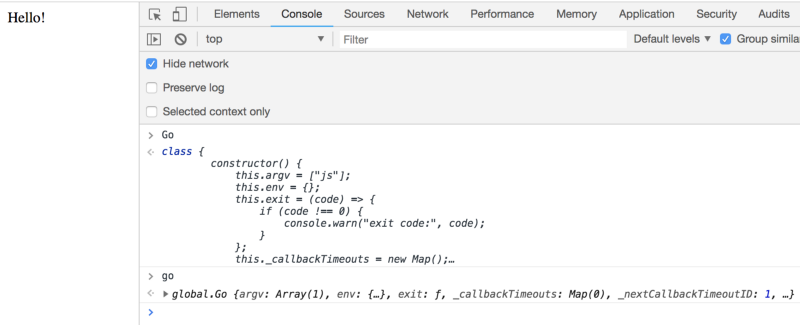
Now change your components/app.js file to the following:
What did we change? Let’s start with the simple stuff. First we added an isLoading attribute to state. This is so we know that WebAssembly is still loading. In the render function, we use the isLoading attribute from state to conditionally render a div that says “Loading” or a button.
You may be asking yourself, “That button has an onClick with a function sayHi, but I don’t see a sayHi function anywhere.” This is where WebAssembly comes in. When we write our Go code, we’ll be defining that function and binding it to global state there. This is why we must wait for WebAssembly to load before we can render our button. But we’ll fill in these blanks later.
Looking at the componentDidMount function, you can see we’re calling WebAssembly.instantiateStreaming which is the optimal way of loading WebAssembly code. It takes a promise that returns a wasm file and an importObject as its parameters. It returns a compiled WebAssembly module. That promise is a fetch request to our API (we’ll build it next!) and that endpoint just returns a wasm file. After we get the module, we use go to run it and then we set isLoading to false.
But of course, since we have nothing on localhost:3000 this will break.
The Server
Now we need to setup the server to serve our wasm file. First, open up a new terminal and cd into the server folder you made earlier and run npm init -y to initialize your package.json.
Next, let’s install some packages. Run the following:
npm install --save compression cors express && npm install --save-dev nodemonChange the scripts portion of your package.json to this:
"scripts": { "dev": "nodemon index.js"},Now in the server directory, create an index.js file and a go folder. In that go folder, create a main.go file.
Your folder should look like this:
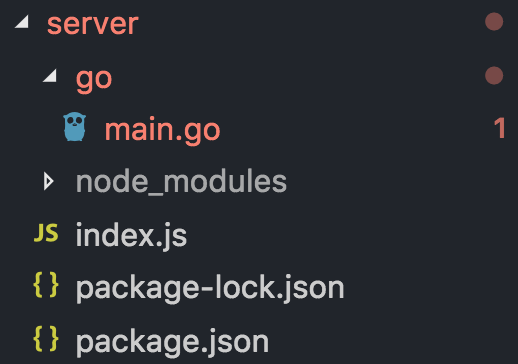
In the index.js paste the following:
This is just a simple express server which serves up a wasm file from the go folder. Let’s make that now!
WebAssembly on the Server
In your main.go file add this (big thanks to TutoiralEdge for his tutorial):
Let’s break this down. First we need to import fmt for basic printing and syscall/js so we can use all of Go’s new JavaScript goodies. Next we’ll create our sayHi function with parameters args []js.Value even though we’re not going to pass in any arguments. All this function does is print “Hi!”
In the registerCallbacks function, we bind our function to global state in our browser. Now when we call js.Global().Set function we’re going to first name our global variable “sayHi” and then pair it with our sayHi function from above by wrapping it in the js.NewCallback function.
Lastly, in our main function, we’re opening up a channel and running registerCallbacks. The channel simply stalls our Go code so it doesn’t finish executing.
Now all that’s left is compiling this Go code into WebAssembly.
cd into the go folder and run the following:
GOOS=js GOARCH=wasm go build -o main.wasmNotice that our GOOS is set to js and our GOARCH is set to wasm. This means that our target operating system is js and the compilation architecture is wasm.
Your folder structure should be this now:
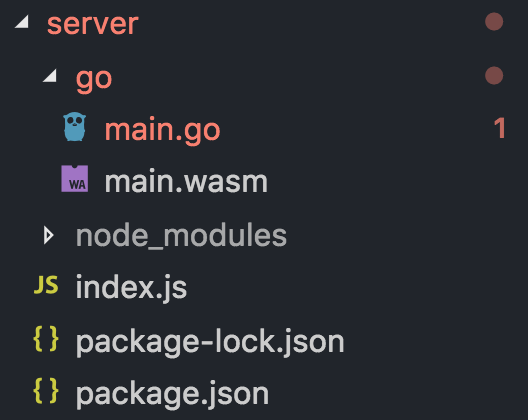
As you can see, now we have a main.wasm file we can serve.
cd back into the server folder and run npm run dev.
Your server should now be running on localhost:3000. Go back to localhost:8080 (assuming you still have the client running) in your browser and refresh it. After it loads, open up the console and click the button. It should print “Hi!” in the console.
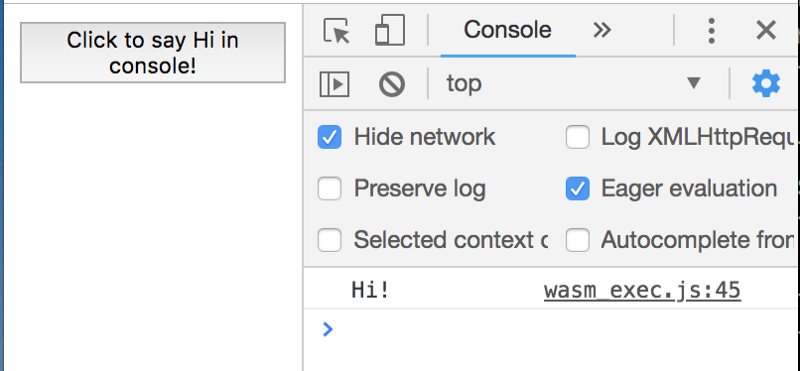
As you probably saw, it’ll say “Loading” for quite some time before our button appears. This is the overhead we incur from using WebAssembly. However, after this initial load, we can bask in low level, high performance glory.
To kill the client and server, just press ctrl + c in your terminals.
Conclusion
Thank you for reading and I hope you enjoyed learning about WebAssembly with me. While this is an extremely basic implementation of WebAssembly in React, in the next part of this series, we’ll be making an AI agent that’s unbeatable at tic-tac-toe. So stay tuned if you’re interested in that!
If you have any comments or questions feel free to leave them below.
Thanks again for reading! Please share, drop a ? (or two), and happy coding.
Add me on LinkedIn!