
by James Okunlade
The essentials of Git explained in five minutes

As you learn to become a software developer, you’ll realize that most work is done in teams. And when you’re on a team, you’ll need a version control system to manage changes to your code base that come from different developers.
Git is one of the most popular version control systems. Yet, new developers can easily get overwhelmed when using it - I know I did. In fact, I avoided it for years.
If you’re a seasoned developer or don’t tremble at the mention of Git, feel free to skip to the next post. However, if you’re new to Git or not confident using it, take a few minutes to learn these basic - yet powerful - Git tips.
Here’s what we’ll cover:
- Git clone
- Git checkout
- Git pull
- Git add and commit
- Git stash and merge
- Git push
Git clone
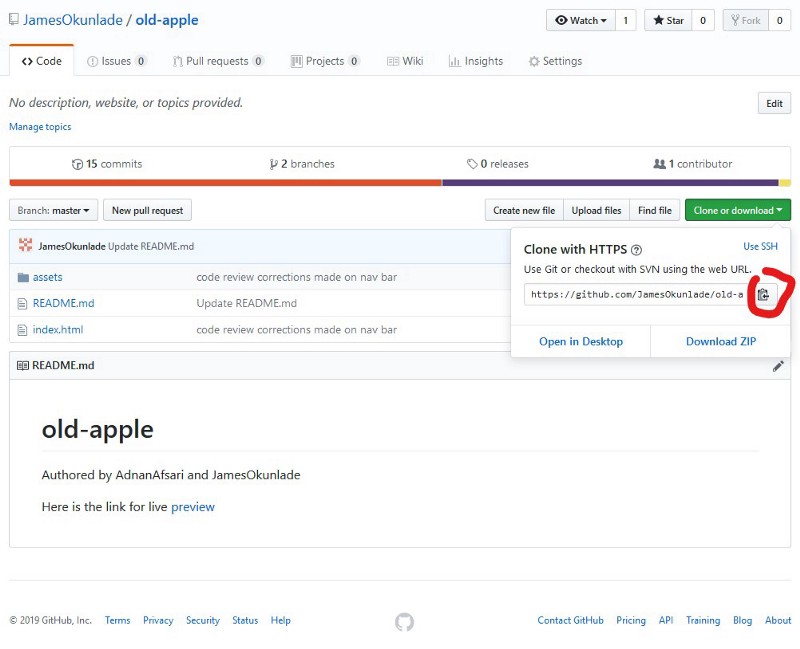
Always clone new repositories you work on, which means downloading a copy of the repository files to your local computer. While there are many ways of cloning a repository, I will explain how to do it with the command line.
For example, if you want to clone the above repository, first copy the clone link above. Then, open your terminal, and cd to the location on your local computer where you want to put these files. Type git clone then paste the link as shown below if you want to clone the master branch.
git clone https://github.com/JamesOkunlade/old-apple.git
If you want to clone a particular branch of this repository, you’d want to do something like this:
git clone https://github.com/JamesOkunlade/old-apple.git -b branch-name
Git checkout
It’s a best practice to create different branches for different features instead of working on the master branch directly. When all features have been deemed to pass certain tests and requirements, then you can merge them into the master branch.
At different times, you will have to checkout to the particular repository branch you want to work on, and you can do this with the following command.
If the branch had already been created:
git checkout branch-name
And if you’re just creating the new feature branch:
git checkout -b branch-name
Git pull
Your team or pair programming buddy will change different branches of a repository, and you should always pull these new changes before you start writing code. On your terminal, checkout to the branch you’ll be working on, and run the git pull command. The recent changes will be pulled to your local repository.
Git add and commit
The add and commit Git commands are almost always used together. Think of them as capture and save. You can’t save a thing if you don’t capture it first. Hence, the add command should always precede the commit command. While you use the add command to point at the particular file you want to capture in its current state, you use the commit to save a copy of what you captured.
To capture all the files (except those excluded by Git ignore), you will use git add . and to capture the current state of a particular file, say index.html, you will have to type git add index.html
After taking the snapshots, you will then have to commit and save your snapshots to your local repository using the following:
git commit -m ‘commit message’
The commit message should explain the peculiarity of the snapshot you’re saving. For example:
git add index.html
git commit -m ‘the form feature button created’
You can do the two together with the && operator as shown below;
git add index.html && git commit -m ‘footer html structure created’
Git stash and merge
Simply doing git stash will stash whatever edit you have made to the branch but do not want to commit. That means when waiting on another developer to commit and push their copy of the code, you can experiment with some things in this same branch. Git encourages it. Whenever you’re ready to pull new changes to your local repository, but do not want to merge your own edits to it, you then have to stash your own edits. Git stash will keep the copy somewhere else for you and it’s accessible by doing Git stash list.
The git merge a command that merges two different snapshots together. It can be merging different snapshots of the same branch by different developers or merging different snapshots of different branches together.
When you’ve checked out to the master branch, git merge development will merge the development branch to your master branch and vice versa.
Git push
Just like saving your snapshots to a Google Photos album for whomever you share the album with, think of git push as sending your local repository to the remote repository for others to access.
git push -u origin branch-name
While there are other Git commands available for use, it’s interesting what you can achieve by mastering the few that I’ve covered above.
Feel free to reach out and ask me any questions on Twitter
James Okunlade (@JamesOkunlade) | Twitter
The latest Tweets from James Okunlade (@JamesOkunlade). Full-stack SWE | JavaScript/React/Redux | Ruby/Ruby on Rails |…twitter.com
def JamesOkunlade (beginnerDeveloper) unless you have a coding buddy OR you’re making a lot of money doing it puts “Coding is not fun!” endendI’m from Nigeria and I pair program every day with my coding buddy from Bangladesh and other devs from Serbia, Kosovo, and Ukraine. They’ve all helped my use of Git.
As a student, I do remote pair programming for at least 40 hours every week. Learning programming as a beginner can be very tedious and hence, reduces the productivity and hardens the learning curve. With a right coding partner, however, and under a proper structure, you’d be surprised at how interesting learning could be.
James Okunlade - Software Developer - Filmdrive | LinkedIn
View James Okunlade's profile on LinkedIn, the world's largest professional community. James has 2 jobs listed on their…www.linkedin.com