by Panayiotis Nicolaou
Think like a programmer: How to build Snake using only JavaScript, HTML & CSS
Hello there ?
Welcome on board. Today we will embark on an exciting adventure, where we will be making our very own snake game ?. You’ll learn how to work through a problem by breaking it down into smaller simpler steps. By the end of this journey, you will have learned some new things, and you’ll feel confident to explore more on your own.
If you are new to programming, I recommend checking out freeCodeCamp. It’s a great place to learn for…you guessed it…free. That’s how I got started ?
Okay, okay enough messin’ around — are you ready to start?
You can find the final code here and a live demo here.
Getting Started
Let’s begin by creating a file “snake.html” that will contain all our code.
Since this is an HTML file, the first thing we need is the <!DOCTYPE> declaration . In snake.html type the following:
Great, now go ahead and open snake.html in your preferred browser. You should be able to see Welcome to Snake!
We are off to a good start ?
Creating the Canvas
To be able to create our game, we have to make use of HTML <canvas> . This is what is used to draw graphics using JavaScript.
Replace the welcome message in snake.html with the following:
<canvas id="gameCanvas" width="300" height="300"><canvas>The id is what identifies the canvas and should always be specified. We will use it to access the canvas later. The width and height are the dimensions of the canvas, and should also be specified. In this case, 300 x 300 pixels.
Your snake.html file should now look like this.
If you refresh your browser page where you previously opened snake.html you will now see a blank page. This is because, by default, the canvas is empty and has no background. Lets fix that. ?
Give the canvas a background colour and a border
To make our canvas visible, we can give it a border by writing some JavaScript code. To do that, we need to insert <script><;/script> tags after the </canvas>, where all our JavaScript code will go.
If you put the<script> tag before the <canvas> your code won’t work, as the HTML will not be loaded.
We can now write some JavaScript code, between the enclosing<script><;/script> tags. Update your code as below.
First we get the canvas element using the id (gameCanvas) we specified earlier. We then get the canvas “2d” context, which means we will be drawing into 2D space.
Finally we draw a 300 x 300 white rectangle with a black border. This covers the entire canvas, starting from the top left corner (0, 0).
If you reload snake.html in your browser, you should see a white box with a black border! Good job, we have a canvas that we can use to create our snake game! ? On to the next challenge!
Representing our snake
For our snake game to work, we need to know the location of the snake on the canvas. To do that, we can represent the snake as an array of coordinates. Thus, to create a horizontal snake in the middle of the canvas (150, 150) we can write the following:
let snake = [ {x: 150, y: 150}, {x: 140, y: 150}, {x: 130, y: 150}, {x: 120, y: 150}, {x: 110, y: 150},];Notice that the y coordinate for all parts is always 150. The x coordinate of each part is -10px (to the left) of the previous part. The first pair of coordinates in the array {x: 150, y: 150} represents the head at the very right of the snake.
This will become clearer when we draw the snake in the next section.
Creating and drawing our snake
To display the snake on the canvas, we can write a function to draw a rectangle for each pair of coordinates.
function drawSnakePart(snakePart) { ctx.fillStyle = 'lightgreen'; ctx.strokestyle = 'darkgreen'; ctx.fillRect(snakePart.x, snakePart.y, 10, 10); ctx.strokeRect(snakePart.x, snakePart.y, 10, 10);}Next we can create another function that prints the parts on the canvas.
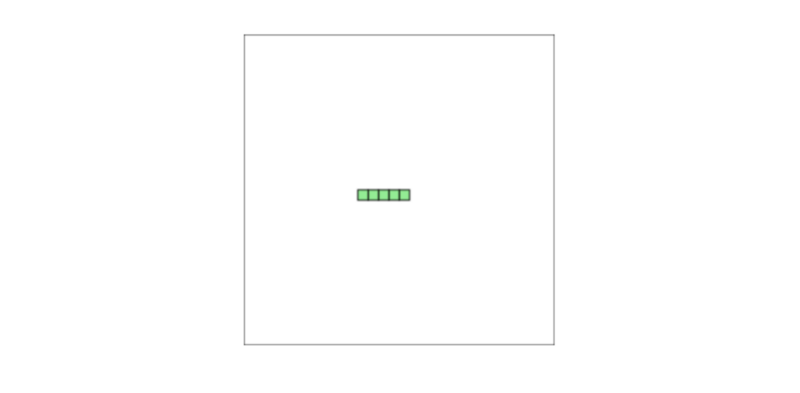
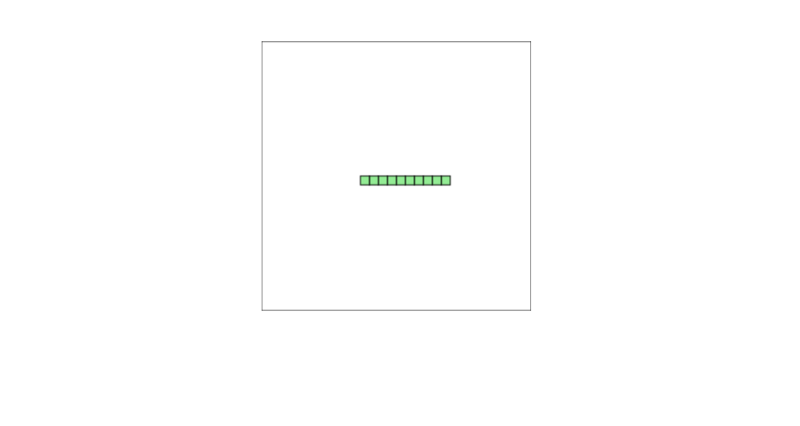
function drawSnake() { snake.forEach(drawSnakePart);}Our snake.html file should now look like this:
If you refresh your browser page now you will see a green snake in the middle of the canvas. Awesome! ?
Enabling the snake to move horizontally
Next we want to give the snake the ability to move. But how do we do that? ?
Well, to make the snake move one step (10px) to the right, we can increase the x-coordinate of every part of the snake by 10px (dx = +10px). To make the snake move to the left, we can decrease the x-coordinate of every part of the snake by 10px (dx = -10).
dx is the horizontal velocity of the snake.
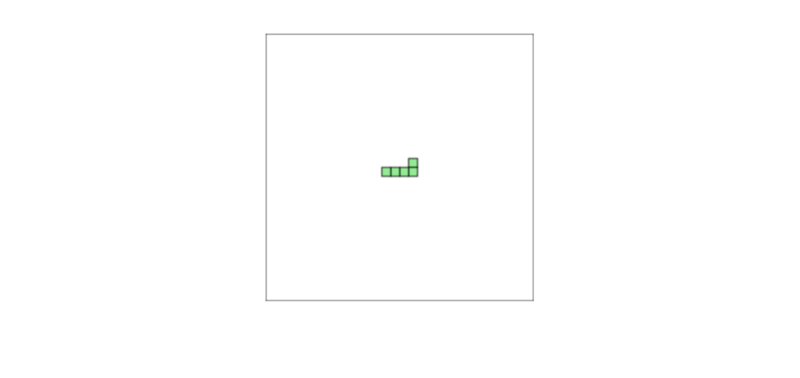
Creating a snake that has moved 10px to the right should then look like this
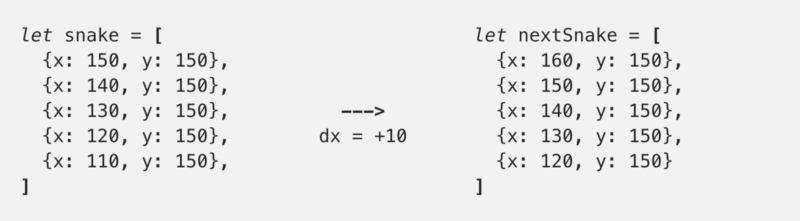
Create a function called advanceSnake that we will use to update the snake.
function advanceSnake() { const head = {x: snake[0].x + dx, y: snake[0].y}; snake.unshift(head); snake.pop();}First we create a new head for the snake. We then add the new head to the beginning of snake using unshift and remove the last element of snake using pop. This way all the other snake parts shift into place as shown above.
Boom ?, you are getting the hang of this.
Enabling the snake to move vertically
To move our snake up and down, we can’t alter all y-coordinates by 10px. That would shift the whole snake up and down.
Instead we can alter the y-coordinate of the head. Decreasing it by 10px to move the snake down, and increasing it by 10px to move the snake up. This will make the snake move correctly.
Luckily, because of the way we wrote the advanceSnake function, this is very easy to do. Inside advanceSnake, update the head to also increase the y-coordinate of the head by dy.
const head = {x: snake[0].x + dx, y: snake[0].y + dy};To test how our advanceSnake function works, we can temporarily call it before the drawSnake function.
// Move on step to the rightadvanceSnake()// Change vertical velocity to 0dx = 0;// Change horizontal velocity to 10dy = -10;// Move one step upadvanceSnake();// Draw snake on the canvasdrawSnake();This is how our snake.html file looks so far.
Refreshing the browser, we can see that our snake has moved. Success!
Refactoring our code
Before we move on, let’s do some refactoring and move the code that draws the canvas inside a function. This will help us in the next section.
“Code refactoring is the process of restructuring existing computer code, without changing its external behaviour.” -wikipedia
function clearCanvas() { ctx.fillStyle = "white"; ctx.strokeStyle = "black"; ctx.fillRect(0, 0, gameCanvas.width, gameCanvas.height); ctx.strokeRect(0, 0, gameCanvas.width, gameCanvas.height);}We are making great strides! ?
Making our snake move automatically
Okay, now that we have successfully refactored our code, we can make our snake move automatically.
Earlier, to test that our advanceSnake function worked, we called it twice. Once to make the snake move to the right, and once to make the snake move up.
Thus if we wanted to make the snake move five steps to the right we would call advanceSnake() five times in a row.
clearCanvas();advanceSnake();advanceSnake();advanceSnake();advanceSnake();advanceSnake();drawSnake();But, calling it five times in a row as shown above, will make the snake jump 50px forward.
Instead we want to make the snake appear to be moving forward step by step.
To do that, we can add a slight delay between each call, using setTimeout. We also need to make sure to call drawSnake every time we call advanceSnake. If we don’t, we won’t be able to see the intermediate steps that show the snake moving.
setTimeout(function onTick() { clearCanvas(); advanceSnake(); drawSnake();}, 100);setTimeout(function onTick() { clearCanvas(); advanceSnake(); drawSnake();}, 100);...drawSnake();Notice how we also call clearCanvas() inside each setTimeout. This is to remove all the previous positions of the snake that would leave a trail behind.
Although, there is a problem with the above code. There is nothing here to tell the program that it has to wait for setTimeout before it moves to the next setTimeout. This means that the snake will still jump 50px forward but after a slight delay.
To fix that, we have to wrap our code inside functions, calling one function at a time.
stepOne(); function stepOne() { setTimeout(function onTick() { clearCanvas(); advanceSnake(); drawSnake(); // Call the second function stepTwo(); }, 100)}function stepTwo() { setTimeout(function onTick() { clearCanvas(); advanceSnake(); drawSnake(); // Call the third function stepThree(); }, 100)}...How do we make our snake keep moving? Instead of creating an infinite number of functions that call each other, we can instead create one function main and call it over and over again.
function main() { setTimeout(function onTick() { clearCanvas(); advanceSnake(); drawSnake(); // Call main again main(); }, 100)}Voilà! We now have a snake that will keep moving to the right. Although, once it reaches the end of the canvas, it continues its infinite journey into the unknown ?. We will fix that in due time, patience young padawan. ?.
Changing the snake’s direction
Our next task is to change the snake’s direction when one of the arrow keys is pressed. Add the following code after the drawSnakePart function.
function changeDirection(event) { const LEFT_KEY = 37; const RIGHT_KEY = 39; const UP_KEY = 38; const DOWN_KEY = 40; const keyPressed = event.keyCode; const goingUp = dy === -10; const goingDown = dy === 10; const goingRight = dx === 10; const goingLeft = dx === -10; if (keyPressed === LEFT_KEY && !goingRight) { dx = -10; dy = 0; } if (keyPressed === UP_KEY && !goingDown) { dx = 0; dy = -10; } if (keyPressed === RIGHT_KEY && !goingLeft) { dx = 10; dy = 0; } if (keyPressed === DOWN_KEY && !goingDown) { dx = 0; dy = 10; }}There is nothing tricky going on here. We check if the key pressed matches one of the arrow keys. If it does, we change the vertical and horizontal velocity as described earlier.
Notice that we also check if the snake is moving in the opposite direction of the new intended direction. This is to prevent our snake from reversing, for example when you press the right arrow key when the snake is moving to the left.
To connect changeDirection to our game, we can use addEventListener on the document to ‘listen’ for when a key is pressed. Then we can call changeDirection with the keydown event. Add the following code after the main function.
document.addEventListener("keydown", changeDirection)You should now be able to change the snake’s direction using the four arrow keys. Great work, you are on fire?!
Next lets see how we can generate food and grow our snake.
Generating food for the snake
For our snake food, we have to generate a random set of coordinates. We can use a helper function randomTen to produce two numbers. One for the x-coordinate and one for the y-coordinate.
We also have to make sure that the food is not located where the snake currently is. If it is, we have to generate a new food location.
function randomTen(min, max) { return Math.round((Math.random() * (max-min) + min) / 10) * 10;}function createFood() { foodX = randomTen(0, gameCanvas.width - 10); foodY = randomTen(0, gameCanvas.height - 10); snake.forEach(function isFoodOnSnake(part) { const foodIsOnSnake = part.x == foodX && part.y == foodY if (foodIsOnSnake) createFood(); });}We then have to create a function to draw the food on the canvas.
function drawFood() { ctx.fillStyle = 'red'; ctx.strokestyle = 'darkred'; ctx.fillRect(foodX, foodY, 10, 10); ctx.strokeRect(foodX, foodY, 10, 10);}Finally we can call createFood before calling main. Don’t forget to also update main to use the drawFood function.
function main() { setTimeout(function onTick() { clearCanvas(); drawFood() advanceSnake(); drawSnake(); main(); }, 100)}Growing the snake
Growing our snake is simple. We can update our advanceSnake function to check if the head of the snake is touching the food. If it is we can skip removing the last part of the snake and create a new food location.
function advanceSnake() { const head = {x: snake[0].x + dx, y: snake[0].y}; snake.unshift(head); const didEatFood = snake[0].x === foodX && snake[0].y === foodY; if (didEatFood) { createFood(); } else { snake.pop(); }}Keeping track of the score
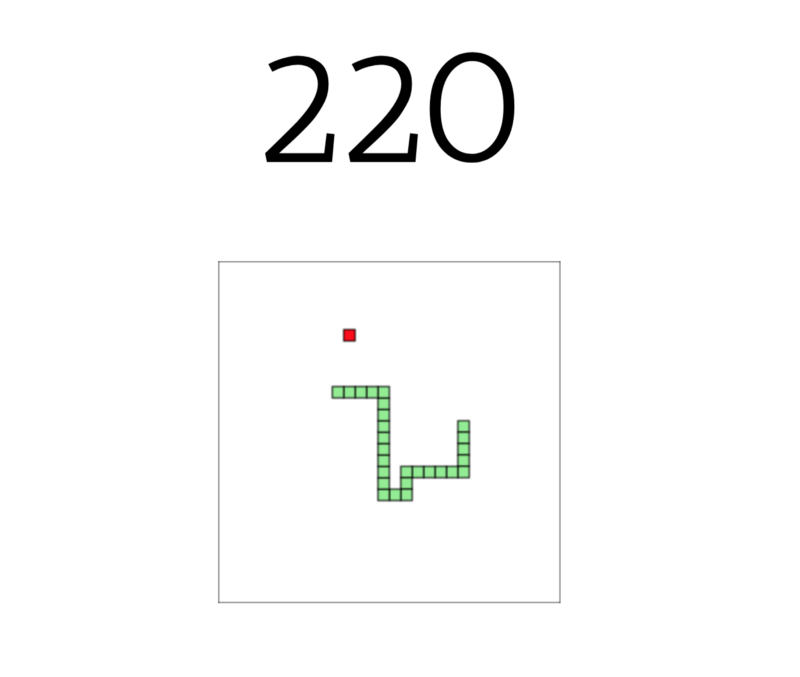
To make the game more enjoyable for the player, we can also add a score that increases when the snake eats food.
Create a new variable score and set it to 0 after the snake declaration.
let score = 0;Next add a new div with an id “score” before the canvas. We can use this to display the score.
<div id="score">0</div><canvas id="gameCanvas" width="300" height="300"></canvas>Finally update advanceSnake to increase and display the score when the snake eats the food.
function advanceSnake() { ... if (didEatFood) { score += 10; document.getElementById('score').innerHTML = score; createFood(); } else { ... }}Pheew, that was quite a lot, but we have come a long way ?
End the game
There is one final piece left, and that is to end the game ?. To do that we can create a function didGameEnd that returns true when the game has ended or false otherwise.
function didGameEnd() { for (let i = 4; i < snake.length; i++) { const didCollide = snake[i].x === snake[0].x && snake[i].y === snake[0].y if (didCollide) return true } const hitLeftWall = snake[0].x < 0; const hitRightWall = snake[0].x > gameCanvas.width - 10; const hitToptWall = snake[0].y < 0; const hitBottomWall = snake[0].y > gameCanvas.height - 10; return hitLeftWall || hitRightWall || hitToptWall || hitBottomWall}First we check if the snake’s head touches another part of the snake and return true if it does.
Notice that we start our loop from index 4. There are two reasons for that. The first is that didCollide would immediately evaluate to true if the index was 0, so the game would end. The second is that, it is impossible for the first three parts to touch each other.
Next we check if the snake hit any of the canvas walls and return true if it did, otherwise we return false.
Now we can return early in our main function if didEndGame returns true, thus ending the game.
function main() { if (didGameEnd()) return; ...}Our snake.html should now look like this:
You now have a functioning snake game that you can play and share with your friends. But before celebrating lets look at one final problem. This will be the last one, I promise.
Sneaky bugs ?
If you play the game enough times, you might notice that sometimes the game ends unexpectedly. This is a very good example on how bugs can sneak into our programs and cause trouble ?.
When a bug occurs, the best way to solve it is to first have a reliable way of reproducing it. That is, come up with the precise steps that lead to the unexpected behaviour. Then you need to understand why they cause the unexpected behaviour and then come up with a solution.
Reproducing the bug
In our case, the steps taken to reproduce the bug are as follows:
- The snake is moving to the left
- The player presses the down arrow key
- The player immediately presses the right arrow key (before 100ms have lapsed)
- The game ends
Making sense of the bug
Let’s break down what happens step by step.
Snake is moving to the left
- Horizontal velocity, dx is equal to -10
mainfunction is calledadvanceSnakeis called which advances the snake -10px to the left.
The player presses the down arrow key
changeDirectionis calledkeyPressed === DOWN_KEY && dy !goingUpevaluates to true- dx changes to 0
- dy changes to +10
Player immediately presses the right arrow (before 100ms have lapsed)
changeDirectionis calledkeyPressed === RIGHT_KEY && !goingLeftevaluates to true- dx changes to +10
- dy changes to 0
The game ends
mainfunction is called after 100ms have lapsed.advanceSnakeis called which advances the snake 10px to the right.const didCollide = snake[i].x === snake[0].x && snake[i].y === snake[0].yevaluates to truedidGameEndreturns truemainfunction returns early- The game ends
Fixing the bug
After studying what happened, we learn that the game ended because the snake reversed.
That is because when the player pressed the down arrow, dx was set to 0. Thus keyPressed === RIGHT_KEY && !goingLeft evaluated to true, and dx changed to 10.
It is important to note that the change in direction occurred before 100ms had lapsed. If 100ms lapsed, then the snake would have first taken a step down and would not have reversed.
To fix our bug, we have to make sure that we can only change direction after main and advanceSnake have been called. We can create a variable changingDirection. This will be set to true when changeDirection is called, and to false when advanceSnake is called.
Inside our changeDirection function, we can return early if changingDirection is true.
function changeDirection(event) { const LEFT_KEY = 37; const RIGHT_KEY = 39; const UP_KEY = 38; const DOWN_KEY = 40; if (changingDirection) return; changingDirection = true; ...}function main() { setTimeout(function onTick() { changingDirection = false; ... }, 100)}Here is our final version of snake.html
Notice I also added some styles ? between the <style><;/style> tags. That is to make the canvas and score appear in the middle of the screen.Conclusion
Congratulations!! ??
We have reached the end of our journey. I hope you enjoyed learning with me and now feel confident to continue on to your next adventure.
But it doesn’t have to end here. My next article will focus on helping you get started with the very exciting world of open source.
Open source is a great way to learn a lot of new things and get to know amazing people . It is very rewarding but can can be scary at first ?.
To get a notification when my next article is out, you can follow me! ?
It was a pleasure to be on this journey with you.
Till next time. ✨