
by Niharika Singh
How to create an application on blockchain using Hyperledger

We are going to build a digital bank using Hyperledger Composer. It will have customers and accounts. At the end of it, you’ll be able to transfer funds and record all transactions on blockchain. We’ll expose a RESTful API for the same, so that even a person who has no clue what blockchain is can make a beautiful user interface (UI) around it. We’ll also create this application’s UI in Angular.
I’m super excited to share this step-by-step guide with you. So let’s get started right away!

When I was first coding this out, I ran into errors. Lots and lots of them. But I think that’s good, because it made me learn a lot of things. Errors are essential. I got to a point where I felt switching it on and off would make things better. It almost made me lose my mind, but it’s an integral part in every hacker’s life.
Before getting started, you need to ensure that the machine you’re using is equipped with the required configurations. You may need to download certain prerequisites and set up a basic dev environment. Below are the links to do that. Follow those steps before starting to develop an application, otherwise you’ll definitely run into stupid errors.
First install the Hyperledger composer. Then install the development environment.
There’s no need to start Playground while you’re installing the environment.
Make sure docker is running, and when you run ./startFabric.sh it’s going to take a couple of minutes. So be patient.
Now that your machine is all set, we can start coding!

Step 1: Outline your Business Network
Our Business Network Definition (BND) consists of the data model, transaction logic, and access control rules. The data model and access control rules are coded in domain specific language (which is very simple to catch up with). The transaction logic will be coded in JavaScript.
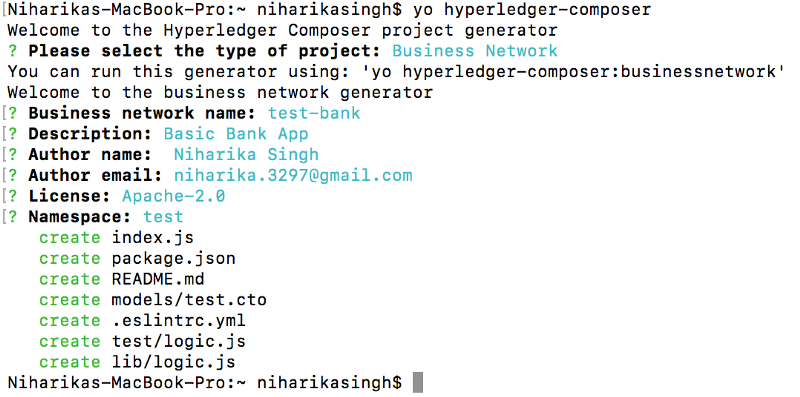
To create a BND, we need to create a suitable project structure on disk. We will create a skeleton business network using Yeoman. To create a project structure, open your terminal and run the following command:
$ yo hyperledger-composerThis will shoot out a series of questions as follows. You’ll be required to use your arrow keys to navigate through the answers.
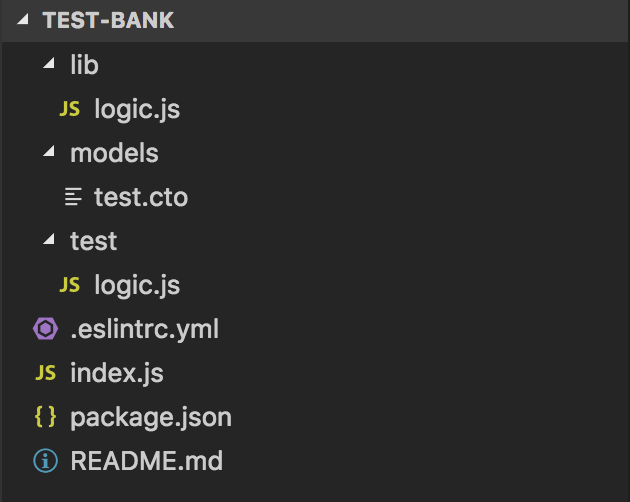
Open this project in your favorite text editor. I’m using Visual Code. This is what the file structure will look like:
Delete the contents of test/logic.js. We won’t be using it at the moment.
Step 2.1: Coding out our Business Network (models/test.cto)
First, we’ll define models/test.cto. It contains the class definitions for all assets, participants, and transactions in the business network. This file is written in Hyperledger Composer Modelling Language.
namespace testasset Account identified by accountId {o String accountId--> Customer ownero Double balance}participant Customer identified by customerId {o String customerIdo String firstNameo String lastName}transaction AccountTransfer {--> Account from--> Account too Double amount}Account is an asset which is uniquely identified with accountId. Each account is linked with Customer who is the owner of the account. Account has a property of balance which indicates how much money the account holds at any moment.
Customer is a participant which is uniquely identified with customerId. Each Customer has firstName and lastName.
AccountTransfer is a transaction that can occur to and from an Account. And how much money is to be transferred is stored in amount.
Step 2.2: Coding out the Business Network (lib/logic.js)
In this file, we’ll add transaction logic in JavaScript.
/*** Sample transaction* @param {test.AccountTransfer} accountTransfer* @transaction*/function accountTransfer(accountTransfer) {if (accountTransfer.from.balance < accountTransfer.to.balance) {throw new Error ("Insufficient funds");}accountTransfer.from.balance -= accountTransfer.amount;accountTransfer.to.balance += accountTransfer.amount;return getAssetRegistry('test.Account').then (function (assetRegistry) {return assetRegistry.update(accountTransfer.from);}).then (function () {return getAssetRegistry('test.Account');}).then(function (assetRegistry) {return assetRegistry.update(accountTransfer.to);});}@param {test.AccountTransfer} accountTransfer is the decorator we put at the top of the file to link the transaction with our JavaScript function. Then we validate if the account where funds are has enough money. Otherwise, an error will be thrown. Then we perform basic addition and subtraction on the account’s balance.
At this point, the most important step is to update this on the blockchain. To do this we call getAssetRegistry API of our assets which is Account. Then we update the retrieved assetRegistry for both the account doling out the funds and the account receiving the funds.
Step 3: Generate the Business Network Archive (BNA)
Now that the business network has been defined, it must be packaged into a deployable business network archive (.bna) file.
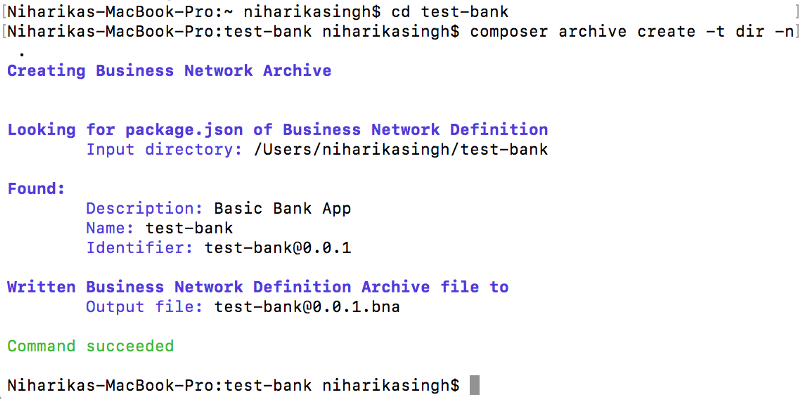
Step 3.1: Navigate into the test-bank app in your terminal.
Step 3.2: Run the following command:
$ composer archive create -t dir -n .This creates a .bna file in the test-bank folder.
Step 4: Deploy the Business Network Archive file on the Fabric
Step 4.1: Install composer runtime
$ composer runtime install --card PeerAdmin@hlfv1 --businessNetworkName test-bank
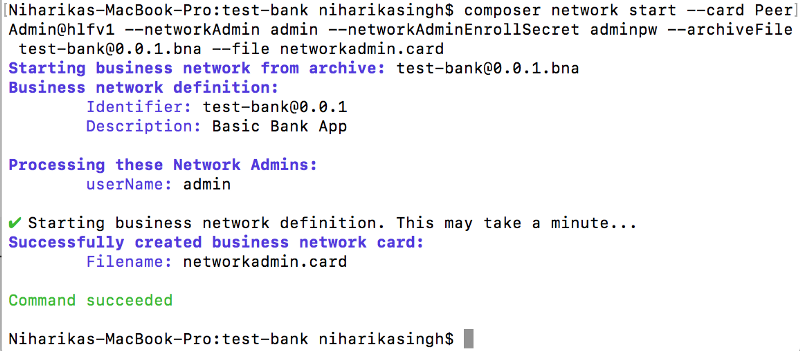
Step 4.2: Deploy the business network
$ composer network start --card PeerAdmin@hlfv1 --networkAdmin admin --networkAdminEnrollSecret adminpw --archiveFile test-bank@0.0.1.bna --file networkadmin.card(Make sure you’re in the test-bank folder).
Step 4.3: Import the network administrator identity as a usable business network card
$ composer card import --file networkadmin.card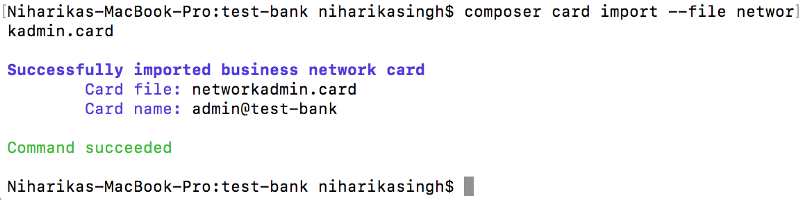
Step 4.4: To check that the business network has been deployed successfully, run the following command to ping the network:
$ composer network ping --card admin@test-bank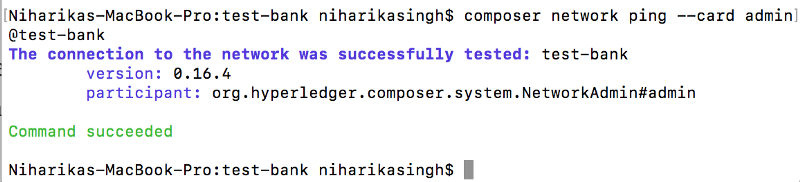
STEP 5: Expose a RESTful API
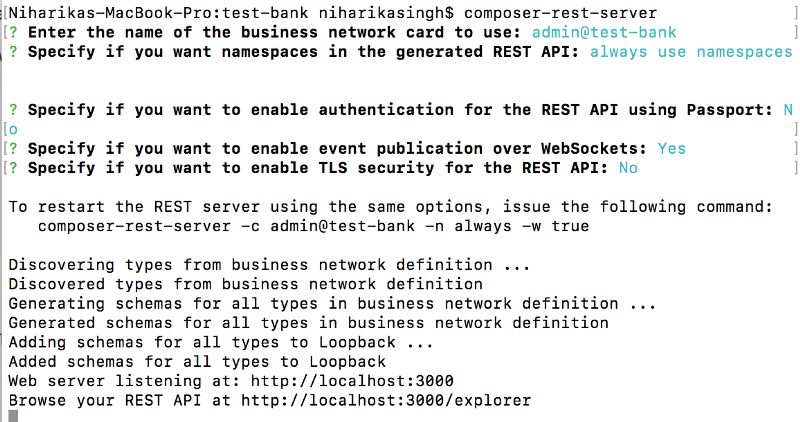
To create a RESTful API from your command line, run the following command:
$ composer-rest-serverThis will shoot a lot of questions.
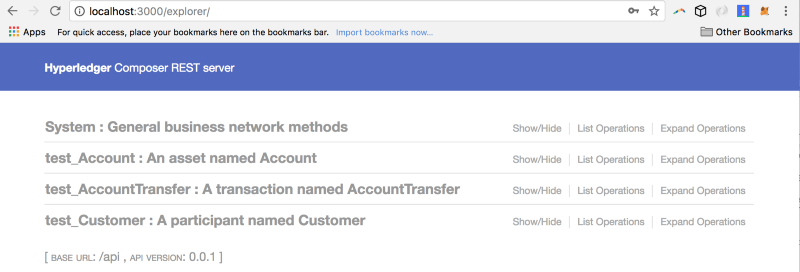
Now point your browser to http://localhost:3000/explorer.
You’ll see your beautiful blockchain API.
Now let’s add two Customers.
Fist, let’s add a customer named Niharika Singh:
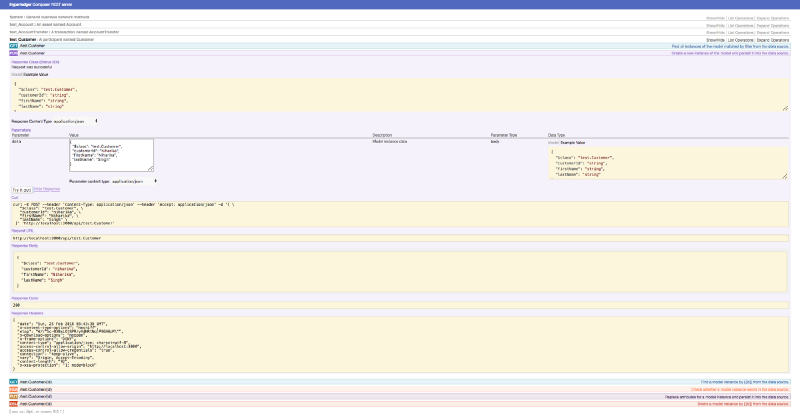
We get a 200 response code.
Now we’ll add customer named Tvesha Singh in a similar way.
To check if you’ve added them correctly, GET them.
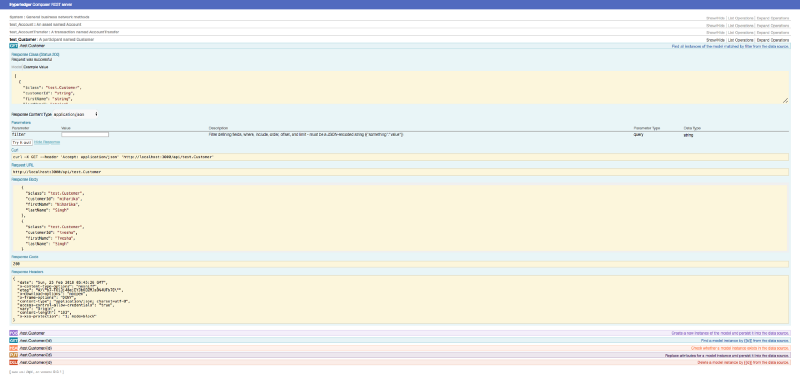
You’ll see two customers in the response body.
Now let’s add 2 accounts linked to these two customers.
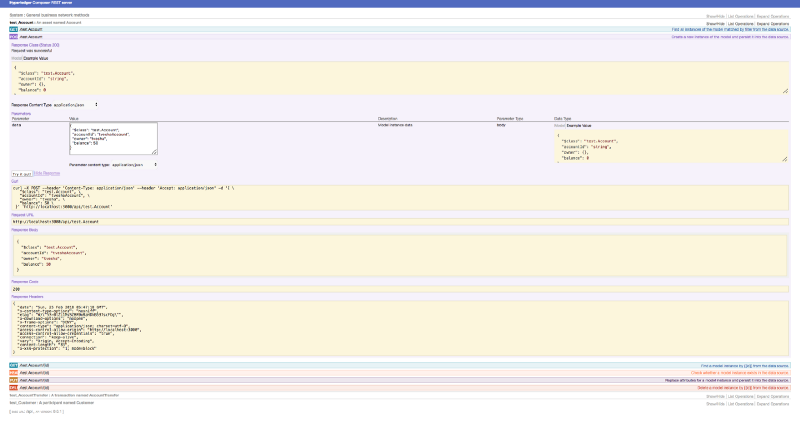
Add accounts this way. Now, GET them to check if you’ve added them correctly.
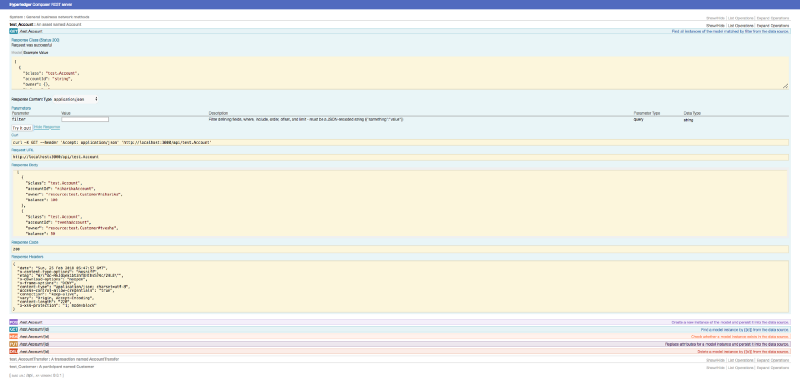
Now let’s transfer 75 from Niharika to Tvesha.
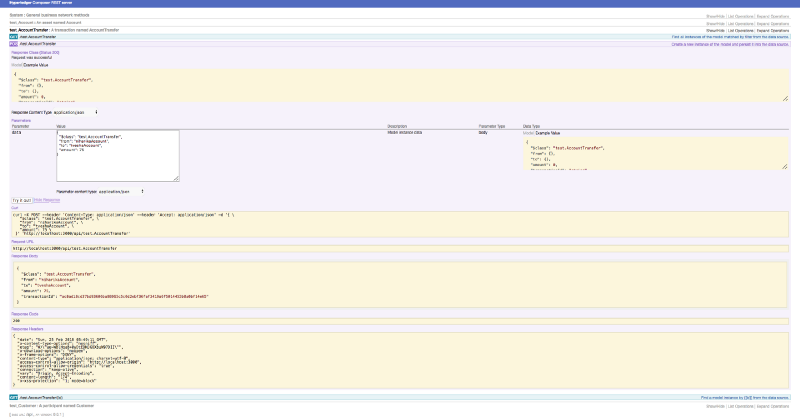
Let’s check if the balance is updated by getting the account information.
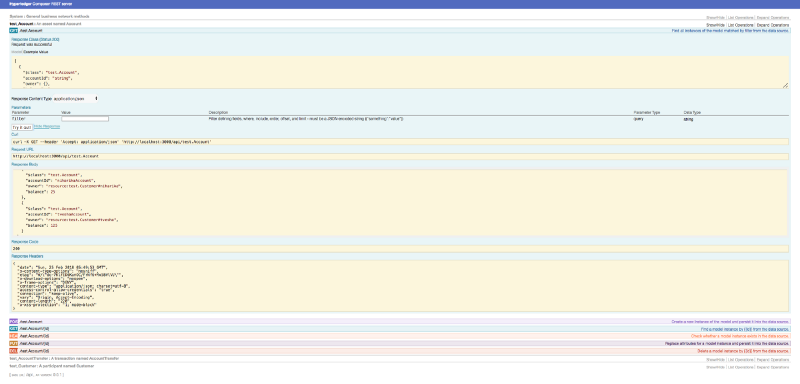
Viola! It works. Niharika has 25 now, and Tvesha has 125.
Step 6: Angular Front End
To create Angular scaffolding automatically, run the following command in the test-bank folder:
$ yoThis will ask multiple questions.
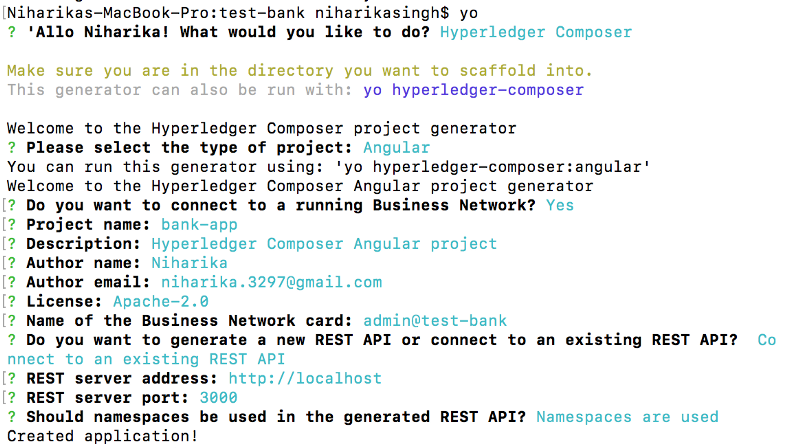
And it will take a couple of minutes.
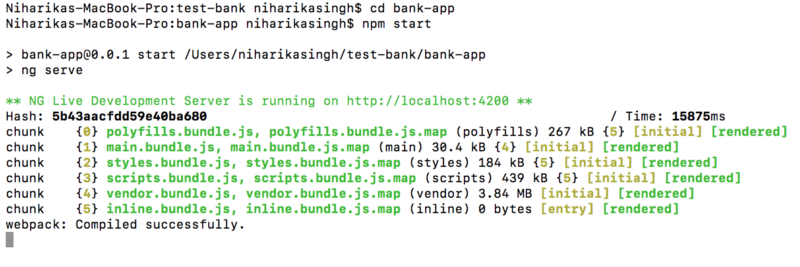
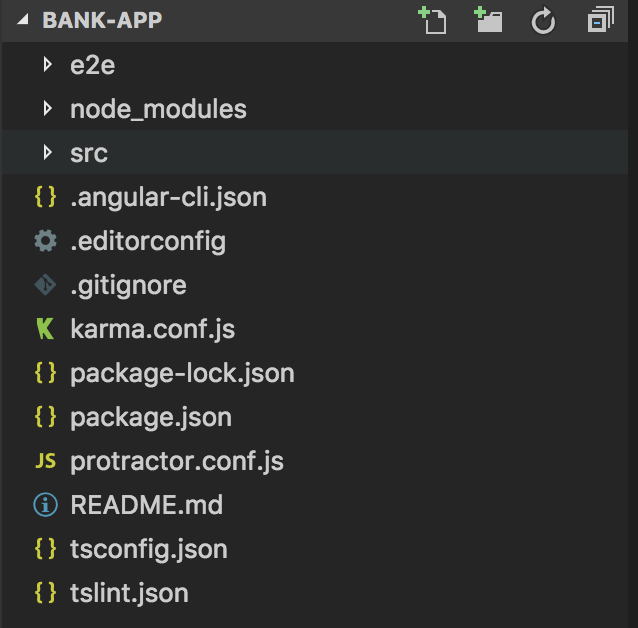
Navigate into the bank-app.
$ npm startThis starts the Angular server.
The Angular file structure is created as follows:
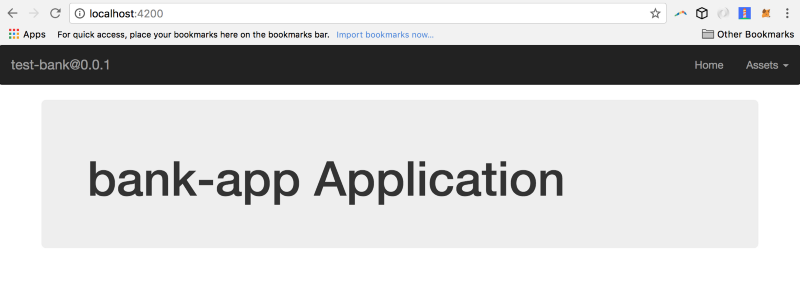
Point your browser to http://localhost:4200. That’s where the magic is happening! You’ll see this screen:
Now go to Assets in the top right corner and click on Account.
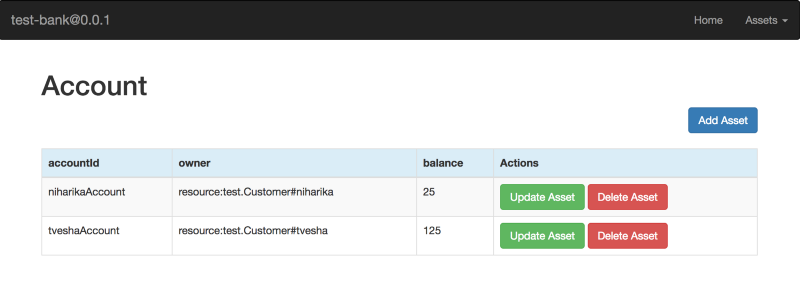
These are the exact accounts we created.
So now you can play around with this.
You have your front end and your backend ready!
All transactions that happen on localhost:3000 are reflected on localhost:4200 and vice versa. And this is all on blockchain.

Recently I wrote an article on blockchain’s use cases. I listed and explained about 20 ideas. They can be found here:
How can India get blockchained?
The blockchain epoch has just begun and like any other technology, blockchain will also hit couple of roadblocks…medium.com
If you have a business idea and want to concretise it with technology and architectural details, feel free to reach me at niharika.3297@gmail.com