
by Thomas Reinecke
How to create a VueJS PWA on a high performance, secure NGINX infrastructure
I’ve been pretty curious ever since one of my developers presented the concept of Progressive Web Apps (PWAs) sometime a few months back to me. And finally I found the time to get my hands a little dirty on it :-)
This article describes my first steps and a high-level intro to PWAs based on the fancy VueJS framework, and concentrates primarily on its deployment to a well secured nginx server.
Here are some lectures I used to dive into this topic:
Progressive Web Apps | Web | Google Developers
Lighthouse, an open-source, automated tool for improving the quality of your Progressive Web Apps, eliminates much of…developers.google.comGetting started with PWA using Vue - Pusher Blog
In this tutorial, have an introduction on how to build a book listing app with progressive web apps using Vue to build…blog.pusher.com
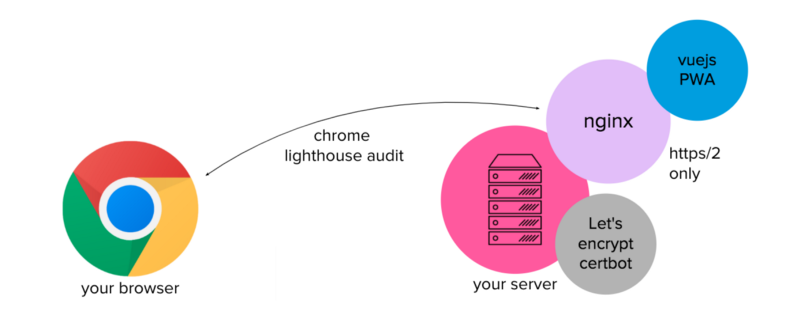
Here is a rough architecture of the scenario we’re going to set up. As you see, this is more a traditional on-Premise setup where I assume you own a domain thats configured and pointed to your root-server. In this article I do not cover cloud-based deployments:
Warmup & nginx install
Let’s start with some prep-work to setup the infrastructure we will use for deployment later:
- If you don’t have it yet, get yourself a domain and a root-server and configure your domains DNS records (for IPv4 and IPv6) to point to your server. I’ll use my personal website www.thomas-reinecke.de as an example here.
- On your server, and I am assuming you have root/sudo access, install nginx (example for apt-based linux distributions like debian or ubuntu).
sudo apt-get install nginx- create your server definition on /etc/nginx/sites-available/default which can look pretty basic for now
server { server_name www.thomas-reinecke.de thomas-reinecke.de; root /server/thomasreinecke/nginx;}- test your nginx config to make sure its syntax is ok before we move on
> nginx -tnginx: the configuration file /etc/nginx/nginx.conf syntax is oknginx: configuration file /etc/nginx/nginx.conf test is successfulConfigure and secure nginx
Since our plan is to utilize PWA service workers, your web app has to run on HTTPS (and ideally also on HTTP/2) only. In addition we certainly should support Google’s attempts to enforce a more secure web.
Beginning in July 2018 with the release of Chrome 68, Chrome will mark all HTTP sites as “not secure”.
Fortunately Let’s Encrypt provides free SSL certificates for your web server including auto-renewal, and all you need to do is properly secure it.
- install certbot from Let’s Encrypt
sudo apt-get install certbot python3-certbot python-certbot-nginx python3-certbot-nginx- Based on the initial config of your nginx server we’ve done earlier, certbot provides a pretty comfortable way to create a certificate for your site including an end-2-end reconfiguration of your nginx service to support SSL and redirect HTTP traffic to HTTPs.
sudo certbot --nginx -d thomas-reinecke.de -d www.thomas-reinecke.de- It’ll ask you whether you want certbot to reconfigure your nginx instance.
Please choose whether or not to redirect HTTP traffic to HTTPS, removing HTTP access.--------------------------------------------------------------------1: No redirect - Make no further changes to the webserver configuration.2: Redirect - Make all requests redirect to secure HTTPS access. Choose this fornew sites, or if you're confident your site works on HTTPS. You can undo thischange by editing your web server's configuration.--------------------------------------------------------------------Select the appropriate number [1-2] then [enter] (press 'c' to cancel):- Pick the 2nd option and let it go. Expect your site config in /etc/nginx/sites-available/default to look like this afterwards:
# HTTPS configuration of my siteserver { server_name thomas-reinecke.de www.thomas-reinecke.de; root /server/thomasreinecke/nginx; location / { index index.html index.htm; } listen <your_IP>:443 ssl http2; ssl_certificate <path_to_fullchain.pem>; ssl_certificate_key <path_to_privkey.pem>; include /etc/letsencrypt/options-ssl-nginx.conf; ssl_dhparam /etc/letsencrypt/ssl-dhparams.pem; }# HTTP configuration of my site, in any case redirecting to HTTPSserver { if ($host = www.thomas-reinecke.de) { return 301 https://$host$request_uri; } if ($host = thomas-reinecke.de) { return 301 https://$host$request_uri; } listen <your_IP>:80 default; server_name thomas-reinecke.de www.thomas-reinecke.de; return 404; }- I added the http2 option on HTTPs configuration area of your site, this won’t come from certbot.
More details about this procedure (including what you’d need to do to renew your certificate) can be found here.
It’s now time to get your nginx server going, so we create a simple index.html and re-bounce nginx to pick it up.
echo "Hello World!" > /server/thomasreinecke/nginx/index.htmlsudo systemctl reload nginxCongratulations, you should now have your secured webpage online. Any access to HTTP will be auto-redirected to HTTPS. You can now test it on https://www.ssllabs.com/ssltest/ and you’ll get an A grade :) How cool is that?

Create your vuejs PWA and deploy it to nginx
Since we have the target deployment infrastructure ready now, it’s time to create your first PWA based on the vuejs CLI.
# install vue cli, skip if you already have itnpm install -g vue-cli# create vue app based on pwa templatevue init pwa <your_app_name>On the few questions this script presents to you, provide your project’s name and for the rest simply take the defaults. I won’t dive into actual changes of the app that was just created based on the template. Instead let’s concentrate on the deployment and operational aspect to run this on your secured nginx infrastructure. As the next steps, build your app and then move its dist folder into your nginx web root:
# build your vuejs pwa appcd <folder of your app>npm run build# copy your dist folder onto your server running nginxscp -r dist/* <your_server>:/server/thomasreinecke/nginx/# on your server restart nginx to refreshsudo systemctl reload nginxYou should now have your VueJS PWA running on your nginx server:
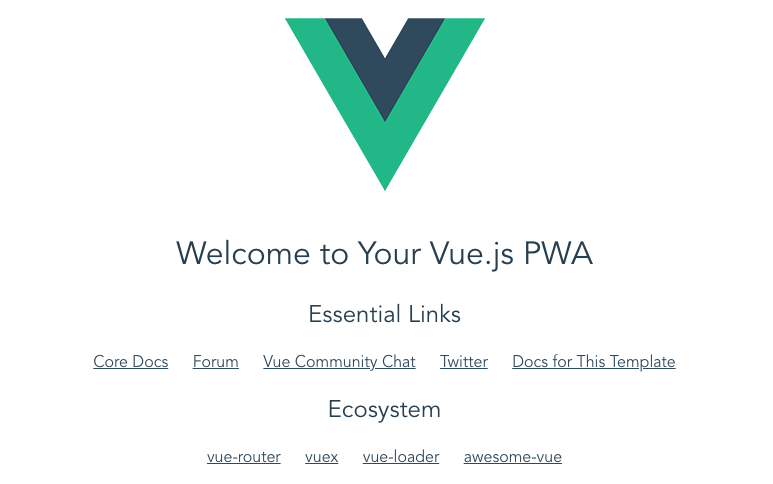
When you get to this page with a usual HTTP URL, you’ll notice a redirection to HTTPs, which is perfectly what we wanted. Now it’s time to run Google Lighthouse against our site and see how it goes. For more details :
Lighthouse | Tools for Web Developers | Google Developers
Learn how to set up Lighthouse to audit your web apps.developers.google.com
Open Chrome > use its Developer Tools > Audits > Run audits. Here is what we get from this setup — isn’t that fantastic !?

Conclusion
In this article I showed how to setup a secured environment to run a VueJS-based Progressive Web App on an nginx server. I have to admit, I thought this would be somewhat harder, but the reality was: it took me no longer than ~3hrs in total to get there from zero which was pretty surprising.
Setting up a secured and high-performance infrastructure is really no big deal and I encourage everybody who’s dealing with on-Premise deployments to dive into this.