
Ever since we started creating courses on Scrimba, our users have asked us for a proper intro course on React. So when we finally got to it, we decided to make it our most comprehensive course ever.
It's called Learn React and it contains 48 chapters in total - a mix of lectures and interactive assignments.
Course launch ?
— Per Harald Borgen (@perborgen) November 28, 2018
We've teamed up with @bobziroll at @VSCHOOLHQ and created a ? course on React at @scrimba_com. It's huge, with 48 chapters in total, and it's also filled with interactive challenges.
Please RT if you think your followers might like it!https://t.co/7pVHxPGkaz
This is the most comprehensive intro course ever created on Scrimba. It contains 48 chapters in total — a mix of lectures and interactive assignments.
The man behind the course is the eminent teacher Bob Ziroll. Bob is the Director of Education at V School, a technology education school that teaches full stack Javascript and UX courses.
V School is one of the top coding schools according to Course Report, so we’re super excited to team up with them.
So if you like this course, be sure to check out V Schools immersive full-stack program. Now let’s have a look at how the course is laid out!
Part 1. Intro & Philosophy
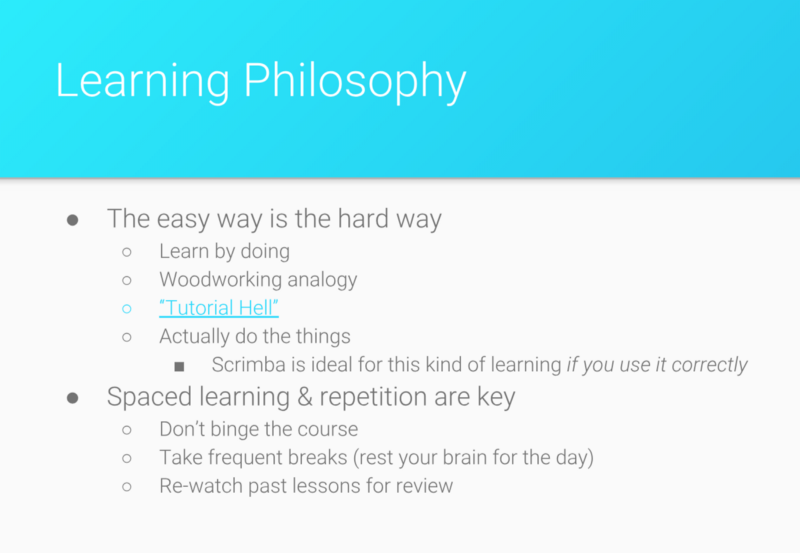
Bob has been teaching in bootcamps since 2014, and has developed his own learning philosophy. So in the first screencast, we’ll get familiar with this philosophy. In the image below you’ll see the gist of it.
Part 2. What we’ll be building
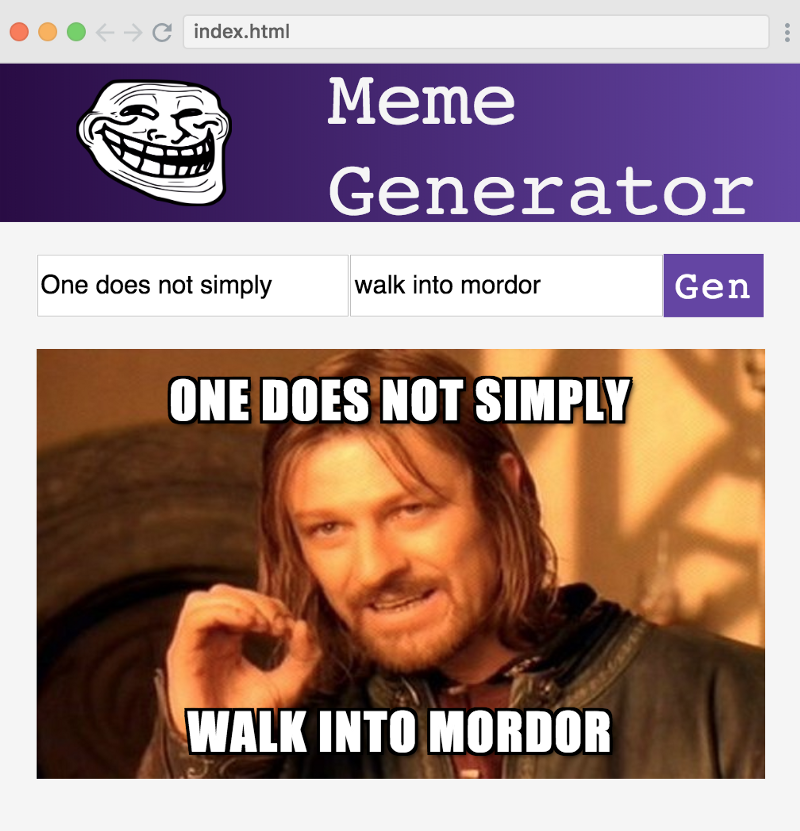
In the next video, Bob gives an overview of the course, where he gives us a quick glance at two projects we’re going to build: a simple To-do list app, which covers a lot of React core topics; and a capstone project, which will be a meme generator app.
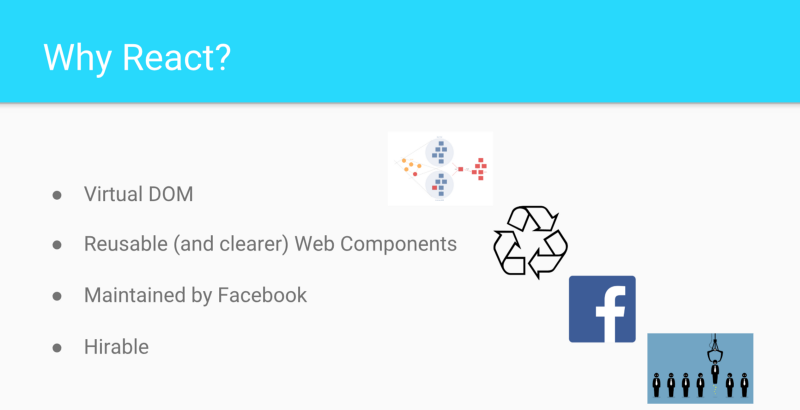
Part 3. Why React?
First things first, Bob lets us know why we should even consider using something like React instead of just writing it in plain JavaScript and why so many developers already chose to use React.
Part 4. ReactDOM & JSX
In this screencast we jump straight into code and write our Hello World using JSX — a React specific JavaScript eXtension, so we can write HTML and JavaScript at the same time!
import React from "react"
import ReactDOM from "react-dom"

ReactDOM.render(<h1>Hello world!</h1>, document.getElementById("root"))
Bob also quickly covers a few gotchas, like correct React imports and that JSX doesn’t like when you’re trying to render two adjacent elements.
// Hm, not sure which element I should render here...
   ReactDOM.render(
     <h1>Hello world!</h1>
     <p>I'm a paragraph</p>,
   document.getElementById("root"))

// This is much better!
   ReactDOM.render(
     <div>
       <h1>Hello world!</h1>
       <p>I'm a paragraph</p>
     </div>,
   document.getElementById("root"))
Part 5. ReactDOM & JSX Practice
This is our first practice of this course. In practice screencasts Bob sets us an Objective and gives us a few Hints.
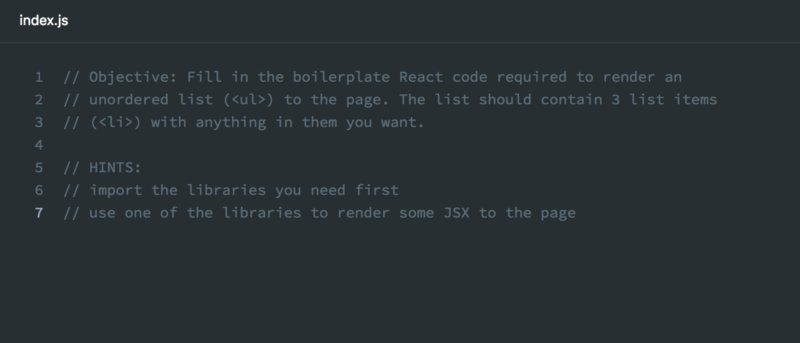
Bob encourages us to spend some time thinking about and working our way through this and subsequent challenges, as the more effort we put in the more we can remember about React.
In the end, Bob shows and walks us through the solution, but this blog won’t give any spoilers ?, so feel free to check it out in the actual screencast.
Part 6. Functional Components
In this cast, Bob gives us a quick overview of Functional Components.
import React from "react"
import ReactDOM from "react-dom"

function MyApp() {
  return (
    <ul>
       <li>1</li>
       <li>2</li>
       <li>3</li>
    </ul>
)}

ReactDOM.render(
   <MyApp />,
   document.getElementById("root")
)
We define MyApp() as a simple JS function which returns a very simple HTML list element, but that’s where React shines through as later we use that function as <MyApp /> HTML element!
Part 7. Functional Components Practice
Time for some more practice.
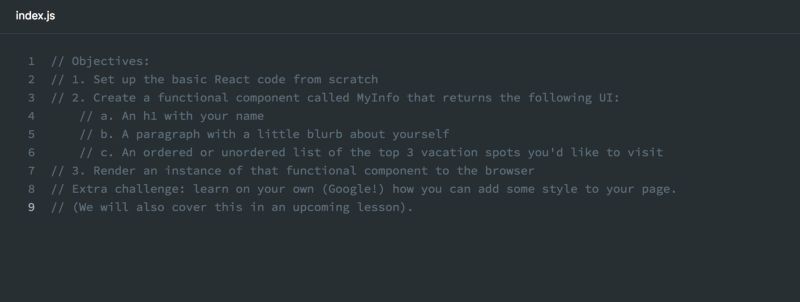
So just like in the previous practice cast, there will be no spoilers here, but feel free to jump straight into code and come up with your own solution. In the end Bob walks us through it just like before.
Part 8. Move Components into Separate Files
In this chapter, Bob gives us a few good and common React practices for organising code, for example naming files with components MyInfo.js the same as the component itself <MyInfo /> .
We then learn how to extract components into their own separate files and how to export them to later use in our app.
// MyInfo.js

import React from "react"
function MyInfo() {
  return (
   // component code
  )
}

export default MyInfo
We can then just place our component into components folder and import <MyInfo /> to index.js
// index.js

import React from "react"
import ReactDOM from "react-dom"

import MyInfo from "./components/MyInfo"

ReactDOM.render(
   <MyInfo />,
   document.getElementById("root")
)
Part 9. Parent/Child Components
In this screencast, Bob talks about Parent and Child components. Regular applications are far more complex than just one component rendered to the DOM. Instead, we usually have a complex hierarchy of components.
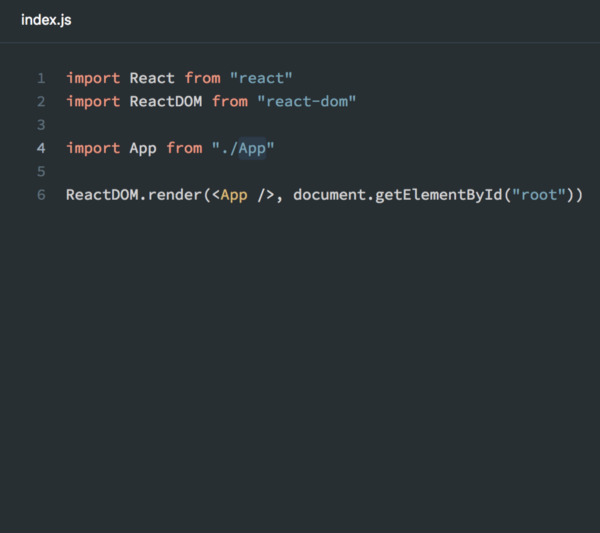
We start with writing our Functional Component <App /> which is going to be at the top of the component hierarchy
// index.js

import React from "react"
import ReactDOM from "react-dom"

import App from "./App"

ReactDOM.render(<App />, document.getElementById("root"))
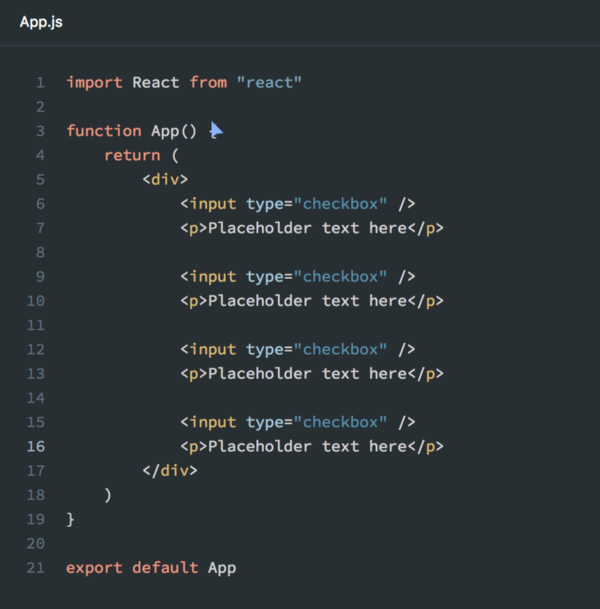
And in the App.js itself:
// App.js

import React from "react"

function App() {
  return (
    <div>
      <nav>
        <h1>Hello a third time!</h1>
        <ul>
          <li>Thing 1</li>
          <li>Thing 2</li>
          <li>Thing 3</li>
        </ul>
      </nav>
      <main>
        <p>This is where most of my content will go...</p>
      </main>
    </div>
  )
}

export default App
As you can see, we can write our pages in <App /> but that defeats the purpose of React. We can take each piece of HTML and put in a separate component.
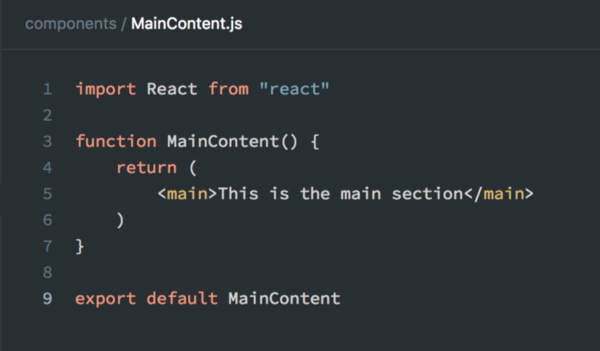
This is what our <App /> might look like:
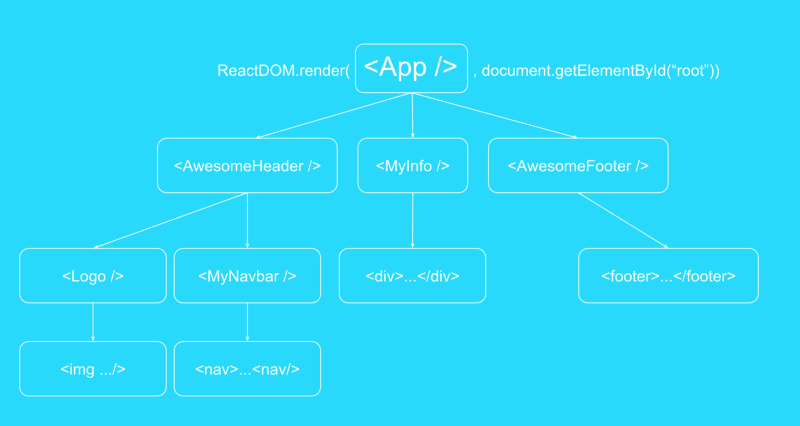
In React, HTML elements that begin with a capital letter indicates a component we created
Using this concept our <App /> component would look like so:
import React from "react"
import MainContent from "./MainContent"
import Footer from "./Footer"

function App() {
  return (
    <div>
      <Header />
      <MainContent />
      <Footer />
    </div>
  )
}

export default App
This is much better and it’s a very neat way to organise code.
Part 10. Parent/Child Components Practice
It’s practice time. Here’s the task we get from Bob so let’s get started.

As usual, no spoilers in this blog, so feel free to dive into the solution in Bob’s screencast.
If you’re not very sure where to start, Bob recommends to look over the previous chapters first and attempt to come up with a solution, even if it’s not perfect at this stage. This would be the best way to learn.
Part 11. Todo App — Phase 1
Alright! Congratulations, we’ve mastered the very basics of React and this foundation is enough for us to start building our first real-world app.
First, we need to create a structure for our app, and that’s a perfect opportunity to practice what we have learned in the previous screencasts. Here’s the task and let’s get started.
By now this should be quite straightforward and Bob walks through the solution with us.
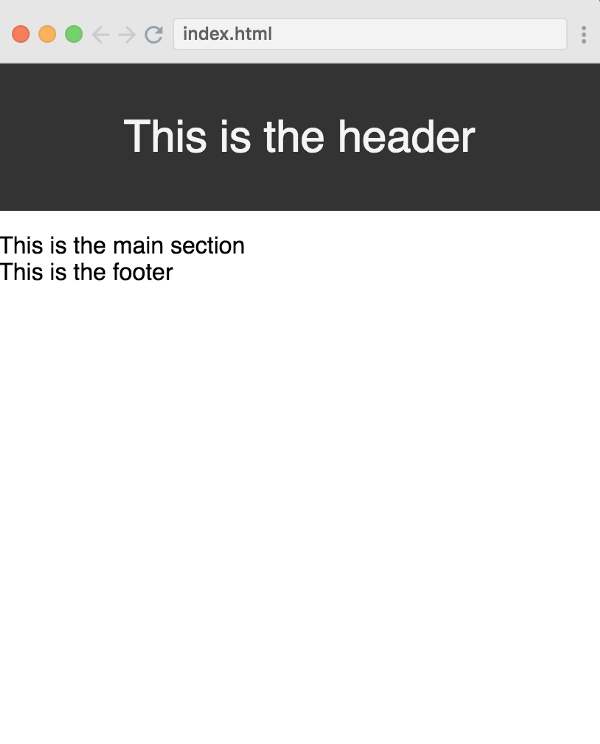
Part 12. Styling React with CSS Classes
In this cast, Bob introduces us to styling in React. There are a few different ways to style components in React, and we will start with CSS classes, as this is the one most of us should be really familiar with.
Let’s start with a simple example. The structure of this example is the same as in the previous chapter.
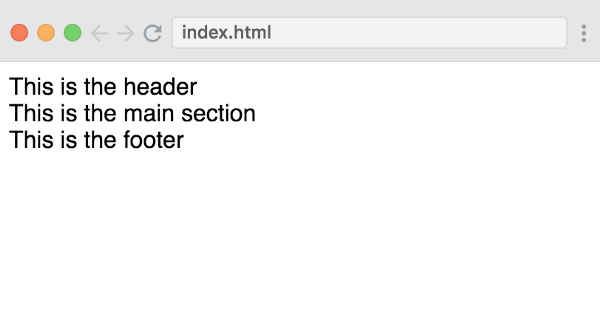
In React it’s very similar to plain HTML, but instead of class we need to use className:
function Header() {
  return (
    <header className="navbar">This is the header</header>
  )
}
A lot of places will tell you that we need to write className because class is a reserved word in JS, but the truth is that under the hood, JSX is using vanilla JS DOM API.
document.getElementById("something").className += "new-class-name"
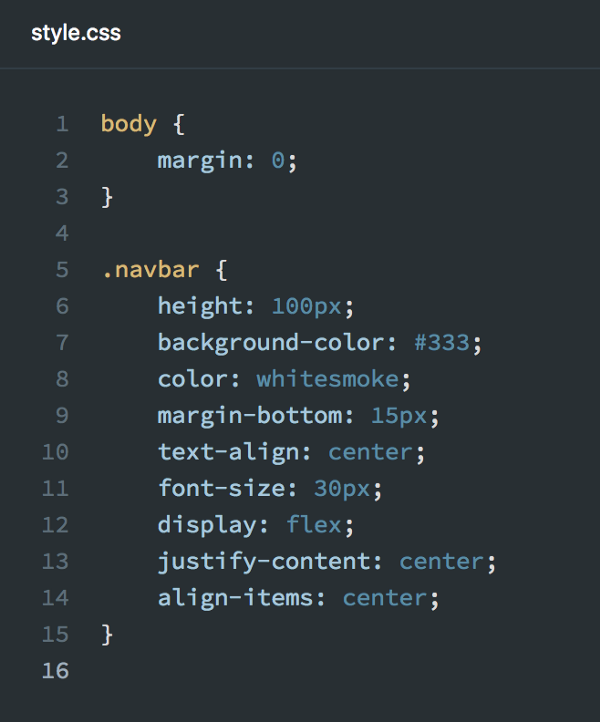
Now we can just write plain CSS:
Part 13. Some Caveats
As a side note, Bob just lets us know about certain styling choices he personally prefers, so we are aware that there is a different way of doing things. Should you wish to write code slightly differently, you’re more than welcome to do that.
// Bob likes to avoid semicolons, where possible
import React from 'react'

// but there is no way to avoid them here
for (let i = 0; i < 10; i++) {}

// Bob prefers regular functions
function App() {
  return (
    <h1>Hello world!</h1>
  )
}

// Although you can write ES6 arrow functions if you wish
const App = () => <h1>Hello world!</h1>
Part 14. JSX to JavaScript and Back
Before we move any further, we should really look into how JSX and JS play together. We see how inside our JS functions we return something that looks like HTML, but is JSX.
Now, what if we wanted to use a variable? We can do it using {}:
function App() {
  const firstName = "Bob"
  const lastName = "Ziroll"

  return (
    <h1>Hello {\`${firstName} ${lastName}\`}!</h1>
  )
}
{} is a way to use plain JS in JSX. In plain language it would look like <h1>This is JSX {now we're writing JS} and we're back to JSX</h1>
Part 15. Inline Styles with the Style Property
One very quick trick to apply styles in React is to use inline styles.
<h1 style={{color: "#FF8C00"}}>Hello World!</h1>
Notice how we use to sets of curly braces{{}}. This is because React expects styles to be passed as an object, but then we also need to tell JSX that we’re using JS objects.
There is a gotcha though.
// This is going to error
<h1 style={{background-color: "#FF8C00"}}>Hello World!</h1>

// This is what we need to do, because JS doesn't like dashes in the
// middle of our property names
<h1 style={{backgroundColor: "#FF8C00"}}>Hello World!</h1>
Part 16. Todo App — Phase 2.
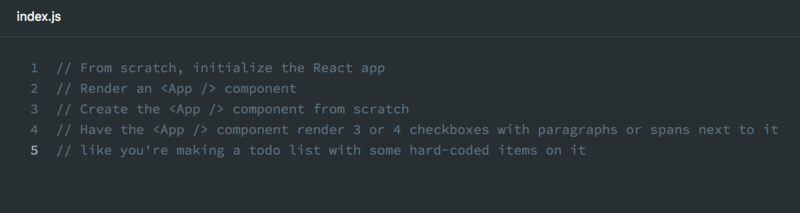
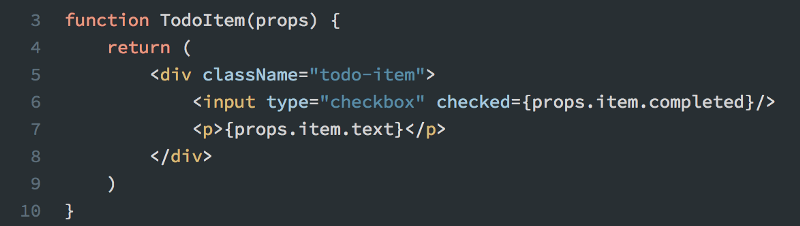
In this screencast, we’re going to pick up where we’ve left off with the Todo list. To start with, Bob asks us to create <TodoItem /> component by extracting the following code into it.
<input type="checkbox" />
<p>Placeholder text here</p>
And now we can add some styling and have a nice-looking todo list. Soon we are going to learn how to customize the text inside the <p> tag, but before that, we need to learn about props.
Part 17. Props Part 1 — Understanding the Concept
Let’s look at some plain HTML and think what is actually wrong with the elements.
<a>This is a link</a>
<input />
<img />
None of them actually do anything important. We really need to add these attributes to our elements.
<a href="https://google.com">This is a link</a>
<input placeholder="First Name" name="firstName" type="text"/>
<img src="https://goo.gl/dKwBew"/>
A lot of times these attributes are called properties and if this HTML concept makes sense to you, then you understand props in React. Since we’re creating our own components we can allow props to modify the way our own components act.
Part 18. Props Part 2 — Reusable Components
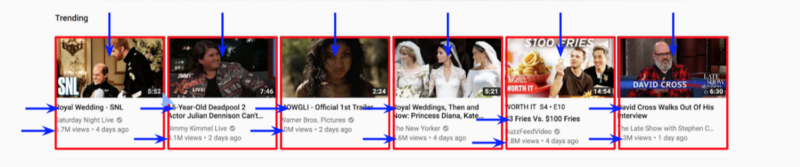
In this cast, Bob takes us to YouTube to illustrate the concept of reusable components on a simple video tile. If it were created in React, we wouldn’t just copy-paste one tile across the whole page, but instead, we might create a single tile and make sure that it can change depending on the different properties such as the image URL or the title.
Part 19. Props in React
In this screencast, Bob will show us how to combine the props concepts from Part 17 and 18 of this course and he created a basic contact card list app for us to practice on.
To start, it would be really nice, to create a component for a contact-card and learn how to make it dynamic so we can reuse a single component for all of the cards.
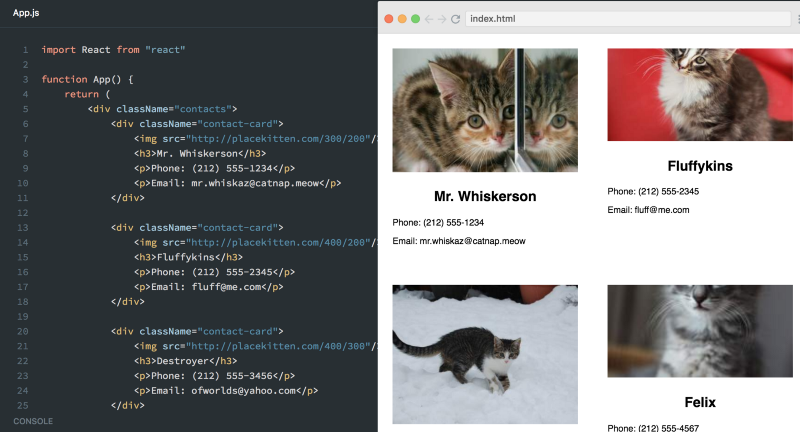
A very React way to use the contact card would be:
// App.js
...
<ContactCard
  name="Mr. Whiskerson"
  imgUrl="http://placekitten.com/300/200"
  phone="(212) 555-1234"
  email="mr.whiskaz@catnap.meow"
/>
...

// instead of
<div className="contact-card">
  <img src="http://placekitten.com/300/200"/>
  <h3>Mr. Whiskerson</h3>
  <p>Phone: (212) 555-1234</p>
  <p>Email: mr.whiskaz@catnap.meow</p>
</div>
Let’s create ContactCard and use props to dynamically show data.
import React from "react"

function ContactCard(props) {
  return (
    <div className="contact-card">
      <img src={props.imgUrl}/>
      <h3>{props.name}</h3>
      <p>Phone: {props.phone}</p>
      <p>Email: {props.email}</p>
    </div>
  )
}

export default ContactCard
Part 20. Props and Styling Practice
Right, let’s practice! Just like in the previous practice casts, here’s your task:
And as it’s now our tradition, to avoid any spoilers and to really learn React, dive into Bob’s walkthrough.
As always, try to crack this task on your own, and feel free to refer to previous chapters as they contain everything you need.
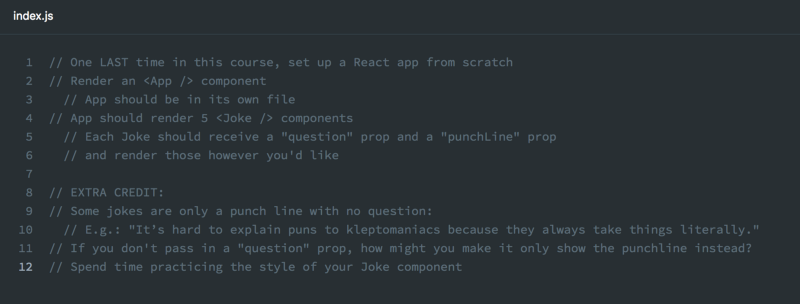
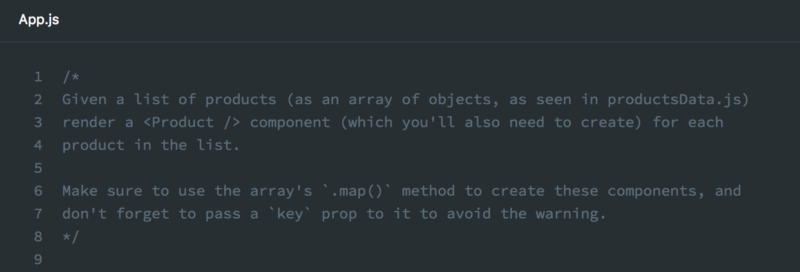
Part 21. Mapping Components
So from the practice session, you might have noticed that we repeat a few <Joke /> components and might have wondered if there is a way to write it only once. Of course! We can use JavaScript .map to help us achieve this.
function App() {

const jokeComponents = jokesData.map(joke => <Joke key={joke.id} question={joke.question} punchLine={joke.punchLine} />)

return (
    <div>
      {jokeComponents}
    </div>
  )
}
Let’s just quickly break apart a few things here.
Very often our data would come from an API, so to imitate it we’re using jokesData to pretend that it has all the data we need.
const jokesData = [
  {
    id: 1,
    punchLine: "It’s hard to explain puns to kleptomaniacs because they always take things literally."
  },
  {
    id: 2,
    question: "What's the best thing about Switzerland?",
    punchLine: "I don't know, but the flag is a big plus!"
  },
  ...
]
You might have also noticed in <Joke key={joke.id} ... /> the key prop. This is really a React requirement, that whenever you’re creating a component over and over you need to pass a key prop with some unique parameter. Most of the time it’s an id which you get from your API.
Part 22. Mapping Components Practice
Time for another practice cast. Here’s your task, and Bob was also kind enough to create some boilerplate code for us, so we don’t need to create that much from scratch.
As always, feel free to walk through the solution with Bob, but do try to do it yourself first.
Part 23. Todo App — Phase 3
Let’s now apply what we’ve learned about mapping and props and make our todo list more dynamic. We can now map item data and render <TodoItem />for every item of data we have.
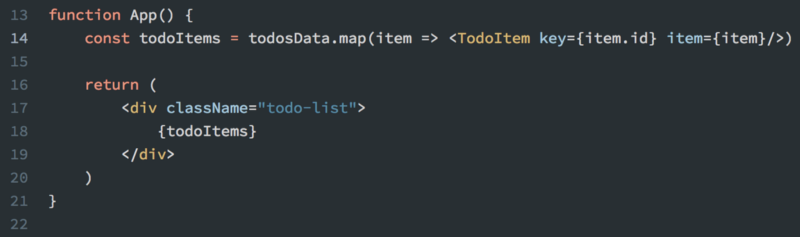
And also use the data as props to <TodoItem /> and place it where we’d like within the component itself.
If at this point you notice the following error, Warning: Failed prop type: You provided a `checked` prop to a form field..., don’t be alarmed — we’ve done everything right. Bob will show us what it means and how to solve it in part 31 of this course.
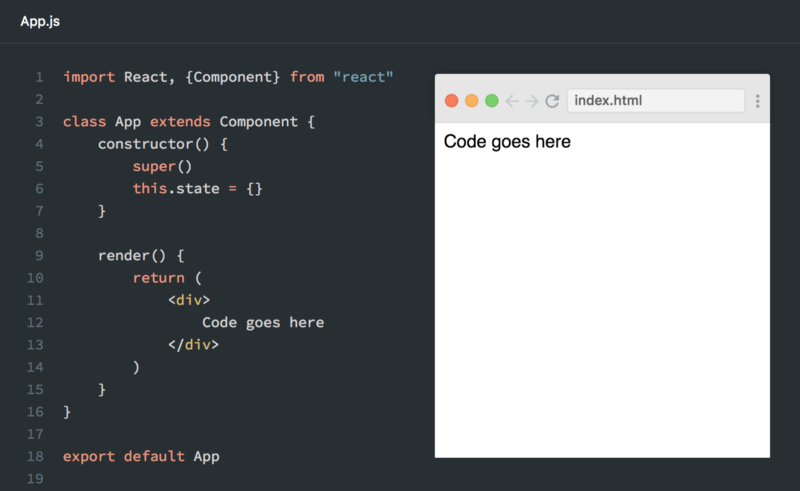
Part 24. Class-based Components
In this chapter, Bob introduces us to class components in React. Sometimes functional components we’ve been using so far are not enough and their functionality needs to be extended.
We will learn more about the underlying differences later, but for now look at how they differ syntactically and try to convert our <App /> from a function to class component.
class App extends React.Component {
  render() {
    return (
      <div>
        <h1>Code goes here</h1>
      </div>
    )
  }
}
Part 25. Class-based Components Practice
Some more practice. This time we get some code written for us and we should practice converting functional components to class components. In this practice we also have a little bug hidden in the code, so let’s find it.
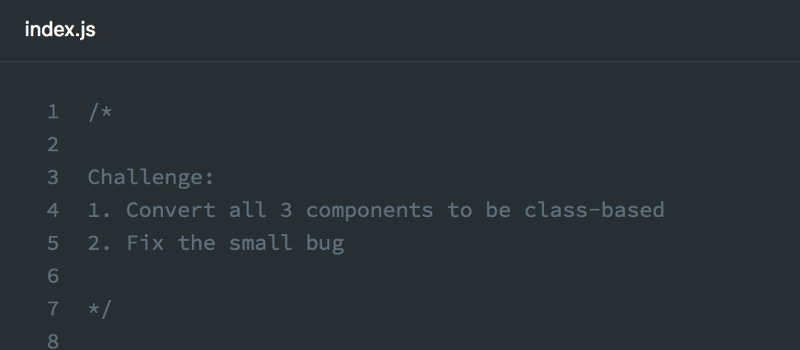
As always try to finish this practice by yourself first and then follow Bob’s walkthrough. See you in the next chapter!
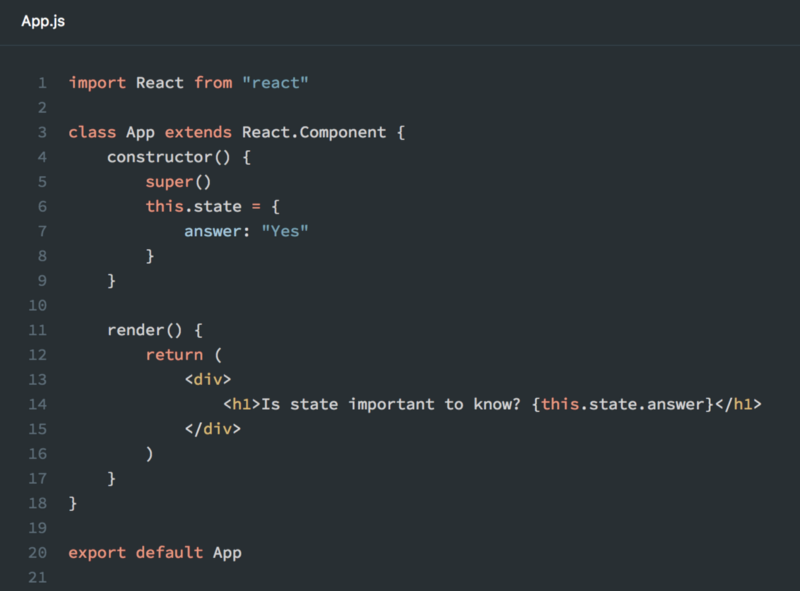
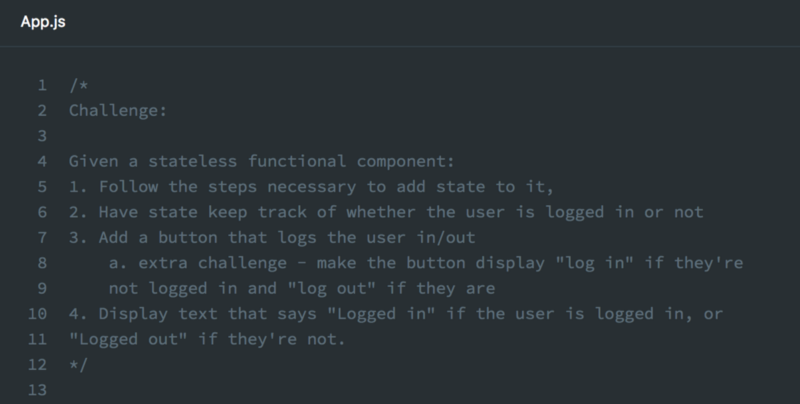
Part 26. State
State is one of the most important parts of React. It’s the data that the component itself maintains. props cannot be changed by a component receiving the props, but state can! So we might want to use state when a component itself needs to change some data. For example, when we click a button, some text in our component changes colour.
A component needs to be a class component to have state and we need to have a constructor method.
constructor() {
  super()
  this.state = {
    answer: "Yes"
  }
}
And then we can use that data in our return and display our data inside JSX.
Part 27. State Practice
In this practice session we have some debugging to do.
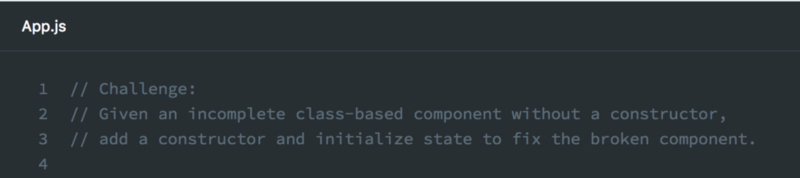
Quite often we need to be fixing some issues in our code, so it’s a very useful skill to practice. If you’re stuck, feel free to look over some of the previous chapters before following Bob’s solution.
Part 28. State Practice 2
State, as we mentioned before, is a super important concept, so Bob included two practice lessons for us.
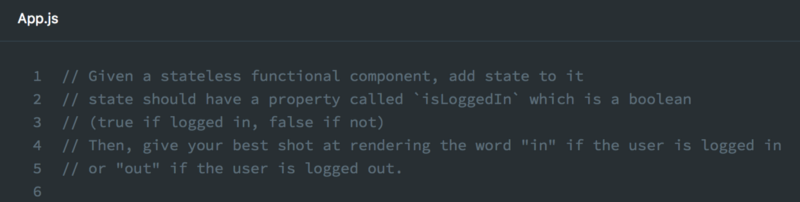
This one might be quite tricky, but do give it your best shot and then have a look how Bob does it.
Part 29 Todo App — Phase 4
In this short cast, Bob shows us how to use state in our Todo App.

Part 30. Handling Events in React
Event handling is essentially allowing a user to interact with your web page and do something specific when something like a button click or a hover happens.
Let’s look at a simple example of executing this simple function.
function handleClick() {
  console.log("I was clicked")
}
You might already be familiar with how it’s done in regular HTML:
<button onclick="handleClick()">Click me</button>
React is very similar.
<button onClick={handleClick}>Click me</button>
The difference would be that event name onClick is in camelCase and handleClick is JS passed inside our JSX as we mentioned in lesson 14 about inline styles.
Part 31. Todo App — Phase 5
In this cast, Bob gives us a challenge. Remember the warning we get in the console about ‘checked’ prop? In order to solve it we need to provide onChange handler. At this point, just let it console.log anything you fancy.
Just like with all the usual challenges — jump to the cast to see the solution.
Part 32. Changing State
We can update state in a component using React’s setState() method.
Let’s look into how we might use it on a very popular example — a counter.
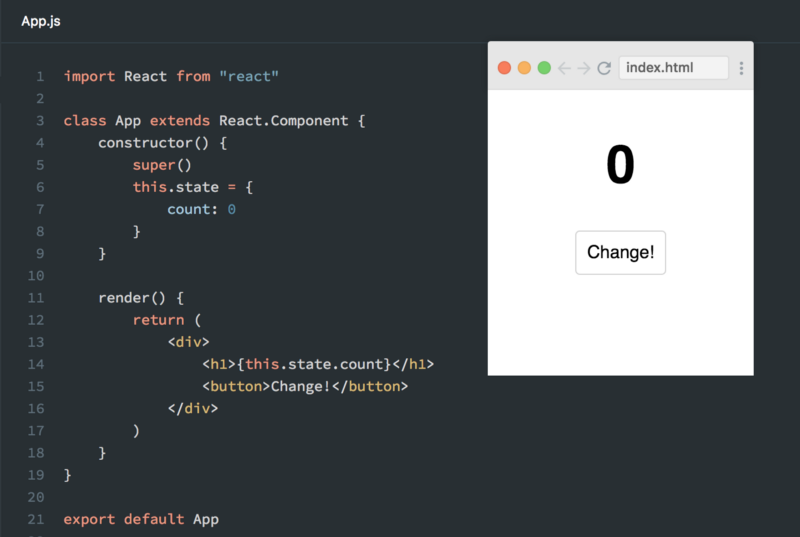
At the moment when you click the “Change!” button, nothing would happen. Let’s implement our handleClick() method. We first begin with us just trying to display a different number:
handleClick() {
  this.setState({ count: 1 })
}
and pass it to our <button>.
<button onClick={this.handleClick}>Change!</button>
If we run this, we will get Uncaught TypeError: Cannot read property ‘setState’ of undefined. This is a very common error, and one of the ways to make our handler work is to bind it.
constructor() {
  super()
  this.state = {
    count: 0
  }
  this.handleClick = this.handleClick.bind(this)
}
Now we want our handleClick() method to be dynamic and actually add 1 to whatever our current state is. Luckily, React provides us with prevState so we can compare states.
handleClick() {
  this.setState(prevState => {
    return {
      count: prevState.count + 1
    }
  })
}
Part 33. Todo App — Phase 6
In this part we are going to make it so when we click the checkbox, it’s going to change our state and tick/untick the checkbox when required. Bob warns us that it’s a tricky part of the app and sounds deceptively simple. As a challenge let’s try to implement it ourselves first, but no need to worry if something doesn’t quite work — Bob’s got our back with a walkthrough.
Part 34. Lifecycle Methods Part 1
One of the nice things about React is how we essentially write vanilla JS and React takes care of a lot of thing behind the scenes. There are a number of these “behind the scenes” events that happen to a component. It’s more like a set of milestones in a life of a component, so they are called lifecycle methods. Bob is going to cover the most popular and important ones in this and the following chapters.
The first one you already know is render(). Its job is to determine what gets rendered to the screen and React calls render() when something changes like state or props.
The next one is componentDidMount() which is essentially like ‘component is born’. This method is called when the component lands on a screen. This is a good time to make API calls.
A third very interesting method is shouldComponentUpdate(). Sometimes React would update a component even if nothing seemed to change. This might become very expensive in some cases and this method gives us, the developers, a chance to optimise our application.
And last method in this chapter is componentWillUnmount() and is a place to clean up right before your component disappears from the user’s screen. You can remove event listeners or cancel API calls.
Part 35. Lifecycle Methods Part 2
In this chapter Bob very quickly covers some of the deprecated lifecycle methods, which you might see in some legacy React applications and he also covers some really rare methods, like getDerivedStateFromProps() and getSnapshotBeforeUpdate(). But we won’t be covering them in great depth as they are not essential to this course.
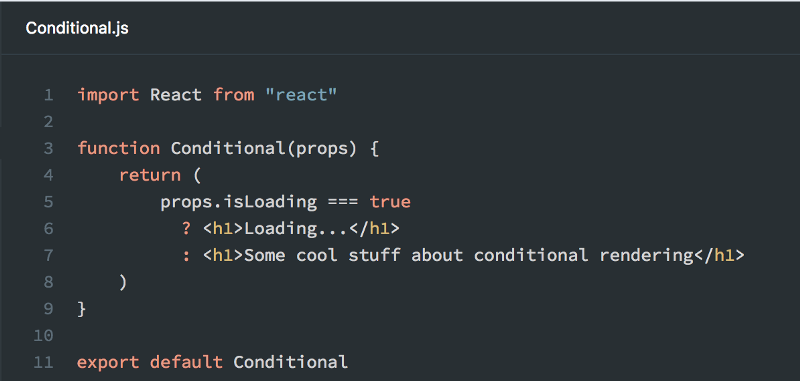
Part 36. Conditional Rendering
Sometimes you want to display some data or render some JSX only at a certain condition. That’s when we use conditional rendering.
One of the strengths of React is that by using vanilla JS we can preserve its flexibility to write our own code. The downside to this is when you’re learning React, there might be too many different ways of doing the same thing. Conditional rendering is one of them. Bob will show us a few ways to do it, but rest assured, there are as many ways as React developers.
Let’s create a <Conditional /> component that renders “Loading…” when a page is loading. We can use it in our app in render method.
render() {
  return (
    <div>
      <Conditional isLoading={this.state.isLoading}/>
    </div>
  )
}
We can achieve our goal by using simple if-else from JS:
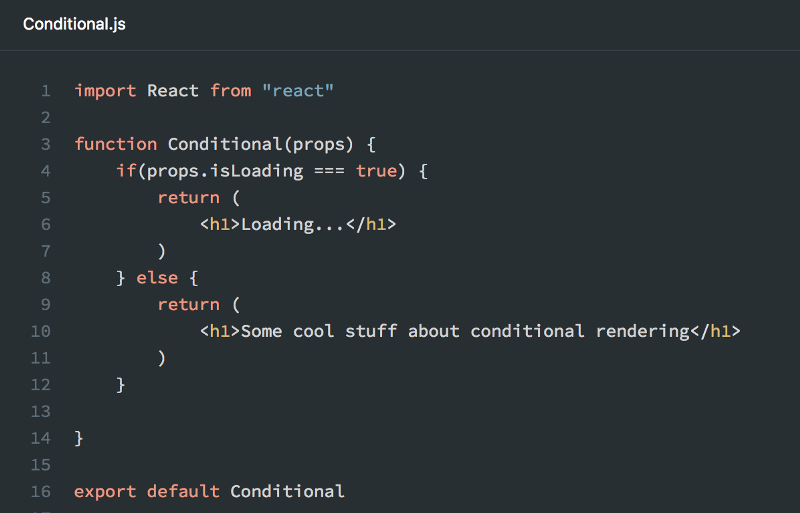
Or we can improve it with the latest ES6 ternary operator.
Part 37. Conditional Rendering — Practice
Let’s now practice. Conditional rendering is one of the essential tools in any React developer’s toolkit.
Try to give it your best shot before walking through the solution with Bob.
Part 39. Todo App — Phase 7
So we’ve reached the final part of our Todo App and we just need to finish off the final styling part and we’re done! The challenge for this part would be to make a completed <TodoItem /> look different. For example, with greyed out text and/or background, turning text to italics. As one of the solutions, Bob will show us how to do it, but ultimately it is really up to us.
Part 40. Fetching data from an API
In this cast, Bob provided us with a bare component to learn more about fetching.
In chapter 24, we learned that one of the most common use cases for componentDidMount() lifecycle method is to get data from somewhere so our component can do whichever task it’s supposed to do.
In this example we will use a free Star Wars API to fetch some names of characters. Let’s write our componentDidMount() method, where we’re going to fetch some data and just console.log it.
componentDidMount() {
  fetch("https://swapi.co/api/people/1")
    .then(response => response.json())
    .then(data => console.log(data))
}

Data we got from the API call
Alright! So we just need to grab name from that data and store it in our state to then just display in the component. In the end our <App /> should be:
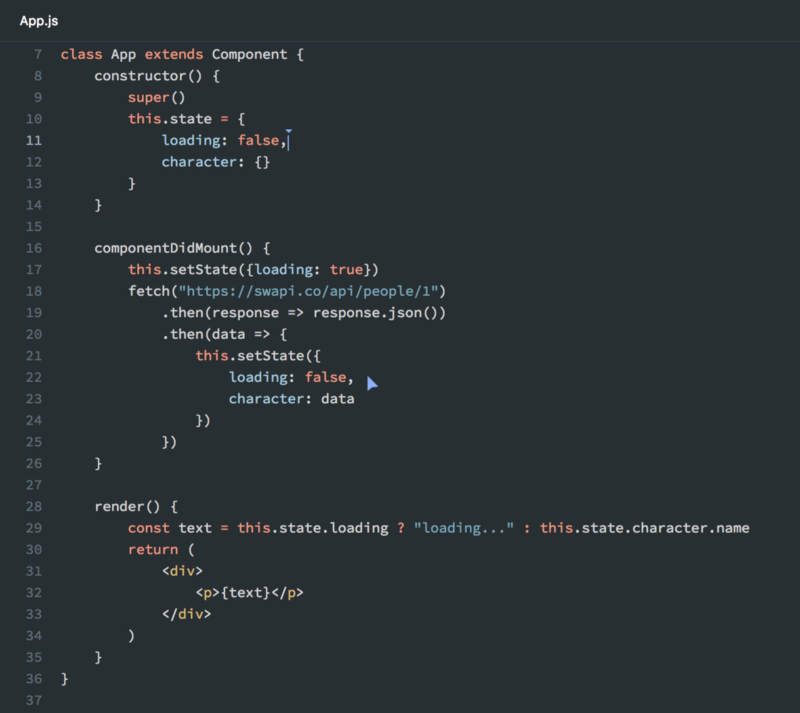
There are a few interesting tricks we can learn from Bob.
It’s good to create a loading boolean on state. In case our request takes a long time, we can just inform a user that the request is processing and their data will be with them shortly.
We create a separate variable text in render() where we do all of our logic and we just have a very clean return(), so it’s easier to understand for the next developer who maintains our code.
Part 41. Forms Part 1
In this cast we’re going to explore how forms are created in React. Forms are actually a really tricky part of React. First thing, if you haven’t completed the challenges from parts about state in React, this would be the best time to catch up. And as a primer to forms, Bob recommends to read the official React docs about them.
In vanilla JS DOM API, you create an HTML form. Once the user decides to submit, you gather all the data from your forms, pretty much at the last second, and validate it before you send.
React advocates for you keeping a track of your form data as you go along, by saving it in state. On every keystroke you have the most updated version of the form saved in the state of your form component.
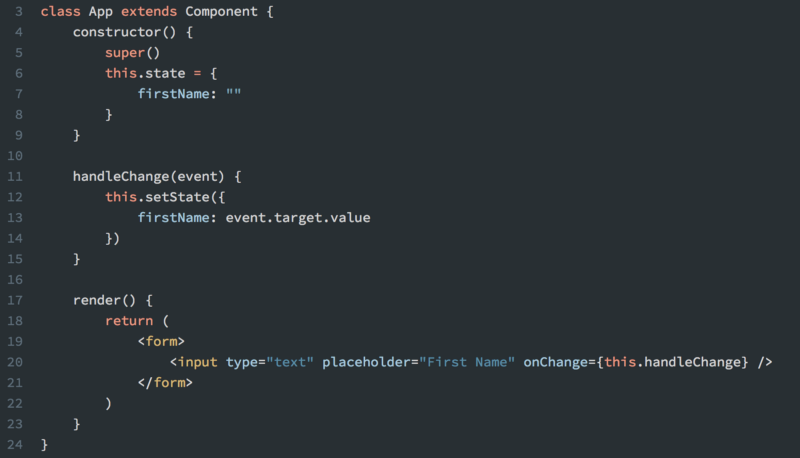
There are 3 key parts to forms in React:
- Input — when the user updates input we fire event handler (line 20)
- Event handler — updates state with data from the user (lines 11–15)
- State — storage for your data (lines 6–8)
For a more complex example, where Bob shows a few neat tricks on making forms very reusable and the code very readable, jump into the screencast.
Part 42. Forms Part 2
In this part, Bob further expands our knowledge about forms. Forms can handle more than just <input />! But things might get tricky. We learn how to deal with <textarea />, <select /> and <option /> for dropdown menus and expand further on <input /> to learn more about checkboxes and radio buttons.
Part 43. Forms Practice
Great, now it’s time for some practice.
Bob sets out a new challenge for us and as usual it’s best if we try to solve it on our own first.
If there is something not quite working out, Bob always has our back with a great walkthrough.
Part 44. Container/Component Architecture
In this cast Bob introduces a very popular React architecture pattern.
Very often when we write complex components, we eventually end up with a lot of lines of code in one file. We then start scrolling up and down to add extra functionality and display logic. That’s when Container/Component split becomes useful. We separate our UI and business concerns into different components in React. There are a lot of different terms around: smart/dumb, container/presentational, all of these refer to the same idea of separating rendered elements from data flow functionality.
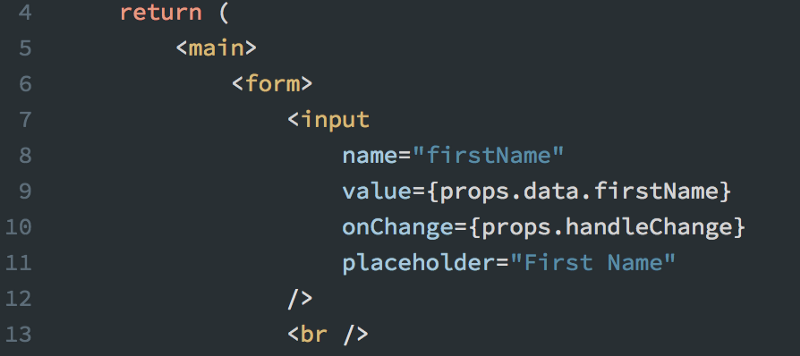
In our specific example, we can implement container/component pattern if we extract our HTML from render() method into a separate functional component <FormComponent /> and our Form.tsx becomes FormContainer.tsx.
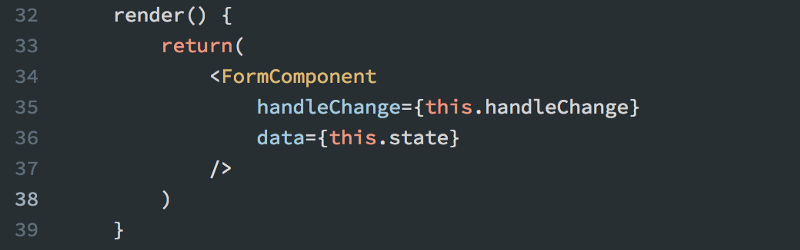
As you can see, we still pass our handlers and data as props into our functional <FormComponent /> and inside the component we now call handlers and data via props.
Part 45. Meme Generator Capstone Project
You made it! Congratulations on reaching the capstone project. In this cast Bob sets out the ultimate challenge. We can now create our own app, from scratch.
If completing the whole project in one go feels intimidating, Bob sets mini walkthrough challenges in the screencast to guide us through the completion.
Good luck and happy coding!
Part 46. Writing Modern React Apps
Well done! Your project is now ready and you can show it to your friends and family! It is truly something to be proud of. Great job!
In this cast, Bob gives us some advice on how to keep up with all the changes in the React ecosystem and gives us a few tips on how things we’ve learned so fa could be done slightly differently, like using ES6 arrow functions or extracting code into new components to improve readability.
Part 47. Project Ideas for Practicing
In this cast, Bob discusses where to go from here, where the course ends. There are some ideas, and good articles to read about how to practice what we’ve learned.
Part 48. Conclusion
Congratulations, we’ve made it! In this cast we quickly sum up what we’ve done in this course and outline what we can learn in the future.
Thank you so much for the course, Bob!
Thanks for reading! My name is Per Borgen, I'm the co-founder of Scrimba – the easiest way to learn to code. You should check out our responsive web design bootcamp if want to learn to build modern website on a professional level.