
Bootstrap 4 represents a complete rewrite of the entire library, and it brings with it several new features and concepts to wrap your head around. So it can feel overwhelming to jump head-first into the documentation in order to learn it.
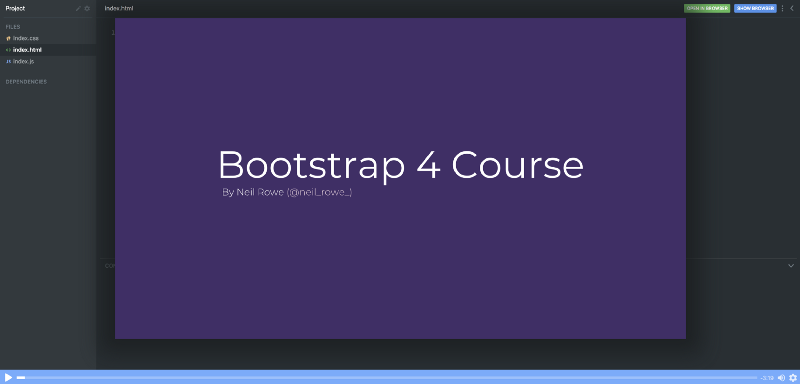
That’s why we’ve teamed up with Neil Rowe (previously known as CodersGuide) and created a free full-length course on Bootstrap 4. Neil previously created one of the most popular Bootstrap 3 courses on YouTube, so we’re very pleased that he’s chosen to use Scrimba for his follow-up course.
You can take the course today. Just head over to the course page and you’ll become a Bootstrap 4 master within an hour.
Now let’s have a closer look at what you’ll learn!
#1 Course introduction
In the first screencast, you’ll get an overview of Bootstrap itself, and which utilities and components it brings with it. Neil also goes through the main benefits v4 brings to the table.
#2 The Responsive Grid System
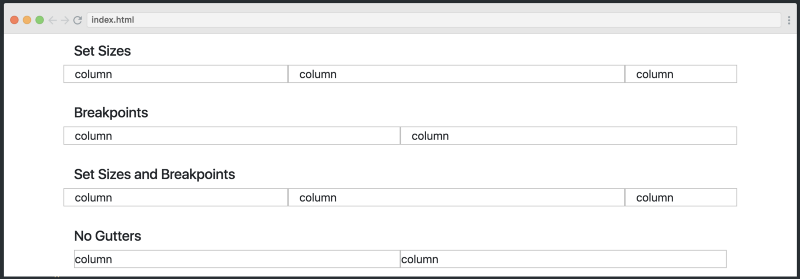
The course then follows up with one of the most important components of Bootstrap, the responsive grid system. Neil explains how to create various grids, with different breakpoints, column sizes and offsets.
#3 Responsive Navbars
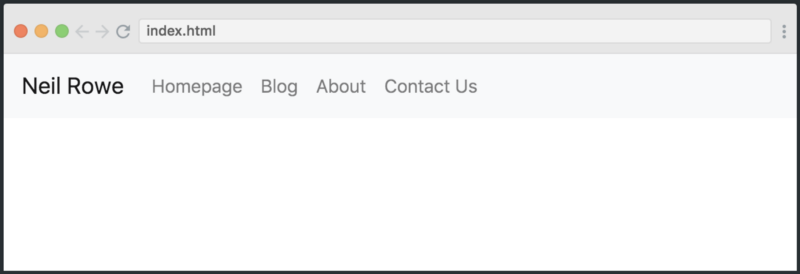
The navbar component is a big reason that many people use Bootstrap. In this lecture, you’ll learn how to build a responsive navbar which collapses into a hamburger menu on small screens.
#4 Modals
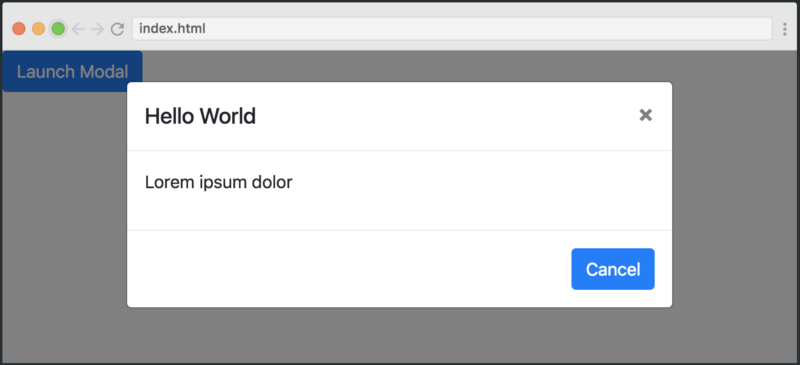
Bootstrap also makes it super easy to create modals, which often come in handy. In this lecture, you’ll learn how to build them step-by-step.
#5 Forms
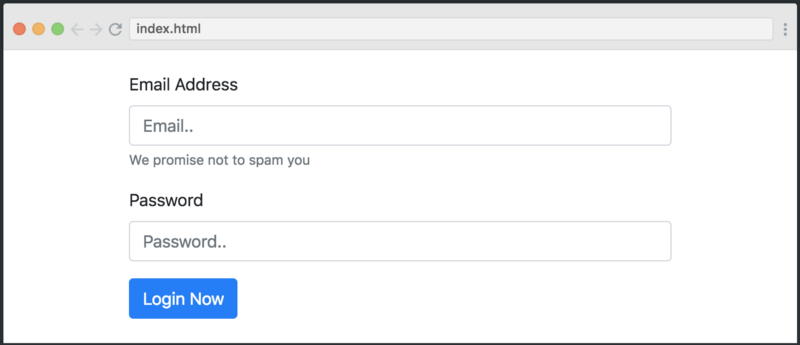
Forms are critical to most websites, so it’s good to know how to create them. So in this lecture, you’ll learn how to create a responsive signup form. Here, your skills from the responsive grid lecture will also come in handy.
#6 List groups
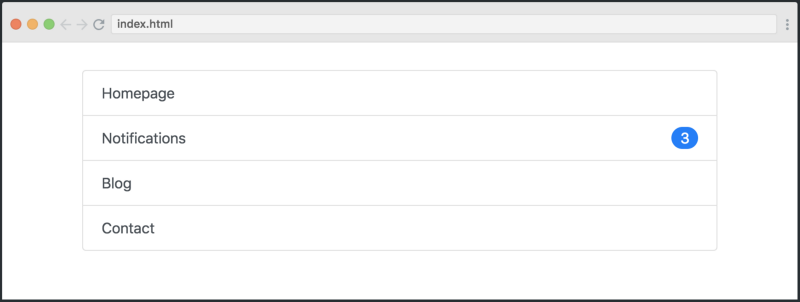
List groups can be used for many different purposes. They can, for example, be used as a sidebar, a menu, a list of articles, or whatever you want, basically.
#7 Cards
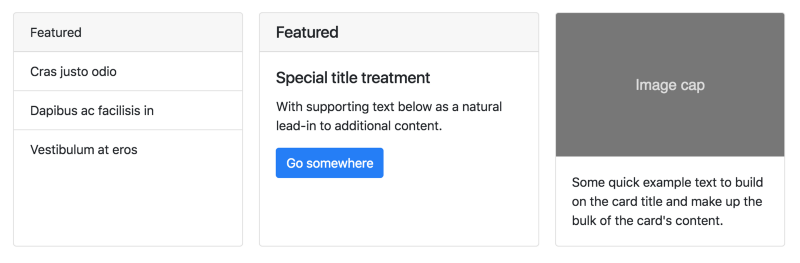
Bootstrap 4 introduces a whole new component called cards, which replace panels, wells, and thumbnails. A card is a flexible and extensible content container. In this lecture, you’ll learn how to build one using various components that commonly make up a card.
#8 Tables
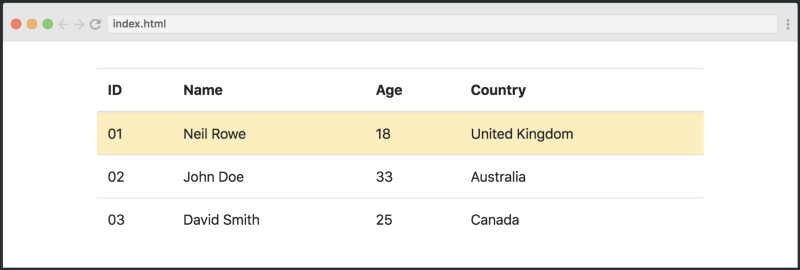
Bootstrap 4 also comes with a bunch of classes for modifying tables, and this lecture will demo most of them. They’re opt-in, meaning you have to actively add a table class to turn a table into a Bootstrap table. This is unlike how it used to be before regular HTML tables were turned into Bootstrap tables automatically.
#9 Alerts

Alerts aren’t particularly exciting, and there aren’t too many changes from previous versions of the library, so if you’ve used Bootstrap 2 or 3, you should be pretty familiar with all this. However, it’s important to get to know these, as giving your users messages and notifications via alerts can help make your website more user-friendly.
#10 Navigation options
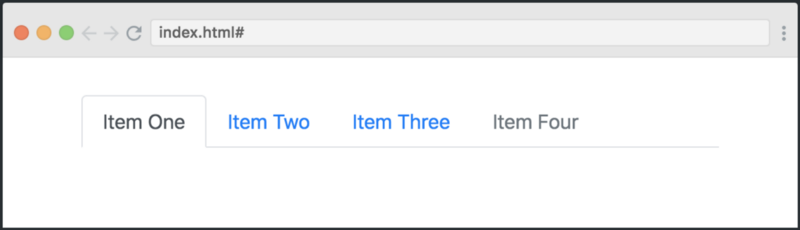
Finally, the course wraps up with where it started, by giving you more tools in your belt when it comes to navigation bars, like tabs and drop-downs. This is handy to know, but not as core as the stuff in lecture two, which is why it comes at the end of the course.
By following all these lectures back-to-back, you should be able to start building websites with Bootstrap 4. And if you get stuck, you’ll be well-equipped to dive into the docs for solving whatever issues you might have.
The Scrimba format
Finally, let’s also have a quick look at the technology behind the course. It’s built using Scrimba, an interactive coding screencast tool. A “scrim” look like normal video, however, it’s fully interactive. This means that you can edit the code inside the screencast.
Here’s a gif which explains the concept:
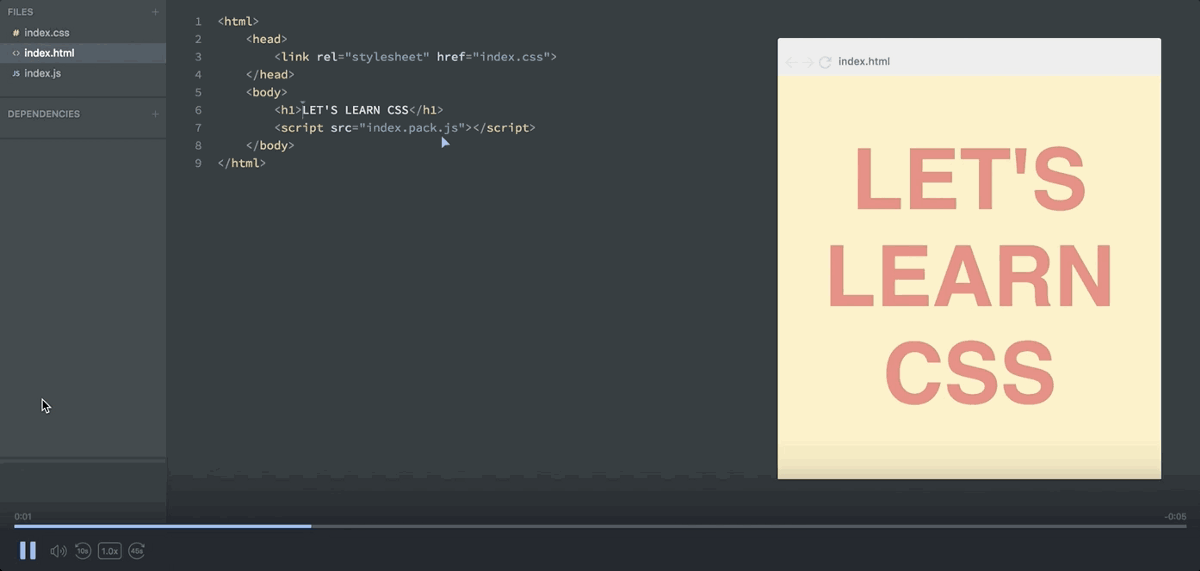
Pause the screencast → Edit the code → Run it! → See your changes
This is great for when you feel you need to experiment with the code in order to properly understand it, or when you simply want to copy a piece of the code.
So what are you waiting for? Go ahead and take the course today!
Thanks for reading! My name is Per, I’m the co-founder of Scrimba, and I love helping people learn new skills. Follow me on Twitter if you’d like to be notified about new articles and resources.
Thanks for reading! My name is Per Borgen, I'm the co-founder of Scrimba – the easiest way to learn to code. You should check out our responsive web design bootcamp if want to learn to build modern website on a professional level.